Search the Community
Showing results for tags 'remove'.
-
Somebody can help on how is the best and carefull way to remove the HD pipes to reinstall the original ones? I already remove the clamp, but seems that the inner pipe didn't moved at all when I can see that the bracket on the back already moved at least 3/4". Even the buffer is out, but I don't want to scratch anything. Thanks, Carlos :stirthepot:
-
I have a 2006 RSTD. I am installing the original mufflers on the bike. Do I have to remove the saddlebags to get to the back bolt?
-
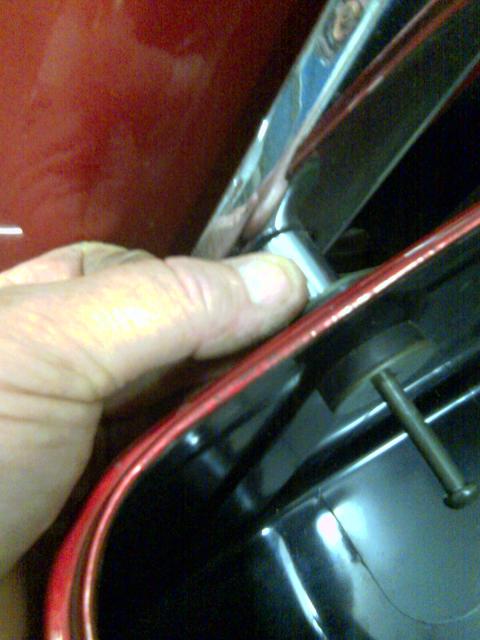
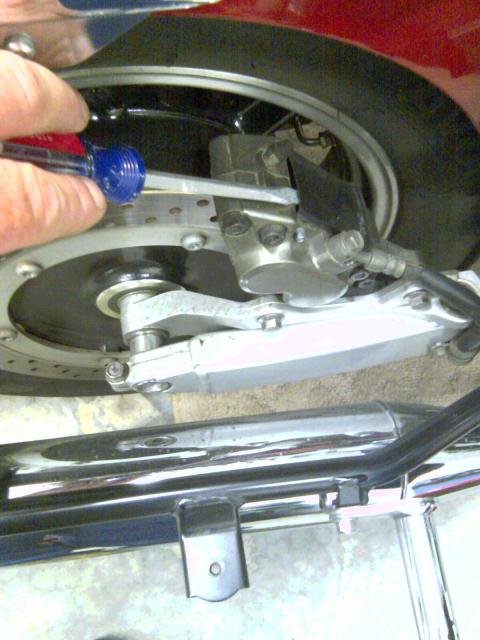
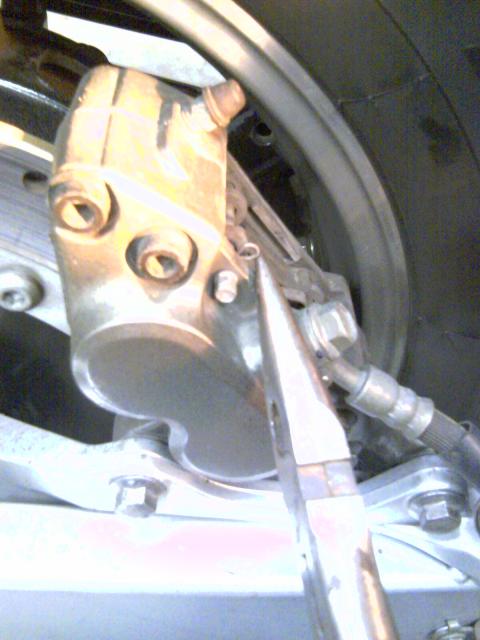
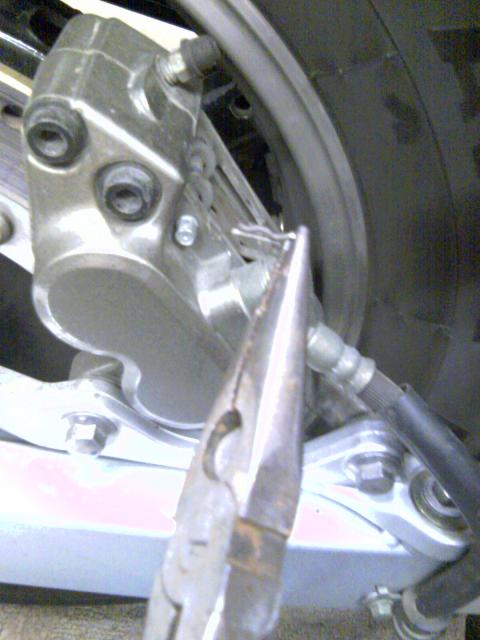
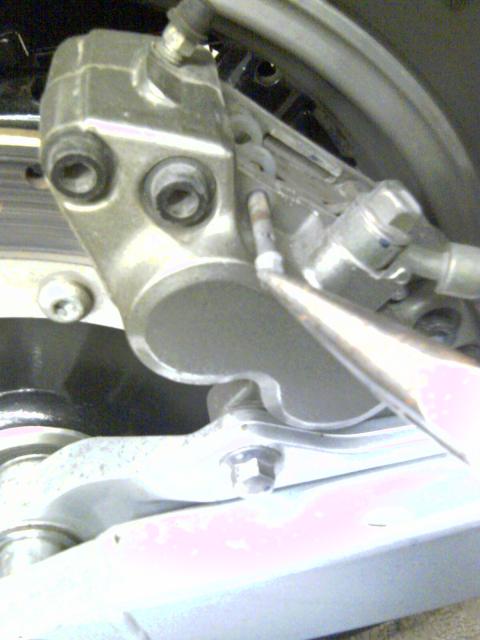
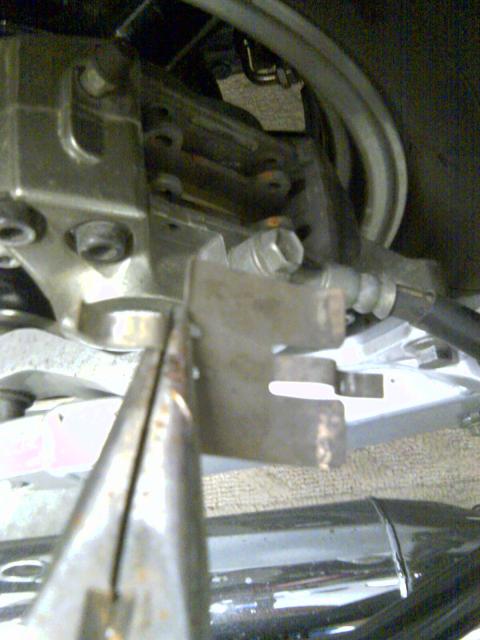
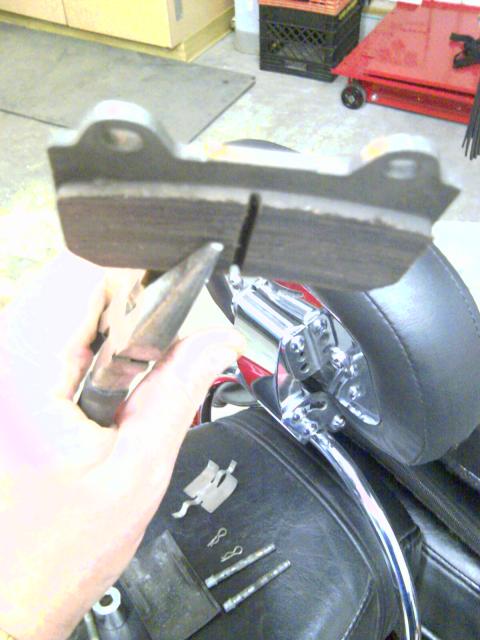
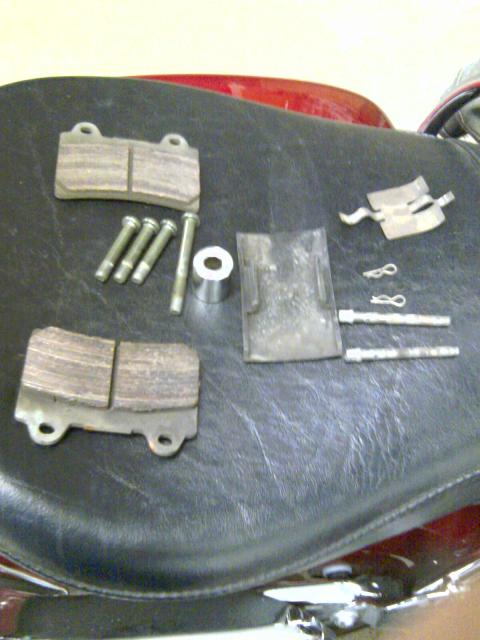
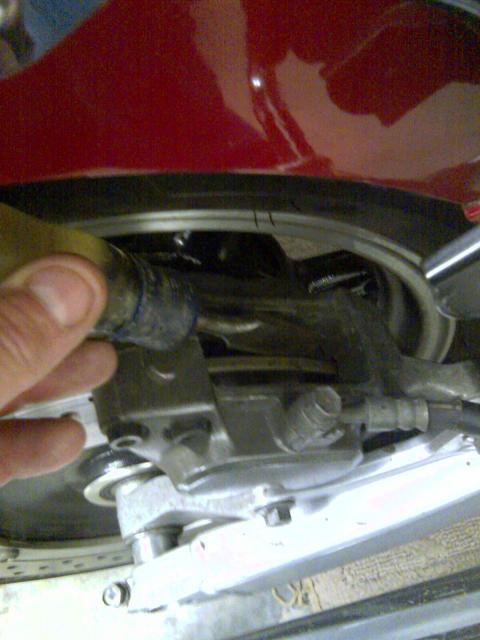
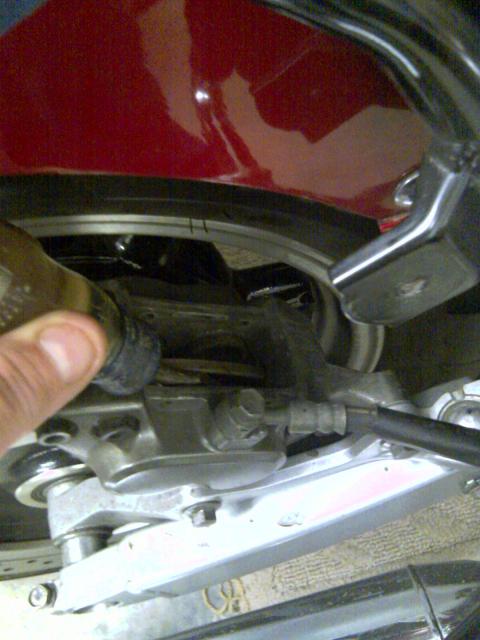
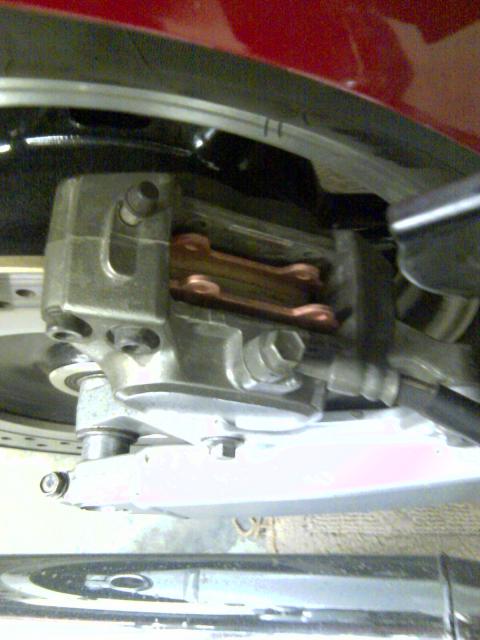
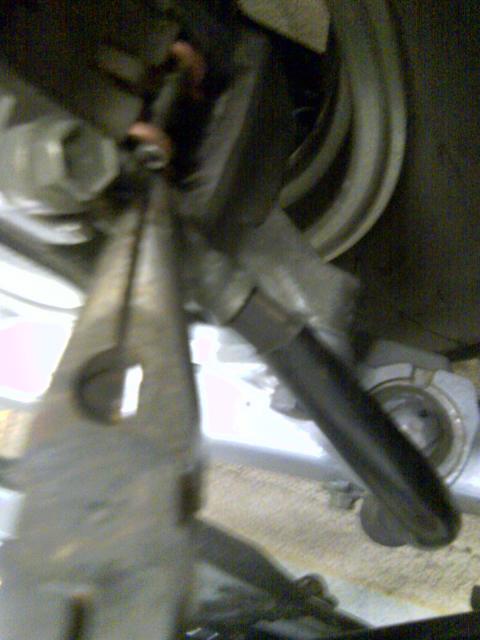
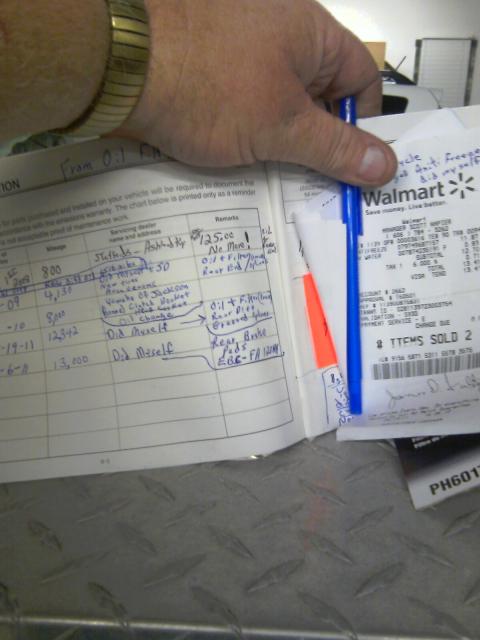
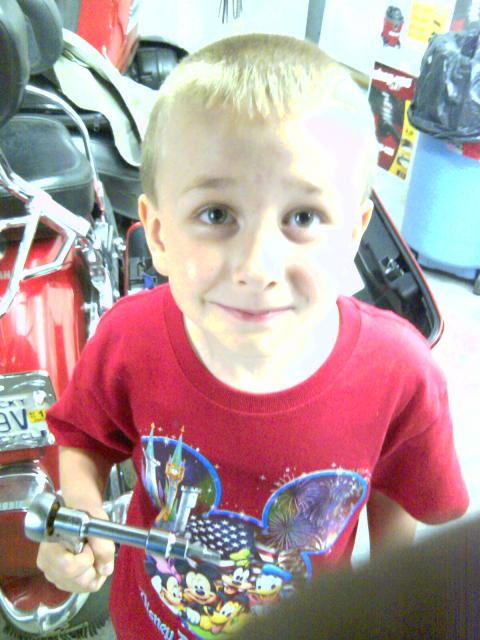
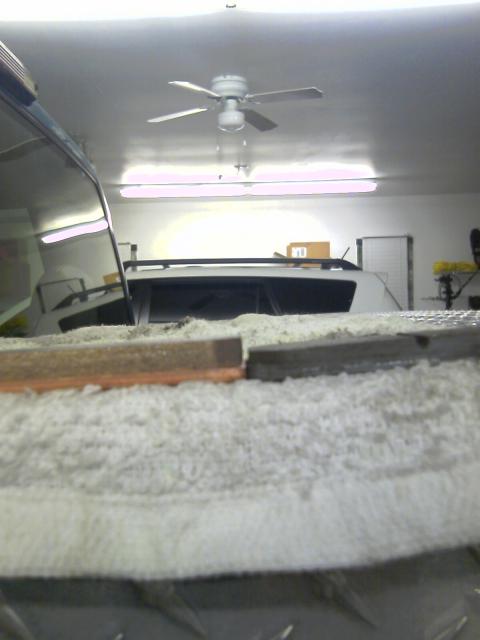
 First of all, if anyone has anything to add, please do. I am a shade tree mechanic. These things are nice to have to do this in hot weather; A garage, a fan, an air conditioner. I am blessed to have these, so I took the time to take some pictures as I did this. Hope it helps someone else. Time frame; 45 minutes to complete. Tools needed; A 4 mm allen head socket or allen wrench. A short 3" extension. A ratchet. A flat screw driver. A pair of needle nose pliers. A 3/4 " wide wood chisel or some tool of this nature to pry with. #1 . Remove the right side hard bag using the ratchet and extension and 4 mm allen head socket. There are 4 allen head bolts that hold this. There is one that is longer than the others and has a chrome spacer between the mount and hard bag. #2 . Remove the plastic cover from the top of the brake caliper with the flat screw driver. It just pops right off. #3 . Locate and remove the small clips that are through the pins in the caliper and brake pads. Rotate them around to face up and carefully pull them right out with the needle nose pliers. #4 . Next remove the two pins with the needle nose pliers, ( twist them as you pull them out). Remove one and then the other being careful of the flat spring type holder thingy. #5 . Remove the flat spring keeper thingy from atop the brake pads. Pay attention as to how it comes off and lay it aside that way. #6 . Using the needle nose pliers, remove the old pads and look closely at the inside (wheel side pad). If it is less than 1/8" replace pads. Some pads are wore more on the rear end of the pad (thinner).You can switch the inside pad to the out side and get 2000 to 3000 more miles out of them if you have 1/8 " left. My bike had 13,800 mile and where less than 1/8 " material left on inside pad, so new pads where installed. Outside pad compared to new> Inside pad compared to new> #7 . If you are replacing the pads, you will need to pry the brake piston back in to allow room for the new pads ( I used - EBC brand FA-123HH brake pads ). I used the 3/4" wood chisel to pry the pistons in because it has a short handle and was wide and easy to get into the area. Per SilverT; Clean the pins before you replace them, they may require a bit of "buffing up" with either emery paper or a buffing wheel on your drill. Clean the " thingy" before you replace it. Coat the pins with brake lubricant before you replace them. Coat the back side of the pads and the outer edges where they will rub against the caliper and other stationary metal parts with brake lubricant. Per RSTDdog; In addition to the lubricating tips (lightly) I am of the "clean the exposed part of the piston before pushing it back in" school of thought. Of course to do this properly you need to take the caliper loose which adds a few steps. Now is also a good time to change that brake fluid. Someone said that it is possible to clean the piston with a Q-tip and some break fluid before pushing back. Also it has been mentioned that a 42 thousand washer be placed between the frame and caliper to line the caliper up to equalize/a-line the inside pad wear. I have not researched this and I am only mentioning here for someone else to search. #8 . Using the needle nose pliers, put the new pads in place with the pin holes up. Being careful to put them in with the wear material toward the rotor. There is no difference in the two pads,they are the same. #9 . Replace one pin through the break pads and into the rotor. Now put the spring type holder thingy in under the one pin. Now the tricky part. Put the second pin through the break pads and through the spring type holder thingy and into the rotor, all at the same. Easy though... #1 0. Now replace the small clips into and through the small holes in the pins as before. I turned the small clips up and to the left and right. Make sure you get these in correctly (half way point). You would not want these coming out. #1 1. Now work the rear brakes and get the pads kinda seated into place. Will feel kinda spongy at first pump or two. I made sure my rear breaks worked and released by pushing bike forward and back a couple times. #1 2. Replace/snap plastic cover back into place. #1 3. Replace the hard bag with the four 4 mm allen head bolts. Remember the long one goes into the rear and side next to wheel and through the chrome spacer. Also make sure the rubber bushings and washers are on the hard bag (bottom and side). Most of the time they will stay in place if you are careful. #1 4. Make notes of your mileage and date in your owners manual and also keep your receipts to proof any warranty issues. Also for a reference/reminder as to when you need to replace again and what type/brand to use. Helpers are good and I had my little boys help. Fuzzy
-
This has probably been discussed before BUT I cannot seem to find anything about how to remove labels off new gas tank(enviromental label yellow)
-
I have a small tree growing up through the deck attached to my house. This deck is only a little bit above the ground, so I can't get underneath it to get to it. The only way I see to get anywhere near it is to remove some of the deck boards and reach down. Anybody have any idea how I can get rid of it? Frank D.
-
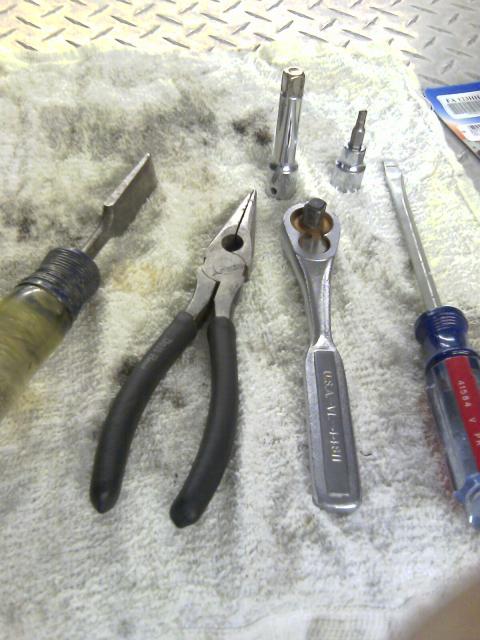
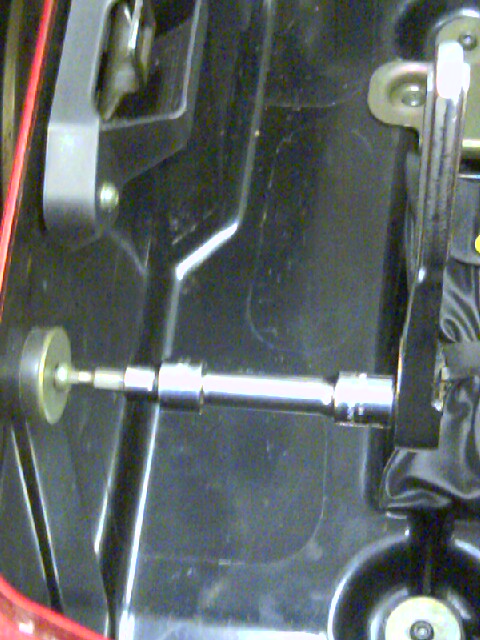
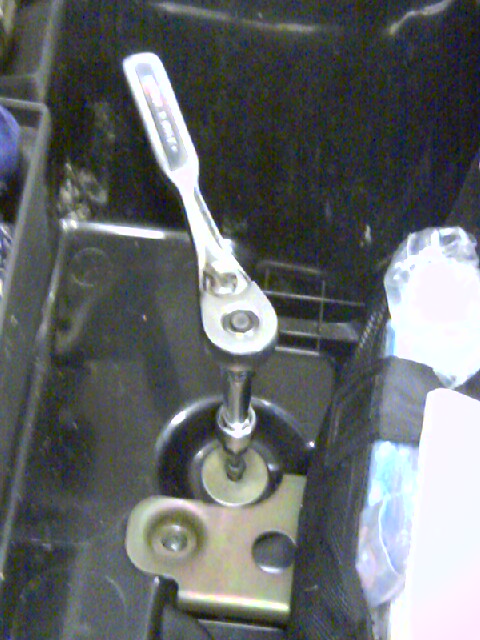
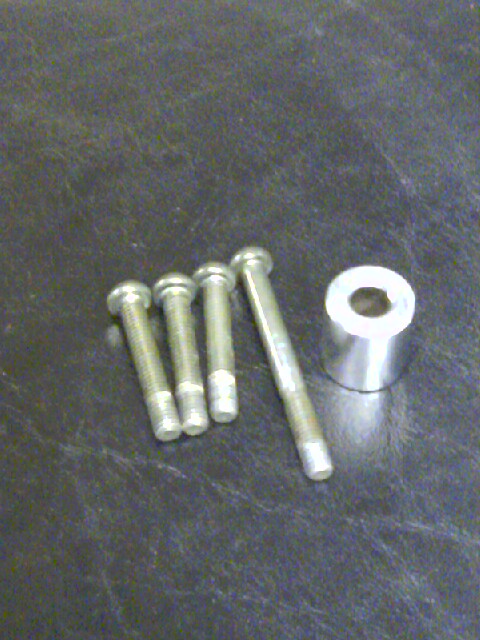
I replaced a faulty ignition switch today, and while there is plenty of info on the forum on how to do it, I wanted to share how I dealt with the tamper proof bolts that hold the switch to the frame. There is no "head" to get a tool onto these bolts, so many guys use a dremel or die grinder to cut slots into the head so they can remove the bolts with a screw driver. Another option is to just drill out the bolt and then remove the remaining bolt after the switch has been removed. I decided that since I didn't need to salvage the switch or the housing (it was already broke) it wouldn't hurt to break it more. I used a small sharp chisel to break part of the switch base so I could get at the recessed bolt heads. http://i15.photobucket.com/albums/a373/gat803/ignitionchange014.jpg Then I used the chisel to tap into the side of the bolthead, making a gouge for the tool to bite into and loosening the bolt. It was just a matter of a couple of revolutions and I could turn it the rest of the way by hand. http://i15.photobucket.com/albums/a373/gat803/ignitionchange015.jpg http://i15.photobucket.com/albums/a373/gat803/ignitionchange018.jpg I replaced the factory bolts with a couple of metric allen head bolts from my collection and I'm good to go. http://i15.photobucket.com/albums/a373/gat803/ignitionchange021.jpg Total time, start to finish to replace the switch.....1 hour, give or take.
-
So, I just broke one of my eyebrows and im looking for another one, or a set if you have it. I cracked it while trying to remove one of them. Never work on the bike when your in an agitated state...........
-
to have the dealer change out the rubber on the front, (removed from bike) do I have to also remove the discs from the wheel? I'm thinking not...but I want to be sure.
-
Hey.. how do I remove the bags from an 83 without the key ? The bags are open, but seem to be locked on the bike. I need to get the bags off so I can remove a hitch from one of my part bikes. I don't want to damage the bags. Do I drill off the locks inside ?
-
.thumb.jpg.9dfefb49018580a1813c8128f131546e.jpg) i want to remove the radio, cassette, cb, and air ride controller ( air ride disconnected). what parts will i need to convert it to a Standard? fairing pockets and covers? i tried ebay but couldnt find exactly what i needed. does anyone have these parts?????? ps: i have a working radio, cassette, and cb.....
i want to remove the radio, cassette, cb, and air ride controller ( air ride disconnected). what parts will i need to convert it to a Standard? fairing pockets and covers? i tried ebay but couldnt find exactly what i needed. does anyone have these parts?????? ps: i have a working radio, cassette, and cb..... -
I want to put a fleece on my set just to cushion it up a bit, but don't want to cut it more than I have to. The best way to accomplish this would be to remove the driver backrest, so all I would have to do is cut about a 1 1/2" square out of it, slide it over the post and replace the backrest. There is a small screw at the top of the post that I would have thought would allow me to slide off the backrest, but it's still on there pretty good. I don't want to break anything so I'm not forcing it. Is there something else I need to do in order to remove it? The bike is a 2001 Royal Star. http://members.storm.ca/~cameron_antaya/ventureseat1.jpg http://members.storm.ca/~cameron_antaya/ventureseat2.jpg
-
ON my RSTD do I need to remove the rear wheel in order to remove the rear fender??? I'm all the way to the point of pulling it off - its completely loose - but these two mounts pictured under the frame where the seat attaches don't seem to allow enough room to lift the fender free. Help would be great.
-
Someone PLEEEEEASE tell me that there is a way to remove the ignition coils from my 89 Venture without removing ALL the front fairing!!----I thought I saw a thread on here a while back saying you could remove the battery box and air filter and remove them that way--also--how common is it to have "cracked" ignition coils--bike started running like crap and a friend suggested plug wires---got ready to replace the plug wires and noticed that the first 2 coils are cracked all the way across the top--found a complete set on E-bay--but now need help removing the old ones!!--------Thanx------Larry
-
 Mine is cracked and rattles. I could probably remove it but I would like have one if someone has one for sale. I looked but couldn't find a part number for it. Thanks! Ray
 -
I am going to be stripping & cataloging the parts bike. The engine has 60K mile & I would like to remove it, crate it & store it for future rebuild. What is the best way to get it out of the frame. My available lifting tools are a car floor jack. car transmission jack, a bottle jack, as well as a full car engine crane. Now on my 81 CB750 I found the easiest way to remove the engine was to remove all the mounts on the left side, lay her down & remove the right motor mounting points. When I lift the frame up, the engine is sitting nicely on the floor w/o a problem. I read Scott MacMartin's write up http://www.venturerider.org/forum/showthread.php?t=39013 but it really doesn't clarify the actual removal. So to the ones on here who have pulled their Gen1 engines, how did you do it?
-
 While taking off my forks to get Progressive springs installed, I checked the bearings and found the lower cup showing wear/damage lines. Since I could feel the line with my fingernail, I believe it is time to replace these bearings (probably only the lower needs replaced, but I am replacing both while in there). I took the lower tree with the lower bearing cone (inner race) to the dealer along with my forks. They are doing the spring replacement since I do not have the proper tools to remove and install the seals. They are going to remove the bottom bearing for me. However, I am looking at a way to remove the bearing cups (outer races) from the neck. The shop manual says to use a long drift for the lower. Nothing in my tool chest comes close to fitting in there. I borrowed a tool from the dealer to remove the top cup. We will see tonight if it will work. My questions is: What do you use to remove the lower cup in the steering head tube? RR
 -
Well I got a question, Im into Phase 2 of the Firefighter RSV and part of it is polishing the outside ring of the wheels and powdercoating the spokes the color of the bike. I think I know my answer but do I need to remove and replace the wheel bearings or can it be done without removing them. Dont really want to mess with them but If I need too I will. Scotty
-
.thumb.JPG.bfcefdc0995aabc77d6b4e8cf9125c91.JPG) What are the black plastic panels on top of each head? I would like to remove them.
What are the black plastic panels on top of each head? I would like to remove them. -
I have to remove the gear cover to get at the slave cylinder to replace clutch line I removed all the bolts but before i go and try to pry it off I need to make sure theres nothing else to look for I only found 7 bolts and the service manual IS NOT very clear as to what to remove any one done it before???
-
 I'm in the middle of trying to remove my carburetors. Its kind of tough getting the carbs off of the bike. I've got the owners manual and it really isnt much help. i figure one your threads can help, maybe with picture. anyone with any insight would be much appreciated!
 -
I need to charge my battery for my 09 RSV. It it under the seat? I understand from a thread that there are two bolts to remove under in front. A little help please, Curby
-
 I am helping a friend get his 1986 Yamaha Venture up and running again. It's been sitting for 2 1/5 years. I need to remove the seat and for the life of me I cannot figure out how. It's embarassing but I just can't figure it out. Plese help
 -
 This is hopefully the last thing I have to do before getting this bike finally on the road. Looking for advice so I don't remove anything unnecessary. What all do I have to remove to get all the plug wires changed out? Thanks.
 -
 I haven't been able to find a write up on here on the r/r of the slave cylinder. I will document my job with pix & post it here for others that follow. Looking at the service manual, I have been able to surmise the following must be done. But I have some preliminary questions I will post in red: 1. Remove bolts on the left footrest-shifter. 2. Remove the 6 allen bolts on the middle-gear cover.. Do I have to drain the oil? 3. Remove the bolt that attaches the clutch line to the slave What size are they? 4 Remove the two allen bolts holding the cylinder to the engine. What size are they? Can I use Allen Wrenchs or will I need to buy metric hex sockets? Also is there a preferred bleeding technique or is it a pain like bleeding my Honda's front caliper? (not enough pressure) Basically That is all the questions I have to prepare for this. I looks simple enough. Andy
 -
 1988 VR... anyone know how to remove the screws on the clutch reservoir? whoever tighten the screws got them so tight that they are striping the heads....Any ideas on how to remove them? Rabbit:confused24: