Search the Community
Showing results for tags 'cup'.
-
 My wife wants a small bag and a cup holder attached somewhere she can access them while we're riding. So I'm needing some ideas. We went to Iron Pony and I bought a cheap(soft) cup holder and a leather tool bag thinking I could just attach them to the grab handles. Well, they hang funny and look goofy. I can't fasten them rigid, because you have to lift them up to open the side bags. Do any of you out there have any ideas?
 -
Been meaning to post this for a while now. Went to Wally World and got a Zefal aluminum bicycle bottle cage for $7 Went to Lowe's and picked up 1 Mending Brace for $2, 2 rubber lined P clamps for $2 and some nuts and bolts for $2 I cut the Mending Brace to sizes I needed than rounded off the squares corners on a grinder. I Attached it to my Mirror Stem on the right side just above the Brake Fluid Reservoir. Since the holder is metal I can spread it wider or squeeze it smaller to fit any size cup or can I might be using. If the resizing ever causes it to break all I have to do is replace the bottle cage for $7 and swap it out. For the passenger I simply used a a conduit clamp and a piece of Mending Brace. I riveted the cup holder and the mending brace together then used the conduit clamp around the passenger hand railing and attached that to the mending brace. Here are the pics of the material and the actual mounting for the front sorry forgot pic for the passenger cup holder
-

MKII fork rebuild
viking2seafarer posted a topic in Venture and Venture Royale Tech Talk ('83 - '93)
Hi All, I have got my 1990 XVZ1300 DA MKII front forks apart and I have found the rubber seals on both of the UFO shaped cups at the bottom of the forks have started to pull away. I have attached some photos. I have searched a couple of parts suppliers sites and it appears that these parts are not available any more. Does anyone know where I might find 2 or whether there is some glue I could use to stick the rubber seal back on to the metal cup? Is this seal critical? I have also noted that the anti dives don't seem to move much. Is this normal? I would have thought that the electrical solenoid would have moved the plunger quickly from one side to the other. A couple of other observations that might help those that attempt the rebuild...Pyramid seals are too tall buy OEM or ones that are the correct size and make sure the oil lock has the big diameter to the bottom. Mine was upside down and the narrow end was firmly lodged in the UFO cup rendering the anti dive useless I guess?? -
Hello everyone, Figured my first post should contribute, so I hope this is something new. I didn't see anything similar here. I just bought an 01 RSV and my first addition is Sirius Satellite Radio, here's how I mounted it. Being one to use what's available rather than buy, if possible. I used parts of the suction cup mount that came with the reciever. I'll post some pics and if you have questions I'd be happy to answer them. Jay
-
I hate advertising! Tim Horton's "Rrrrollup the Rim to win" campaign is on. Huge sign in the store with a rollup cup and writing below that. Very first sentence is.... "No purchase necessary." (see the pic below). So, I go over to the counter and ask for a rollup cup. "what size coffee you like sir?" ... no, I said, I don't want coffee ... I just want the cup. "oh no sir, you have to buy a coffee" ... course, I say "but your ad says no purchase necessary" ... "no sir, you have to purchase" ... get me a manager! ... out comes the manager "no sir, you have to purchase a coffee .... please call head office... they will explain ... blah blah" Ok, so I walk away (after causing a mini-scene with 20 customers lined up behind me). I go online and open their rules ... sure enough, you can get a rollup cup without making a purchase ..... 2. NO PURCHASE NECESSARY TO PLAY: In Canada, obtain a FREE Tim Hortons contest cup and/or a copy of the official rules, by writing to: Tim Hortons Contest Cup, P.O. Box 9162 Saint John, N.B. E2L 4Y2. In U.S.A., to receive a FREE contest cup and/or a copy of the official rules write to: Tim Hortons Contest Cup, P.O. Box 1315 Calais, ME 04619-6315. ggrrrrrrrrrrrrrrrr!!! The display ad (pic below) could have been a bit more informative and would have saved everyone a lot of wasted time and energy. I wonder how many other people have done what I just did... (or am I the only a-hole?) I also think the manager could have explained a bit better. [ATTACH]64651[/ATTACH]
-
 While taking off my forks to get Progressive springs installed, I checked the bearings and found the lower cup showing wear/damage lines. Since I could feel the line with my fingernail, I believe it is time to replace these bearings (probably only the lower needs replaced, but I am replacing both while in there). I took the lower tree with the lower bearing cone (inner race) to the dealer along with my forks. They are doing the spring replacement since I do not have the proper tools to remove and install the seals. They are going to remove the bottom bearing for me. However, I am looking at a way to remove the bearing cups (outer races) from the neck. The shop manual says to use a long drift for the lower. Nothing in my tool chest comes close to fitting in there. I borrowed a tool from the dealer to remove the top cup. We will see tonight if it will work. My questions is: What do you use to remove the lower cup in the steering head tube? RR
 -
Fun video, not my cup of tea but funny!
-
A C-130 was lumbering along when a cocky F-16 flashed by. The jet jockey decided to show off. The fighter jock told the C-130 pilot, "Watch this!", and promptly went into a barrel-roll followed by a steep climb. He then finished with a sonic boom as he broke the sound barrier. The F-16 pilot asked the C-130 pilot what he thought of that? The C-130 pilot said, "That was impressive, but watch this!" The C-130 droned along for about five minutes, and then the C-130 pilot came back on and said, "What did you think of that?" Puzzled, the F-16 pilot asked, "What the heck did you do?" The C-130 pilot chuckled. "I stood up, stretched my legs, walked to the back, visited the restroom,then got a cup of coffee and a cinnamon roll." When you are young and foolish, speed and flash may seem a like good thing! When you get older and smarter, comfort is not such a bad thing ! Slower, Older andSmarter! Yup My dirt bike days are definately behind me!
-
BC LIONS - 99th Grey Cup WINNERS!!!
-
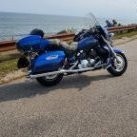
anyone put a cup holder on a 83 venture ? if so which kind did ya get and where did you mount it so its easy to get to and not in the way?
-
http://toronto.ctv.ca/servlet/an/local/CTVNews/20110727/edgewalk-cn-tower-110727/20110727?hub=TorontoNewHome Watch the video
-
In the first week of September, Um taking a little ride. riding the entire East coast. Maybe we can meet up for a cup of Joe http://maps.google.com/maps?saddr=17932+sw+29th+lane,+miramar,+fl+33029&daddr=Altona,+NY+to:Plattsburgh,+NY+to:Roselle,+NJ+to:39.67822,-75.49399+to:38.61832,-75.589+to:Norfolk,+VA+to:Murfreesboro,+NC+to:34.83923,-77.29627+to:Georgetown,+SC+to:Charleston,+SC+to:Miramar,+FL&hl=en&ll=35.155846,-75.761719&spn=7.021938,13.688965&sll=32.463426,-80.678101&sspn=1.81215,3.422241&geocode=FetzjAEdy2k1-ymTJ8Te6qPZiDEqSfRHlc6YXg%3BFTTxrAIdbhqc-ylJQncp6TLKTDEjaBHjMGU1nw%3BFV8PqgIdkDKf-ynXfqXoqDjKTDEVdFPFoeiwtQ%3BFb5NbAIdtN-S-ynx4-ZGiLLDiTFz5GeqomjNlA%3BFQxxXQIdmg2A-ylxpuCk4hzHiTHbDen7gzuZOw%3BFdBETQIdeJp--ylJ5RcM7_C4iTHc7N2QNmNBbg%3BFVFMMgIdT_hz-ylFyiJTOpe6iTEKHnrOfxCZqw%3BFQcRLAIdsZFn-ymJFbgK9NGviTFh4Bc6k-XaXQ%3BFb6aEwIdco1k-ylnlBXqMRmpiTEE0AZi2L9agg%3BFUJK_QEd4A9G-ylhxz-5YCsAiTF97MtmUk_Y6Q%3BFXYh9AEd1lk8-yl3JKjcQnr-iDFr7OGu4Pf6NQ%3BFXZbjAEd4us2-yn34VC_mKbZiDH6vOMh5_mpOw&mra=ls&via=4,5,8&dirflg=t&t=h&z=7
-
I have a Droid X and am looking to use the GPS on it. Does anyone have it mounted? I have seen the cases and just want to make sure what I buy works. Secondally, does anyone use the Butler cup holders? I was wondering about clearance for the tank. TYIA
-
I have smoked and brined a lot of things but this brine for a turkey breast bye far is the best I have used if you like sweet things. In a 2 gallon ziplock bag in a pot put 1 5-7lb turkey breast 1 gal water, 1 cup salt, 1 1/2 cups brown sugar, 1 tbls Rosemary,thyme and allspice, 1/8th cup molasses, white wine and Worcestershire sauce then brine for 12 hrs and smoke with apple wood at the end I put corn on the cob on the grill.
-
I am looking for a OEM shop manual for my 2008 RSV. I checked with my local dealer and he said they were unavailable. He offered me an after market one that was not specifically for RSV's. I also need to get a cup holder, which may not be that big of a deal. I saw a post on here about a cup holder from Target for less than $10. Thanks for any help ya'll can offer. Charlie, Midlothian, Va
-
Boy are you in Hot Water over This , Leaving a strafoam cup on Ronda.s Scoot
-
Still making improvements for our Jun ride. I saw several different options on here for cup holders. The option I had decided to go with was the water bottle holder from Wal-Mart. I found a couple on clearance and bought them but before I got around installing them, I found these. I got them from the bike section in my local PX (on Fort Carson Army Post). I had to bend the brackets slightly to fit around the handlebars and the rubber on the rear grab bars (though if you wanted to cut the rubber off, they would have worked). I think they look really nice and should be functional. The only thing is you have to make sure you have a cup that tapers so that it will stay in...so a regular water bottle won't work...but we plan to just find some nice cups with straws, then we will dump whatever we are drinking in the cup and we can drink from the straw with the helmet on and no tilting of the head.... I've included a picture of the product packaging incase anyone else is interested. They are a nice chrome look. Oh, and they cost a whole $5.86 each! Mike
-
I am sitting in a hotel lobby in Lake Point (just west of SLC) unable to continue riding because of the snow. I can probably make it to town if anyone is interested in catching a cup of coffee. I may be here for a while until I can find a clear way out of these mountains. RR
-
 Hi everyone! So I figured that I wanted to make my first post a good one, so here it is. Pics at the bottom. I had been looking into my options for a tachometer for quite sometime and was rather unimpressed with the steep price tag and the style of the available motorcycle tach's. So I did some internet hunting and found a company based out of Michigan that makes Retro style tachometers for classic and muscle cars. You can find them at Classic Instruments. I thought to myself, oh now wouldn't that look good on my RSTD. Before I knew it, I was whipping out my cards to make a purchase online. With a lots of humming and hawing about which model to get, I ended up getting the All American Nickel 3-3/8" Tachometer and the chrome cup insert. Total $198US. Took about 4 days to ship to Canada! Not bad eh~! http://www.classicinstruments.com/images/products/AN80SHC.JPGhttp://www.classicinstruments.com/images/Tach%20Cup.jpg Once I received my new purchase I went to work right away. However, I had to really think about where to mount it, how to mount it and how to get it to work. So in case if anyone is wondering, read on. First off, where to mount it. I have a Uniq Cycle Classic speakers system (long story, I have the system but I currently waiting for a replacement amp because the first one was faulty. Not happy with those guys.) that will occupy the left and right portions of the handle bar, so that was a no-go. I decided to mount it dead-center about the speedometer display because that would give me enough space to not interfere with the windshield. Second, how to mount it. I was stumped for a while on this one. One of the problems was the chrome cup insert was far too long. If I were to mount it, the tach would stick way out over the front of the speedometer unit. I noticed that the tach itself was quite a bit shorter than the cup, so I decided to cut the cup insert down. I cut about an inch or so from the opening. I also cut down the screws (the ones that you bolt on the wiring to) on the back of the tachometer to shorten it down some more. After the trimming work I had reduced the length on the tach enough for the front of the gauge to sit flush with the speedometer unit. I spent a good amount of time trying to figure out a way of fixing the tach to the top of my speedometer without having to drill holes or welding to the pretty speedo casing. So I took an old stainless steel stirring ladle from the kitchen and went to work bending it into shape. I apologize for not taking step-by-step photos of the process, I was just... lets say... in the groove. I ended up bending the ladle with a slight arc, following the curve of the speedo casing, and a sharp 'S' shaped bend at the end. I drilled a hole in at the end of the 'S' shape and easily mounted it to the one screw that holds the speedo casing in the front (if you stand right in front of your bike and look at the speedo casing, you will see the bolt). The ladle works perfectly because it has a slight curve to it already and it follows the curve on the speedo casing. I then took the cup insert and the ladle and welded them together. I would assume that you could use some kind of adhesive or jb-weld. But since I have a MIG that I am always trying to find uses to justify its purchase, it was quick work . It was a simple one bolt job from there to permanently but non-destructively fix the tach to my bike. Third, the wiring. Not fun trying to figure this one out on your own. I will just write down what was the winning combination. Then tachometer has a 4 position selection screw on the back for calibrating. 4 cylinder, 6 cylinder, 8 cylinder, 12PALT. Sorry V-Twin friends, this mod is only for us!. I basically ran a wire from the 'signal' terminal on the back of the tach to the ignition wiring. It runs with many of the wires that are located above the ignition coils. The one you want is the only wiring harness that is made up of just two wires, white and black. I hooked up the signal wire to the white wire, set the tach calibration to 12PALT and SUCCESS! For me, the 12PALT setting works. It does act a little funny at about 4000 rpm while accelerating, where the needle with suddenly retreat slightly and the advance forward. Now I know there are other ways to set up the tachometer. Classic instruments sells a multiple ignition coil adapter gadget, or there is this one that you can build yourself. I'm going to live with my setup because its totally livable in my books. I also wanted to have a nice clean look for the tachometer wiring, and didn't want any ugly wiring exposed. I tried to look for some nice 'chrome' plastic wire covering but couldn't find any. So I ended up going to the plumbing section at the local Canadian Tire and buying a 20" braided steel flexible hose. I cut off each of the screw ends and slipped the wiring through it (I bought a pack of trailer automotive wire while I was at crappy tire for the tach wiring). I slipped one end of the steel hose through the rubber grommet that is supplied with the tachometer and the other end of steel hose around the speedo unit and into the steering cover. From there you just wire up the tach + and - terminals to the auxiliary wiring harness that is located under the seat. I also jumped a wire from the + terminal to the 'light' terminal on the tach, which keeps the tach light on all the time. I will try to take some night-time pictures. From there I just bought a small tube of silicone caulking/adhesive and put it around the rubber grommet, braided steel hose, tachometer and cup, and between the bottom of the cup insert and the speedometer casing. The last one is important, it prevents the tach cup assembly from scratching the speedo casing, and it eliminates and noise from vibration. The tachometer unit does not interfere with the windshield in any way so it can be used with or without it. One thing that I did notice that when I went for a ride on a hot day, I got a bit of condensation on the inside of the gauge glass. I remedied that by drilling two holes on either side of the gauge just behind the glass. This should prevent the build up of condensation. It also allows you to use a can of compressed air to clean any condensation that may build up (and it works really well too!). All in all it was a successful modification. I am really happy with my cool retro tach, its easy to read (due to its large size) easy to see placement, and its lower price point. http://i924.photobucket.com/albums/ad85/phertwo/retro%20tachometer/IMG_8552.jpg?t=1275937176 http://i924.photobucket.com/albums/ad85/phertwo/retro%20tachometer/IMG_8554.jpg?t=1275937176 http://i924.photobucket.com/albums/ad85/phertwo/retro%20tachometer/IMG_8553.jpg?t=1275937176 http://i924.photobucket.com/albums/ad85/phertwo/retro%20tachometer/IMG_8545.jpg?t=1275937176 http://i924.photobucket.com/albums/ad85/phertwo/retro%20tachometer/IMG_8547.jpg?t=1275937176 http://i924.photobucket.com/albums/ad85/phertwo/retro%20tachometer/IMG_8564.jpg?t=1276000546
 -
We had a great 5 day trip out west. Come ride along with us! Sorry the show is a little long. So get a cup and enjoy. http://www.photoshow.com/watch/Bw3ER5ze
-
For those that kept asking where I got the holder, here is the link and info: Called BareFoot Willies, the 1" type, but when you get it, go buy a couple of longer bolts, tilt the cup holder up slightly. The saddle bag lid will hit if you do not slightly tilt it up. http://www.barefootwillies.com
-
:thumbsup:
-
I've got a Garmin nuvi 255w gps. I have the ball mount for use in the car. What I need is a handle bar mount for my RSV. Can't find any thing at garmin.com. Where should I be looking for a mount? I did stick it to the windshield with the suction cup, but it fell off at hwy speeds and scared the s--t out of me. I grabed it before it fell off the tank and gave it to the wife..
-
Here is a photo show of some classic motorcycle. So get a cup and enjoy! http://www.photoshow.com/watch/Zi6GY5Tu?p=photoshow_deluxe&v=6.0.0&d=787&l=full_paid&s=ss_photoshow_desktop_6&b=roxio&lo=1&la=en
-
I have a TOM TOM and all I have is the suction cup. Does anyone have any ideas?