Search the Community
Showing results for tags 'remove'.
-
When i got my 85 I thought the seat was dirty. It also was sticky to the touch on the passenger seat. Its already stained a pair of the girlfriends pants. I've tried cleaning it with everything i can think of . So far Windex and nail polish remove have worked BUT Now I'm wondering am i taking a color layer off the top of the seat or am i removing some sort of foreign goo that has been deposited by the prevoius owner in cleaning/treating the seat. The sticky layer can be "rolled" with the finger like glue on a sticker. I read on another site that Armor All might be the culprit If so is there a way to remove it or do i have a seat that needs replacing?
-
Can I get rid of it? I want to remove the breather tube that goes from the crankcase to the intake. Can I remove it and put something in its place like a filter or something? Even with perfect oil level it makes my intake box oily.
-
Hola, My first post on this site. I am syre the air filter replacement procedures are not difficult on my 2008 RSTD but I am not sure of them. Do I need to remove the cowling? Are there any technical docs on this subject? Thanks:97: Knifeeven
-
Since I have half the bike torn apart, I thought I may as well see what's under the travel trunk and seat. I am now trying to replace/regenerate the desiccant (silicagel) in the drier tube in my 1989 Venture. Got to the part where owners manual (and manual for 1st gens) say to push on cap and remove circlip. WELL....what a chore. Pushed with all my might and finally got the circlip out. Thought man that must be one heck of a spring....but nothing happened after removing the circlip. I CAN NOT remove the cap. I even grabbed it with a plumbers pliers. I can wiggle it, can slightly turn it, but can't remove it. The whole canister and cap seem to be made out of aluminum. I wonder if this has never been changed and it is all corroded up inside? Any suggestions? Probably my next move is to soak the heck out of it with penetrating fluid or such. It will ruin the silicagel, but that can be replaced. Open to suggestions from this knowledgeable crowd.
-
Dear Owner's Manual: I know you say simply, "If the headlight bulb burns out, replace it as follows. 1. Disconnect the headlight coupler and then remove the headlight bulb cover." 2. Remove the headlight bulb holder by turning it counterclockwise and then remove the defective bulb." Excuse me sir.........I'm stuck back at HOW THE HECK DO I GET AT THE HEADLIGHT COUPLER!?! Anyone? Do I need to remove the fairing? Or just that one allen screw on the headlight chrome trim ring? (I tried that........and nothing else seems to want to pop off.) Or do I hire a tiny little person with tiny little hands, to reach in behind the fairing, in front of the steering head? Tips?
-
Hey everyone! I need some help. I got my '86 Yamaha Venture Royale about 18 months ago. It came with nice floorboards and a heel toe shifter. I figured this was standard equipment. About a week ago, I started home from work and to my dismay, I could only shift into first, neutral and second. I babied it along sidestreets and took my time driving 5 miles. Three more stops, I could only get first and neutral to work. To shorten this story, I discovered that the fitting on the left crankcase cover had broken. Reading on here, I discovered that I could get it welded because the casing is aluminum. I then took to working on removing the left crankcase cover. I have read the service manual, the repair manual and all I could find to get help on removing the left crankcase cover. After getting all the bolts off and discovering other things I need to remove, I found that there are two sets of wires that come from the back of the cover and goes to the flywheel assembly connected inside the crankcase cover. Here are my questions. 1. Do I need to removed the copper coils, the 4-5 screws holding everything in to disconnect the two sets of wires? ( I ask this because the philips screws are tight and I really don't want to remove this if possible so I won't have problems later matching to the flywheel. 2. Is there a simpler way to disconnect the two sets of wires without removing the screws and coils? 3. Is there a diagram somewhere that shows how to disconnect this? (The manual says to remove the electrical connectors like it is a simple switch) 4. Finally, is there much danger of warping or causing some damage to the inner electronics if I leave them inside? (I don't think there is, but maybe someone will have a horror story to change my mind!) I appreciate any help given and hope someone is smarter than I am figuring out how to get this off the bike so I can get it welded. Happy Thanksgiving!
-
Will this work with the front end lowered? http://www.denniskirk.com/jsp/product_catalog/Product.jsp?skuId=58318&store=&catId=416&productId=p58318&leafCatId=41606 to check the air right now, I have to remove the handle bar. Does this take more room then the regular air valve at the top of the forks?
-
I bought a set of roto covers for my MKII a while back on craigslist, but it did not include the spacer. I thought that my machniest buddy could make a new spacer for me using the origional as a sample. I want to not shorten the OEM spacer incase I want to remover the roto covers for some reason, then I'll need the origional spacer. He can make one out of aluminum. My question is, would making one out of aluminum be ok. I would think it would be but I thougth I better ask. Another question: I need to remove the front axle, so I can get the spacer out. I see the axle nut head. But I also see an allen head screw the goes in at a 90 degree to the axle. Do I need to remove the allen head screw before I attempt to remove the front axle? Or maybe better yet, does anyone have an extra front axle spacer opposite side of the speedometer. for a 91 MKII? It be a lot easier to machine shorten a spare OEM spacer the width of 2 roto plates than to make a new complete spacer.
-
So...I got an 89 and just bought a set of beadrider seats and am anxious to install them. Except how do I remove the seat so that I can cinch up the stretchy cords on the seats? Sweaty in Iowa Iowa Guy:confused24:
-
So I rebuilt my slave cylinder on my 86' tonight. The kit came with a new pushrod seal. I mildly (without destroying) played with trying to get it out and eventually gave up. I'm assuming it gets wrecked taking it off. So how do you remove this seal? Thanks!
- 17 replies
-
- assuming
- eventually
-
(and 3 more)
Tagged with:
-
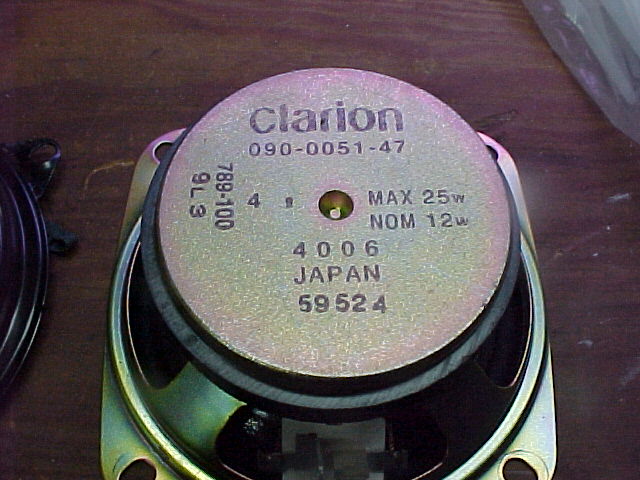
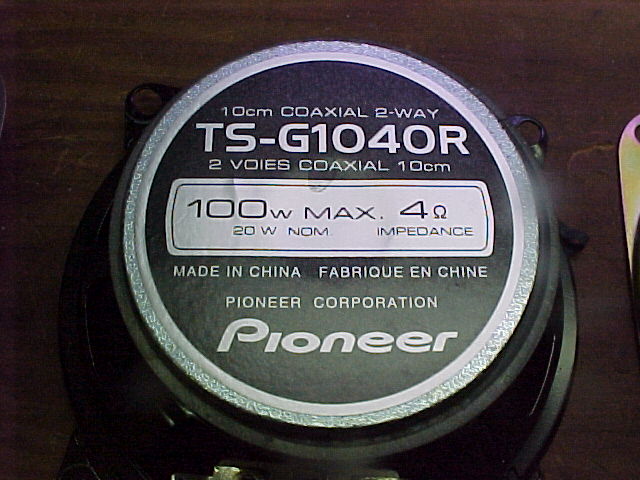
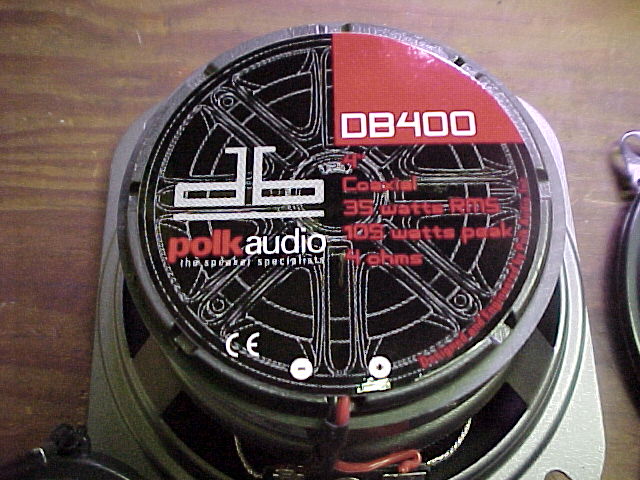
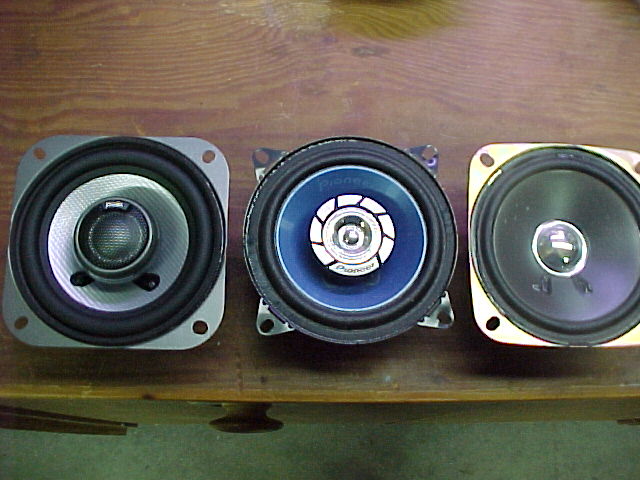
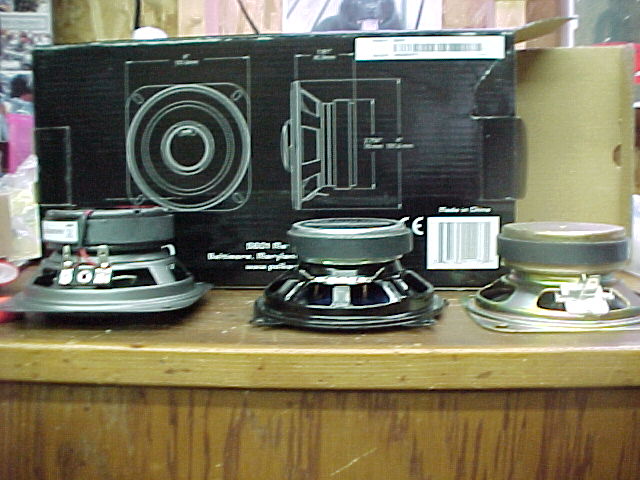
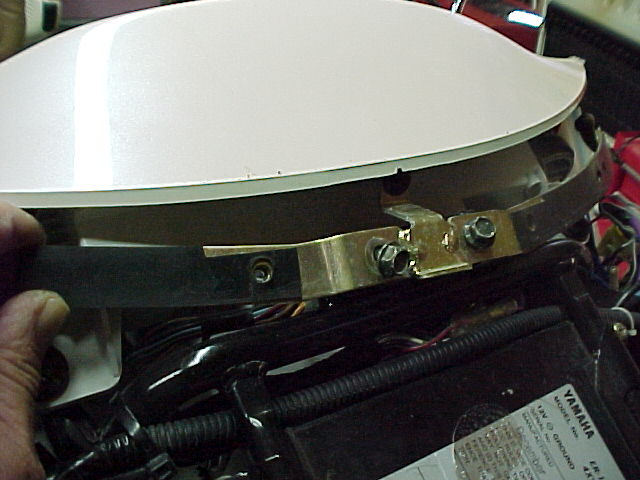
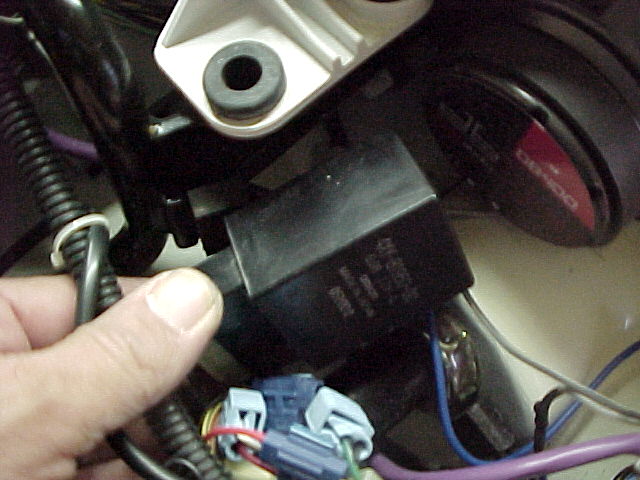
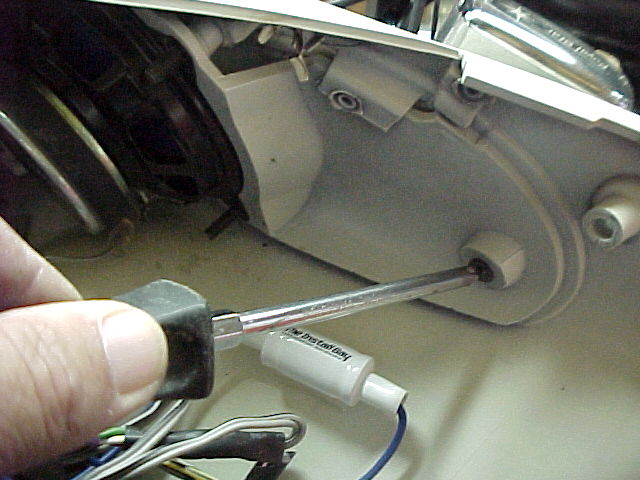
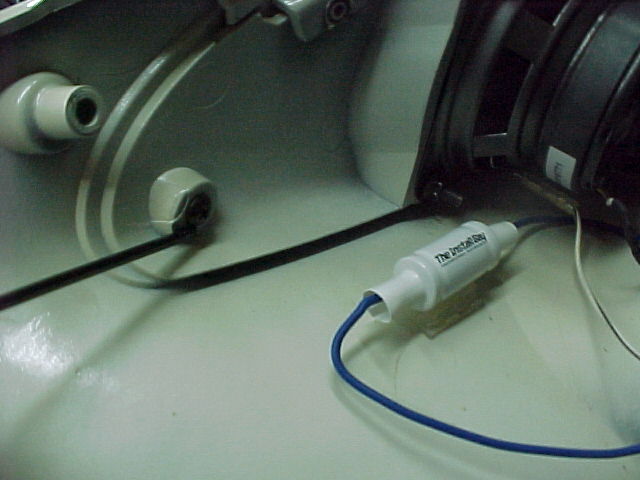
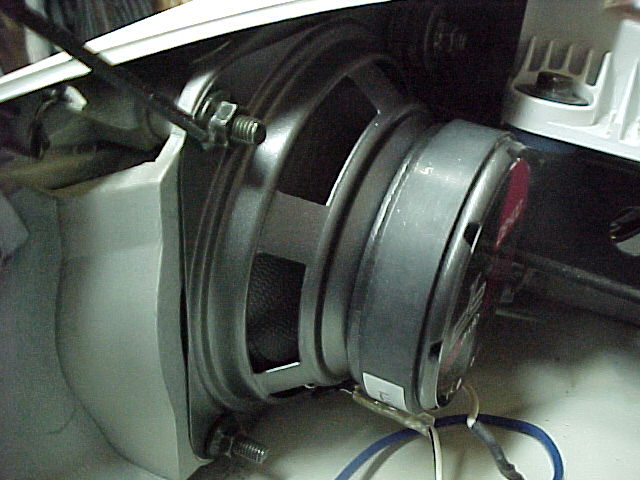
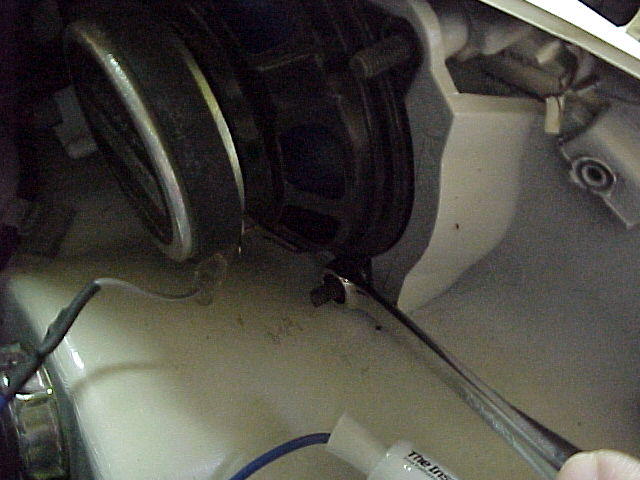
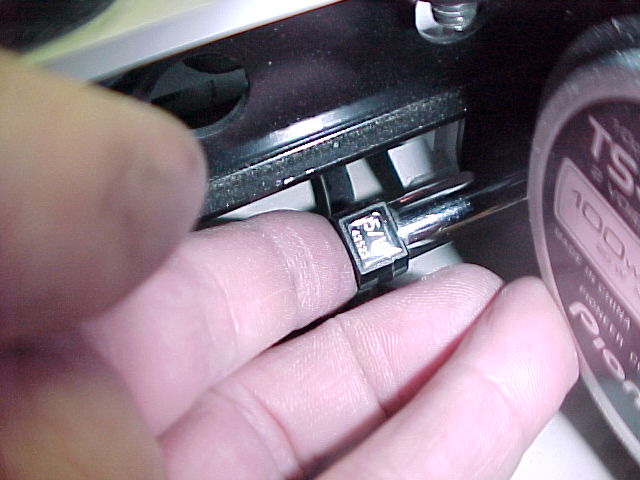
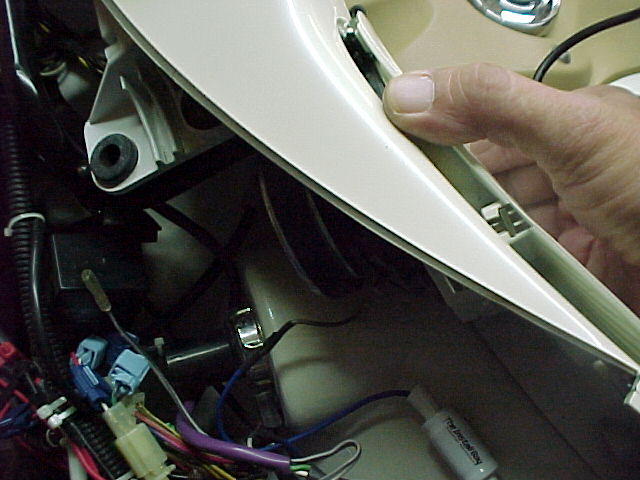
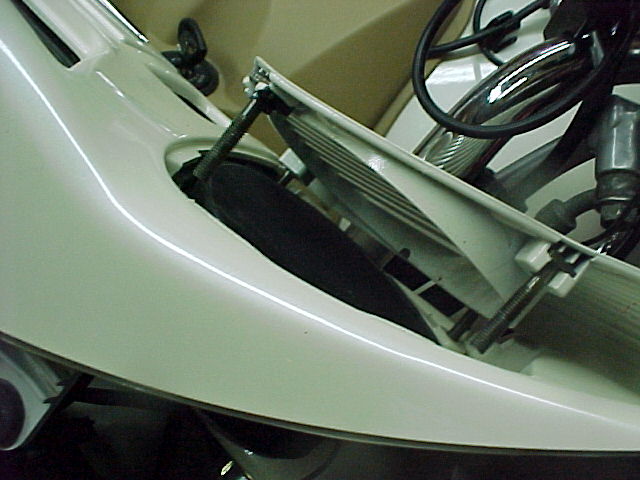
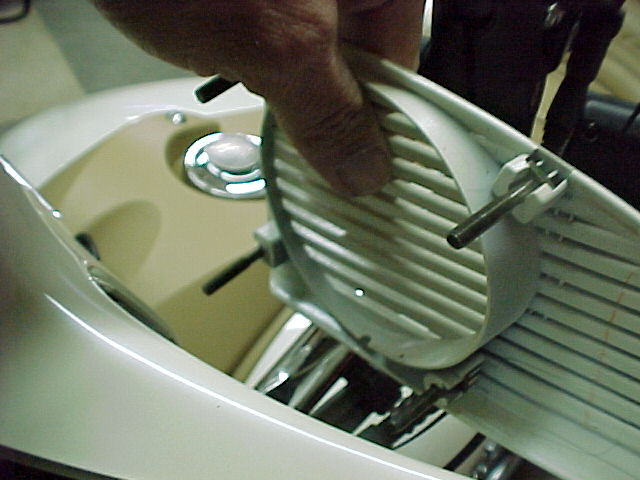
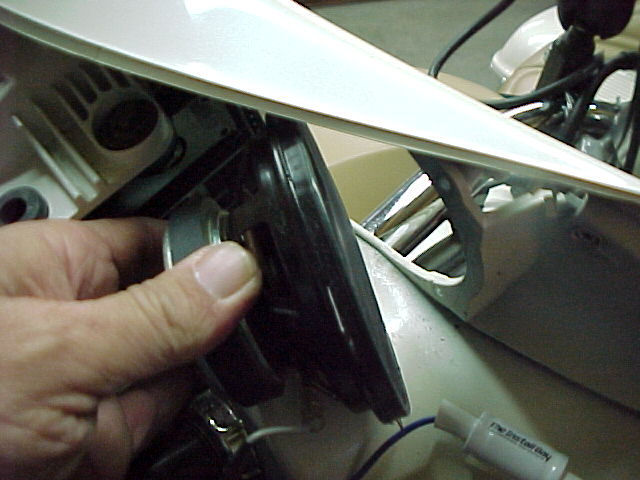
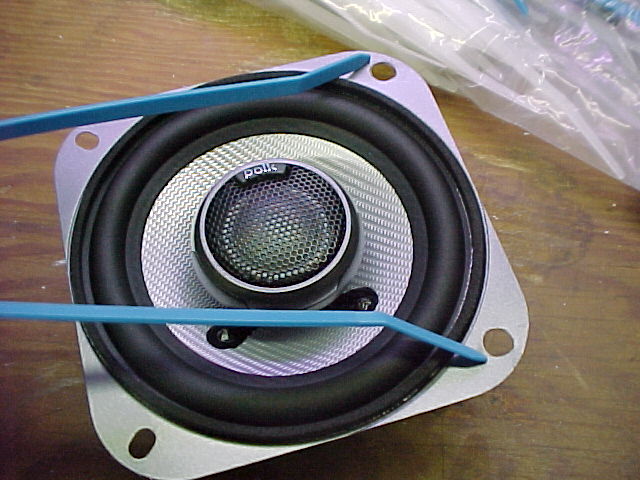
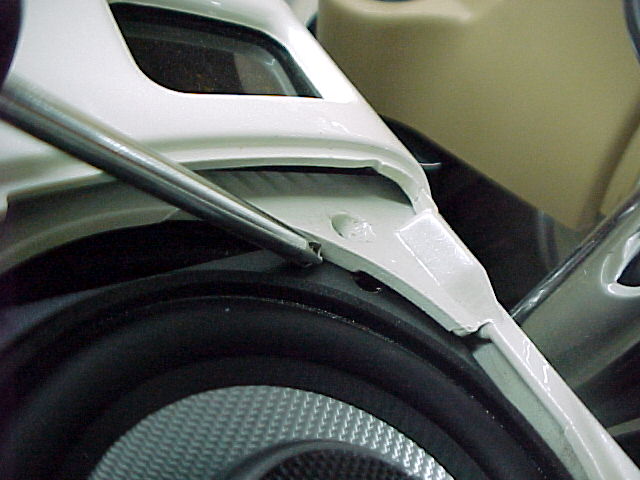
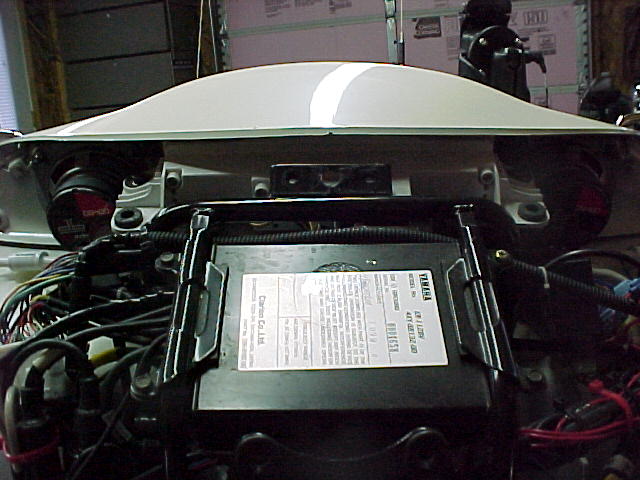
Changing 2nd Gen Speakers From what the guys posted last week about the Polk's I ordered two of them and I think they are great sounding! Two Summers ago I changed the stock speakers to Pioneer TS-G10400's the speakers are OK but just not there yet. I then added bass blockers and it helped. now with the blockers added to the new Polk's (front only) Moocho better. The Polk's can handle a little more power (amp in trunk) so combined with the bass blockers it really sounds great even with-out the fairing on the bike. That is the problem with the fronts.. not like the rear on the RSV. (in a pod un-cased) sound much better. So I left the Pioneers in the rear for now. Here are some pics of all 3 speakers OEM SPEAKERS (Junk) Pioneers Much Better Polk's Even Better 107DB400Polk Audio db 400 4" 2-way Speakers 1049.9949.99 Here is all 3 of them top view And side view Now with that being said, here is how you remove and put them in a 2nd Gen..... #1 Remove Fairing. (there is no going in from the front) #2 Remove the gold bracket and the black box (blinker box>?) #3 Remove the Philip's screw for each speaker #4 Start removing the four screws holding the speakers in place.. use a 8mm wrench when you can and a 5/16 deep socket for the hard to get to ones. #5 Now with all the screws removed you start to pry the front bikes grill along with the speaker a part. If adding Polk's you will need to enlarge the (2) inner holes a little bit.. (2 holes that will face the middle of the bike) #6 when adding the new speakers the (inside holes will be placed in-between the plastic as show) NOTE: I did place small pieces of cardboard in-between the metal bracket and the magnet so it Will help NOT to demagnetize the speakers. #8 DONE (replaced everything in reverse order) Now CRANK IT UP! Happy Riding! Jeff Notes: 2-way 4" car speakers polymer/mica composite woofer with butyl rubber surround liquid-cooled, silk/polymer composite 3/4" dome tweeter certified for marine use 2-way crossover network recommended power range: 4-35 watts RMS peak power handling: 105 watts frequency response: 85-22,000 Hz sensitivity: 91 dB top-mount depth: 1-13/16"
-
“Fiscal Cliff” put in a clear perspective which explains why so many of our American colleagues are dead against tax increases of any kind. Lesson # 1 * U.S. Tax revenue: $2,170,000,000,000 * Fed budget: $3,820,000,000,000 * New debt: $ 1,650,000,000,000 * National debt: $14,271,000,000,000 * Recent budget cuts: $ 38,500,000,000 Let's now remove 8 zeros and pretend it's a household budget: * Annual family income: $21,700 * Money the family spent: $38,200 * New debt on the credit card: $16,500 * Outstanding balance on the credit card: $142,710 * Total budget cuts so far: $38.50 Have you got it???? OK now, Lesson # 2: Here's another way to look at the Debt Ceiling: Let's say, You come home from work and find there has been a sewer backup in your neighborhood.... and your home has sewage all the way up to your ceilings. What do you think you should do ...... Raise the ceilings, or remove the crap? Tough decision, Eh?????
-
On my bike (96 Royal Star) I have the original exhaust and those 4 big old mufflers. Say I had a bunch of carbon deposit inside the mufflers...how would you go about cleaning or flushing them out? Could ya remove them from bike and get a few cans of carb cleaner and a air hose and go to sprayin and a blowin? Would that accomplish anything or not?
-
Just finished this morning replacing my rear shock. easier than I thought went through the right side did not remove tire. Not a bad 2 hours job.
-
I have a new rear shock on order and need to find someone who has replaced thiers to get tips and pointers on how to replace it. What to remove and what not to remove. Any help would be great. John
-
These are the videos I promised on replacing the seals on a Gen 1. I did not document the entire breakdown. I assume we all know how to remove the calipers, antidives, & remove the front tire. This video starts as if you were doing progressives spring upgrade. The write up on here from skydoc was very easy to follow. I did use an impact gun for the 18mm allen bolts under the forks as they were spinning when I tried to remove them by hand. I used 5wt oil & have 8lbs of air in my class with progressive springs. It was recommended I use 7wt, but I could not find it. I have 15wt in it before but that was too harsh. befor the summe I will change the oil again. The best wt for me at 225lbs is either 7wt or 10wt w/o any air in the forks. I will figure that out! REMOVING THE SEALS [ame= ] [/ame] REASSEMBLY [ame= ] [/ame] I've put 50 miles on my bike & the forks seals are holding perfectly! I would be happy to answer any questions if you're planning to do it.
-
I would like to move the trunk back on my 93 Royale trike and its not clear to me how to remove the trunk. I would appreciate it if someone could give me a few hints on where to start.
-
is there a picture showing where the ground wire is for the R/R ? I have the gas tank off, and I understand its on the right side of the bike near he neck. do I have to remove the other plastic plate, wrapped around the ignition? Just checking, for a lose ground
-
On my in to work this morning my low beam went out everything is okay hi beam and charging.. So my question is I have the rubber boot off and bulb unplugged, does that bulb just pull out or does it need to be turn, there is a clip there as well and does that need to be remove... Geez I wish my daughter was here her hands are much smaller... Thanks in advance
-
I just mounted a 1st gen center stand on my 99 RSV. I now need to remove the rear wheel to replace the wheel bearings. Is it possible to do this using the center stand instead of the bike lift? I'd hate to remove the center stand to facilitate the bike lift. I'd have to remove both bags and one side rail but will I still need to jack the bike up to get the wheel out or is the center stand going to be high enough ( the rear wheel is 1.5" off the floor with the center stand).
-
Thanks to Vincent, AKA: Playboy, for this EXCELLENT tech article. Packing Swing Arm Bearings 1. Remove the rear wheel as you normally do and your halfway there. 2. Drain the final drive and remove the speed sensor wire and four acorn nuts and simply pull out final drive and drive shaft. This is a great time to catch up on a lot of those little maintenance items. . http://www.venturerider.org/Swing%20Arm/swinga1.jpg 3. Un clip the speed sensor wire from the swing arm and remove the clamps from the brake line. So you don’t have to hunt for them later re insert the clamp bolts back into the swing arm finger tight. Just allow the caliper to hang over out of the way. Be sure and check pads for even wear. 4. Now its time to remove the shock and the dog bones or leveling links. Before removing top bolt from shock remove seat and right side cover. http://www.venturerider.org/Swing%20Arm/swinga2.jpg 5. Un clip the shocks vent line located beside battery on right side. Then remove round black plastic cover where you add air to rear shock ( it just pops out ) http://www.venturerider.org/Swing%20Arm/swinga3.jpg 6. Remove the nut from the valve stem. http://www.venturerider.org/Swing%20Arm/swinga4.jpg 7. Now just work the vent line and air line down from top and pull out top bolt from shock. http://www.venturerider.org/Swing%20Arm/swinga5.jpg 8. To remove Y pipes you will need to remove left side cover also. Under the lower section of the Y pipe loosen clamp closest to the rear. http://www.venturerider.org/Swing%20Arm/swinga6.jpg For the section attached to rear cylinders you can loosen that clamp as well or remove the two nuts on the flange going into head . http://www.venturerider.org/Swing%20Arm/swinga7.jpg Remove the bolt where the mufflers slide on . http://www.venturerider.org/Swing%20Arm/swinga8.jpg 9. Now you can just work the Y pipe out and to the rear. http://www.venturerider.org/Swing%20Arm/swinga9.jpg 10. Next pop off the chrome covers on both sides. http://www.venturerider.org/Swing%20Arm/swinga10.jpg you will notice a bolt head on the left side. 30mm I think remove this bolt from the left side . http://www.venturerider.org/Swing%20Arm/swinga11.jpg This bolt requires 72 ft/lbs on re installation. 11. On the right side you will notice a Allen head bolt with locknut loosen or remove nut then remove bolt . http://www.venturerider.org/Swing%20Arm/swinga12.jpg This bolt only needs 5.1 FT/lbs of torque. Locknut requires the 72 ft/lbs. Don’t worry about the swing arm falling out when you remove the bolts. Now you can work the swing arm out from under the bike with just a wiggle. http://www.venturerider.org/Swing%20Arm/swinga13.jpg The rubber boot protecting U joint should come out with it . http://www.venturerider.org/Swing%20Arm/swinga14.jpg 12. Place the swing arm in a vice with drive shaft side down. Pull of the rubber boot so you can see the back side of the right side bearing. Insert the left side bolt from the inside. http://www.venturerider.org/Swing%20Arm/swinga15.jpg Using a wooden dowel rod tap out the bearing and seal. This will allow minimum distortion to seal so you can re use it . http://www.venturerider.org/Swing%20Arm/swinga16.jpg 13. I used a seal puller on the right side seal because I had one but working carefully with a screw driver or very small pry-bar you can get that seal out with out much distortion. 14. Inspect bearings and races for pitting or wear marks I doubt you will find any unless this has been neglected for a very long time. My bike was @ 30k and had some grease still on bearings Probably just what the factory put on them. 15. Re-pack your bearings with a good quality grease. Insert the right bearing and reinstall seal flip over the swing arm and repeat for left side. 16. Reattach the rubber boot and work the swing arm back up into the bike. Don’t worry about the trying to get the boot back on just yet. Just get it in there where the swing arm bolts will be close to lining up. Lift the swing arm up and slide something under it to support it. . http://www.venturerider.org/Swing%20Arm/swinga17.jpg 17. Reinstall both bolts just enough to get the threads started good and then work the rubber boot back over the U joint. Long handle needle nose pliers and a monkey hook are real handy here. 18. Tighten both swing arm bolts. The left bolt must be tightened first. Remember right side is only 5.1 ft/lbs and locknut is 72 ft/lbs. 19. Everything else goes back in reverse order. Don’t forget to lube those pivot points on the shock while your there. Something that works well for me when it comes to reinstalling final drive and drive shaft is that I pull the driveshaft off the final drive, put the bike in gear, I then insert a large Allen wrench into the hole of the driveshaft where the spring fits for a handle and install the driveshaft into the U joint. You can turn the gear on the end of shaft to determine that your in the U joint and not beside it. Hope this helps because it is not the dreaded job I thought it would be. Could have done it in a afternoon but it was a 100 degree day and trying to take pics on all the steps took some time. Vincent aka PLAYBOY
-
Can someone tell me where the anti tamper covers for the air adjustment are located or post a pic of them. Been looking in the service and parts manuals but they must be under a different name or terminology for me to find them. And what is the best way to remove them when I find them.



.thumb.jpg.176b2ebbe9863175975d94710375c414.jpg)
