Search the Community
Showing results for tags 'spacer'.
-
A HUGE THANK YOU! To everyone who purchased this spacer. I assume all are satisfied with it, your feedback/comments in the classified ad would be greatly appreciated. As much as I hated to do it, I had to increase the price by $5. I lost my connection for aluminum and cheap shipping rates. Bill W.
-
 I bought a set of roto covers for my MKII a while back on craigslist, but it did not include the spacer. I thought that my machniest buddy could make a new spacer for me using the origional as a sample. I want to not shorten the OEM spacer incase I want to remover the roto covers for some reason, then I'll need the origional spacer. He can make one out of aluminum. My question is, would making one out of aluminum be ok. I would think it would be but I thougth I better ask. Another question: I need to remove the front axle, so I can get the spacer out. I see the axle nut head. But I also see an allen head screw the goes in at a 90 degree to the axle. Do I need to remove the allen head screw before I attempt to remove the front axle? Or maybe better yet, does anyone have an extra front axle spacer opposite side of the speedometer. for a 91 MKII? It be a lot easier to machine shorten a spare OEM spacer the width of 2 roto plates than to make a new complete spacer.
 -
just tore down my 88 venture forks to replace seals and it seems someone has replaced them with progressive springs because they do not have the stock look...nor do they have all of the yamaha parts after the top fork plug... when I disassembled the top for plug these springs did not have any spacer, washer or plug between the spring and top cap... Now I need some senior advice for what to do... Can I make a spacer and washer...the spring is just riding on the top plug...Thanks everyone in advance.
-
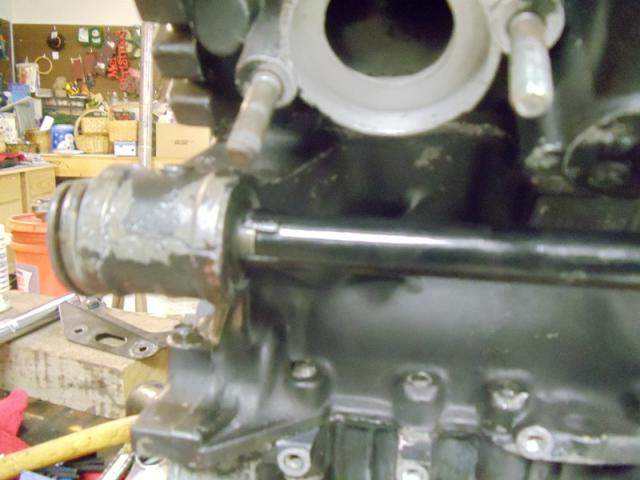
Im rebuilding the rear wheel with all new bearings, spacers and seals. I have a question on the proper positioning of a spacer flange on the disc brake side of the wheel so maybe someone here who has had to rebuild their wheel and/or someone who has removed the bearings on that side can answer this. Or maybe someone who has a rear wheel laying around with the bearings removed can chime in too. The spacer flange is a stamped steel spacer with one side flat and one side hollow. It goes into the wheel just behind the wheel bearing and seats into a cut-out in the axle opening, followed by the bearing. What I need to know is what side of the flange faces the bearing. The flat part, which im leaning to or the hollow portion? The parts fiche offers no help. Thanks
-
Hey guys, Could use a little input here... When I purchased a new set of tires for my 06 RSMV, I took them and the bike to a local metric dealer to be installed. (BTW, this will be the last time. I went to Harbor Freight and bought a few tools and I will do them myself on both of my bikes from now on). Anyway, a few days into my recent road trip, I noticed a faint sound coming from the rear wheel which would come and go. I also had the clicking sound so many of you have described from the rear end. It was an intermittent issue, and went away for the remainder of the trip. When I got back I went on this wonderful forum, and realized my problem had all the earmarkings of the dread "Creaking wheel syndrome". So I printed up the TSB and took the bike back to the stealer that did the tire change, explained the problem, the likely remedy, and asked them to fix it. Result, they kept the bike for 4 days and couldn't fix it. The service manager said "you know more about it than we do". But at least he didn't try to charge me. Anyway, took the bike home and put it up on the lift yesterday, removed the mufflers and saddlebags and brake caliper, etc. Started to remove the rear axle, which was tight as @#ll! After getting the axle out about an inch, I noticed that the axle spacer (the one between the swingarm and the caliper mounting bracket) was NOT on the axle. Oh, and I forgot to mention, they changed the final gear oil at the dealer to try to cure the noise and said it had metal shavings in it. I am sure the spacer was on the axle when I brought the bike to them because this was the first tire change. I've only had the bike since last October and it only had 4000 miles on it when I bought it. The guy I got it from was not exactly a stickler about maintenance so I really doubt he ever had the axle out, so it should have still been on there when I took it in. So guys, I guess I'm looking for some ammo to go back to the dealer with. What are potential problems that can be caused by leaving the spacer off? It seems to me that without the spacer things would either be too loose, or too tight back there, either of which could wreak havoc with the rear end of these bikes! Any input would be appreciated! Ride Safe, 1/2crazed
-
Lary, your stainless steel horn bracket is finished first class. The only thing is that the bracket is approximately 5/8" to short on the ground bolt leg requiring the use of a spacer. Restoring a 99 RSV for a customer and found the above today. I personally think spacers are tacky. RIDER FIRST, HARLEY OWNER SECOND.......
-
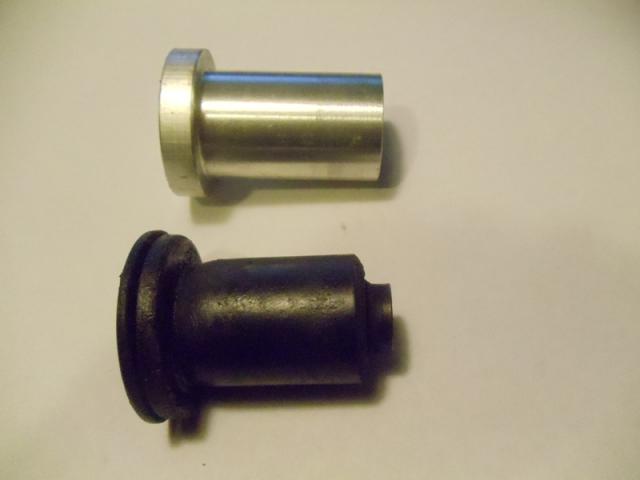
Which way does this spacer go on the rear wheel? This spacer goes against the rear wheel bearing and is the seal surface the seal rides against. There is a raised shoulder on one side while the other is flat. Pictures of both are attached. I am assuming the raised part goes against the bearing since it is the same diameter are the inner race. And yes, those are the balls from the rear wheel bearing. Not good. RR
-
So I replaced my springs with progressives and this is what came out. None of the instructions referenced this piece. Maybe someone might want to referenced this in the Progressive instructions for new comers so it does not throw them like it did me. So when I removed the 17mm cap, picture 1 is what I saw. When I removed it as I pull picture 1 thing out the 4 inch spacer can along with it. After the 4 inch spacer then I pulled the flat washer with the collar. I pulled this thing of picture 1 off the 4 inch spacer. It came off kinda of hard but because the instructions/picture did not show it to discard I put it back in. Also because it had the O-ring I thought it was of some signifcant so I used it. Well I tryed to add the 1/2 inch ABS spacer and it was almost impossible to put the 17mm cap on. So I discard the ABS Spacer. This thing of picture 1 is about 1 inch in length with the flat washer. My 1st ride was pretty stiff. I removed this thing of picture 1 and replaced it with the 1/2 inch spacer with the washer collar. This morning I went a 2nd ride of the same course. Ride is still stiff, there might have been a very very slight improvement. This evening I'm going to remove the 1/2 ABS spacer, maybe I should also remove the washer too. Don't like the idea of the end of the spring butting up against the 17mm cap. At 173 lb, guess I'm a light weight. I sure hope the ride softens up some with no spacers. Oh I have a 91 VR. So for those who need to use a 1 inch spacer, rather than using 1 inch of ABS spacer you might consider the below. This is how I installed it for my 1st ride. Progressive Spring with the tight coil down 1st. Flat washer with the coller going inside the thing of picture 1. then the 17mm cap.
-
For those who have installed Progressive Springs in their MKII, I have a few questions. I need to readjust my spacer length and so I'd like to come as close as I can to the perfect desired ride. I love what the progressive does to the handeling of my MKII, but mine is way too stiff. I would like to use a spacer size that would be the most appropiate for my 170 lbs(birthday suit). I rarely ride double and my storage trunks are pretty much empty. I would allow 10 to 15 lbs of stuff all together in my storage trunks. No Gas Tank Bag. I'm usually a one day rider so I travel pretty light. What length spacer do you use? What wt fork oil What length of non oil space did you leave after compressing your forks. Whats your weight? Hows soft and smooth is your ride? Would you like to use a different length spacer, or oil wt and why?
-
I just purchased a Chrome Radiator Grill from ebay and learned that I need spacers for correct installation. Was wonder if someone with one of these might remove a spacer and post the diameter and thickness of the spacer. There is a Mclendons Hardware store near by and they have all sorts of spacers in various sizes. I would also think that a Nylon Spacer would work for it would be far enough away from the Radiator heat. If I can't find the exact size I might be able to find one long spacer and chop saw it to the specific length.
-
Hello Riders Looking for the chrome cover to the driving light bar on the front as well as a light bar spacer. I emailed the contact listed on the site for the spacer, never responded to my inquiry. My scoot was missing the U-shaped chrome cover (Yamaha does not have this single itme available) and I would like to also install the spacer to make it easier to access/cowling removal. Any out there looking for sell or move these items?
-
Anyone install the passing lamp bar spacer ( the one Tony makes) on a lowered front end 2nd gen? are there any issues with it hitting the fender? Thanks
-
Following Freebird's Tech section instructions, I have the fork springs out (Plastic spacer - did Yamaha use a plastic spacer?) and the bottom bolts out. I tried to remove the lower tubes as instructed, but while they broke loose from the "pressure hold", I seem to be hitting something solid and metallic right at the bottom before they come apart. Anyone know what I'm hitting? I don't want to keep slamming the lower tubes against this without knowing what's happening. Thanks Andy __________________
-
Following Freebird's Tech section instructions, I have the fork springs out (Plastic spacer - did Yamaha use a plastic spacer?) and the bottom bolts out. I tried to remove the lower tubes as instructed, but while they broke loose from the "pressure hold", I seem to be hitting something solid and metallic right at the bottom before they come apart. Anyone know what I'm hitting? I don't want to keep slamming the lower tubes against this without knowing what's happening. Thanks Andy
-
Is the spacer bar for passing lamps still available? Any contact info appreciated.
-
RK pipes I got for $75, and the 1 3/4" 20 degree bend pipe. I'm not too happy about the bend, but it shouldn't affect the performance much. http://i868.photobucket.com/albums/ab243/BriRit/2011-03-23_17-34-48_914.jpg Hanging the pipes from the bag hangers. I had to drill out the threads to accept the larger bolt that threads into the pipe hanger. http://i868.photobucket.com/albums/ab243/BriRit/2011-03-23_18-16-48_484.jpg I used some rubber grommets with a spacer inside to drop the pipes so they don't hit the bottom of the bags, and to isolate the vibration. http://i868.photobucket.com/albums/ab243/BriRit/2011-03-24_17-52-12_618.jpg http://i868.photobucket.com/albums/ab243/BriRit/2011-03-24_17-58-10_692.jpg Here's what they look like from the side. I'm still working out the connector pipe dimensions, I may have to put more of a bend in it, and get the ID of the collector side expanded a bit. http://i868.photobucket.com/albums/ab243/BriRit/2011-03-24_19-03-12_936.jpg
-
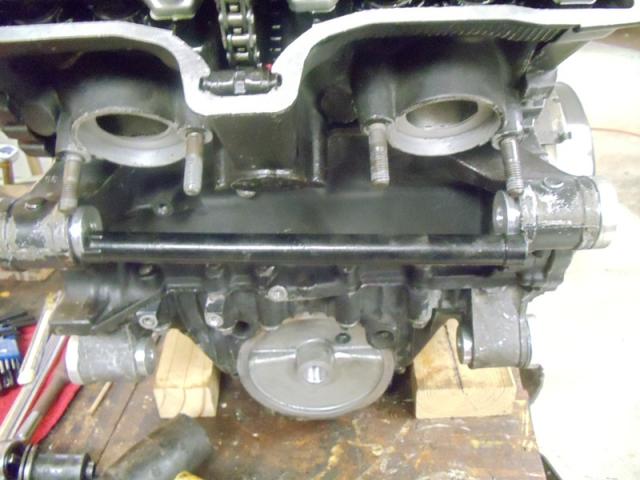
 For those of you putting the solid motor mounts in the 1st gens, I have encountered a minor issue with them. The solid mounts are interfering with the upper spacer that goes between them. The solid mounts are the exact same length as the stock rubber ones. They have a 1.10" dia. shoulder that fits through the mounting boss on the block. This 1.10" dia on the solid mounts is the same dia. to the end of the mount. This differs from the stock mounts. The stock set has another diameter reduction to .58" at .23" from small end. A comparison of the two mounts is shown in the 4th picture. On the upper front mount this smaller diameter is used to capture the Spacer, Engine Mount (2H7-15336-00-00, located in crankcase section of fiche). There is a welded on collar on each end of this spacer that fits over the small end of the stock mount. Shown in last picture. I really don't don't see a structural purpose for these two collars, so the solution seems to be to grind them back to allow the spacer to fit in between the new solid mounts. I think the spacer does perform a function by maintaining the distance between the two mounts, and not allowing the long bolt that passes through both mounts to pull the motor mount ears inward. Omitting this spacer could lead to one of the motor mount ears snapping when the frame is under stress. The other four mounts are fine as far as I can tell at this point. The block did require a very thorough cleaning to allow the solid mounts to be inserted. I used a dremel with a sanding drum on it to clean. This is a view of the upper mounts and the long bolt in place. The spacer rod is not installed yet in this picture. This is a view of the stock upper mounts with the spacer in place. Stock mount with spacer shown over small diameter. Spacer shown with solid mounts in block to illustrate length issue. View of solid mount next to stock MKII mount. MKI mounts differ slightly in that there is ribbing around the larger diameter rubber portion. View of spacer next to stock MKII mount. The welded on collar on the spacer is what can be ground down to allow use of spacer. Gary
-
 Ok, been reading up on the install on the springs and there is some good stuff about installing progressive springs, the problem i have and cant find the answer to is how long and what size is the pvc spacer is, the springs i got came out of of a set of forks and they had no spacers in them, do you realy need the spacers ? it said to cut the spacer in half that came with springs, sence i did not buy these new and there was no spacer in there to begin with i am lost, does the space go on the top or the bottem, help if you will.
 -
SkyKing needs a spacer for his driving lites so he can remove the fairing with out removing his D/Ls . anybody know where to buy one ? Thom
-
I seem to have lost the "chrome" top rear saddlebag bolt spacer (2nd Gen). What's the best place to get a replacement? Dave
-
Not sure if this has been covered before, but I was adding a 3 female aux splitter last night so I had to split the fairing. I don't do it that often, but often enough to were I tried to figure out a solution to not have to remove the lightbar anymore. This is what I was able to come up with. Not sure if you can get any longer bolts in there. In my vast collection of bolts and spacers, I found 1 3/4" bolts and 1 1/4" spacer. This leaves 1/2" of thread sticking out. This is also how much thread that is sticking out from the stock bolt and spacer. So this moves the lightbar out and still looks good IMO. Only untested thing is to split the fairing again to see if I can remove the fairing w/out unbolting the light bar.
-
Are these still available out there somewhere????
-
Is the passing lamp spacer still available, and if so where and how much?
-
 I will be "attempting" to install new progessives tomorrow. I have never done this job but it doesn't appear to be that difficult. I've thought that before about other mods I started and what should had been easy turned out to be much more involved than I initially thought. Been burnt many times. But still this seems to be a fairly straight forward job. So, I ask, once I remove the fork caps, otherthan the old springs, what else is removed and "not" reused? Also, in addition to the new springs and the PVC looking spacer, what else should I install and/or replace? I am building that "monster" tool as recommended by Condor; a piece of 17mm Hex key soldered in a 17mm 6 pt socket. Hopefully, all goes well.
 -
Bought all the components to rebuild the forks on my 87 VR. Installed all new parts and reassembled the forks. All went well until I seated the seals. Found they would not drive in far enough to install both the top spacer (gold colored upper spacer) and the snap ring. No such luck as it appeared the seal wasn't bottomed out enough to allow both spacer and snap ring.Bought a seal driver and tried to get the seal to bottom. Thought they were hydro locked by grease lube. No such luck as the seal driver would not bottom out the seal, in fact it was telling me they were already bottomed. Finally decided the seal must be the issue so disassembled the forks to remove some grease. Found when I compared the old seal with the new ones that the new seals were thicker by exactly the thickness of the top spacer. Reassembled the forks and left out the top spacer and installed the snap ring. The forks are back together and hold air fine. Bottom line is to compare the seals before assembly. Wasted a lot of time but the fix was simple once I knew the problem. The snap ring above the seal is all that's needed to tightly retain the seal and top bushing, the top spacer takes up the slack with the thinner stock seal (lower spacer (silver) is in place). Anyone ever run into the same thing?