Leaderboard


Popular Content
Showing content with the highest reputation since 04/14/2026 in all areas
-
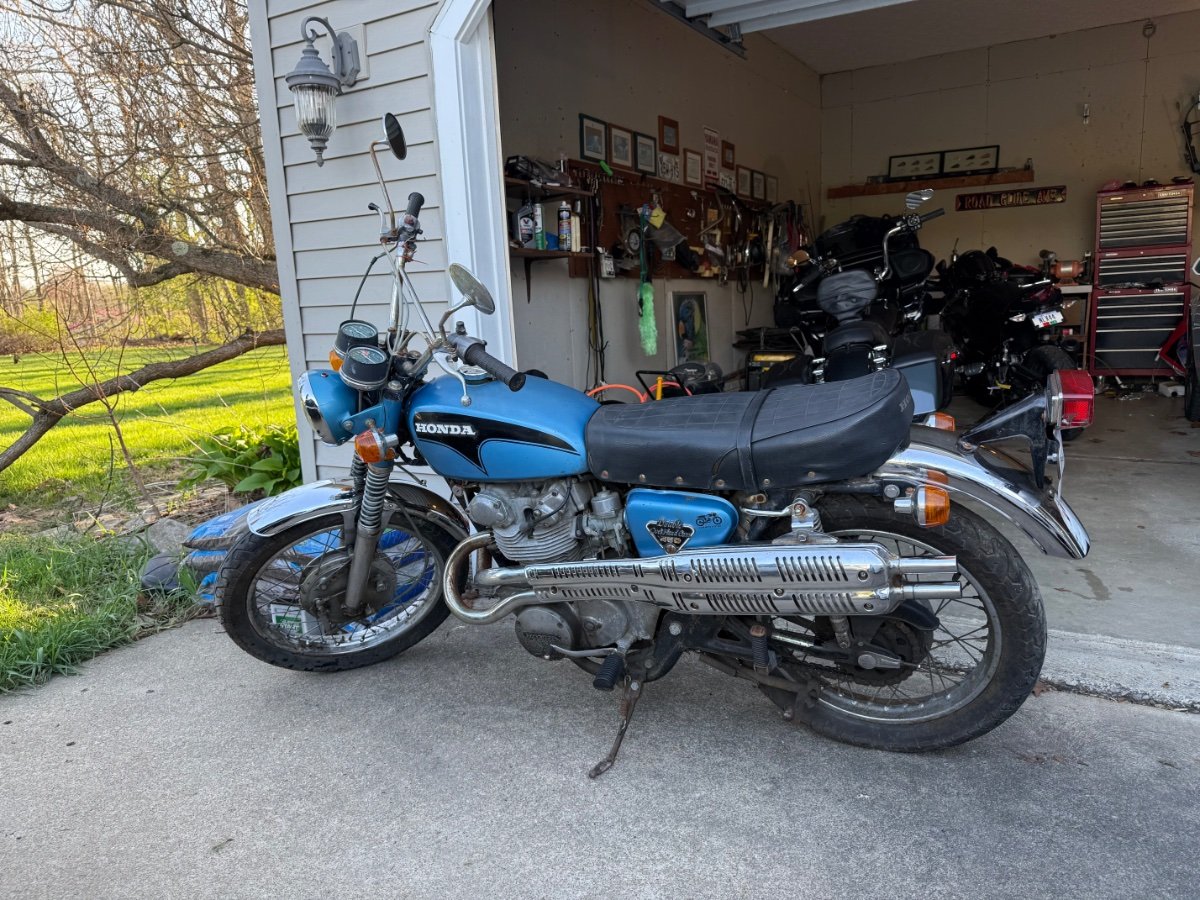
Ran across this old ‘71 Honda CL450 last night online. Went to look at it and bought it today. It needs significant TLC but I think it can be a nice bike. Not sure how far I will go with it. Maybe just far enough to resell it and make a few bucks. Sure brings back some memories though.
 6 points
 -
Hi all, sorry for not being here for a while. Life gets in the way with health problems, but all is well now. I did pick up a couple older bikes. One is a 95 Harley Road King with 37548 miles I got from my brother when he passed. the other is a 78 Yamaha 550 that my son and I are restoring.3 points
-
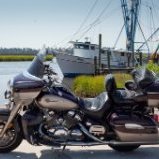
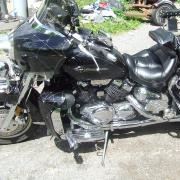
she got a new owner today at 87,000 miles. 🥹
2 points
-
What you get from burning your whiskey instead of drinking it.2 points
-
Still a go on our part, talked with some other Venture Riders that are not on the site any more sounds like a couple of them are coming. Sure am looking forward to seeing you all.2 points
-
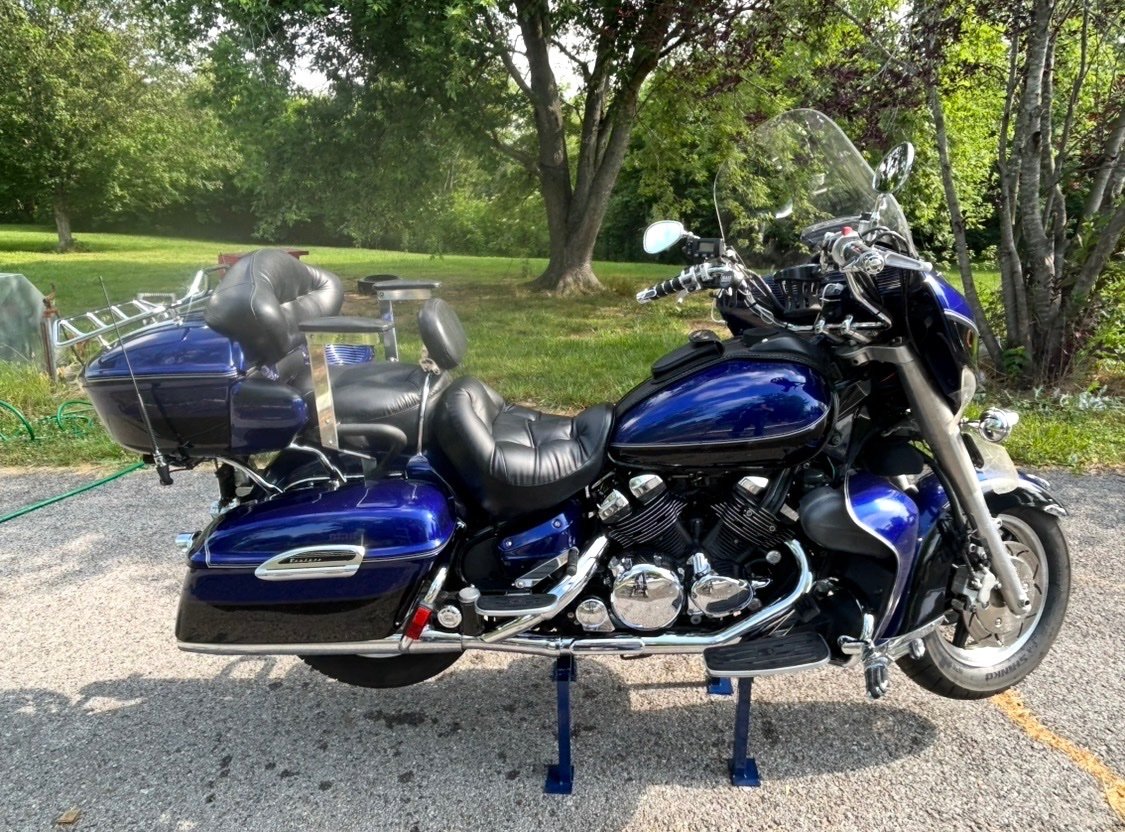
Just had the stereo and n the Roadglide upgraded. Tim’s Stereo was in Cleveland and I had him add the Soundz 500 watt amp, dsp, and speakers. Fantastic sound.2 points
-
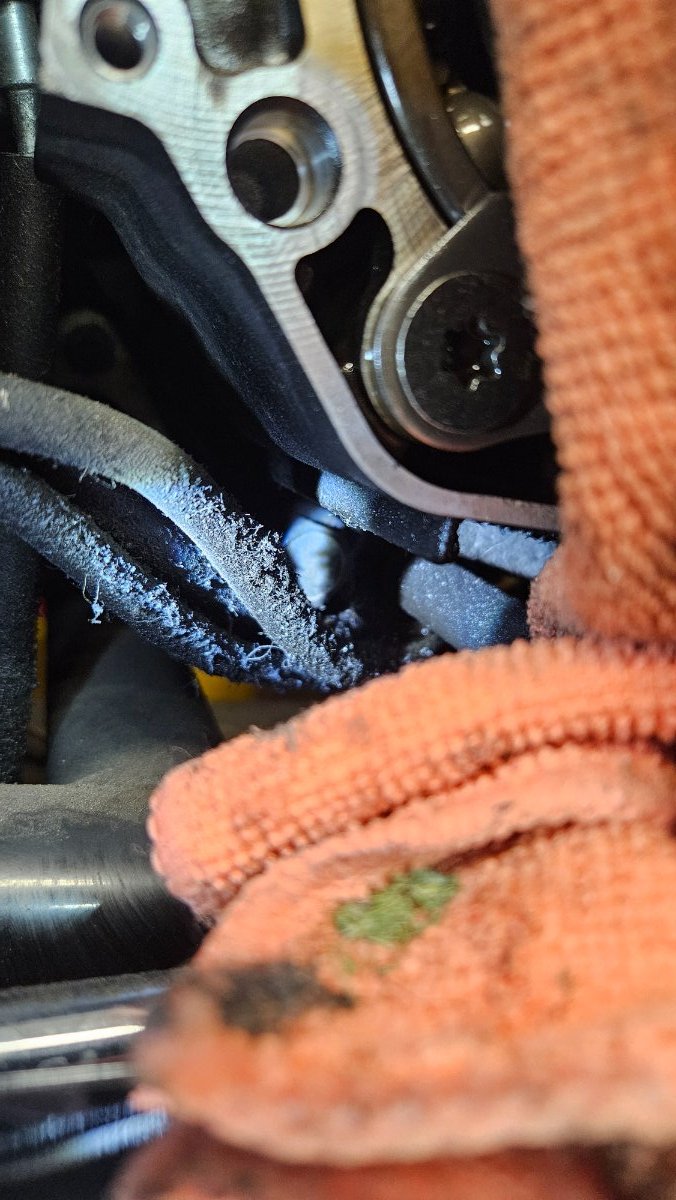
Finally figured how to get clamp opened to get wires out! Was a real pain disconnecting tha small 2 wire plug that had to come out with Stator!1 point
-
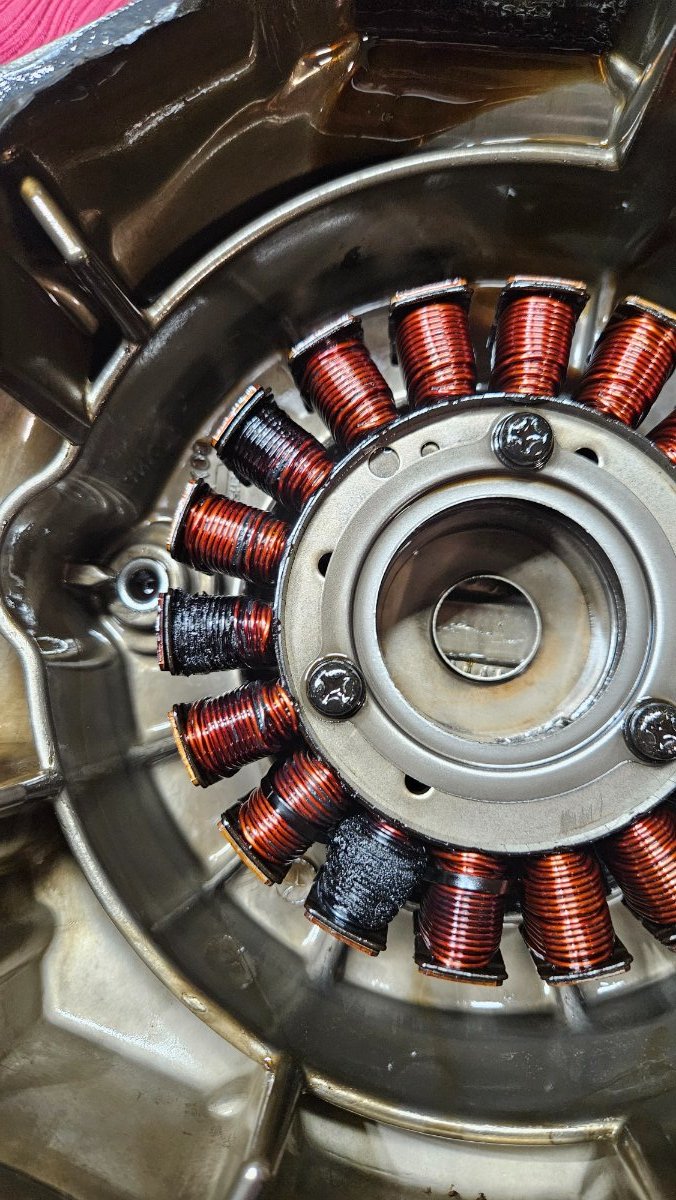
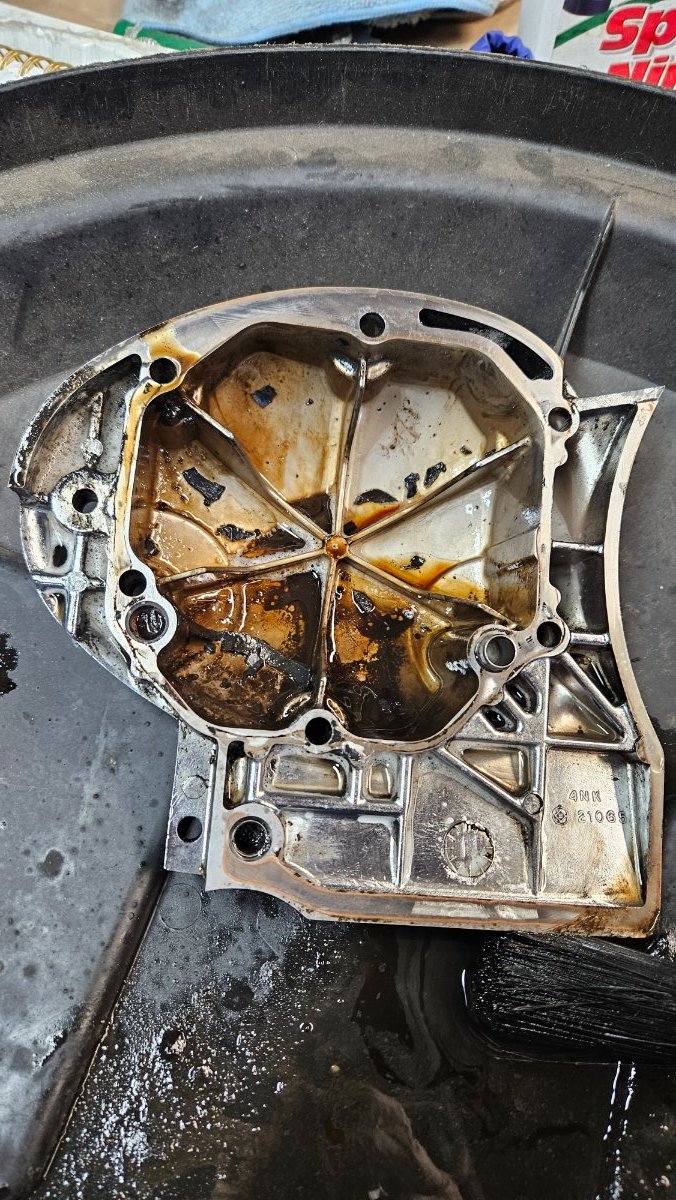
Got Stator cover 1 off and this is picture of Stator! Now to clean off gasket and then replace Stator!
1 point
-
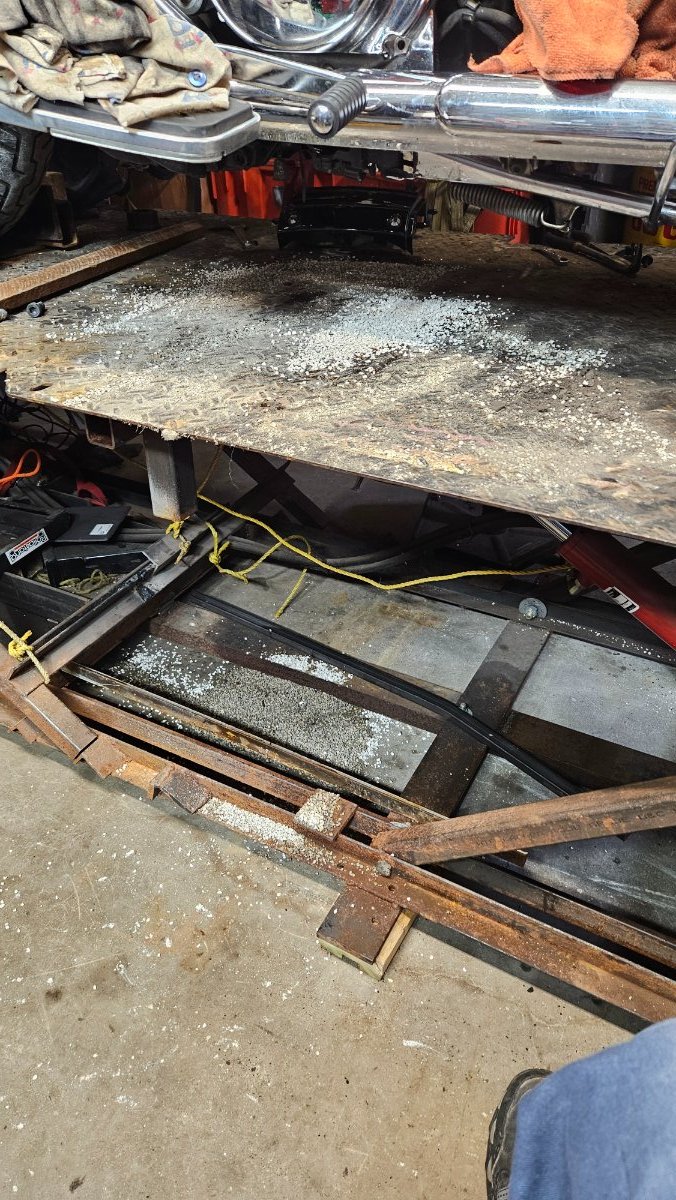
Pictures of antifreeze being soaked up on bike table and one of dirty wires! Still trying to get them loose from clamp then I can pull them out to remove Stator! Had to pickup son's rototiller as he needs it for weekend if weather is good!
1 point
-
Yes it is getting exciting! Should have realized that the pressure behind the plug would want to go somewhere! Should have put the covers on until I had to put exhaust back on! Picked up tube of RTV and blue Lock Tite for the rubber plugs in Stator!(going to try and vacuum seal them after use as am hoping them to last without hardening as I don't use them enough)1 point
-
Been busy all day today and finnaly went out to do some more work on bike and now I have to add putting Antifreeze in when I'm done with Stator! Took off engine fins off to remove exhaust and didn't put it back on and freeze plug fell out sometime and drained Antifreeze! Wiped up the mess,dried off tools and wiped down drain hoses that went thru frame so I have a little more room to try tomorrow to get wires out so I can get Stator out!1 point
-
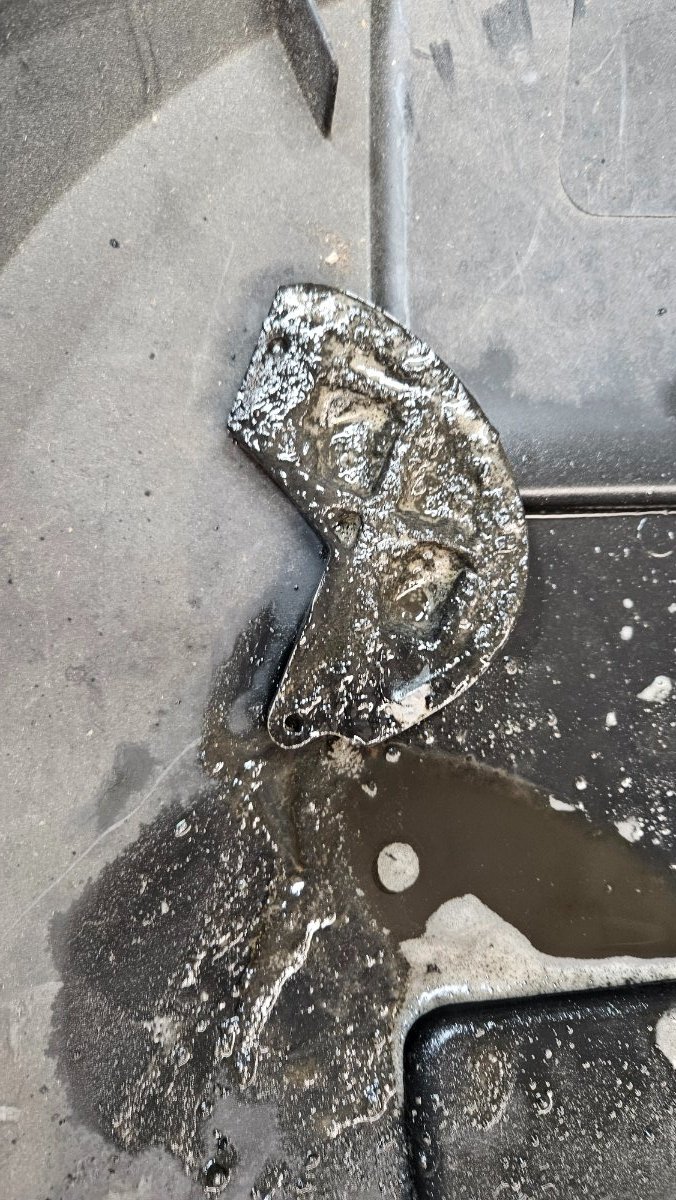
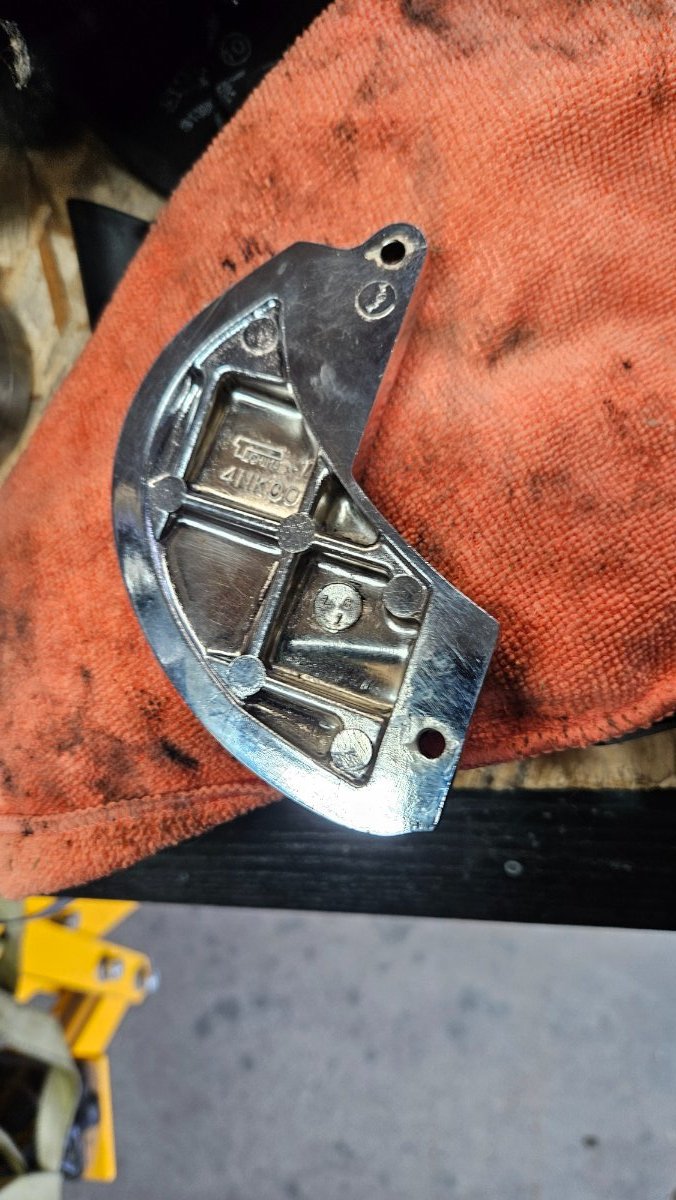
before and after cover2 and piece behind it
1 point
-
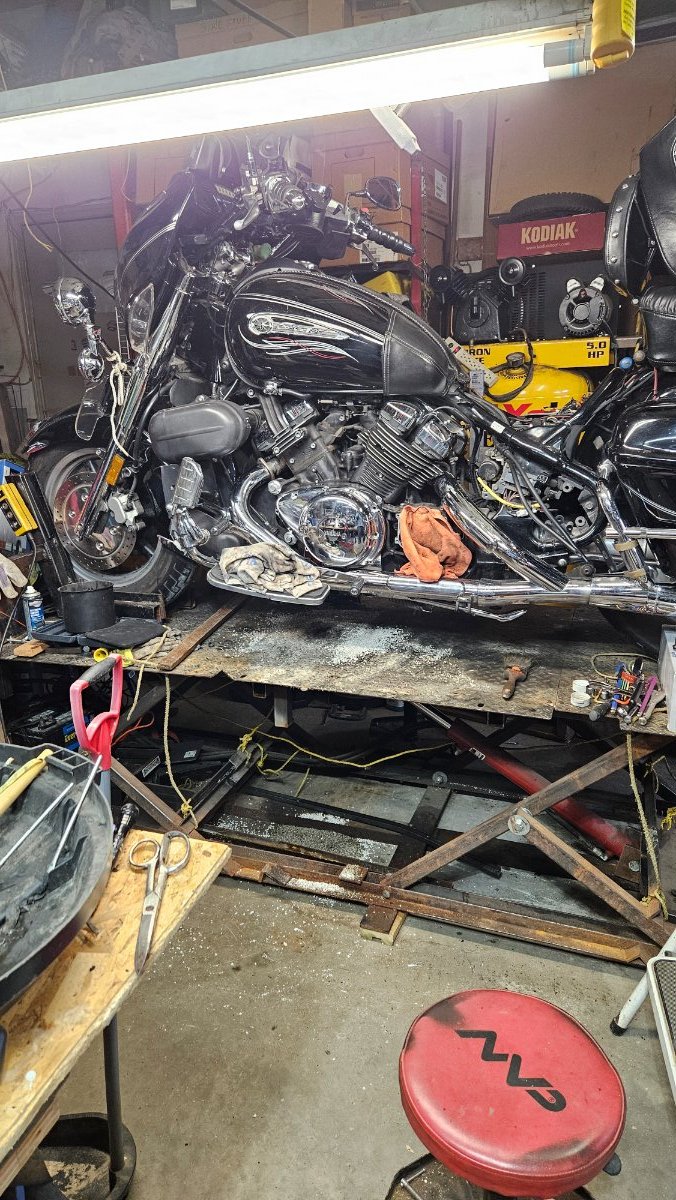
Got garage organized enough to have more than enough room and places to put parts on when dismantling what I need to take off! Punched holes in small box to hold bolts in order of disassembly! After taking farthest chrome part(half moon shaped) from cover2 looks like there was a small leak somewhere as there is a LOT of crud on it and everything under bike! Have oil drained,exhaust disconnected, all bolts except one each cover till ready to take off and also make sure all oil is drained then will try to clean all crud from oil pan,frame ,hoses and wires before I get too far!1 point
-
I gave him the info. Pretty sure he’ll show up here. We talked about good knowledgeable factual information vs facebook information. Now I need to move out 2 more for even more room. Got a 1st gen and a Honda to move.1 point
-
I had to replace the thermostat and one of the sensors on my 2007 many years ago, I did not remove the radiator, pulled the tank and did all the work from the top. I do not recall it being overly difficult.1 point
-
Stator,Voltage Regulator and gasket dropped off by Purolator today ! Still organizing garage while working on sons lawnmower! Also got neighbors lawn cut as she is at new home and her old one is for sale! Probably start working on bike in a couple days!!1 point
-
Got called in again to work Sunday morning. Must get my beauty sleep. Good night to all.1 point
-
Went on the first Venture ride today, 28° brrrr I should clarify that it was the first Venture ride of the season, we had the CanAm out in March… just before we had 36” of snow.1 point
-
@N3FOL Picked up a gasket today for$12can today from dealer that had one in-stock. Thanks for your offer anyways! Now just have to wait for parts to show up!1 point
-
@N3FOL Yes it is! It is our HST(Federal tax) and PST(Provincial tax)which we pay on all purchases except food which is PST only! So when I bought my parts it cost me $48can in tax.1 point
-
@N3FOLyes I finally stopped procrastinated and on the way to fix, miss ridding but things were always coming up that had to take care of first!1 point
-
@N3FOLJust ordered a new Ricks Motorsports Stator, Kimpex HD Voltage Regulator and a gasket for Stator. Nobody has a Cover2 gasket for the chrome cover behind Stator cover(Cover1) from Fort Nine in Montreal Quebec Canada $433can free shipping! Should arrive by Friday or Saturday!1 point
-
Looks Good1 point
-
Finished up a shop project and yesterday took a ride on the trike maybe about 2 hours. came back home and started loading the camper. Now I'm washing the truck and the camper hoping to get to use it later.1 point
-
Your welcome Ron. Glad you got to put it to use.1 point
-
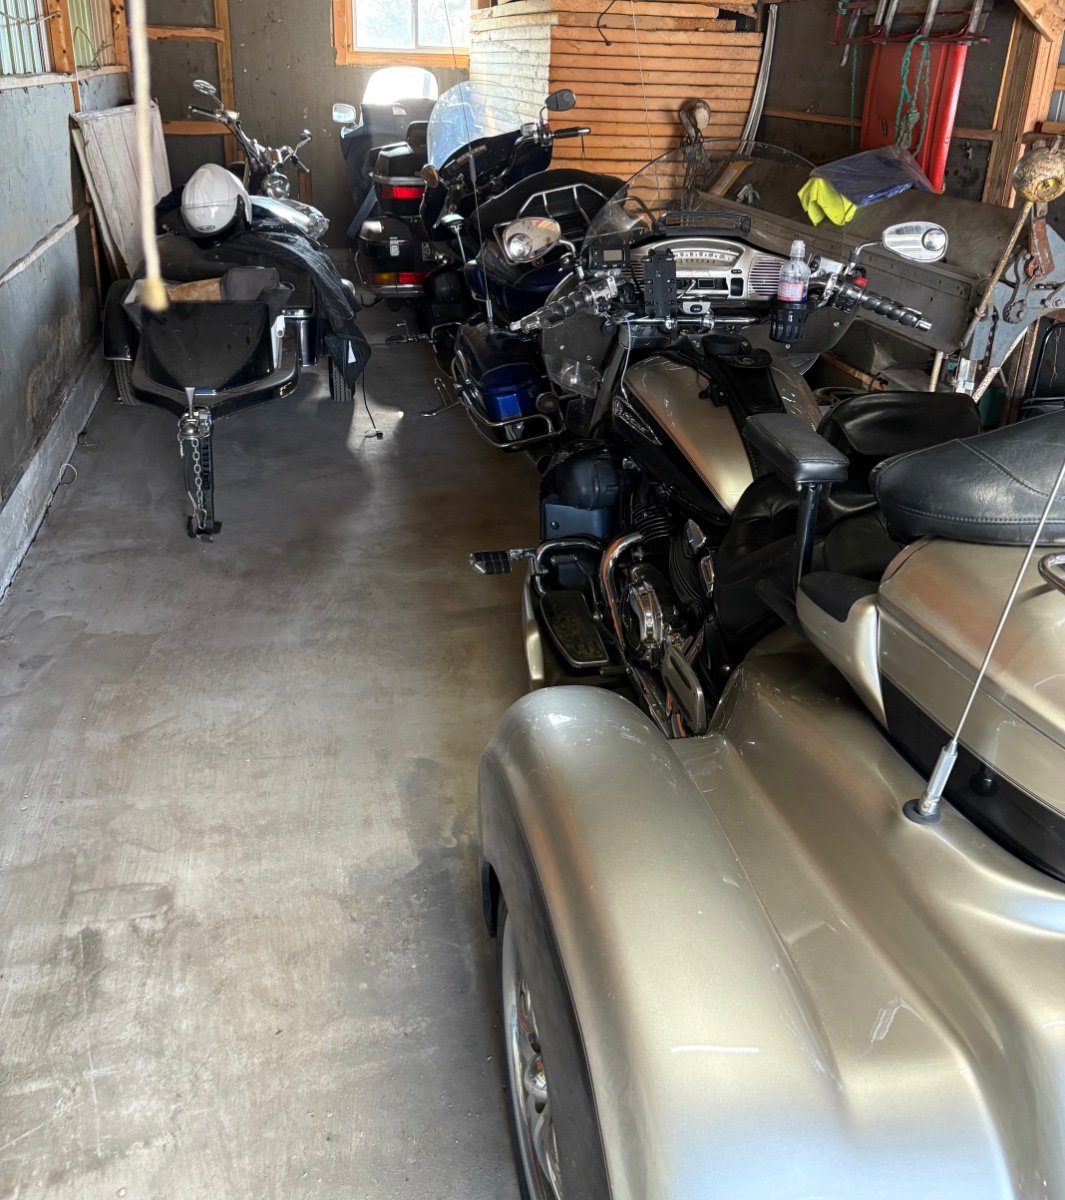
1st gen Venture Royale, 2nd gen Venture, 2nd gen Venture trike, Honda Shadow 600cc 4 speed.1 point
-
Would be nice to see them again.1 point
-
Anybody else need a new old bike? Need to clear some out. 🤣🤣🤣
1 point
-
My second motorcycle was a 73 CB750 with an orange metalflake tank bought in February, 1973. It was used with about 800 miles on it and paid $1150. A new one cost $1450 in the winter. What a smooth great bike after learning how to ride on my vibrating 71 CB350. Now my run around town bike is a 1985 Kawasaki ZN700.1 point
-
Orlin posted a ride and get together for june 26t and 27th up in Wisconsin. looks like several riders are going to show up.check out his post.1 point
-
Robin and ! are going to give this some thought. will let you know1 point
-
Father in law does1 point
-
To answer the question. No, I do not have the bag speakers. I debated that option for a while but decided against them. The stock system was almost good enough so I decided to just upgrade the fairing speakers and add the 500 watt amp. I’m not at all disappointed. The sound is much cleaner and plenty loud. On the 40 minute ride to the shop, mostly freeway and 70 mph, I had it set on full volume. On the ride home after the upgrade I ran mostly at 50% volume and the sound was great. He was prepared to do the bag speakers if I wanted to but of course it would have meant I would have given up my bag covers, cutting the lids, etc. I like the bag covers and the demo I listened to convinced me that I would be happy with just the fairing speaker, dsp, and amp. I didn’t want to lose my covers and pay another $1,000 for the bag speakers, larger amp, etc.1 point
-
He now sits on the throne, there none else but Him.1 point
-
Replacing the gaskets is a good time to check the clearances on the valves also. Rick F.1 point
-
I replaced mine last winter for the same reason & tightening didn't do anything on mine. I added some RTV at the half circles when I replaced them and its been perfect since. Replacing the gaskets is fairly easy, its just tight working in that area. What got me was figuring since I was doing that, I might as well check the valve adjustments, then I was like what the hell, might as well replace the twinkie gaskets & rebuild the carbs... which let to Ivan's jet kit & figuring out how to re-set my float heights. Then while waiting for some parts I tore off the swingarm to re-pack the all the bearings which lead to re-packing the wheel bearings too, lol. Ended up having it stripped down & tinkering with it for over a month. I enjoy wrenching tho so I was looking for excuses to be in the garage. Upside is the bike has never run better and its nice not to have oil dripping down the back of the engine!1 point
-
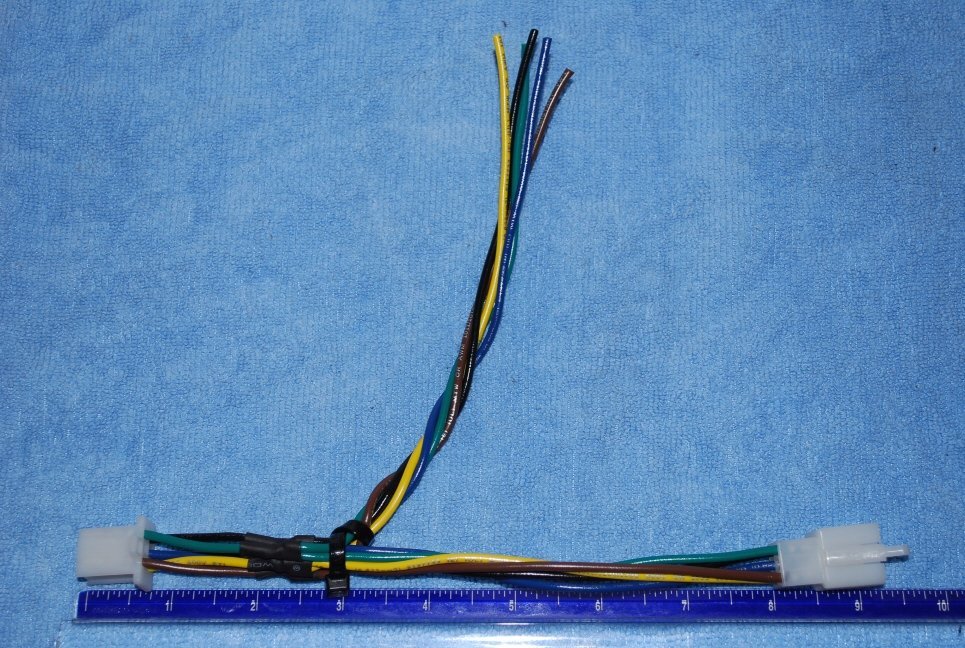
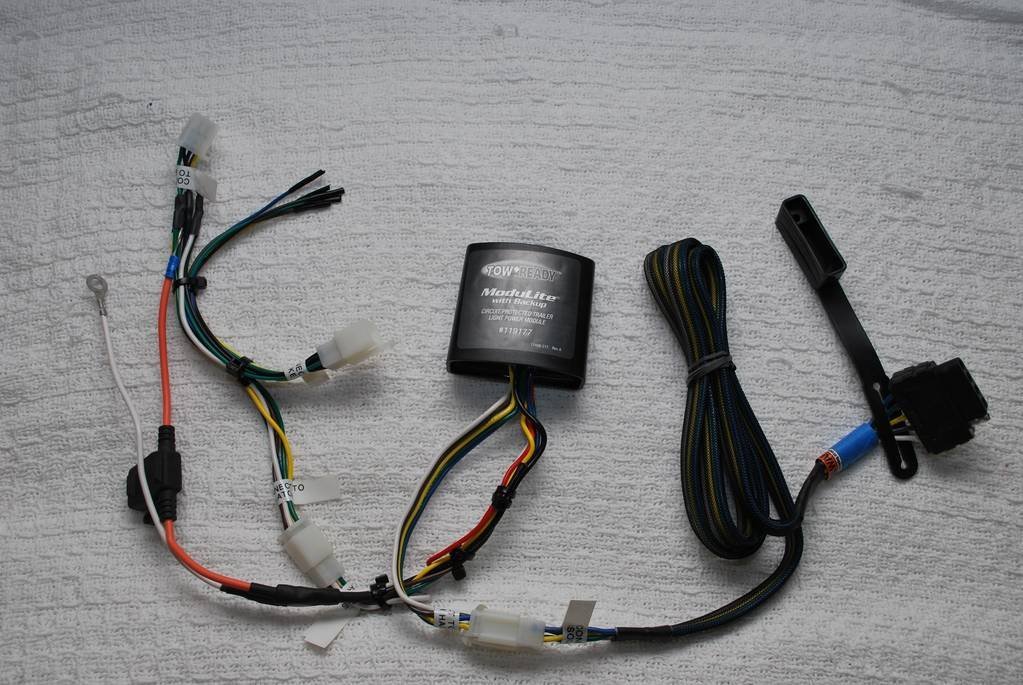
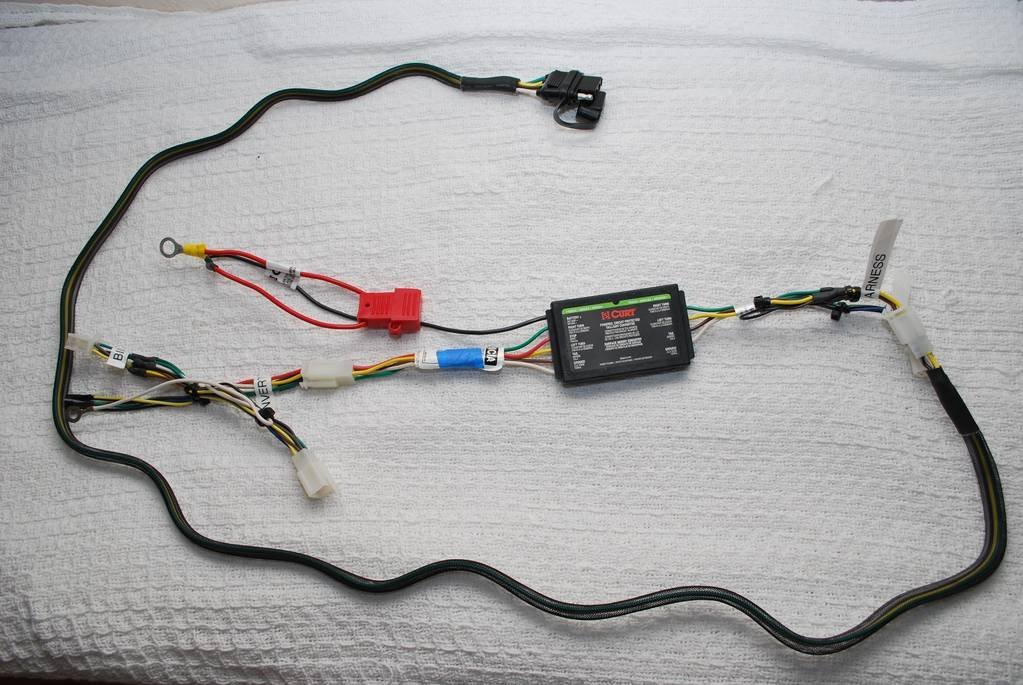
Some pictures as promised. Venture rear lighting breakout harness. 5 wire trailer harness with isolator 4 wire trailer harness with isolator.
1 point
-
Got an e-mail last night about the parts I ordered! I was informed that the Stator I ordered was not available and DID NOT fit my bike like it said in the catalog so they gave me the right number for the one that does fit my bike! It will be $25 more! So now it will be next week before they arrive!0 points
-
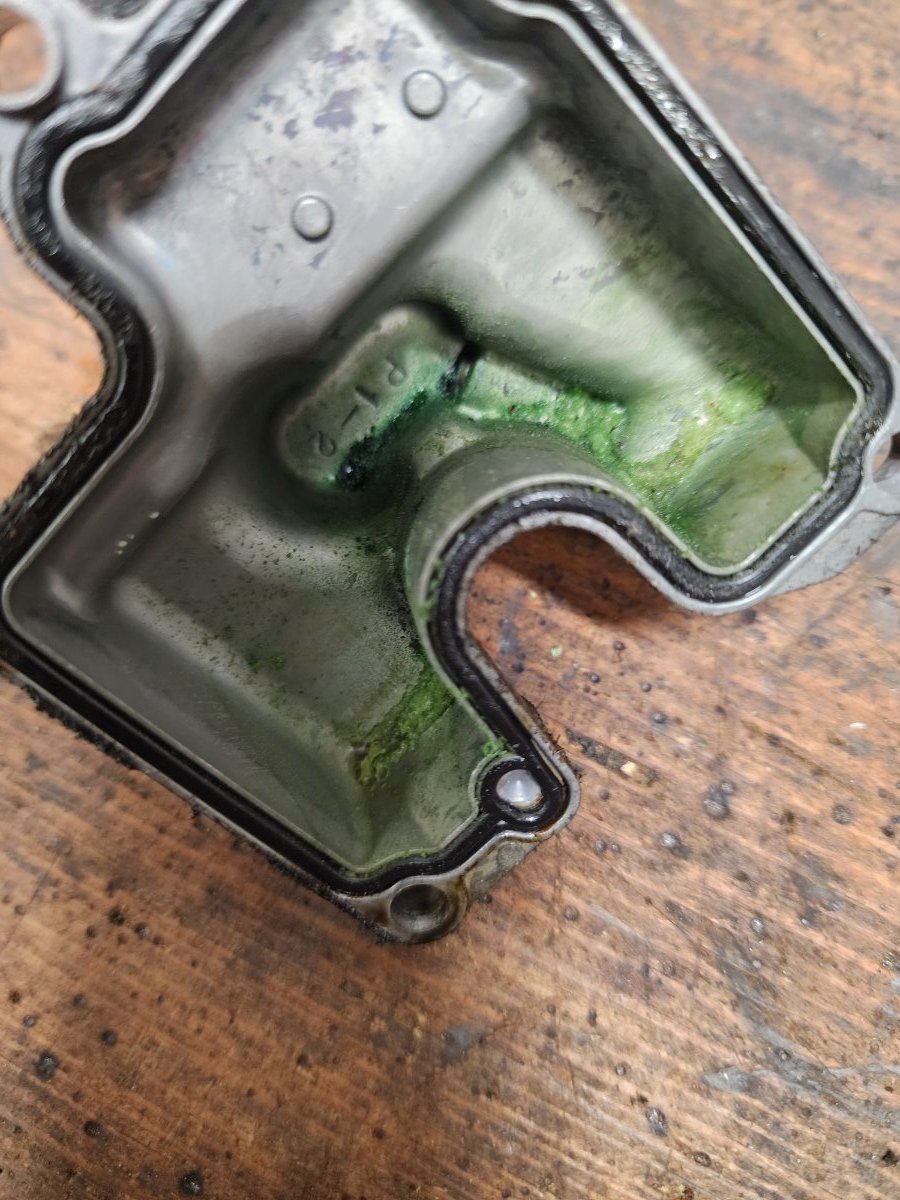
what do you think it's got green stuff growing in the carbs
0 points


.thumb.jpg.bf82ce75721b193880368d3ccb1ca2d0.jpg)
.thumb.jpg.2205483fddeda4af671a7b2c5b4f4ab4.jpg)