Search the Community
Showing results for tags 'pad'.
-
You know, I always wonder what the other people look like, who I chat with on this forum. So, this is Me. Brake Pad Tall & Silver Hair Late 40's I can't find a picture of just me
-
A gell seat cushion made for autos at Wall-mart for $19.96. Yes gell seat covers are sold for $100.00 or more with the sheep skin cover just for bikes. If I could find just a sheep skin cover now to go over the geel pad, I would be in high cotton..... I hear that it works fine for our bikes from another rider here about two days ago. I found one at the local store here and I am going to go pick it up. The first store was sold out and the next store only had one, so they put it back for me. Evidently they are popular. I am driving the car to get because wifey wants to go to dress store and drive car. So I will give update later on the true effects of the pad. Right at this moment I am in somewhat of pain from a ride the last two days, about 725 mile total. Not to bad but need a little extra something in the seat. I did the Rick Butler seat mod and it is nice, but still need a little something else, and I am not getting any younger. If this works out, this will be a good seat cover for a whole lot less money. More money for gas to ride.... :mo money: Fuzzy
-
How thick are new pads just put new rubber on now looking at brakes. Seems like there is some pad left to me but just making sure.
-
what size socket do you use to remove the brake pad pins from the caliper? Is it a 6mm 12 point? Thanks
-
Computer Down got major virus. From repair forum for weed eater carbs. Warden is working on it and I don!t have a clue. Posting this on her I Pad. I,m lost without computer. May get something done. Has black screen blinking cursor???
-
I haven't seen one before Sent from my ASUS Transformer Pad TF700T using Tapatalk 2
-
I am in the process of re-foaming my wife's seat. I know that Butler does it reasonable butt I need it done asap and don't have the down time. I have cut in the bottom foam and set in a gel pad. The top foam is some lite density foam, has anyone tried memory foam to replace the topper??
-
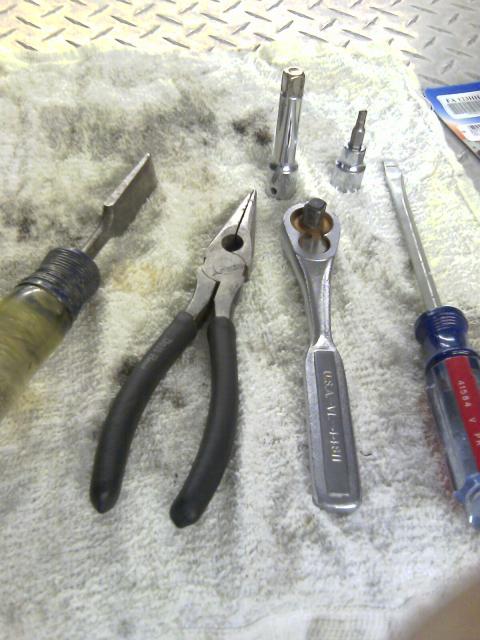
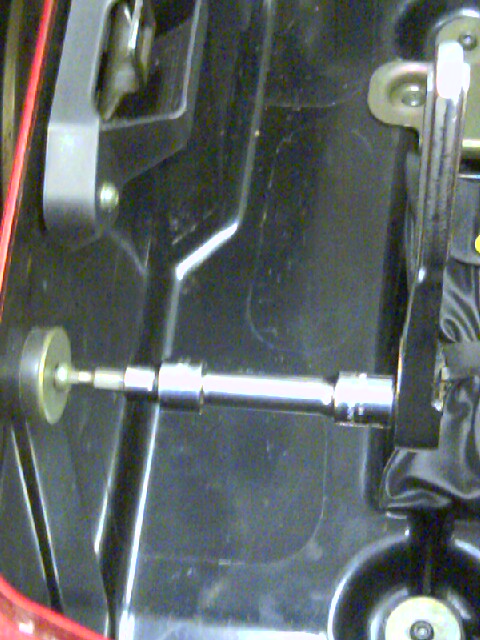
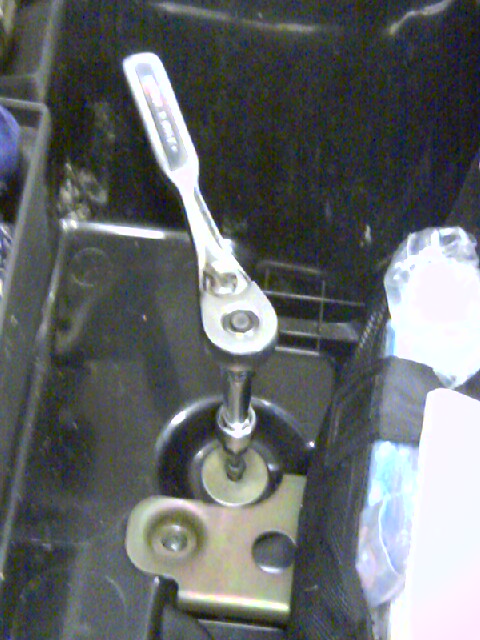
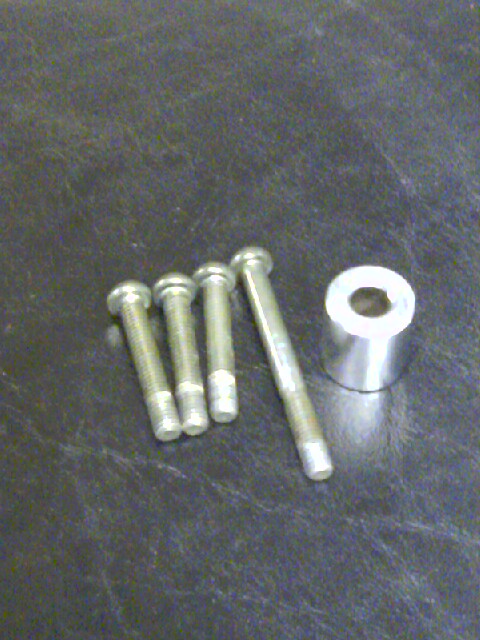
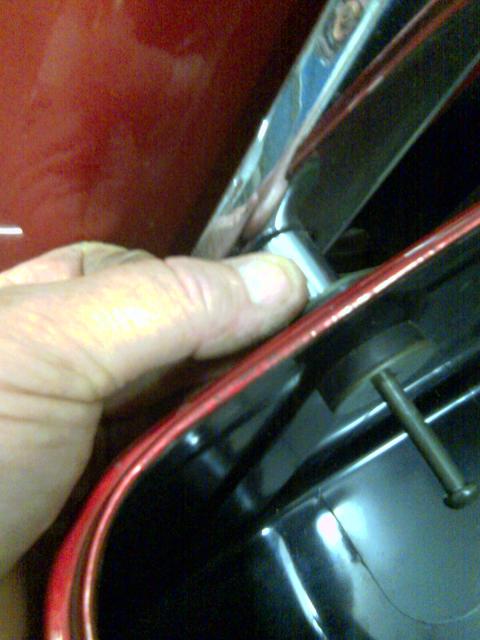
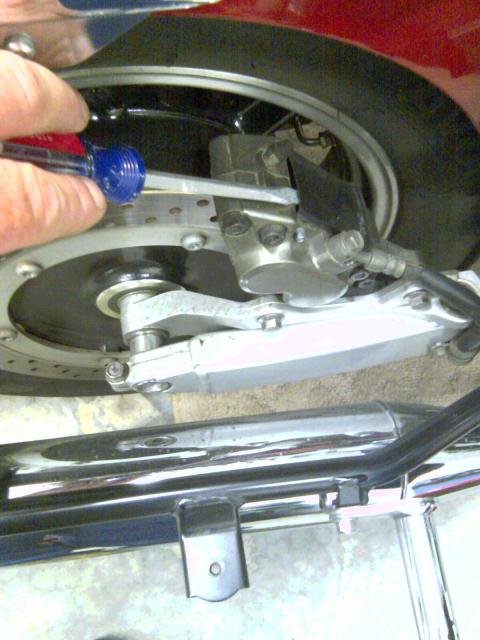
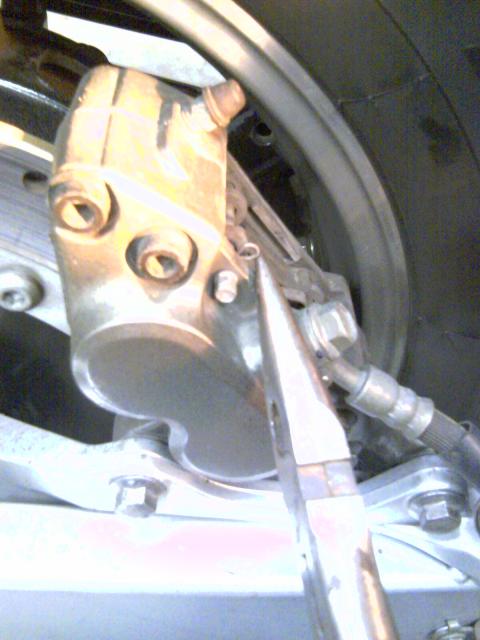
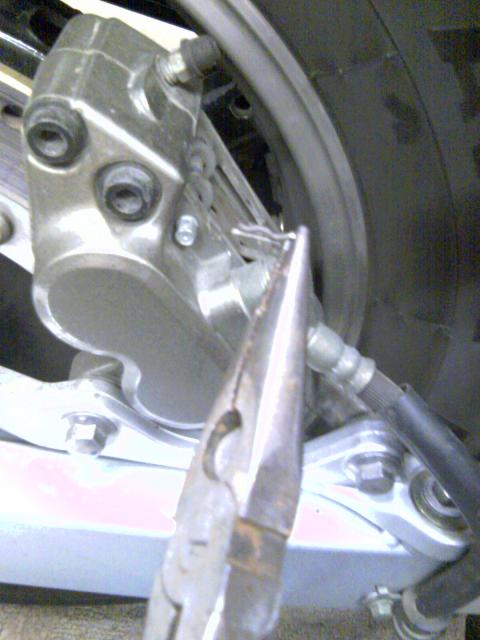
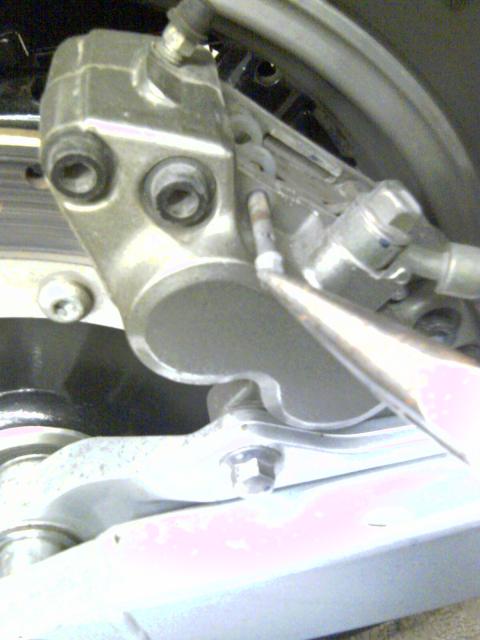
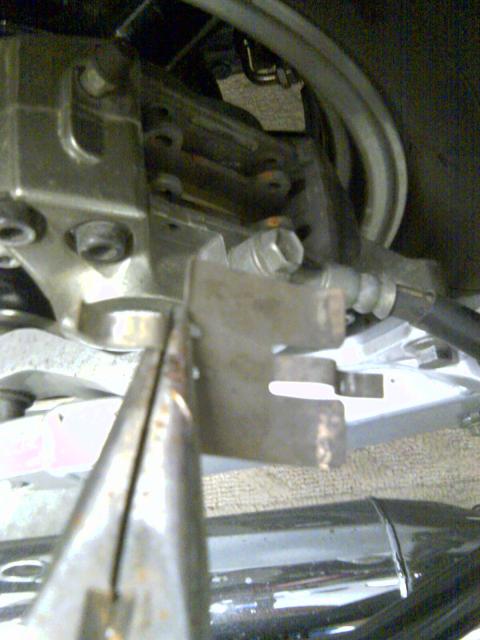
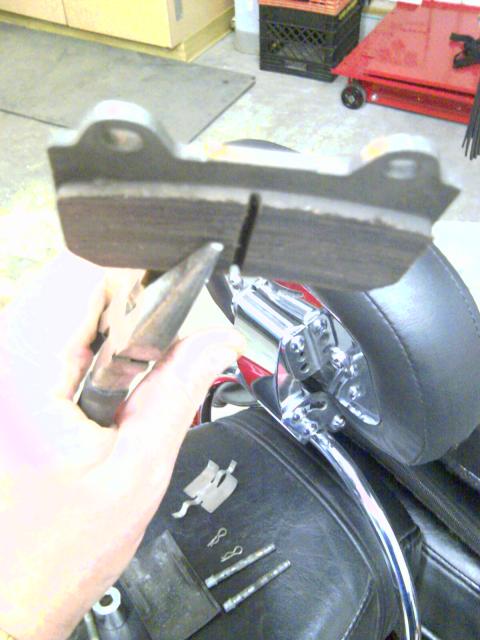
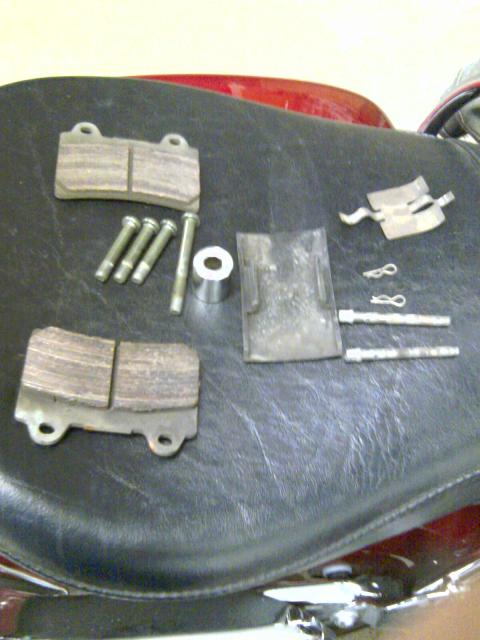
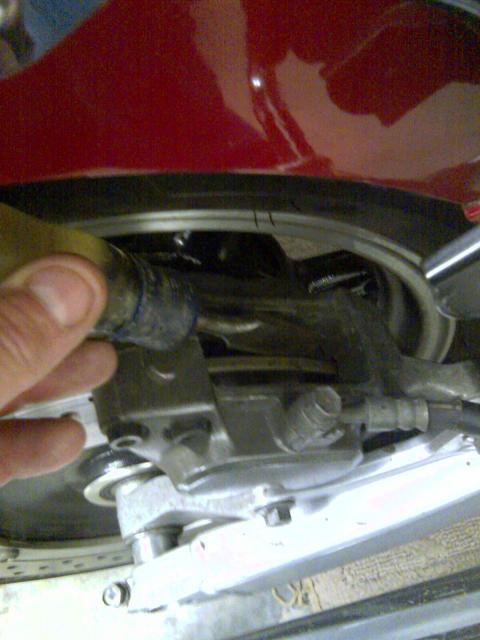
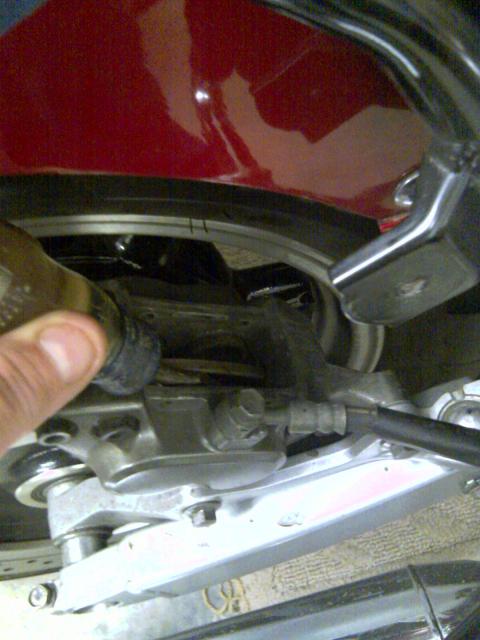
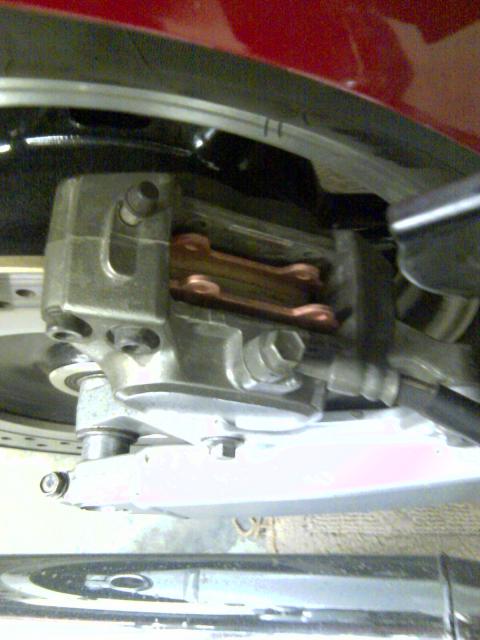
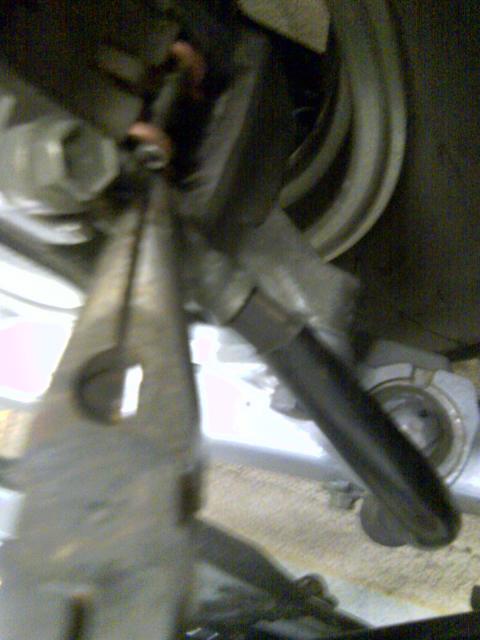
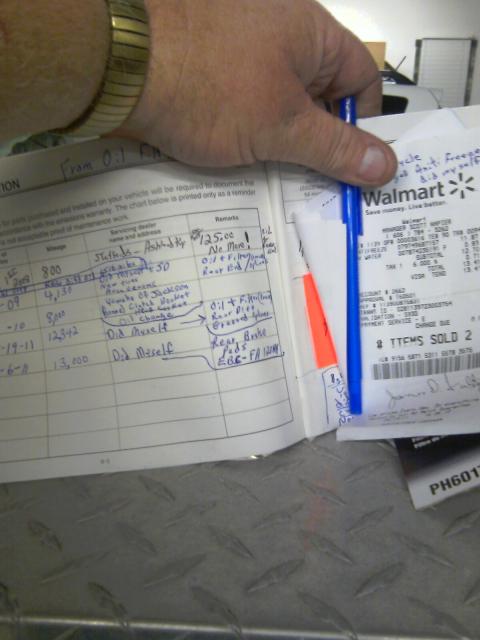
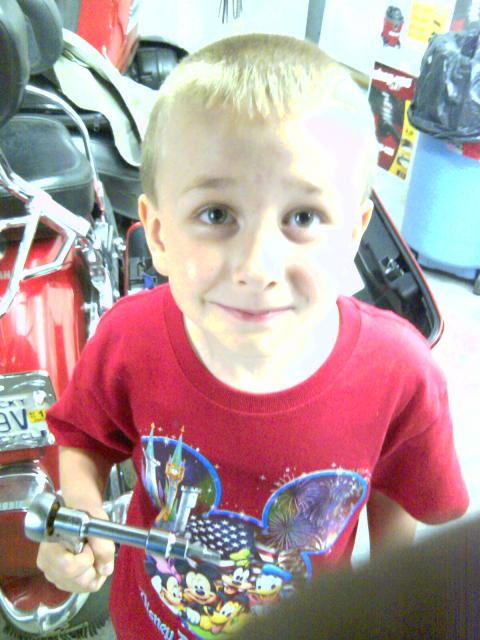
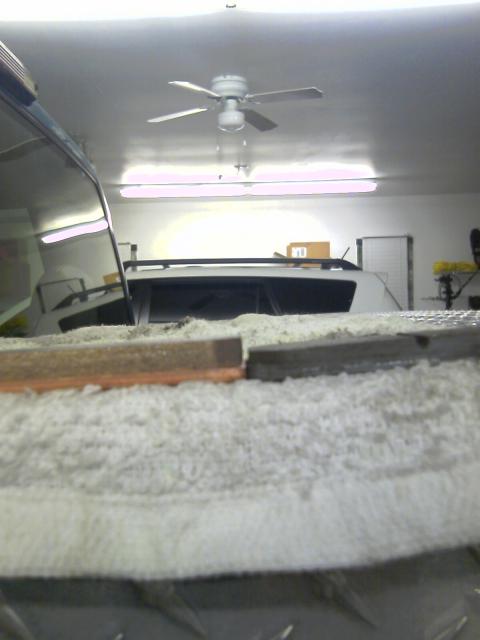
 First of all, if anyone has anything to add, please do. I am a shade tree mechanic. These things are nice to have to do this in hot weather; A garage, a fan, an air conditioner. I am blessed to have these, so I took the time to take some pictures as I did this. Hope it helps someone else. Time frame; 45 minutes to complete. Tools needed; A 4 mm allen head socket or allen wrench. A short 3" extension. A ratchet. A flat screw driver. A pair of needle nose pliers. A 3/4 " wide wood chisel or some tool of this nature to pry with. #1 . Remove the right side hard bag using the ratchet and extension and 4 mm allen head socket. There are 4 allen head bolts that hold this. There is one that is longer than the others and has a chrome spacer between the mount and hard bag. #2 . Remove the plastic cover from the top of the brake caliper with the flat screw driver. It just pops right off. #3 . Locate and remove the small clips that are through the pins in the caliper and brake pads. Rotate them around to face up and carefully pull them right out with the needle nose pliers. #4 . Next remove the two pins with the needle nose pliers, ( twist them as you pull them out). Remove one and then the other being careful of the flat spring type holder thingy. #5 . Remove the flat spring keeper thingy from atop the brake pads. Pay attention as to how it comes off and lay it aside that way. #6 . Using the needle nose pliers, remove the old pads and look closely at the inside (wheel side pad). If it is less than 1/8" replace pads. Some pads are wore more on the rear end of the pad (thinner).You can switch the inside pad to the out side and get 2000 to 3000 more miles out of them if you have 1/8 " left. My bike had 13,800 mile and where less than 1/8 " material left on inside pad, so new pads where installed. Outside pad compared to new> Inside pad compared to new> #7 . If you are replacing the pads, you will need to pry the brake piston back in to allow room for the new pads ( I used - EBC brand FA-123HH brake pads ). I used the 3/4" wood chisel to pry the pistons in because it has a short handle and was wide and easy to get into the area. Per SilverT; Clean the pins before you replace them, they may require a bit of "buffing up" with either emery paper or a buffing wheel on your drill. Clean the " thingy" before you replace it. Coat the pins with brake lubricant before you replace them. Coat the back side of the pads and the outer edges where they will rub against the caliper and other stationary metal parts with brake lubricant. Per RSTDdog; In addition to the lubricating tips (lightly) I am of the "clean the exposed part of the piston before pushing it back in" school of thought. Of course to do this properly you need to take the caliper loose which adds a few steps. Now is also a good time to change that brake fluid. Someone said that it is possible to clean the piston with a Q-tip and some break fluid before pushing back. Also it has been mentioned that a 42 thousand washer be placed between the frame and caliper to line the caliper up to equalize/a-line the inside pad wear. I have not researched this and I am only mentioning here for someone else to search. #8 . Using the needle nose pliers, put the new pads in place with the pin holes up. Being careful to put them in with the wear material toward the rotor. There is no difference in the two pads,they are the same. #9 . Replace one pin through the break pads and into the rotor. Now put the spring type holder thingy in under the one pin. Now the tricky part. Put the second pin through the break pads and through the spring type holder thingy and into the rotor, all at the same. Easy though... #1 0. Now replace the small clips into and through the small holes in the pins as before. I turned the small clips up and to the left and right. Make sure you get these in correctly (half way point). You would not want these coming out. #1 1. Now work the rear brakes and get the pads kinda seated into place. Will feel kinda spongy at first pump or two. I made sure my rear breaks worked and released by pushing bike forward and back a couple times. #1 2. Replace/snap plastic cover back into place. #1 3. Replace the hard bag with the four 4 mm allen head bolts. Remember the long one goes into the rear and side next to wheel and through the chrome spacer. Also make sure the rubber bushings and washers are on the hard bag (bottom and side). Most of the time they will stay in place if you are careful. #1 4. Make notes of your mileage and date in your owners manual and also keep your receipts to proof any warranty issues. Also for a reference/reminder as to when you need to replace again and what type/brand to use. Helpers are good and I had my little boys help. Fuzzy
-
 Hey Guys, I'm just curious if EBC makes a HH pad for the 1200s? I've searched just about everyone and I can't find anything definite with a part number.....so I suspect not. But if not, what sintered brake pad is available? Thanks, Rick
 -
sorry not sure how to delete this.
-
Has any of you had made or know of anyone who has experienced a Russell Daylong Seat. They are custom made seats according to your size and weight. I`m 330 lbs and there is to much of me for the stock seat and the horn of the seat is a little uncomfortable. Height is not a problem as I have a passenger " Pro Pad " on the driverseat with a black sheepskin covering that. Would like to get rid of all that and find a good custom seat. Any help will be greatly appreciated.
-
I recently had a post about seat beads and somebody suggested trying a gel pad from wal mart instead. I tried the beads and hate them, so I bought the 20 dollar pad. I just got back from sturgis. It is roughly a 350 mile trip one way for me. Since this is the first time I have traveled a good distance with it I was skeptical how long I would be comfy. Well I'll say this, my bike is no longer a 350-400 mile per day bike. I could easily double that now if i wanted. I could sit in the seat all day. So if anybody is having seat trouble (all you rstd'ers like me) give it a try, you might be surprised. 2 of my friends bought them too. 1 rides a vtx, and the other a wing. They guy on the vtx couldnt believe how much they help. The wing rider was comfy anyway, but even he noticed a difference.
-
anyone from here trying to call Brake pad (416) 640-3489 is from Toronto, On, ON
-
For those deciding on a drivers backrest. I recently purchased and installed a Bakup backrest. The installation is simple, however, an extra set of hands is helpful to avoid possibly scratching something. The pad matches the stock passenger pad closely and the overall look is clean. Seat adjustment is easy, no tools needed. The backrest is a little pricey, but the quality and look is good. To me, the stock seat is comfortable enough, all it needed was a backrest. I figured I saved $300.00 by not having to buy a Mustang seat with a backrest.
-
If anyone that has a Corbin Seat and waiting for it to "Break In" well mine hasnt in the 5 years Ive had it . I found at Wal Mart yesterday a Gel seat pad with a waterproof fabric on the outside cover for only $19.00 It fits perfect on the seat and the "Waffle" design of the gel inside is very comfortable...I think I have found my cheaper alternative to the ones offered on most MC accessory sites. The wrapping on the pad says RelaXzen Gel Seat Cushion. It is in the Automotive section but I cant find any Info on the internet about it. Usually these things are an item Walmart will bulk buy on then htey are gone FYI. Tom
-
Several of us showed on Sunday July 5 at Riderduke and Leo's vacation pad. We kind of took over. Just a few pics of that day. http://s7.photobucket.com/albums/y262/venturerider/Sleeperhawks%20Mechanic%20Wrightsville%20Beach%2020090705/
-
I noticed in your add in the classifieds for your backrest, that you got a road sofa!! I've been seriously debating it. How do you like it??? why did you switch from stock?? Did you get the one with the Gel pad built in?? OH...and...how's your passenger like it (veeerry important question!!)Any info would be GREATLY appreciated. Thanks
-
I bought a 2000 Mercury Grand Marquis 2 weeks ago and the headlights were horrible on it. I priced new ones and about choked. I saw Walmart did a headlight restoration for $40. I found out it's just a 3M kit that anyone can buy for $20 at VatoZone, Oreilly's,Napa, or Advance Auto. I tried the Meguiar's PlastX and spent an hour polishing them by hand. They looked better but they were still cloudy. I broke down and bought the 3M kit this morning after watching some youtube videos on headlight restoration. This kit works great. My headlights are crystal clear like new. If you have yellow, foggy, or cloudy headlights, this is a MUST!! You don't need the kit to do this. If you have very fine sandpaper (2000 grit or finer), then you could do this yourself by hand. I had no sandpaper nor do I have a polishing pad so the kit was more economical for me. The kit comes with 2 different sanding discs, a 3000 grit sanding pad, a polishing pad, an arbor and Velcro pad to attach the sanding discs and pad to, and some 3M plastic polish. You start out with an 800 grit paper and completely sand the headlight until the entire lens is a uniform texture. Next, sand it with a 2000 grit paper until all the there is a finer uniform texture. Then, use the 3000 grit sanding pad and water to sand all the scratches out of it. Finally, use the polishing pad and plastic polish to bring the headlight to crystal clear shine. Be very careful to keep the sanding discs clean. I apparently had something on one of my discs and now have some tiny little swirlly scratches in my left headlight. I can only see them at certain angles and I can feel them with my fingernail. I could probably sand the lens down some more and polish it out, but I'm very happy with the current results. I also removed three molded tits off the headlight lens. I took a rotary tool and ground them down flush and the 3M kit polished them out smooth. http://img183.imageshack.us/img183/650/1000563small.jpghttp://img265.imageshack.us/img265/8449/1000564small.jpghttp://img176.imageshack.us/img176/4675/1000565small.jpghttp://img269.imageshack.us/img269/6892/1000566small.jpghttp://img176.imageshack.us/img176/406/1000569small.jpghttp://img190.imageshack.us/img190/1906/1000570small.jpghttp://img196.imageshack.us/img196/3530/1000571small.jpghttp://img44.imageshack.us/img44/9899/1000576small.jpg
-
Argh close call.. Just a heads up for those not too sure about their brakes on the Venture.. I was starting to hear strange sounds from my rear brakes when I applied them but when I checked the pads I could see quite a bit of wear left on the one side but the inside pad I couldn't see properly.. but hey, if the outside pad has life left to them then the inside pads must also, right? Egads no.. Just because the noise was making me nervous, I opted to change the pads out anyway, what the heck, start of the season, at least I'll know they'll be good for most of the rest of the summer.. and dayum!! Might as well say it was metal on metal.. Though the outside pad showed life left to it, the inner pad was wore right down to the metal pad holder.. wow.. Good thing I didn't decide to push it further.. It certainly didn't sound like a worn pad metal to metal sound but now I know what it sounds like on this bike.. The hardest part of the job is taking the bag off the bike.. So when in doubt, get in there and check.. I was quite surprised how badly worn they were.. wow. and Phew for going ahead with the pad change..
-
To all RSV and ventures riders. I have changed my rear brakes 6 times and 2 times in the front and found out that in the reat the inner pad wears out quicker than the outer pad. (has to do with the hydrolics) So now I change the pads from the left to the right (swap them over) after some riding (AND WITCH IT DOESN'T TAKE LONG TO DO ABOUT 15 MINUTES ) So when I do check them, i swap them over, but only if they need it. It depends on the thickness whether or not it needs to. But I always scrub them in by hitting the rear hard for the first couple of times. With riding in the Adelaide hills almost every Sunday (hard) I have not lost the rear brake at a sharp bend (so far) I have done just over 60,000 km
-
Ok, So I have a venture that I bought sans trunk. My wife reslly needs som kind of back support so I bought an upright from a royal star and mounted it up. It fits like a champ of course, but now I need to know it the mounting pattern of the upright pad from a roadstar will fit the upright of a royal star. I am trying to find a deal on a pad now. I have seen a lot of roadstar upright pads and can get a good deal on those, so I want to use one of them for my upright. Anyone know if the bolt pattern on the back of the pad will allow to be mounted to my upright?
-
where can i buy a hitch at. are they available online. anybody expriencing a rattle sound maybe from the rear. sounds kind of like a disk pad rattle or squeak but thats not what it is. i have a 2008 venture.
-
Ok, weekend's here. I started looking at my scraping noise (on my '84 Venture). Didn't think it was the brakes but when I put the bike on the double stand, the rear wheel was not turning freely. Could not remove the rear pads so I took the caliper off. Now the pads fell out and I have to say that they look almost new (thickness wise). There was a small metal plate covering about 1/2 the piston on the piston side of each pad. The small plate hooks on to the pad. It has an arrow on it. Can I take the plate off ? If not, which direction does the arrow point (front or back)? Is there an adjustment somewhere to take the pressure off because the pads are always in contact with the rotor and prevent the wheel from turning freely. Thanks in advance.
-
I have a 1989 Venture. When I crawled underneath to get a good look at my brake pads I found this. Hope the pics show it well enough. The pad to the outside of the wheel (ie right side of bike when sitting on it) has worn at a very bad angle. The other pad is not as bad, but actually has the opposite wear angle. Obviously, the pads need replacing. I suspect the pistons and seals as well? Are there only two pistons in the rear calibre? That is what local Yamaha dealer says....at about $113 each and another $50 for pads. Is there a cheaper source online? Should I get a kit and redo the master rear as well? Thanks.
-
i still have the stock seat on my2006 rstd. after about 150 miles but rearend(butt) starts to not feel so good. help me find a pad or something i can add to my seat to make it better, thank a lot guys. rooster522


.thumb.jpg.ce61bc94739efc1059157f86c7216f78.jpg)
.thumb.JPG.a7ecab44ca5a487b6c43626aaa290fcc.JPG)