Search the Community
Showing results for tags 'remove'.
-
Hello Everybody, Shadow here. Can anyone tell me how I can remove or rather drill out a broken tap? It is in the foward rear fender bolt hole. Long story, but the head on the bolt striped when trying very carefully to remove it. So that entailed drilling out the bolt but, my bit did not come out center on the inside of the fender. So I took a tap and slowly with oil proceeded to tap new threads. Almost to the end and the tap breaks. I guess it's case hardened cause drilling it even with new cobalt bits seems futile. I've been at this for most of the day. I can't take the chrome fender rail off because the other bolt holding the fender won't turn. They have the red loctite on them. Funny thing the other side bolt came right out. I know heat would help with the loctite but how do you heat inside the fender without removing the rear wheel or hurting the paint. I just need to know if anyone knows, do they make a better or harder drill bit than the cobalt? I still think drilling the tap out is the best way I just need a drill bit that will cut it. I'm sure I'm not the first one of us to break a tap or easyout that had to be drilled. I appreciate all ideas.
-
 Ok, I've looked and I can't seem to find the thread, sorry if I missed it. Has anybody got instructions on removing the seat from a MKII VR? I've dug around on the seat and I haven't seen anything that looks like it would remove it.
 -
I know that the factory toque's the ignition bolts down and brakes them off at the factory if my thinking is correct. So my Question is how are some of you removing them. The only reason I want to do this and remove them and place a regaler bolts on there place is I have a spare and if one day I was stranded I could just replace it on the road and be on my way. any idea's or tricks that you folks have done to remove them? Is it a hard job? I guess worse case is I could pull tank back a bit and un-plug bad iggy and plug now on in leave it lay there .. under the tank. all I am doing is thinking ahead a little for long road trips. even have my spare fuel pump as well. Thanks! Jeff
-
Well I got a question, Im into Phase 2 of the Firefighter RSV and part of it is polishing the outside ring of the wheels and powdercoating the spokes the color of the bike. I think I know my answer but do I need to remove and replace the wheel bearings or can it be done without removing them. Dont really want to mess with them but If I need too I will. Scotty
-
I just removed my rear tire this afternoon and will be taking it to a dealer to install my new tire. Do I need to remove the rear brake disk for them to balance the tire? Oh yes, I do have pics on my rear tire removal...will be posting soon.
-
So I have started the tear down of the 1st gen so that I may (after 10 Yrs) replace the 2nd gear. In the tear down I have come across a few problems that I am wondering about. The first question being do I have to remove the clutch release cylinder in order to remove the engine? I have found that one of the bolts is stripped :thumbdown:and its a 6MM? allen bolt. If you have seen or done this before you know how tight it is in there. Any suggestions on how to remove this bolt? Thanks in advance:bowdown: Michael
-
 I am a new member and a new Venture owner,I would really like to thank everyone for all the great information provided. I have a 86 Venture,the fuel tank has rust in it and I need to remove it. What is the easiest way to remove the fuel tank?
 -
I saw this and I kind of like the look with out the trunk. I wonder how hard and much time it would take to remove it? Where are the antennas? And how about the no mufflers? http://cgi.ebay.com/ebaymotors/Yamaha-Royal-Star-2008-YAMAHA-1300-ROYAL-STAR-VENTURE_W0QQcmdZViewItemQQhashZitem3a552e0ba7QQitemZ250537184167QQptZUSQ5fmotorcycles
-
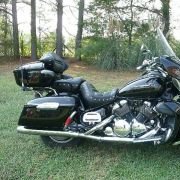
I just purchased a Royal Star Tour Deluxe *2007) will, actually traded my HD FXDL for it. How do you remove the drivers seat? Thanks Mark
-
Any ideas how to remove a stripped Allen bolt? My plan was to remove the saddlebags so I could install the Saddlebag rails that I purchased. The Allen bolts where so tight.. That I stripped one of them…what would be the best way to remove that stripped Allen bolt?
-
My kickstand irritates me. It is quite stiff requiring an extra "kick" to get it to fully extend down. I grease it to no avail. I tried to remove it today but you have to remove the shift linkage to get the darn bolt out. I cleaned everything as best I could a reapplied grease. No real change. It works real fast and smooth if I've been riding in the rain. It snaps down with nary a thought. I did notice a fair amount of up and down play. Does anybody else's act the same way?
-
My '83 Venture is running bad....really bad. It had sat for 3 weeks. I got it out one day to ride, and it went to missing under load. It starts and idles fine. I checked out the fuel system...it's good. I replaced the spark plugs I replaced the fuel filter. Plug wires and caps check good. cleaned connectors to stator, regulator and TCI. When I ride it, it tries to go...has full power for a few secs, then sputters,and falls on its' nose. Under load, it just jerks back and forth. Backfires out the right side exhaust sometimes too. Like I said, it starts and idles fine...it's only under load. It looks like I have to remove my fairing to remove the TCI/coil assembly...is this correct? I had removed the airbox and battery box, and it seems the fairing has to come off next. Help!!
-
What is the best way to remove a decal from a windshield?
-
 I need to replace the front u-joint, mine is a trike so I have two. After reading the tech talk it sounds like after removing the driveshaft you then remove the entire u-joint yoke from the bike, is that correct? Looks like the front part of the yoke is bolted to a transmission output shaft, do you remove that shaft and if so how? I also read that there may be other U-joints that will work as well as the OEM, any thoughts? As ususal all the advice is good and thanks.
 -
This works on all motorcycles with carbs. I've slightly revised this for better clarification. And I posted to this section for 2nd Gen's to read. Easy 1-2 Hour job 1. Remove the carb cap, 4 screws. If 1 screw is a security screw used vise grips to turn. 2. Remove the spring. 3. Remove carb slide and diaphram, it's black with a needle hanging out the back. 4. Remove the jet needle, there's a large screw inside the middle of the carb slide holding it in. Pay attention to the order the parts come out. 5. There is a white spacer under a circle clip. Remove it. 6. Replace the white spacer with any small washers about 1/2 the thickness of the white spacer under the circle clip. 7. Ignore the fact that the white spacer has a small tit on one side. 8. You can add 1-2 washers on top of the circle clip to take up the space. (I didn't on my Venture and friends) 9. Put it all back together in the same order it came apart. New washers, jet needle with circle clip tight (check it), 1 or more washers on top of circle clip, small spring, plastic screw, in that order. 10. Carefully reinstall slide and diaphram. Notice diaphram has a tab. 11. Do only one carb at a time. (Can use others as reference) 12. Go for a ride checking gas mileage and performance. My friends 87 Std. went from 37 to 45 mpg. 13. Clean and check spark plugs before and after. Correct color is gray, tan or clean depending on type of gas used. Slightly white electrodes is Ok if the plug base near threads is darker. white base and tip is too lean; black is too rich. 14. SO: Add washers under circle clip to richen, remove washers to lean. 15. My bike is faster now lean (hotter combustion) 16. I set pilot jet screws to 1 3/4 turns out 17. All 4 Ventures were way out of synch before I did them. Much smoother now. Questions? Send me a PM or email: chuckfrench48@gmail.com (mention VR)
-
So who out there can help me find a pump to adjust the air in my shocks? I read somewhere that it needs to be a certain type to be able to add and remove the PSI Thanks
-
I need to pick the brains of the membership here. I am in the process of installing an LED brake/running light on my 84. I have removed the trunck, trunk mounting bracket, and the plastic cover under that. I discovered that some time in the past, someone wired in a trailer conector. The trouble I have is that they used the Scotch lock connectors. What would be a good way to remove these? When I get them removed, would a good spray of contact cleaner and then a covering of liquid tape be appropriate? I have used these connectors in the past, always with less that good results. Thanks to all, Dave
-
i am working with an eBay seller (axe63) who makes very affordable backrests for various model Yamahas - however he does NOT make one for the RSTD. i told him i would post here, asking for someone on this forum to take a ride to him for him to take some measurements (would need to remove seat). if anyone is interested and can help please let me know and i'll get more details...thanks to all ! :-) Buz
-
I am in the process of changing all my blinker to clear linses and new amber bulbs and I can't get the old bulbs out. The first one twisted off in my hand leaving the base in the socket. I am assuming I have to push the bulb in and turn counterclockwise like the manual states. Mine is '99 RSV and I doubt the bulbs have ever been changed. I have never seen a socket quite like this one. It has a metal strip across the base. Should I remove that strip before trying to remove the bulb? I tried this but when I rotated the bulb the whole socket moved. Someone please set me straight on this. I have one rear bulb broken and do not want to try another one until I am clear as what to do.
-
To loosen the handlebar bolts, there are chrome caps over each one. Does anyone have a special method to remove these caps, so as to get at these 4 bolts? Thanks.
-
 I have a question for those who have totally removed the AIS system on their RSV....after removing the valve by the rear shock, did you also remove the box or valve that is at the front of the engine by the oil filter? If so, I'm assuming that is a remove the radiator job too? Thanks, Joe
 -
Hi, I recently developed an afterfire on my 84. Upon further inspection, I have one fair sized crak near the very rear of my collector.. I imagine there may be more.. Time to fix I suppose...How much effort and job to remove this and weld....I think the baffles are okay. Any tip or trick to speed removal or make it easier? Thanks Clay
-
 I haven't changed my air filters. The dealer did it the last time so I looked around on the bike yesterday to see about removing them and didn't find an easy way to get them off. Do you have to remove the lower fairings in order to get the filters off? Thanks, Dennis
 -
Recent findings 1. They will make noise at low rpm and high electrical loads. Lights, radio, aux's "On" 2. Stators may appear to be ok visably but still bad. 3. If they are black on 1/3 to 2/3rds of the coils they are probably burnt out or going out. 4. The ohm reading (2.4) maybe OK as stated in the service manual but they still will not generated electricity. 5. The regulator/rectifier is probably more reliable than the stator. It has cooling fins and is in cooling air. 6. Make sure you reinstall the starter gears correctly, watch how they came out. 7. Have an extra stator cover gasket in case yours gets torn. Silicone RTV is not needed. 8. Make sure the gear selector arm is in the up position behind the cover before reinstalling. Use both washers, don't loose the circle clip. 9. You must remove the middle gear cover to get the stator cover off. 10. Look for leaks at the gear selector electrical switch, the clutch push rod and gear selector shaft seal while your in there. 11. Make sure all wires are covered, taped and will not get pinched when either cover is reinstalled. 12.At idle the voltmeter should not drop down to 12.0 volts unless the fan is on. It does have high current draw. Yes I've done it all wrong and had remove the stator cover 6-8 times now!!
-
First, apologies upfront if this has already been discussed. I've typed in a few variables in the search part and couldn't find anything close so here goes....... Most of my buddies ride Harleys. What I've always admired about their bikes is that they have low cut (4" or taller) tinted windshields which are easily removable in order to change back to a larger shield for long distance riding. (Ahhhh, to have that wind-in-the-face feeling again!) So this got me to thinking about my own Venture and how I'd love to be able to switch back and forth from my huge shield to a tiny one for local rides and real hot summer days. The big problem with our bikes is removing the chrome trim on the fairing because of the design of the damn thing (those little plastic tabs! Aaaargh!). I get nervous as hell trying to remove it just to get inside to do some wiring on occasion, never mind having to remove it on a more regular basis to switch a windshield. So I began thinking up ways to come up with a 'quick' release system for the fairing. My first thought was to find some real shiny chrome screws and drill into the trim and fasten it to the fairing so that way I'd only have maybe 5 screws to remove (2 in the back, 3 upfront) in a fairly reasonable time with an electric screwdriver, then remove the screws for the windshield and make the switch. Voila! Done! But having a discussion one evening with Draegerman, we came up with a better idea. The chrome trim already utilizes 2 screws to make certain it stays put so instead of drilling holes in the trim, why not use magnets? Apparently there are some pretty heavy duty magnets available on the market nowadays that would do the job very well. Mounting them in the right place would surely hold the chrome trim in a perfect position. This way, all you have to do is remove the 2 screws and then pull out the chrome trim and not worry about those plastic tabs anymore! Now you have fast access to the windshield mounting screws and they can be removed just as quickly and switched with another shield. Sure it may take 5, maybe 10 minutes, but to have a shorter screen up front would sure be nice at times. Anybody want to add to this? Anybody come up with any other way to remove a windshield quick? I'd love to hear other ideas if anyone has one before I go and give this particular idea a try. Any input would be greatly appreciated. Bluez

.thumb.jpg.176b2ebbe9863175975d94710375c414.jpg)