
Search the Community
Showing results for tags 'drill'.
-
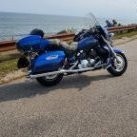
I have a set of TD on my 07 RSMV and have been wanting a little noise from them. Has anyone drilled the TD mufflers out for a "little" more sound? I have been considering buying the RK mufflers to get a little more sound from them but before I do, has anyone drilled the TD mufflers? If so how did they sound? Hard to take a drill after any of them before I know what it will do. I bet some of you have had some experience with this?
-
http://www.venturerider.org/spoiler/image002.jpg INSTALLATION INSTRUCTIONS Trunk Lid Spoiler w/ Light STR-4XY62-03-XX Royal Star Venture (XVZ1300TF) http://www.venturerider.org/spoiler/image004.jpg Please read and understand these instructions completely before installation to avoid injury to your self or damage to the motorcycle or accessory, Dealer: These instructions contain important information for future reference and must be given to the customer. 1.Parts List: Item Part Name Part Number Description Qty 1 Spoiler W/ Light Molded ABS 1 2 Wire Guide 24” rubber “D” extrusion 1 3 Screws Phillips head self tapping screws 3 4 Flat Washer Steel 3 5 Rubber Washer Rubber 3 6 Drill Guide Plastic Strip 4 7 Drill Template Paper 1 http://www.venturerider.org/spoiler/image006.jpg Fig 1 http://www.venturerider.org/spoiler/image008.jpg Fig 2 http://www.venturerider.org/spoiler/image010.jpg Fig 3 http://www.venturerider.org/spoiler/image012.jpg Fig 4 http://www.venturerider.org/spoiler/image014.jpg Fig 5 http://www.venturerider.org/spoiler/image016.jpg Fig 6 2. Preparation: a) Clean trunk lid thoroughly 3. Installation: a) Place spoiler upside down on workbench use a towel or soft cloth to protect paint. b) Center hole in drill guide with mounting stand off and attach to spoiler with a small piece of tape (fig. 1). Repeat for the remaining 2 mounting stand offs. Locate 4th drill guide under end of light with hole centered on spoiler (fig. 2). This will be used for wire routing. c) Mark the centerline of the lid with of masking tape using latch button as center (fig. 3). d) Center spoiler on trunk lid with back edge just above “Yamaha” logo approximately 2-1/4” from the bottom edge of the trunk lid (fig.4). Using a tape measure level the spoiler on trunk lid by measuring fro the bottom edge of the spoiler to the trunk lid edge at each end of the LED light. These measurements should be equal (fig.5). e) Using masking tape, tape the 4 drill guides to the trunk lid (fig 6). Double check location. f) Gently remove spoiler from trunk lid leaving drill guides in place on lid. g) Using 1/16” drill bit and drill guides carefully drill 4 pilot holes through the drill guides into the trunk lid. Remove drill guides and enlarge holes using 1/4” drill bit. Carefully debur holes. h) Feed the three light wires through the wire routing hole and attach spoiler to lid using self-tapping screws (#3), flat washer (#4) and rubber washer (#5). Tighten securely being careful not to overtighten. NOTE: DO NOT USE LOCKTITE ON MOUNTING HARDWARE. i) Remove passenger backrest, rider and passenger seats and set aside. Cut out drill template (#7) and tape it to the inside of the trunk lid as shown. Carefully drill pilot hole using 1/16” drill bit. Remove template and enlarge hole using 1/4” drill bit. Carefully debur hole. http://www.venturerider.org/spoiler/spoile1.gif Fig #7 j) using a piece of stiff wire (like welding rod) pull light wires through wire guide (#2). Clean inside of trunk lid using isopropyl alcohol. Remove backing from wire guide and adhere guide to inside of trunk lid along path to wire exit hole drilled in step J. k) Route wires through exit hole. Loosen face panel on front panel and carefully route wires behind panel. Tighten panel and replace passenger backrest. l) Dress wires along fender under seat to taillight/Turnsignal connector near battery box. Strip 3/8” from wire ends. m) Unplug the Taillight/Turnsignal Connector. The TRUNK SPOILER LIGHT WIRES will inserted into the “female” Taillight/Turnsignal Connector (fig 8) following the “wire color code below. http://www.venturerider.org/spoiler/image027.jpgRed Orange Black http://www.venturerider.org/spoiler/image025.gif Yellow Blue Black a) Reconnect Taillight/Turnsignal Connector being careful not to dislodge or “short” the wires to one another. Check operation of lights. b) Install seat. 4. Maintenance: Periodically check all fasteners for tightness and re-torque as required. 5. Care and Cleaning: See your Owners Manual 6. Customer Service: For further information see your Yamaha dealer. July 2003 PAK-4XY63-00-XX
-
Incredible piece of engineering. OPERATIONAL THERE ARE STILL SOME REAL ENGINEERS IN THE WORLD. THIS IS AMAZING..... Watch it all the way through, he machines, assembles and runs this little engine..... This is not CNC technology; this guy made everything at home on his lathe and drill press. Took 1220 hours (a year and a half?) to make the 261 pieces. Note the end-loaded crankshaft into the block (like an Offy), 12 individual cylinder heads, TINY rods and pistons, dual "underhead" cams with pushrods to rockers in the heads. And, he did break-in runs using an electric drill driving the crankshaft! Even if you're not an engineer, you'll appreciate this! http://www.wimp.com/tiniestengine/
-
So what do you all think. Will this pass? What do those who pull a trailer do when the cooler rack blocks the plate. I know I could drill holes in back of the cooler rack, and put the plate there.
-
 Last weekend I pulled the carbs to seal up the base of the intake tubes with a little permatex black. Problem solved, no more creeping idle. The problem is I decided to drill and pull the caps on the pilot jets and when I did the right front carb the drill bit bumped the jet. Now the jet itself is fine, but when reinstalling the jet it bottoms out at about 2 full turns. I'm figuring I screwed the threads up. I set that needle at one and a half turns out just to be safe. I have the carbs I bought on ebay a few weeks ago and decided to use them for parts because they were dropped in shipment and the whole rack is crooked. So now I need some input from all of you. Will the carb thats on there run ok for now as it sits or should I change it? I'm out the door now for work, but I will check back in the morning to get your 2cents. Thanks, Ray.
 -
 It’s dead. Down and out for the count. I screwed it big time. I had used the washer under the valve cover shoulder bolts technique to stop a couple of small leaks. Worked fine except one little leak that was working it’s way down to the exhaust. Was looking forward to riding it through the weekend and decided while chatting on the phone with a friend, to “snug” that one valve cover bolt in an attempt to stop the small oil weep. Went good until I gave it the little “one more for good luck” tweak. Yea..more like major bad luck. It snapped off under the shoulder stop part. I don’t see how I can fit even an angle drill in there to drill for an easy out. Gotta pull the engine to fix it. I think that is way beyond my skill and time availability. Was going to start working on the 87 this weekend with/for my son. Seriously thinking of selling both as is and moving on… The 2nd Gens win this battle.... This sucks.
 -
.thumb.jpg.176b2ebbe9863175975d94710375c414.jpg) [attach]64269[/attach] [attach]64270[/attach] [attach]64271[/attach] Drill the middle hole of the flap to go over the pin Also remove in that same area the rest of the backing inside the fender tip. [attach]64272[/attach] [attach]64273[/attach] Trim the top away until your happy [attach]64274[/attach] I use a little goop as well (love the stuff) LOL and I also used the clamps to help push the flap tighter agienst the fender I also has to drill the hole on each side just a little bit to get the bolt back through. [attach]64275[/attach] [attach]64276[/attach] Enjoy, Jeff
[attach]64269[/attach] [attach]64270[/attach] [attach]64271[/attach] Drill the middle hole of the flap to go over the pin Also remove in that same area the rest of the backing inside the fender tip. [attach]64272[/attach] [attach]64273[/attach] Trim the top away until your happy [attach]64274[/attach] I use a little goop as well (love the stuff) LOL and I also used the clamps to help push the flap tighter agienst the fender I also has to drill the hole on each side just a little bit to get the bolt back through. [attach]64275[/attach] [attach]64276[/attach] Enjoy, Jeff -
Anyone have an opinion on the HF Drill press. I can get it for $56 new with a 20% discount coupon, or get a used craftsmann or ryobi for about $50 to $75 used. HP Drill Press This inexpensive, heavy-duty drill press is just what any homeowner needs in his basement shop for general-purpose drilling. Ball bearing motor with 5 speeds lets you drill in materials from wood through mild steel and iron. Includes depth-adjustment gauge. 5 speeds, between 620 and 3100 RPM Maximum swing: 8" Table tilts 45 degrees left and right Spindle stroke: 2" Chuck capacity: 1/2" Throat depth 4" Motor: 120 volts Column diameter: 1.89" Table dimensions: 6-5/16" x 6-1/2" Base dimensions: 11-1/8" x 7" Overall dimensions: 23" H x 17" W x 7" D Shipping Weight: 37.54 lbs.
-
Sorry for the new thread, ok I'm ready to try to drill like 5 holes thru the cone on the end then I know you have to drill thru the other piece inside, question is, does this sound good and does this make sense to do this. I'm broke after getting this bike so for nor now new slip ons are not an option.
-
 whats the best way to drill mounting holes for trunk rack? i finally found a rack for my 83 and trunk never had a rack and any tricks you guys have to drill the holes without cracking the trunk lid?? before i go drilling
 -
Just wanted to personally thank you for a great weekend,and also for the Venture Bell now I can hang it on my bike and be protected. I will also get good use of the sirius set up I won on the ticket drawing. I am also thanking all who was involved in this year's MD, yes even you Squidley even though you skipped by me for the muffler drill out. :rotf::rotf:just kidding it was nice just to see your ugly pug :rotf::rotf:and Lonna too. God bless and hope everyone makes it home safe and sound. Joe
-
Ok gang, I have my RSV lowered front and rear.I am VERY happy with the way the bike handles, only real problem is the muffler scraping. I thought maybe I would make a set of links that are 3/4 or 1/2 the difference between the Barons and the stock links. I don't have a drill press handy and thought I might just see if someone was making these? Thanks for any and all help! Frank
-
Just thought I would share this experience with you. Having stripped my machine down and doing a complete service on it before the Spring I tried to remove the slide pins from the front brake to strip the calipers down and clean them and change the pads whilst I was at it. At first I carefully tried to remove the offending pins. Needless to say they would not come loose and the allen key just stripped the head even after tapping it to try to loosen any corrosion. I soaked them for a few days in release oil on the caliper. I ordered four new ones but was amazed to find the part number had been changed from 4TT-25914-00-00 to 5JU-259141-00-00. (I'll explain later). The lower one on each side of the caliper came out no problem by inserting a torque bit no. CR-MV 45 into the rounded allen hole after a little bit of tapping with a hammer. I did have visions at one stage of having to drill them all the way out. The upper of the two pins were real pigs I ended up drilling through the center of the head with first a 4.5mm drill, followed by a 7mm drill and lastly a 9mm drill go as deep as the thread so you can get the other torque bit in comfortably, this was a CR-MV 10 has more splines on it and gets a good grip. They came out easily with a ratchet and attachment. Be aware that the caliper pistons retract as you work on the brake so I periodically operated the brake lever to put them back into position. I could find no signs of corrosion on any of the four pins, they were clean and looked almost new. The part has changed from an allen bolt to a 12mm socket head in line with all newer models, I did comment at the time I ordered the new parts that if I knew these newer type pins would fit I would have had some of them fitted. It turned out that they did fit and the reason for the part number change was obvious. I applied copious amounts of copper slip to the pins on re-assembly and torqued them to the recommended 25nm. Did Yamaha know something I did not, before I started this? Key to photographs. 1. Slide pins. 2. Left to right. Lower right caliper. Lower left caliper. Upper right caliper. Upper left caliper 3. Two torque bits. 4. Torque bit fully home in 9mm hole. 5. The new slide pin, with copious amounts of copper slip. 6. Nearly in one piece again. Neil. (Old Miner).
-
i need to know what size tap drill a 1/4 " npt tap takes. can't find my machinist book and can't remember what size it takes.
-
I finally got my HD pipes on last night, went smooth as silk and no I did not drill them out and kind doubt I will like the sound like it is.. Only problem is the bike won't shut off it just :Venture: I believe the bikes has more power than when I drill out the OEM pipes but that could just be me I would never drill another set of OEM pipes out..
-
ok im looking for a thread or advice on how to remove the fairing left and right side to repair some cracks. or a how to thread? looks like im going to have to do a small drill hole to stop a crack from spreading. and not sure on how to do that?
-
I'm double checking here on this, can I installed a set of HD with a cat in them and not drill them out, I don't want to unless I have too... Thanks
-
 Today is 4-25-10 and i am editing my original post to let RSTD riders know i have 3 brackets left. they are $225.00 and you pay shipping. ------------------------------------------------------------------------------------------------ Finished up the tour pak yesterday and the wife and i logged some miles on it so that i could get her feed back. we've also made two Walmart runs and we filled up the tour pak on both trips. i am happy to say that she said she feels more secure than with a stock back rest, she also said that she has more room between us, her one downside comment was that she thought the contour of the back rest cushions weren't as comfy as the stock back rest - so i'll take the cushions to my friend the upholsterer and have him do his magic. i originally said i was going to offer this unit with locking mechanisms but honestly the amount of hours that we put into it to make it work caused us to think of a simpler and less expensive solution. we're going to replace the locks with knurled stainless steel thumbscrews. this will allow us to have the holes placed by our water jet cutting guy and they will all be uniform. we are thinking on offering the bracket several ways...1) primered 2) powder coated (black) 3) chrome plated, however plating it presents one problem - when you drill it for your tour pak it will chip the chrome ...or you can take it primered and drill your own holes and have it plated. i'll post up the price(s) during the week as soon as i get the numbers from powder coater and plating guy. take a look at the pic and i hope to get a video up on you tube as soon as i can. http://i41.tinypic.com/2q8a71y.jpg http://i43.tinypic.com/ipd46a.jpg http://i41.tinypic.com/el60rs.jpg http://i39.tinypic.com/24uyiie.jpg http://i39.tinypic.com/207t45t.jpg
 -
I was wondering if there are any members awaiting black sludge in their backyards? I feel a little stupid, I did not realize once you "pierce" into one of these gas or oil deposits you had to suck it dry or else as soon as you pull the drill out the whole mess comes pouring out. And now their saying 3 months to stop the flow of 5000 barrels per day?! This will become world altering if it is not fixed ... IMHO
-
Is there any aftermarket add ons that will give me an actual fuel gauge without having to drill a hole in my tank? I hate having nothing else than the idiot light.
-
I've been busy on ebay looking at getting a few things for my RSTD, kind of to personalize it a bit although I must say the fellow that owned before me must have had similar tastes and hasn't left me much to do. But I love the Star Front Fender Ornament and think it would be a nice addition, the only thing is I will have to drill 2 holes in the front fender. I plan on using a new drill bit and tape the fender off where I will be drilling. Are there any other suggestions to prevent any paint chipping etc from occurring or anything else I need to concern myself with?
-
Hello Everybody, Shadow here. Can anyone tell me how I can remove or rather drill out a broken tap? It is in the foward rear fender bolt hole. Long story, but the head on the bolt striped when trying very carefully to remove it. So that entailed drilling out the bolt but, my bit did not come out center on the inside of the fender. So I took a tap and slowly with oil proceeded to tap new threads. Almost to the end and the tap breaks. I guess it's case hardened cause drilling it even with new cobalt bits seems futile. I've been at this for most of the day. I can't take the chrome fender rail off because the other bolt holding the fender won't turn. They have the red loctite on them. Funny thing the other side bolt came right out. I know heat would help with the loctite but how do you heat inside the fender without removing the rear wheel or hurting the paint. I just need to know if anyone knows, do they make a better or harder drill bit than the cobalt? I still think drilling the tap out is the best way I just need a drill bit that will cut it. I'm sure I'm not the first one of us to break a tap or easyout that had to be drilled. I appreciate all ideas.
-
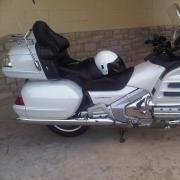
 My 06 RSV came with stock RK pipes. I would like to get a little more sound. How do you drill the baffles and how many holes do you drill? I looked at some of the old posts but didin't see specifically how it should be done or how many holes? Thanks
 -
These young men are good! http://www.whc.net/rjones/USN/USN_team.html
-
was trying to get a harbor freight tire changer. well they are on back order. i bought the bottom part and i am making the motorcycle part. i did a little innovating along the way. so far it really is going good, and i'm only in for $2.75. i did have some donations of materials from one of my good friends who owns a machine shop. all he had was stainless steel tubing so stainless it is. any way i could'nt drill the stainless for the pins (burned up a new titaniam drill bit), so i redesigned it. it is going to have an infinate wheel dia. setting now. i will have pic's when it is complete. bill


.thumb.jpg.e030d8724ef3f2eadc94ab840d0f3801.jpg)


.thumb.jpg.0def0cd11f551e85e5aebca6947d2cdb.jpg)