
Search the Community
Showing results for tags 'holes'.
-
 As part of my changeover to the MKII forks on 83, I am wanting to slide the forks up a little in the tripple tree. When I changed my springs to Progressives, even though I did not use any spacers on the springs, it raised the front of my bike up some. I will be transfering these springs and won't be using any air and wondering if any others had done this and what did they do about the holes where the air goes into the tube. I suspect the holes will be up under the clamped area, but feel they would still need some type of seal to keeping from leaking shock fluid. RandyA
 -
well I changed the front tire yesterday, I have an issue with the lift adapter. I couldn't get the holes to line up If I pushed the rod in from the right side (brake) through I could get three of 4 holes and missed the last one by half the diameter of the rod( Might have been able to force it) if I tried from the left (shifter) side I could only get two holes, no matter which way I moved the adapter around. Is there an adjustment (grinding one of the tabs) or is there a trick I'm missing? its funny I've had the adapter almost a year and haven't needed it till now. With the GF out of town was gonna fix tire last night (done) and detail the bike today (if I can figure this out) i'm gonna subscribe via instant alert so if anyone has an idea it'll shoot right to my phone.
-
Has anyone done an installation of a chrome rear fender tip, the "Official" Yamaha fender tip that requires drilling holes for the mounting bolts? I installed the front fender back of fender tip with no problems. My question is how much "Stuff" would I need to remove to have access to the rear fender to be able to drill holes in the proper locations. I'm sure I would need to remover the bags, but how much of the other hardware must be removed? Thanks!
-
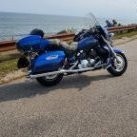
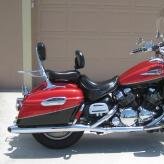
Hi, I have been looking at the trailer hitches available for my 06 RSTD and they all come with the round bar all the across to connect to the saddlebag brackets. But when I look at my bike, I see 2 bar/brackets with threaded holes in them. I have attached 2 photos of the bars. Does anyone know what is supposed to be attached to these threaded holes? Thanks
-
I've got a pair of Wolo Bad Boy air horns on my 89. The left one is newer because it was replaced after a crash. The design of the left is a bit different than the right, it does not have that apparent intake hole like the right one and the Stebel horn has. The left horn started sounding pretty weak. I tore into it expecting to find a nest of some sort in the intake hole, which I never found. In my search I noticed that there are a pair of holes in the bottom which are apparently used to hold the brushes back during installation (at least that's what I used them for on reassembly). Since I had the armature out I lubed the bearings. That solved the problem. My guess is some dirty water got in through the bottom holes which put some drag on the shaft. The last couple rides before it acted up were wet and sloppy. The older horn has the same holes and I suspect is vulnerable to the same problem. **EDIT** Didn't mention: The armature can be removed by removing the brush plate at the bottom. There are a pair of phillips screws near the electrical terminals. Putting screws back is not fun because magnets pull them out of alignment with the holes. I stuck the ends of a paper clip through the holes to hold the brushes back during assembly.
-
Just when you thought you completed your mental checklist of hazards: Inconsiderate / rude / inattentive drivers pot holes animals here comes one you wouldn't expect.... http://www.cp24.com/servlet/an/local/CTVNews/20110829/110829_motorcyclist_injured/20110829/?hub=CP24Home
-
my 09 didnt have them when i got it,,can someone tell me or show me a pic where thay mount,,,some pic show mounting holes and some dont
-
I need one of the metal braces/brackets for my 88 trunk It's on the right side (looking from the rear of the bike) It's the offset "L" shaped bracket that runs up the front side of the base section, bends towards the center of the bottom and has the flared plate on the end with 4 mounting holes Mine is broken in two, PO had it welded (badly) and it broke again. If anyone has one , please let me know and we'll work something out. Thanks
-
I cut out the back of the mufflers and went crazy with the drill. First two holes that turned to four holes that turned to six drilled holes. I am a reformed Harley drag pipe guy. I went mad I think. I kinda like the rumble of the small block Chevy sound. But as I age I also appreciate the quiet morning runs that do not wake the birds in their nests. I am converting back to stock. Question. How many here regretted drilling their pipes and like the stock sound? Anybody need some drilled pipes?
-
 Went on fairly long trip last weekend and notice the bike was sputtering a little and had a little backfire once in a while. Anyway, I pulled the plugs and found that the front left was much darker then the rest as you can see in the photo below. Some history, I replaced the TCI with the new electronic one from the group buy, I run a shot of seafoam with every gallon of gas, I only use Premium fuel. After replacing these plugs today, I installed Skydocs Shim Mod on the sliders and since the Torx screw was not present I have to assume the previous owner was already into these carbs. Diaphragms looked new with no holes at all. I do have a set of new NGK spark plug wires I bought from ebay but i have yet to install them. I know I will need to have the carbs synced soon, but I am having trouble finding a dealer that will work on this vintage in my area. http://i906.photobucket.com/albums/ac264/bobandlou3/IMG_0368.jpg
 -
I have a 2002 RSV and was given a centerstand off of an 84 venture. Matching up the bolt holes to the bracket on the chassis seems to be exact. Does anyone know if I can just attach it to the existing holes on the chassis and if I can, does someone have a diagram on how the spring and lever attach to the stand and frame?
-
Has anyone heard of putting a few extra holes in the inside surface (3ea ¾ dia.) of the air filter housing along with a K&N? Sounds plausible as these engines like to breathe and that's what the V-Boost is all about on the VMAX.
-
My truck is suffering from a bad case of chemical weight reduction. The rust is coming thru from the inside in areas that there is no access to the inside. I am not a body man by any stretch of the imagination. I am not looking to restore it to like new appearance just to stop the cancer and cover the holes to keep it from getting worse and stop the whistling in the wind. I was looking at POR15 or Rust Bullet. But I have no idea of how to get it to the insides of the areas that are rusting. The rust has created plenty of holes stick things in there. Is there some kid of a wand spray gun that can be had for not to much cash? I was then going to fix the areas with glass cloth and epoxy resin, followed by some Bondo to smooth it out a little before I buzz bomb it.
-
I believe it is called the needle daiphragm for the carb, but im not entirely sure. Started my rebuild today and noticed all the rubber boots had holes in them. Anyone who knows that its called would be much appreciated
-
 whats the best way to drill mounting holes for trunk rack? i finally found a rack for my 83 and trunk never had a rack and any tricks you guys have to drill the holes without cracking the trunk lid?? before i go drilling
 -
Has anyone removed the stock rear turn signals / brackets? How bad are the holes left behind in the fender? Are there three holes?
-
The question is to anyone that has installed the HD licence plate light bar on their bike. What has anyone done to finish off the 90 degree bend at the top of the bracket with the two holes in it. I believe the two holes were used to bolt it to a tour pack or frame work that the tour pack is attached to. With the RSTD the bend is very visible since we do not have a rear trunk, it's not that it is terribly distasteful, it just looks like something is missing.
-
I want 1st phase only. Do I drill half inch holes around front baffle? thanks Richard
-
I recently pulled the chrome trim off the fairing and found that the plastic around 4 of the 6 windshield mounting holes was cracked completely through. I emailed my dealer photos and he said to bring it in and they'll replace the fairing and anything else related to the problem. Off to the dealer tomorrow. Anyone else had this problem? Dennis
-
There's a lot of threads/posts regarding levelling links including a "how-to" to make them yourself. Rather than adding to any of those, thought I'd just start a new thread due to a specific question. In the how-to, it says to drill the holes at 6 & 5/8 inch center ( 1/4 inch less than stock ). According to that, it should give about a 1" lift which changes the rake & trail of the bike resulting in better handling. I'm wondering (since I haven't read anything related to it) .... what effect a person would get if they set the holes at other positions such as, for example, 6.5 inch center or maybe even 6 & 3/8 inch center? Just curiosity here but I haven't seen any comments that address it.
-
 Are there supposed to be any little holes that look like drill holes in the sides of the air cleaner box? I think I have about 4 or 5 of them. I didn't do it. They are in the filter area. If not, what is a good way to plug them? Duct tape? lol
 -
On my way to Marcarl's this spring, I ran over something that did a job on my exhaust collector (on the highway at 70mph). Ended up with two fairly large holes on the botom, one with a large dent. Carl tried a patch but that did not hold. I tried more patching with some muffler cement and again, the heat and pressure blew holes in the patch areas. Any reason why I can't weld a patch in place? How important is it to try to straighten out the indent before patching? All comments appreciated!
-
I know a few members here are aware of the story of Jonas' bike. Long story short, I was commissioned to do a bunch of modification work on the '98 Royal Star he keeps in here in the States. The list includes VMX cams, 32mm carbs and VMX rear gear along with a few other smaller items. Here are a few pictures to go along with the progress. The first is cams, VMX on the left and stock on the right. There's a good difference in size there. Cams and springs are a drop-in fit. Second is the VMX rear gear being machined for the speedo sensor. Third shows the new pair of bolt holes in the heads to mount the 32mm intakes which have a different bolt pattern to them. Here, the new holes are the upper right and lower left, where the holes for the stock 28mm carbs are the opposite. My '96 did not have the extra set of bosses for the bolt holes, so I used an adapter plate as shown in my 32mm carburetor swap article elsewhere on this board. I was not aware that later heads had blank bosses like these do, so in this case, instead of adapter plates, I drilled and tapped the bosses for the bolt holes. The adapter plates on my bike work fine, but this is a nicer result. The fourth shows the 32mm carbs in place. I am almost finished with this project. I have had to procure a few odd fiddly little parts at the last minute, stuff that you can never foresee. Once those come in, it should only be a couple more days and it should be ready to ride. I know he is anxious to see it and ride it this summer.
-
Hey guys i ve read all the search forums and nothing shows for raising the bike. Mine uis the 96 rs . the rear monoshock is horizontal so the leveling links wont work. my prob is that when I get to do some good turns I scrape on my floorboard as well as my year bottom pipe and braket. I am a heavy guys and have been through the shock settings. this is the one setting which feels best. Large holes are a bit rough at high speeds but 60 mph back road cruising is very comfortable. Now before i get people telling me not to treat it like a sport bike! My turns are far from saggressive. or who knows maybe they are . But my buddy with a 96 electra glide takes the same turns with no scrape. Same speed also. What can i do?
-
Freebird Centerstand Installation Note: Since I am no longer making these stands and there have been some requests for the measurements, here they are for those who wish to make their own. The large holes on the U Braket and straight bars are 16mm. The ground out slot on the bottom of the bars are so that the stand will break over the proper amount. If it doesn't break over far enough, the bike will roll off the stand. If it breaks over to far, it is almost impossible to get the bike off the stand. You want it to break over so that it is just past vertical. The stands all vary just a bit so I always assemble them first and then grind the slots on each one until I get it right. I also grind all the sharp corners before painting. Just enough to put a nice rounded corner on them. You don't have to but it just looks nicer. You will notice that this one has the tab welded on. I later started having these stamped out at a machine shop so that they were one piece. It was just easier for me that way but welding works fine. The installation of the Freebird centerstand is pretty simple. Before proceeding in purchasing or installing one of my stands though, I should point out a couple of things. 1. Will this stand lift the rear wheel off the ground? Yes, if your suspension is STOCK it will lift it maybe a half inch off the ground. If you have installed the Diamond R leveling links, it will NOT lift the tire off the ground. I have the links on my bike but even though my tire is no longer off the ground, I find the stands very useful for oil changes and etc. 2. Can you still use a bike lift with the stand installed? I do. The lift WILL rest of the stand at the rear but I just let it. It has worked fine for me. If not, it only requires the removal of 4 bolts to drop the stand off. 3. This is just a note more than anything else. These stands are made from used centerstands off first generation Yamaha Ventures. I have them available as I can locate stands. I have the brackets available all the time so if you have or can find a used first gen stand, I will sell you only a bracket. You can also buy NEW first gen stands for somewhere around $85.00. So even if you buy a new stand and one of my brackets, you will still have less than $150.00 in a centerstand. 4. This is not an exact science. There are some variances in the old stands and I've seen some cases where the angled tab on the bottom of the second gen or RSTD have been slightly bent...or mashed down. I have test fitted every stand that I sell on my own bike but I sometimes get an email that the holes do not line up perfectly. That is usually not a problem. If you follow my directions and leave everything loose until all the bolts are in, you should then be able to tighten everything up and it will work fine. If there is a small space between the U Bracket and where it rests on the bikes frame...don't worry about it. I promise that the first time you put the 1,000 lb. bike on the frame...that space will go away. 5. I grind the inner part of the foot pad off so as to prevent it from hitting the exhaust shield. It will still be very close but should not touch. If it does, simply remove the stand, lay it on the ground and WHOP the foot lever with a sledge hammer. It will bend enough to clear. So...after all that...here are the instructions. This picture shows the existing tabs on the bottom of the bike where the stand will bolt up. Place the stand under the bike and insert the rear bolts into the holes. The existing holes are a metric size just ever do slightly smaller than 5/16". I supply 5/16" bolts so you will need to run a 5/16" bit through those holes...or you can purchase slightly smaller metric bolts. It's very easy though to run a bit through the holes. Now just swing up the horizontal bars and place the 3/8" bolts through the holes. The bars of the bracket go OUTSIDE the tabs on the frame. If they don't line up perfectly, just wiggle it around until you get them in. Tighten all the bolts and the stand is now mounted. Installing the spring is the next step. Place the LONG end of the spring through the small hole on the left horizontal bracket and take the spring OVER the top of the bikes frame. The other end of the spring connects to the existing tab at the bottom of the left stand leg. This picture shows how close the foot pad comes to the exhaust. If it touches or you feel it is too close. Just take the stand back off and bend it out a bit. Do NOT spread the legs of the actual stand...just hit the arch of the foot extension so that IT bends a bit further out. This is how it looks all mounted. On the stand from the side. Close up with bike on stand. From the back


.thumb.jpg.bea94b2fb3a7dc72d417d9ffb4f4fc28.jpg)


