Search the Community
Showing results for tags 'bolt'.
-
Hey guys finally got all my speakers installed abd they sound great! I did however manage to lose two of those bolts that hold the speaker in place. They're kind of a special bolt and I'm wondering if anyone knows where to find these? Any info would be much appreciated. Thanks in advance
-
Just My luck....going to be near 75 tomorrow, was going to ride the bike to church in the A.M. and then go for a ride. Went in the shop to check on the bike and found a coolant leak around the left rear cylinder cover. Pulled the side cover and discovered, it appears that the plug is leaking. There are threads in the plug but no bolt. Is there supposed to be a bolt that holds the plug in ? If so what size? Thanks, Mel
-
My '02 RSV seems to have developed a slight fuel leak. The leak is a slight drip coming from the end of an allen bolt. You can see the drop in the attached pic. What is the assembly that the bolt holds? Anybody have any idea of how to fix this? That assembly looks like a pain to remove! Any help is much appreciated.
-
 Stator went out on my awhile back so I have to replace it, got down to the bolt that holds the retaining cover for the stator wire going out of the case and snap off came the head. So I think ok I will drill it and use and easy out nope broke the stupid easy out in the middle of the bolt. I had thought about drilling to the side of it, tapping it and putting in a smaller bolt but I guess I really should just get a new side cover. Any thoughts , ideas or just plain jabs for my stupidity are Welcome. I am hoping I can find someone parting out an engine or has replaced one because it was scratched for cheap. Looks like a new one cost around 300 bucks.
 -
How do I remove the chrome ring around the headlight? The bike (RS Venture) has the chrome visors on all the lights and I bumped the visor on the headlight and it came off. I need to get the chrome ring off to put the visor back on. I removed the bolt at the bottom, but something is still holding on. I need your help. Thank you! Owen.
-
Thanks to Vincent, AKA: Playboy, for this EXCELLENT tech article. Packing Swing Arm Bearings 1. Remove the rear wheel as you normally do and your halfway there. 2. Drain the final drive and remove the speed sensor wire and four acorn nuts and simply pull out final drive and drive shaft. This is a great time to catch up on a lot of those little maintenance items. . http://www.venturerider.org/Swing%20Arm/swinga1.jpg 3. Un clip the speed sensor wire from the swing arm and remove the clamps from the brake line. So you don’t have to hunt for them later re insert the clamp bolts back into the swing arm finger tight. Just allow the caliper to hang over out of the way. Be sure and check pads for even wear. 4. Now its time to remove the shock and the dog bones or leveling links. Before removing top bolt from shock remove seat and right side cover. http://www.venturerider.org/Swing%20Arm/swinga2.jpg 5. Un clip the shocks vent line located beside battery on right side. Then remove round black plastic cover where you add air to rear shock ( it just pops out ) http://www.venturerider.org/Swing%20Arm/swinga3.jpg 6. Remove the nut from the valve stem. http://www.venturerider.org/Swing%20Arm/swinga4.jpg 7. Now just work the vent line and air line down from top and pull out top bolt from shock. http://www.venturerider.org/Swing%20Arm/swinga5.jpg 8. To remove Y pipes you will need to remove left side cover also. Under the lower section of the Y pipe loosen clamp closest to the rear. http://www.venturerider.org/Swing%20Arm/swinga6.jpg For the section attached to rear cylinders you can loosen that clamp as well or remove the two nuts on the flange going into head . http://www.venturerider.org/Swing%20Arm/swinga7.jpg Remove the bolt where the mufflers slide on . http://www.venturerider.org/Swing%20Arm/swinga8.jpg 9. Now you can just work the Y pipe out and to the rear. http://www.venturerider.org/Swing%20Arm/swinga9.jpg 10. Next pop off the chrome covers on both sides. http://www.venturerider.org/Swing%20Arm/swinga10.jpg you will notice a bolt head on the left side. 30mm I think remove this bolt from the left side . http://www.venturerider.org/Swing%20Arm/swinga11.jpg This bolt requires 72 ft/lbs on re installation. 11. On the right side you will notice a Allen head bolt with locknut loosen or remove nut then remove bolt . http://www.venturerider.org/Swing%20Arm/swinga12.jpg This bolt only needs 5.1 FT/lbs of torque. Locknut requires the 72 ft/lbs. Don’t worry about the swing arm falling out when you remove the bolts. Now you can work the swing arm out from under the bike with just a wiggle. http://www.venturerider.org/Swing%20Arm/swinga13.jpg The rubber boot protecting U joint should come out with it . http://www.venturerider.org/Swing%20Arm/swinga14.jpg 12. Place the swing arm in a vice with drive shaft side down. Pull of the rubber boot so you can see the back side of the right side bearing. Insert the left side bolt from the inside. http://www.venturerider.org/Swing%20Arm/swinga15.jpg Using a wooden dowel rod tap out the bearing and seal. This will allow minimum distortion to seal so you can re use it . http://www.venturerider.org/Swing%20Arm/swinga16.jpg 13. I used a seal puller on the right side seal because I had one but working carefully with a screw driver or very small pry-bar you can get that seal out with out much distortion. 14. Inspect bearings and races for pitting or wear marks I doubt you will find any unless this has been neglected for a very long time. My bike was @ 30k and had some grease still on bearings Probably just what the factory put on them. 15. Re-pack your bearings with a good quality grease. Insert the right bearing and reinstall seal flip over the swing arm and repeat for left side. 16. Reattach the rubber boot and work the swing arm back up into the bike. Don’t worry about the trying to get the boot back on just yet. Just get it in there where the swing arm bolts will be close to lining up. Lift the swing arm up and slide something under it to support it. . http://www.venturerider.org/Swing%20Arm/swinga17.jpg 17. Reinstall both bolts just enough to get the threads started good and then work the rubber boot back over the U joint. Long handle needle nose pliers and a monkey hook are real handy here. 18. Tighten both swing arm bolts. The left bolt must be tightened first. Remember right side is only 5.1 ft/lbs and locknut is 72 ft/lbs. 19. Everything else goes back in reverse order. Don’t forget to lube those pivot points on the shock while your there. Something that works well for me when it comes to reinstalling final drive and drive shaft is that I pull the driveshaft off the final drive, put the bike in gear, I then insert a large Allen wrench into the hole of the driveshaft where the spring fits for a handle and install the driveshaft into the U joint. You can turn the gear on the end of shaft to determine that your in the U joint and not beside it. Hope this helps because it is not the dreaded job I thought it would be. Could have done it in a afternoon but it was a 100 degree day and trying to take pics on all the steps took some time. Vincent aka PLAYBOY
-
I have a 2006 RSTD. I am installing the original mufflers on the bike. Do I have to remove the saddlebags to get to the back bolt?
-
 So Im replacing my swing arm shock mount on my 1990 I couldnt find a 90+ but I bought one from an 86 . I know there are differences with no zerk fittings on 86 but the shock mount is definitely different. The 90 has two set of bolt near the shock mount the 86 has one. Does anyone know if this will work?
 -
I have look the service manual and can't find anything on this.. The chrome heat shields that are on the rear header pipes how do you remove that shield I have taken out the bolt and still it will not move.. Does the shield even come off, I'm wondering now?
-
The hollow bolt in my passing light is broken. It's the one that screws into the turn signal from the passing light bucket. Had to do a roadside temporary repair while on a trip. Have searched, but have not found a source for these. Dealer is no help. Does anyone know a source or part number?
-
I replaced a faulty ignition switch today, and while there is plenty of info on the forum on how to do it, I wanted to share how I dealt with the tamper proof bolts that hold the switch to the frame. There is no "head" to get a tool onto these bolts, so many guys use a dremel or die grinder to cut slots into the head so they can remove the bolts with a screw driver. Another option is to just drill out the bolt and then remove the remaining bolt after the switch has been removed. I decided that since I didn't need to salvage the switch or the housing (it was already broke) it wouldn't hurt to break it more. I used a small sharp chisel to break part of the switch base so I could get at the recessed bolt heads. http://i15.photobucket.com/albums/a373/gat803/ignitionchange014.jpg Then I used the chisel to tap into the side of the bolthead, making a gouge for the tool to bite into and loosening the bolt. It was just a matter of a couple of revolutions and I could turn it the rest of the way by hand. http://i15.photobucket.com/albums/a373/gat803/ignitionchange015.jpg http://i15.photobucket.com/albums/a373/gat803/ignitionchange018.jpg I replaced the factory bolts with a couple of metric allen head bolts from my collection and I'm good to go. http://i15.photobucket.com/albums/a373/gat803/ignitionchange021.jpg Total time, start to finish to replace the switch.....1 hour, give or take.
-
Several weeks ago I finally got around to removing the hitch off of my 87 and putting it on my 89 so I could use it for a PGR flag mount. The removal and reinstall was pretty cut and dry taking only a couple of hours, including a short trip to Ace for some different bolts. The next "simple" "easy" "no problem" step was to take the ball off and bolt on my home made flag holder. That took probably 6 hours over 2 days. The bolt would not budge. I'm guessing the ball was installed back around 87 and had been in the Oregon area until 2 years ago. Even soaking with WD40 over night didn't help. I went from wrench to breaker bar to pipe wrench and using my Tahoe hitch to Sawzall to grinder. Ended up grinding the thing in two. What a job !
-
So I am pulling the rear wheel for a tire change and once the wheel is off I am checking the swing arm, shock etc. WHen I pick up on the swing arm, there is up and down slop where the bolt goes through the top shock mount. Bolt is tight, its like the mount hole in the shock is too large. I would figure this to be a near zero tolerance fit where the bolt passes through. Sufficient slop that you can make impact noise with it if you push up and down slightly on the swing arm. Amounts to about 1/8 inch movement up and down at the axle just from the slop in the bolt. Anyone else seen this before? OEM shock 22,000 miles. There is also oil on the bottom of the bellows. Still holds air and no excessive bouncing I can tell, but likely not long for this world. Thanks, RSTDdog
-
Pro Fix Stripped Threads The way I have always done stripped bolt holes is to install a HeliCoil. It is a thread replacement device that you drill out and tap the hole for the Helicoil to be installed. This lets you use the original size bolt. You can pick up a kit that will contain the Coil, Drill bit and tap. They are available at most Auto parts stores. If unsure what size you need take a bolt with you and match up. The link below is a site that gives good info on use and installation http://www.repairengineering.com/helicoil.html
-
I was installing the clutch slave cylinder on the 83, and when I went to snug up the bottom bolt, the threads in the block stripped. Any ideas how to fix them good enough to tighten up the bolt? I checked and it looks like there is about 1/8" or a bit more of good, unused threads left down in the blind hole, so I may try and see if I can find a bolt that is a little longer and see if there is enough left to hold. I don't think a heli-coil would be very easy to install. The female threads in the block are about 6" inside of the bulge in the stator cover, so I'd have to find a way to extend the installation tool. Also, the threads don't start at the surface, they are recessed about 1/8" so that the bolt will act as a pilot bushing also. The next best alternative that I see is to tap it for a larger bolt, probably a 1/4"-28 and open up the hole in the cylinder a bit. The Yammie bolt is 6mm or .236". I'll still have to come up with a way to extend the tap though. I haven't looked on the Grainger site yet, but do they make a tap extension so you can reach into recesses? Anybody ever have any luck with Devcon or something like this? Barb and I are leaving on the 89 Thursday, so it'll be sitting for a bit. Frank D.
-
What would I gain by changing my final drive out in my 2008 RSTD to a V-Max final drive? Also what year would I have to get to do this and is it a straight out change bolt for bolt? Joe and
-
Sooo New guy here trying to remove the starter clutch so i can send to Dano. I got the covers off no problem. How do you lock up the rotor to get the bolt out and do you have to take the gear loose before you pull the rotor? Thanks Kevin:confused24:
-
 Hey all, I've been a lurker on here for a long time now, don't post much, but this is important so I wanted to ask. About a month ago after being out for the day on the bike I noticed that the right rear helmet lock was falling off, hanging on by just a thread or two. I tightened this up and didn't think much of it again until last weekend. I was riding home from work on Saturday night and I have this habit of reaching back with my left hand and holding onto the passenger grab bar to stretch my back. Well the grab bar was moving all over the place in my hand. Got home and found I'd lost the bolt that held the grab rail to the fender, and the bolt under the trunk on the other end was really loose. Ordered the new bolt to replace that one, got it yesterday and went to work putting it together. While under there I checked the other bolts in the fender and found that 3 of the 4 bolts holding my trunk on were very loose. This led me to grab a bottle of lock tite out of the garage and put it on all of the bolts in question, including the two helmet locks. Is this typical? I have owned the RSV for about 1 1/2 years and love it, I will now be checking the bolts rather often, are there any other area's that I should look for things "falling off" that are common? Sorry to be so long winded, thanks for all your help in advance! What a great forum this is, I have learned so much here and it has enabled my to do a lot of my own maintenance with confidence. Great group of people here!
 -
Replaced my rear shock today took about 90 mins (gotta love air tools) figured out a couple of things and thought I would share. I did not remove the rear tire I did everything through the sides. 1. If you put a quarter inch shim between the Carbon One adapter and the frame it gives you plenty of clearance to pull out the leveling links bolt. 2. Needle nose vice grips are great for pulling out the top bolt and putting it back in. 3. A floor jack under the rear tire will give you control of the tension and makes it real easy to slide the bolts back in.
-
I finally got the air collars off after soaking in WD40 for about 36 hours. The forks slid out OK. I made a tool that allowed me to disassemble my forks using an eight inch bolt with the nut welded on the end, a couple of extensions, a 15/16" socket, and a little tape. I had to get the dimensions for this bolt from two different threads. It seems we have a guy on here that wants to describe bolts by their shaft size For those others that are sometimes lost (like me), the bolt that fits is 5/8" shaft x 15/16" head. Now I am trying to re-assemble the forks and the bottom bolt will not start threading into the damping rod. I worked on it for about an hour. Arghhhhhhh:sign67:
-
Does anyone know what size; grade etc.. the bolt is that goes through the engine/frame at the front top of the mount? Thanks
-
 I did a rookie thing and screwed up (I hope not big time). To make a long story short, What size tap should I use to clean the female starter threads out on the inside of the drive shaft that the Flywheel bolt screws into? And where can I get one? It looks like a M12 x 1.25 thread pitch. I've tried Sears, Harbor Frieght, Northern Tool and NAPA. None of the sets they sell have that particle size included in them.
 -
So I had a leaky stock shock on my '09 RSTD. I did some research and opted for the YSS from EPM Performance. One surprise about the shock is that it is made in Thailand. I don't think that matters much in todays day and age. The machine tooling in Asian countries is as good if not better than in the US. China still has issues with specifications and stuff. Taiwan is a powerhouse in machine tooling that started with their bicycle industry. Not sure of Thailand but this shock is a very well made aluminum piece. Very pretty bike porn. I filled out the information from the website and got an e-mail from Klaus Huenecke the next morning. I called them and placed my order Jan. 16. I was quoted 2-3 weeks for the shock, but I ended up getting it in March. This was not that big of a deal as I have been swamped with other projects in the first couple of months of the year. Here is the photo that Klaus sent me of the shock when I ordered: http://farm8.staticflickr.com/7205/6887486880_efa82f3026_b.jpg Here is the shock as received by me: http://farm8.staticflickr.com/7251/7033581199_0300d3a992_b.jpg If I am not riding, the next best thing is working on the bike in the garage on a nice day. My house faces north so I think it is the perfect place to work: http://farm8.staticflickr.com/7241/7033597743_3514120497_b.jpg I did not want to take the rear wheel off so I figured I would go thru the battery box and change the BikeMaster TruGel with a Deka. I took the battery box out as well as the passenger floor boards on each side and the side covers. I realize now I did not get a good shot of that. That shock sure is tucked down in there pretty good: http://farm8.staticflickr.com/7192/6887488318_a1f4ecb868_b.jpg http://farm8.staticflickr.com/7265/7033586793_c1469fd67a_b.jpg When I first started motorcycling I purchased this bike jack from Kawasaki. Very handy when you want fine control lifting the bike up. You still have to lie on the floor, but it is perfect for unloading the shock: http://farm8.staticflickr.com/7280/7033587875_ab1f8dec3d_b.jpg Some other people have written that you don't have to take off both floorboards to do this, but I am glad I did because you can really get in there and work and see what you are doing. Another set of hands would have been good to hold the back side nut when loosening the bolt on the shock and the dog bone, but it was nothing strategic use of a 2X4 and a box end wrench could not handle. Since I was laying the ground the hardest part was getting the vent hose released, I was on the left side and should of got up to undo it on the right side: http://farm8.staticflickr.com/7070/6887495050_98ac4cb53c_b.jpg Here is the new versus the old. Very nice piece of kit is the new one: http://farm8.staticflickr.com/7103/7033589763_a8f55435e4_b.jpg The YSS came with 2 washers that there are no instructions as to where they go. There was some play in the bottom clevis so I put them on the inside of it. Unfortunately the Billet clevis is wider than the stamped steel original and the bolt does not quite get full engagement. http://farm8.staticflickr.com/7041/6887506104_c6f16530ed_b.jpg bad pic that does not quite show the lack of full engagement of the nut. I'll keep an eye on it and maybe talk to the bolt supply guy at work and get a longer one if it seems to be a problem. When I bought the longer dog bones for the rear, they came with new bolts. For $499.00 I wish it would have been all inclusive of all the parts you need. Also the instructions it comes with are generic and not specific to the bike. http://farm8.staticflickr.com/7255/7033603105_a7dab270ef_b.jpg Here is a pic that shows accessing the nut on the top bolt. The bolt head has a capture device so you only need one socket to remove it: http://farm8.staticflickr.com/7089/7033598581_363648a59e_b.jpg Here is another pic that shows the lack of full engagement on the bottom bolt. Unfortunately there is a dearth of places to get large metric bolts like this. I'll have to measure it and get a longer one from Bolt Depot perhaps. http://farm8.staticflickr.com/7084/6887508424_c64620c0ba_b.jpg by sadicarnot, on Flickr
-
 Hi all, Just lowered my front end, 2005 Venture. All was going fine until trying to get the triple tree back on. It's not quite centered on the middle bolt so when it get's down to the 'neck' of the bolt the triple tree is hanging up. Have tried pushing rearward on the front tire, and forward with the front brake on. Doesn't seem to change. Can't think of any way to get any leverage between both fork tops and the bolt to get it to 'lean' in. Any suggestions? Looks like I'm about a half hour from being done if I can get past this..... Thanks John
 -
Hi All, I know the R1/R6 monoblock calipers will bolt on to our Royals front forks.. My question is if the same monoblock will bolt onto the rear? The caliper looks identical to me. Any ideas?

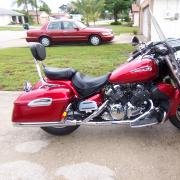
.thumb.gif.24ec023d5cf7e3e17253f6fad2620e78.gif)


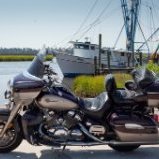
.thumb.JPG.bfcefdc0995aabc77d6b4e8cf9125c91.JPG)