
Search the Community
Showing results for tags 'plastic'.
-
Looking for a part no. for the metal impeller as mine has a plastic one. Any help would be appreciated?
-
Does anyone know of a way to clean up the passengers hard plastic armrest if it is scuffed up and therefore off color from the rest of it?
-
I need the pieces that go below the fairing and the chin piece that goes below the radiator. If anyone has these please let me know. Thank you, Shaun
-
The inside 2 rear trunk hold-down bolts recently broke right through the trunk base on my 06 Midnight Venture. Looking things over revealed that my trunk does NOT have the re-inforcing kit which Yammi has for this design flaw. Here's what I did to fix the problem. A trip to NAPA to pick up 2 large flat washers with 18mm holes in the center of the washers....a Plastic weld product by VersaChem called PLASTIC WELDER....rough grit emery cloth. Procedure: 1) Roughen up the ABS with the emery cloth where you intend to use the Plastic Weld. 2) Shoot Plastic Welder directly onto the area of use...mix quickly and spread over area of repair. 3) Imbed flat washer on top of Plastic Welder being careful to center the hole in washer directly over the screw mounting hole on trunk hold-down chrome frame. Allow this to set-up overnight for full strength of Plastic Weld to form. (Product sets-up in 15 minutes if needed for quick roadside repair) The next day.....Use remaining Plastic Weld to COVER the flat washers (Do NOT cover the washer holes!!) and trunk area in a 3"x 3" area. Allow this to set up for 24 hours. The next day.....Cut 2 pieces of leather from an old belt....Punch out a hole in the center of each piece of leather large enough to allow the trunk mounting bolt to go through easily. Install each piece of leather between the trunk underside and the top of the bolt-holdown nut. Install a 17mm bolt and snug down everything. For this I used 2 leftover bolts from my saddlebags...(I had these when I installed the improved trunk bolts with knobs last year) When all was done I then installed 2 NyLoc nuts on the trunk hold-down bolts and ran them up snug. This will prevent the hold-down bolts from vibrating loose again IMHO. Note: A Yammi Dealer is ordering me a NEW lower trunk as the bike is still under Warranty. I did this repair mainly for a temporary fix and to test this Plastic Welder product. So far so good on the repair!! The Plastic Welder is rated for 3500psi strength!! For anyone who has a Venture out-of-Warranty you might want to consider doing this to repair your trunk. Boomer.....who sez if ya sniff the fumes from this stuff it puts a pretty color to what yer looking at for about 5 minutes....but it don't give ya the munchies.
-
While I had my fairing split to work on replacing my headlamp bulb and doing some cleaning and general maintenance, I removed my deflectors to clean them real good. I reinstalled them last night using a touch of Loc-Tite Blue on the phillips-head bolts and snugged them up without overtightening. This morning when I replaced the bulb and went to re-assemble the fairing, the deflectors literally fell off their mounts. It appears that the Loc-Tite disintegrated the ABS plastic protrusions that the screws mount into on the inner fairing. It's hard to describe, but the plastic turned to black crumbles. I've never seen anything like it. Has anyone ever experienced this with Loc-Tite Blue? My inner fairing will no longer be able to hold the deflectors, unless I can rig something up. This sucks. The pic shows the right side deflector mounted as of last night. Any suggestions would be appreciated.
-
After reading through some posts on the problems with the plastic thermostat top , here is my solution. I cut a support washer from a piece of 1/8 plate to fit around the housing. My old top was warped like most of them are and not mating flush with the base. After the washer was put on it is flush all the way around. I feel better about this now. Since I have the motor out its a good time to fix things like that.
-
After acquiring 2 identical 1985 Ventures 18 months ago as a project to help rehab my knees after total knee replacements in Late July 2009, I finally have a complete, good looking, great running Venture Royal. It has been an experience. The primary bike was completely torn apart and it took 3 truck loads to get it all home BUT it had only 13500 miles on a one owner bike but had not been run in over 8 years and the original owner gave it to his son who took it apart with the thought of putting the motor in a golf cart. He got bored with the idea and through a friend offered the bike to me just to get it out of the garage. Free is good! The second bike I found when looking for a manual, went to pick up the manual and the owner asked "what about the bike that goes with it?" The bike was complete BUT had not moved in over 10 years and sat under a pine tree outside uncovered for the whole time. Fortunately the owner had pulled the bags and trunk and stored them in the basement. $30 for the manual and the bike (which we had to dig out since it sunk down to the frame in the soft dirt) Mice had nested in a variety of areas including the air box and had eaten some of the harness but the bike was a great template for assembling the good bike and great for getting useable components and fasteners that were missing or damaged when the first bike was taken apart. Some of the major issues that needed to be dealt with: The carbs - having 2 complete sets of carbs helped. The biggest problem during the entire project was determining why I could not get consistent fuel flow to one cylinder, turned out to be a hairline crack in one of the carb bodies sucking air took forever to diagnose and correct. Front fork tubes needed to be replaced, both sets had pitting and were drawing fluid up when compressed went wit new tubes (Forking by Frank) at around half the price of OEM. Brakes needed serious attention. Biggest problem was finding a replacement rear master cylinder and the rubber diaphragm for the inside of the rear brake reservoir. Once all the components were acquired rebuilding the system was pretty straight forward except for the right front brake which refused to bleed for the longest time. The clutch needed attention but having 2 full sets of components got me a solid working clutch. I'm not a big fan of hydraulic clutch systems just due to the added complexity. Cables are so much easier to deal with. Once all the mechanicals were taken care of, the electrical system came next and generally went fairly well, mostly checking, cleaning and replacing but every thing works. Final repair and reassembly of all the body work completed the project. I was amazed at how fragile some of the mounting points on much of the plastic were but I was also amazed at how much of the mounting hardware and grommets were still available. Repairing the plastic was definitely a learning experience. Unfortuneately much of the plastic from the second bike was badly deteriorated from the years out in the elements so repairing the first bikes plastic that was damaged in disassembly became my only option. The end result is now a very nice, very good running and very good looking motorcycle as original as I can get it within a very limited budget. I'm not new to resurrecting old motorcycles but this bike had a level of complexity that I had not worked with before. Having worked on a VMax sure helped. I want to thank those on this forum who offered parts and assistance and the owners of theis group for having a place that offers so much technical information. Without this group, this project would not be possible. By the way the knees turned out better than the bike and now I have to figure out what to do with 4 large storage bins of leftover parts! I'll post some pictures as soon as I can get some taken. Thanks again
-
Hi All Im starting to look for a drink mount and a mount for a sirus radio. I would like somthing made out of metal not out of plastic. Thanks Bull463
-
I know we've talked about this a bunch, but usually we're only talking about spot repair. I'm starting to get a bunch of cracks in the plastic of my fairings so I've decided that my winter project this year is to strip all the plastic off of the bike and reinforce it. I'm going to build up the areas that have cracks pretty good, but I want to also put a layer of fiberglass cloth all over the insides to add some strength. I've looked at Plastex, but dang it's going to be expensive to get enough for a project like this. Several on here have said not to use fiberglass resin, so what are my options? Will ABS cement work for this or do I need to look at something else? Thanks.
-
 Question for those of you out there that have installed the Stebel Air Horn. Got mine installed today, and its a pretty tight fit. The upper left edge of the plastic "chrome" is practically touching the exhaust pipe. I realize this is the shiny cover and not the actual pipe, but it does get hot. Was wondering if any of you have had trouble with the plastic chrome melting? Also, in case you were wondering... the "SuperChrome" version of the Stebel is actually just shinier chromed plastic. Looks nice, but still not really chrome. Not exactly what I'd expect for $140. Thought I'd throw that out there for the benefit of others... Thanks in advance for your thoughts on the pipes/horn cover. Bob
 -
I picked up a used VentureLine backrest. I'd like to replace the nylon friction washer beneath the hangers due to deterioration. But, can't seem to figure out the trick. The diamond shaped part in the middle rotates 90°. The hex keyed screw in the center will turn either direction without any effect that I can tell. And the chromed plastic cover won't come off without applying force and I'm reluctant to do that without knowing that's the thing to do. Anyone have experience with these things? http://i112.photobucket.com/albums/n163/coy55boy/83%20Venture%20Royale/backresthanger.jpg
-
Like this hasn't been dicussed before! Ha! Last December when I stored my bike I removed all the plactic and bought it into my basement shop with the intention of making all the repairs needed on the tabs and broken or missing pins. Oh yeah! And the headlight cover .... or replace it. So a good cleaning and a long look at everything showed me I had more work to do than I thought and I needed stuff to do it right. A really good epoxy and some ABS flatstock to replace or create new tabs and build up cracked areas on the fairings. Ok..... a couple of things. I tried 5 different epoxies over the winter. All dual chamber, 2 part dispensors for hard plastics or ABS listed on the package. I bought one "quick set, short cure time" and well, not worth it. All of the ones I chose were about 24 hours cure time. But from what I found, and tried a lot of different ways of testing the end repair, that they all seemed to have the same result with proper prep of the plastic to be repaired. As for repair materials.........you find things in the strangest places some times. I found all kinds of ABS flat stock at a grocery store. For FREE!! The store was doing a reset in the pop isle and all those plastic bin and shelf sliders are plastic......ABS plastic. Got to talking to the manager and they had ordered all new signage for the isles and displays and had stacks of sheets of plastic on the back waiting to be thrown out. Checked it out....three different thicknesses of ABS sheets. Some were 3 ft square. That should hold me through the testing process. But anyway I wanted to share some of my ideas and the way repairs were done. I know the head light covers suffer from cracked screw holes on a lot of the bikes and mine had really gone South so I'll start with that. The mounting holes in mine had given out and were missing pieces. So I tried this. Grind or sand out any rough edges and rough up the remaining surfaces with sandpaper. I wiped it all down with alcohol to remove any loose particals and oil. Next I packed the areas I wanted to keep open with modeling clay. Better than trying to reshape it later. I wrapped the front of the head light cover around the repair area with wax paper to shape the outer side of the repair. Attach it firmly with masking tape and create a cup for the epoxy. Fill the area with epoxy and let it cure. It's going to be thick so a couple of days would be plenty of time. Peel off the tape and wax paper. Most the paper will peel off and what sticks is easy to sand off. Remove the modeling clay and you will see the basic repair. I used a Dremel with a sanding drum to shape the epoxy rough and then used a sanding block to final shape it. Mask off the corners again and give it a light coat of primer. You will see any defects that need to be fixed. A light sanding and another thin coat of the epoxy to fill the defects and after curing it's ready for the final sand down, primer and the new paint. The paint is the tricky part. Still waiting for the color matching to work out and then the air brushing will be done. So far......installed it......and it took a good tightening with no cracking. So much for the head light. Next......the side panel pins.
-
My Harbor Freight trailer worked fine on a 400 mile trip BUT it lost 3 of the 4 plastic end caps from the 2" square metal frame. Anyone else have this problem, and if so, how did you deal with it? The last one popped out onto the driveway while just setting there! I'm having trouble finding replacements, haven't yet contacted HF. I doubt if they can help, these end caps aren't even listed seperately in the parts list. Maybe it was the 90 MPH pass made on some slow moving traffic on state route 9 in northern Indiana?!?!?
-
 All, I have been researching problems with lights on the bike and have narrowed it down to possibly being dirty connections. Alot of posts say to spray WD40 and contact cleaner and that does a fairly good job, but my mechanic is suggesting that the chemicals will do harm to the plastic. He suggests dissasembling the switches, using files and sandpaper and cleaning them that way (if even possible, if they all come apart). What's the skinny on this? Has anyone experienced harm by using these products? Thanks, Woody
 -

83 fuel petcock valve
DesertRider posted a topic in Venture and Venture Royale Tech Talk ('83 - '93)
I changed out my fuel filter this morning - hate lining up that set-screw that holds the clamp to the fuel tank. When I went to open the fuel valve back up, the little plastic square knob on the fuel shut-off valve shattered like glass. As a temporary measure to get the gas turned back on so I can use it, I'm going to try to jb-quick weld a make-shift knob onto the sheared off plastic that's fairly flush with the metal valve body. If that don't work, anybody got any other ideas ? Also - when I cut the gas off, the indicator in the knob was vertical for on. I think I turned it one/quarter turn to the left to turn it off. Before I put any turning pressure on a glued on know, I wanted to ask if anyone with a working petcock can check and make sure that as you face the valve from the right side of the bike, that the valve needs to go 1/4 turn to the right (if it was a screw that would be the tightening direction to turn it on). Anybody got a petcock valve for sale ? -
i kind of don't like this era to much. it's a world made out of plastic throwaway crap. i think i will finish up my years enjoying the neat collector stuff i had when i was a kid, and things were high quaility, and hand made out of real metal and wood. since i won't be able to ride much longer, i think i'm going to start collecting and fixing up some of the neat things i had. i think i was awful lucky to live in the days when folks valued the neat things they had to work so hard to get. i feel sorry for the next generation that will have nothing but cheap plastic crap to fall back on.
-

I can hear the spark in my
Cruser posted a topic in Venture and Venture Royale Tech Talk ('83 - '93)
stereo speakers even when the sound system is off. I know this can't be good, the plug wires have the plastic sheathing on them and I don't see any spark jumping in the dark, but where else could it be coming from? -
well after long and thoughfull times. we had to put my Aunt in a home. age 69 and starting to forget us. and wasent takeing care of her self. but what i want to ask is any one out here interested in cassette tapes? i know most of us have these wonderfull players on our first generations. mine still works. so i will keep some of these for my self. there are close to 145 of them. some still new never played still wraped in plastic. ok now the bad there all country music from old to modern any one interested in some pm me im thinking of keeping most of the newer ones like alan jackson and so on but there are patsy kline, lorretta. stuff like that. pm me if any one would like a few. or if your looking for a certain one. i just might have it sincerly oldgoat
-
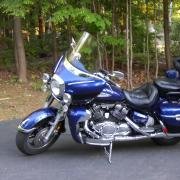
 Been working on this since Oct 09, Finally ready to try out on road-maybe tomorrow. Didn't take before pic, but was busted up plastic all black like bags. Still need to paint bags to match rest of plastic. I can see small problems with my paint job, but for most part I think it looks great. Anyone have a right hand dash vent that I am missing?
 -
Some plastic pieces needed
Cruser posted a topic in Venture and Venture Royale Tech Talk ('83 - '93)
Im looking for the left inside vent and the radio weather cover . If anyone has these parts laying around Please let me know. -
The front faring on the old 86 is acting like it's wanting to start cracking on me quiet a bit, so I think I've decided to make it a winter project. I would like to pull all the plastic off the bike, reinforce it somehow and maybe even give the old girl a new coat of paint. I know Plastic Weld is good for repairing cracks, but I really want to beef this thing up so I will never have to fix another crack again. Have any of you folks ever done anything like this? I want to start working on ideas now so I can put her up about the first of December and have her ready to ride by the first of March.
-
Since managing to lose the lid on the right bag I am on the hunt for a replacement. Though the bag itself is fine I figure the best way to search this is to see if anyone has a right side plastic molded saddlebag for a '98 RSTD. Am searching other sites however always start with the best. Thanks, Norm
-
 What are you guys doing about repairing/replacing the lower 2 fwd fairings due to crumbling ABS plastic? Mine are in pretty bad shape, and actually are beginnning to crumble at both attach points and, in the case of the lower fwd piece in front of the exhaust, it literally crumbled into several pieces. Did a search on some of the usual parts sites, but they are pretty expensive. Any ideas?
 -
 Just wondering if anyone has a part bike or something where I could get these plastic parts. Attached is a picture, I can look through the part diagrams for the numbers if it would help. Basically the plastic that the CLASS and CB sit on. 89 VR Thanks!
 -
 I'm wondering if anyone else has had this problem. On my right saddlebag the screws that hold the hinge mount plate to the bottom of the bag (see attached pics) are failing. The screws screw into the molded plastic and the plastic is disintegrating. To me it looks like they were overtightened at the factory. I just notice this a few monthes back. The left bag has no issues. I have been very careful not to overload or overpack the bags. I will be talking to my dealer about warranty and want to make sure I have as much info as possible. Comments appreciated. Thanks JR

.thumb.JPG.3f1849be2171e599daf53751f716091f.JPG)


.thumb.jpg.e030d8724ef3f2eadc94ab840d0f3801.jpg)
