Search the Community
Showing results for tags 'engine'.
-
Hi, What do folks use to keep the visible portions of the first gen engine cases clean and presentable looking? I have cleaned mine on occasion but its a job I don't like much, so they get pretty dirty each time before I'll do it again. They are very grimey at the moment. Generally, I use soap and water and a tooth brush. I have used carb & brake parts spary cleaners but my conscience nags me about environmental issues. Is there an easier & safer way? Spray on, hose off & go for a ride is the kind of thing I had in mind. I don't think she'd like the pressuer washer though. What's the best way? Thanks, Brian H.
-
I have a 2001 Dodge Intrepid, with 223,000 miles on the car. The engine went south on me an I don't feel it would be worth repairing it. I'm considering on replacing it with a remanufactured engine from Marshall Engines http://www.marshallengines.com The cost for what they refer to as a long block, with new heads would be 2,300.00 with a 3yr warranty unlimited mileage. Does anyone here have any knowledge on this manufacturer about their engines? Thanks
-
Having starting problems. More when the engine is hot. I've noticed that the lights are brighter when engine if reved then at idol. When engine is hot starter drags and sometimes won't turn over at all. Booster pack will make it spin and start with no problem. Just wondering if this sounds like the battery is cooked or if the stator is getting bad?
-
I bought an old mercury style carb stick from someone and when I used it today (1st time) it darn near sucked mercury into the manifold! I yanked the first and second tubes off just in time I think! I think I followed SOP? I warmed the bike, shut down, attached the hoses, started engine, and began to adjust 1and 2. I had bliped the throttle a couple times no problem and was teeking when 1and 2 started to continually rise. no change in engine noise though. Before I pulled the plug I noticed the Mercury had seaperated with air bubbles. Any clues? I'm baffled and I dont want to suck mercury in the engine!
-
I have a 1985 that starts and runs great, but it has a miss at idle. Cyclinder #2 has low compression (about 65 psi) I think it is the rings because after I put a little oil in the cylinder the compression went up to 100 psi. I can not find new piston rings anywhere. My question is do I replace the engine or just ride that way. It goes down the higway just fine and gets 38 mpg. I bought it last fall with 45600 miles on the odometer I'm thinking that was 145600 miles? The local salvage yards want $500 to $1000 for an engine. Does anyone here know of a source for rings for these bikes? Thanks in advance for your help, Randy
-
What does the yamaha book say about the interval adjustments for the valves on the engine? I'm at work and my book is at home. thanks gunky
-
Just changed the Coolant in the 83 today and noticed at the car parts place a product called "water wetter" it makes water/antifreeze pull more heat out of the engine and dump it faster into the radiator. http://www.redlineoil.com/products_coolant.asp Anyone tried this stuff? does it actually work? They claim 30 degree temperature drops.
-
On my way home yesterday I noticed the back of my legs were getting cooked, I attributed it to a suspected leak in the exhaust possibly dumping more hot air into the engine compartment. Rode a little this evening and same thing happened except that all of a sudden it would disappear, and come back, and disappear, and ... you get the picture. The temp gauge did not waiver from well in the green (one width above horizontal), yet it would seem that I am only getting intermittent cooling, yet the cooling reservoir is full. Is it possible to not have coolant flow through the engine, without it showing on the gauge? Where would I have a blockage for this to happen? What other cause could there be for this excess heat build up?
-
Ok guys got another question for you all, recently did a bunch of work to my 05 midnight ( plugs air filters carb sync oil change tires brakes) and i am noticing when its cold and i choke her to warm it up it isnt smooth, and only when cruising not under accel the engine seems to "studder" just a lil bit was expecting it to run smooth at say 40 riding through town but has a spudder maybe is a better word, you hit the gas and she seems fine, am gonna change the fuel filter but wonder if you guys have any other suggestions??
-
 Hello all, Thanks in advance for your help. I've got an '84 XVZ1200. I've owned it about 3 years. This season, it started doing something weird the 3rd or 4th time I had it out. As a result, I haven't been able to ride much this year. It's taken me a few rides to get things narrowed down, as it was fairly intermittent. When: Under light acceleration, no problems. Under moderate acceleration, it happens occasionally in 1st and 2nd. Under heavy acceleration, it happens repeatedly during acceleration through 3rd gear. I have eventually narrowed it down to a position of the throttle. "What" happens: I describe it as a lurch. Although, the lurch is the result of the engine dying for a split second, followed by a quick rebound when it starts going again. When I say the engine dies, I mean all 4 cylinders loose power (not a gradual power lag). My initial guess was fuel starvation, perhaps from gummed up jets, etc in the carb. But, after running 2 tanks with half a can of Sea Foam each, there was no change whatsoever. (I understand Sea Foam won't fix everything for sure... it may well be clogged.) I then started to rule this out because of discovering the quick, repeated jolts under hard acceleration later on (see below for "speed"). As a result, I started leaning towards an ignition problem. Its as if the coil(s) run out of spark. What strikes me as weird is that if I run the RPM's up slowly, I can get it to redline without a problem... the engine runs normal all the way up. So, it seems as if ignition is working OK under load (at high RPM). So, this brings me back to a fuel problem. Are there accelerator pumps in these carbs that might be failing (I assume not)? I'm still surprised that the fuel could "recover" if there is a momentary starvation so quickly with the speed of repeated jolts. To give you an idea of the "speed" of these jolts: If I rail on the throttle, I would guess it gets as "violent" as 4 times per second in the 2000-5000 RPM range, and weaning off to 1 time per second nearing redline. Does anyone have any idea what this could be? Many thanks in advance for your help! Regards, Scott
 -
Saw this on another Venture site. Honda Motor Company announced its plans for the new 2009 GL-2000 Goldwing The new 2009 Goldwing will replace the industry-leading GL-1800 Goldwing which went into production in 2001. The 2009 GL-2000 Goldwing will feature a larger 2.0 litre (2000 cc) 6-cylinder engine matched to a new 6-speed transmission. Honda claims the new engine will produce 165 horsepower and 157 foot pounds of torque. "This new powerplant and transmission should provide the kind of power and torque Goldwing owners have come to expect" a company official says. With the new 6-speed transmission, the 2.0 liter engine turns only 2,500 rpm at 70 miles per hour. The new Goldwing will increase the safety of its riders with standard ABS brakes on all 2009 models. A rider airbag is also available as an option on the level 4 model. The 2009 GL-2000 will be offered in the following configurations: Standard features on all 2009 GL-2000 Goldwing models: - New 2000cc 6-cylinder engine with 6-Speed transmission - Linked ABS brakes (front and rear) - Dramatically improved suspension with adjustable pre-load front and rear - 6.9 gallon fuel capacity - Adjustable seat (can be raised/lowered up to 1.5 inches) and rider backrest can be moved forward/backward. - Adjustable windscreen (electronically adjustable is optional) - Cargo capacity has been increased to 45 liters per saddlebag and 65 litres for the trunk. - Heated handgrips and heated seat - L.E.D. tail/brake lights and lighted trunk spoiler - New instrument cluster includes speedo/tach/engine temp/voltage/ambient temp/gear indicator/tire pressure/trip computer (see below) - DC Accessory Outlet in dash glovebox - Trip Computer displays: Miles to Empty/Avg Miles Per Gallon/Current Miles Per Gallon -Intercom features improved audio quality and passenger volume/on/off switch -Honda Warranty 3-year Unlimited Miles (up to 4 year optional extended warranty) BASE MODEL - includes comfort package (heated handgrips and seat), ABS brakes front and rear, 85-watt 4-speaker stereo with MP3/iPod connector. COMFORT PACKAGE - includes BASE model features + electonically controlled windscreen, Homelink remote garage door opener, integrated anti-theft device. $20,499 PREMIUM PACKAGE- includes all comfort package features + 120-watt 4-speaker stereo with MP3/iPod connection/optional XM/SIRIUS radio/Bluetooth capability, Electronic tire pressure monitoring system, integrated NAVI navigation system with Bluetooth remote programming capability using MapSource and compatible laptop, integrated fog/driving lights, HID Xenon headlights. SAFETY PLUS PACKAGE - includes all PREMIUM features + Rider SRS Airbag restraint system, rear-end collision proximity alert system, electonically controlled cruise control. In addition, the completely re-designed Goldwing offers owners lower maintenance costs with easier access to regular maintenance areas such as air cleaner, oil drain plug, oil filter and oil dipstick. A quick-remove engine protector plate has also been added to guard the oil pan from potential damage caused my road debris. The new Goldwing is expected to appear in dealer showrooms in September 2008 and will be offered in the following colors: Pearl White, Pearl Yellow, Pearl Orange, Illusion Blue, Black, Titanium and Illusion Red.
-
Thanks to Scott MacMartin from Ottawa Canada for this excellent article. 1984 Yamaha Venture Motorcycle Engine removal, repair, and re-installation Distance traveled since purchase 208,728 km (about 130,000 miles). This Venture was the second year of production, built January of 1984. My 1984 Venture was making a rumbling sound at idle, which went away if I pulled lightly on the clutch. I pulled the clutch cover off, and removed the clutch. It was apparent that the bearing behind this clutch was distressed. Late fall is a relatively nice time in Ottawa, Canada. Temperatures vary widely, from highs around 20 (70f) to highs barely above freezing. I put the bike in the back of the garage, borrowed my brother's 1500-watt heater, and set to replacing this bearing. The garage is now very pleasantly warm (and quiet too - I can hear my watch ticking). This is an excellent time of year to spend a bit of time in the garage with the Venture. First some tools. The Yamaha tool kit is useful, but not adequate for this job. I used the following additional tools: 1. Torque wrench (50 foot pounds) 2. Metric Allen key set 3. Feeler gauges 4. Hydraulic car jack with wheels (3000 pounds) 5. Socket set (10mm to 19mm) 6. 1000 pound press (homemade with 2by6 lumber) 7. Yamaha Shop service manual 8. Circlip pliers The engine can be removed in an afternoon, if you keep steady at it. Since my brain is not total recall, I place each part removed along the garage wall beside the last part I took off. That way re-assembly is just a matter of picking up a row of parts and bolting them back onto the bike. Clicking on the thumbnail photos will open a much larger copy of that photo. http://www.venturerider.org/engineremoval/photo_hdr.shtml_files/810a.jpgThe carbs, exhaust system, rear brake master cylinder, battery, and radiator have been removed. The bolts for the thermostat housing and the starter motor are a bit tight, and I have put WD40 on them. These bolts should remove easily tomorrow. A neighbor's child drops by to see what I am doing. http://www.venturerider.org/engineremoval/photo_hdr.shtml_files/811a.jpgThe bodywork has been removed, the YICS chamber, and the air deflector dams. Foot pegs and shift lever have been taken off. All of the engine attachment points (except three) have been removed. The small hydraulic jack with wheels will be used to lift and move the engine 2 feet to the waiting "pad". http://www.venturerider.org/engineremoval/photo_hdr.shtml_files/813a.jpgThe engine has been out for 10 seconds or so. The engine rests on a piece of blue Styrofoam. It is apparent that the engine is also cosmetically not well - just have a look at that chrome cover on the clutch housing!! The radiator hoses are still attached. On re-assembly, I found it easier to put the radiator hoses on after the engine was in. http://www.venturerider.org/engineremoval/photo_hdr.shtml_files/814a.jpgI am working in a fairly small space - the back half of a one car garage. The blue and black boxes hold my tools. The floor has the parts, in order of removal - drive shaft, exhaust components, radiator assemblies, starter motor, and engine mounting hardware. http://www.venturerider.org/engineremoval/photo_hdr.shtml_files/815a.jpghttp://www.venturerider.org/engineremoval/photo_hdr.shtml_files/816a.jpghttp://www.venturerider.org/engineremoval/photo_hdr.shtml_files/817a.jpgSeveral photos of the failed bearing. You can see that the balls and race are perfectly fine, but the ball-bearings are all bunched to one side. The bearing cage has failed. http://www.venturerider.org/engineremoval/photo_hdr.shtml_files/818a.jpghttp://www.venturerider.org/engineremoval/photo_hdr.shtml_files/819a.jpgThe oil sump has been removed. Two views of the oil pump. You can see small bits of the bearing retainer on the oil pump intake screen. Later, I found other pieces trapped in the baffles on the sump itself. http://www.venturerider.org/engineremoval/photo_hdr.shtml_files/820a.jpgThe various items that attach to the side of the motor are removed (stator, coolant and clutch housings, and the clutch slave cylinder). The oil pump is removed as a single unit, and is not disassembled. The crankcase bolts are loosened in order, and then removed. The crankcase easily pops in half. http://www.venturerider.org/engineremoval/photo_hdr.shtml_files/821a.jpgI have placed the shaft with the failed bearing in the top half of the crankcase for this photo. It is only now that I realize that a 2ton press will be needed to remove this bearing. It is a press fit onto the shaft!! This should be an amusing problem to solve. Perhaps I will sleep on it... http://www.venturerider.org/engineremoval/photo_hdr2.shtml_files/823a.jpgI set the shaft with the stubborn/broken/press fitted bearing aside in the kitchen while I wait for the new bearings to arrive from the dealer. Yamaha Canada is amazing. EVERY single part that I order is in stock in the central warehouse in Toronto, and will be here in three days. Nothing is back-ordered or out of production. It is hard to believe that I am ordering parts for a 16 year old motorcycle. http://www.venturerider.org/engineremoval/photo_hdr2.shtml_files/824a.jpghttp://www.venturerider.org/engineremoval/photo_hdr2.shtml_files/825a.jpgThis is our first view of the upper crankcase. The shaft with the failed bearing is of course in the kitchen, so you cannot see it here. The rear shaft (the "driven" gear set) has two bearings that I will be replacing also. I will have to use a press to gain access to one of these bearings also. http://www.venturerider.org/engineremoval/photo_hdr2.shtml_files/826a.jpgI now can guess why this clutch bearing failed. It is a standard ball bearing. However, unlike all the other ball bearings in this engine, this one ball bearing set must resist sideways thrust every time you pull on the clutch. I show here the clutch pushrod, the seals (I ordered new ones), and the bearing. http://www.venturerider.org/engineremoval/photo_hdr2.shtml_files/827a.jpgThe shift mechanism has long seemed a confusing piece inside the motorcycle. I can understand its design when I look at it closely in real life, but in the photo it looks confusing once again. To me, a planetary gear set would seem a better way to provide gearing on motorcycles. http://www.venturerider.org/engineremoval/photo_hdr3.shtml_files/831a.jpgThis is one of the covers that I cleaned up. The clear-coat applied by Yamaha back in 1984 had weathered a bit over the last 200,000km. This was removed with a paint remover that "removes epoxy paint". Does the job just fine!! Anything that I missed the first time comes off with a second application. http://www.venturerider.org/engineremoval/photo_hdr3.shtml_files/832a.jpgIn areas that the cover had corroded, a gentle circular sanding with 400 grit wet sandpaper brought up a uniform appearance. I use soap with the sandpaper to keep the sandpaper from loading up. http://www.venturerider.org/engineremoval/photo_hdr3.shtml_files/834a.jpgPolishing is a peculiar task. Place a small bit of polish on the rag, and then polish lightly until the polish dries out. At that point of dry friction, more vigorous polishing yields excellent results. I initially used a white shop cloth, but later used "White Swan absorbent and strong paper towels" with results just as good. (and I did not mind throwing these towels out after a single use!) http://www.venturerider.org/engineremoval/photo_hdr3.shtml_files/835a.jpgThese are the three products, and the most excellent result. I purchased a high temperature clear coat spray can used by the local Harley Canada dealer, and trust that it will provide an excellent long term protection. http://www.venturerider.org/engineremoval/photo_hdr4.shtml_files/849a.jpgI went to the lumber yard, and for 5 bucks purchased a length of 2by6. Screwed it together, and drilled a hole of suitable size for the disassembly of this shaft. Note that the wheels on the jack are not supporting the force. A section of 2by6 is directly under the jack so that the jack does not try to move while under load. http://www.venturerider.org/engineremoval/photo_hdr4.shtml_files/852a.jpgI push the shaft up effortlessly with the car jack, and the spring on this shaft compresses. The split washers appear, and it is a simple process to pull the split washers and disassemble the shaft. These two split washers, and the full washer behind them, were the cause of all that "second gear" grief in the 1983 and 1984 model years. I had replaced these split washers almost 100,000km ago when my second gear had failed and thought it might be a good idea to change them again. There was no need. Less that a thou had worn off these washers in those 100,000km (by comparison, the original split washers had worn half through in the first 105,000km, causing the second gear failure). http://www.venturerider.org/engineremoval/photo_hdr4.shtml_files/853a.jpgI have now replaced the bearing on this shaft, re-installed the spring and gear/bearing (the gear and upper bearing are a single unit and do not need to be disassembled). Apply a little force with the car jack to compress the spring, insert the washer and split washers. Release the car jack and the shaft is ready to go!! http://www.venturerider.org/engineremoval/photo_hdr4.shtml_files/854a.jpgThis same press was used to remove the failed bearing behind the clutch, and re-install the new one. The forces on this operation are significant - I would guess a thousand pounds force to push the bearing onto the shaft. While I replaced many items as part of this project, this one bearing was the only item that absolutely required replacement. http://www.venturerider.org/engineremoval/photo_hdr5.shtml_files/855a.jpgThe cases drop together (with care to ensure that it IS easy, or something is out of place). Bolts on the lower cases and upper cases hold the two sides together firmly. I use Three Bond to ensure that the cases do not weep. You can see the 8 main crankcase bolts ready to be tightened. http://www.venturerider.org/engineremoval/photo_hdr5.shtml_files/856a.jpgThe oil gallery has been dropped in place. The oil pump will be added after these bolts are tightened. Then the sump is put on, and the bottom of the engine is now completely assembled. I roll the engine up-side-up and torque the upper crankcase bolts to specification. http://www.venturerider.org/engineremoval/photo_hdr5.shtml_files/860a.jpgThe clutch housing needs to be tightened onto the shaft that it rotates on. We will need a "special tool" to hold the basket from turning while we provide the correct tightening torque. http://www.venturerider.org/engineremoval/photo_hdr5.shtml_files/861a.jpgOnce again, wood is my special tool maker. I drill a hole in the lumber so that I can fit the socket through, and fasten two arms (purchased for 29 cents each) so that they slide into the slots on the clutch basket. Then torque to 600 inch pounds, by far the highest torque of any bolt on this engine. http://www.venturerider.org/engineremoval/photo_hdr5.shtml_files/862a.jpgThis is the setup. The torque is 50 foot pounds, so I use the empty frame of the Venture to hold the piece of lumber from turning. There is a lock tab under the bolt which must be bent over to ensure this bolt does not move. I bend it over with a screwdriver. I re-install the clutch plates, and torque down the pressure plate. The clutch housing can now be installed. The engine is ready to be re-installed in the bike. http://www.venturerider.org/engineremoval/photo_hdr6.shtml_files/863a.jpgI am very pleased at the appearance of the cams. They show no chipping, scoring, or other signs of stress. The exhaust valve clearances should be slightly higher than the intake valve clearances. http://www.venturerider.org/engineremoval/photo_hdr6.shtml_files/864a.jpgA detailed examination shows the tolerances to be good. On the chart, some of the tolerances look "too tight" by half a thousandth of an inch. I am not going to replace a shim which is only half a thousandth of an inch out of range. http://www.venturerider.org/engineremoval/photo_hdr6.shtml_files/866a.jpgThe valve covers need a little cosmetic refreshing as well. I ran these through the same process as the other covers, although I added "washing in the dishwasher" to get the crevices perfectly clean before spraying on the clear coat paint. http://www.venturerider.org/engineremoval/photo_hdr6.shtml_files/868a.jpgThis multipart piece sits on top of the engine between the cylinders. It too needed shining up. On assembly, I used Three Bond to ensure that the part would not weep. (this part is normally sealed by two intricate O-Rings. The O-rings do their best, but are not quite up to the task on my Venture.) http://www.venturerider.org/engineremoval/photo_hdr6.shtml_files/870a.jpgThis multipart piece seems to do many tasks!! It has passages for coolant, sections for crankcase ventilation, and piping for high pressure oil to the cylinders. I will be happy to install this part and forget about it. I really hope it does not get an oil mist on it like it did over the last 100,000km http://www.venturerider.org/engineremoval/photo_hdr6.shtml_files/871a.jpgThis is the starter motor. If you remove the two long bolts, the motor comes apart for maintenance. The brushes are in excellent shape. This starter motor needed just a little cleaning up inside and out, and that's all. http://www.venturerider.org/engineremoval/photo_hdr6.shtml_files/873a.jpgThe multipart piece is installed. The cam covers are being installed. The cam covers get new gaskets, and new "seals" around each of the bolts. These seals have never been previously replaced which is perhaps why they misted oil onto the cam cover. This task could normally be done with the engine "in" the frame, although it is vastly easier to accomplish with the engine "out" http://www.venturerider.org/engineremoval/photo_hdr6.shtml_files/874a.jpgThe engine is ready to install!! http://www.venturerider.org/engineremoval/photo_hdr7.shtml_files/877a.jpgThis is a task that I am a little apprehensive about. I am not exactly a strong man, and I am nearly 50 years old. This engine will have to be balanced on the jack and then kept balanced while I move the jack under the frame. The back end of the engine must go in first, since the drive shaft part must fit into the swing arm. Once that is in place, the engine can be straightened out and bolted in place. http://www.venturerider.org/engineremoval/photo_hdr7.shtml_files/879a.jpgThe drive shaft part is nicely in the swing arm, and the engine can now be straightened out. I have lifted and lowered this engine a number of times by a quarter of an inch or so while I maneuver it around the various obstacles. Even so, I break a small tab on the upper fairing. I will repair this break later with a thin aluminum sheet. http://www.venturerider.org/engineremoval/photo_hdr7.shtml_files/882a.jpgThe engine is back in!! I have held it with two bolts at the rear of the engine and an incorrect temporary bolt at the front of the engine. I am so relieved that this step has been successful that I stop for an early Saturday lunch. http://www.venturerider.org/engineremoval/photo_hdr7.shtml_files/884a.jpgInstallation of the starter motor, and the oil filter (I use an aftermarket spin on filter for convenience). You can see the "incorrect bolt" just above the starter motor, which is temporarily holding the motor in place. http://www.venturerider.org/engineremoval/photo_hdr7.shtml_files/885a.jpgThe coolant system gets installed, with new o-rings all around (the coolant system would occasionally weep a bit when left overnight. I had purchased the seals about a year ago but had not "got around to" replacing them.) The radiator sits ready to be installed next. http://www.venturerider.org/engineremoval/photo_hdr7.shtml_files/886a.jpgThe radiator is in and filled with 50% aluminum antifreeze and 50% distilled water. The right frame tube needs to be installed next. This frame tube is one of the few parts that requires "Loctite Blue" when assembling. http://www.venturerider.org/engineremoval/photo_hdr7.shtml_files/887a.jpgHere is a task that I have not ever done!! I have never opened the top of the rear master cylinder and cleaned it out. Turns out there is a little diaphragm (just like in the handlebar units) that could use a little cleaning. Bled this rear brake, the clutch system, and the front brake. http://www.venturerider.org/engineremoval/photo_hdr7.shtml_files/888a.jpgHere is the jack that Scott used. Also the heater which made this job so relaxing and comfortable. On the heater sits the air cleaner box which has just been de-greased. And to the right on the floor, a large socket used to adjust the swing arm pivot bearings. Well, this is the end of the photo story. The rest of the bike needs to be put together. And then I expect to drive many, many years. I will let you know at 300,000km....
-
I have a 1985 VR with the dreaded bad second gear. I want more power and a full functioning transmission. My idea is to replace my engine with one out of a Vmax. Has anyone made this swap?
-
I am trying to calibrate my new SyncPro Carburetor Tuner. I checked the idle, it is at 1000rpm. I attached the short hose to Cylinder 1 -- which I believe is the rear cylinder on the left side, and normally wears the cap instead of the tube. See picture. When I start the bike to calibrate, the leftmost column rises all the way up and past the scale. The other tubes are also very high, but don't get sucked into the engine. It seems the engine has too much vacuum. What should I do? Should all the other vacuum tubes and caps still be attached? Should I reduce idle? I'm getting frusty, Dave
-
I usually ride with a 3/4 helmet and usually listening to music. Today I went out with the half helmet and I couldn't believe how noisy that engine is. It's like I can hear all of the mechanical noises that are going on in there. Are they all like that?
-
 This could be a problem on any bike and I need some advice on it. We found the head bolt loose on a Yamaha Radian. I think that's the name. The threads were all on the bolt. Of course the bolt goes through the cylinders and is close to the middle of a 4 cylinder inline engine. Is there a way to repair it? We havn't had the bike apart and it doesn't appear that the head has been off. I've had several ideas but need some input. We really didn't want to take the engine apart. Is there a way to rethread it or maybe a stud that is self tapping with a larger set of threads. I had some head bolts that pulled out of a VW engine years ago and I found a replacement that you could put in that cut it's own threads.. That worked great long ago. Any ideas?
 -
I have an '88 Venture Made in '87 with 35K miles. Not a Royal I am getting a strong vibration at 3,000 to 4,000 rpm, strongest at 3,500. I get this vibration in all gears including neutral with the bike not moving. It does not mater if I am accelerating hard, steady speed or decelerating. It is strictly engine rpm dependent. Above or below that rpm and it is nice and smooth. Any ideas of where to start looking?
-
Hello all, I just got a 88 1300 Venture Royale and well.. all the gears work fine.. but when I put it into 5th gear it makes noise like something is loose and bouncing around in the gearcase. Is there something common I should know about? or am I going to have to pull the engine apart and rebuild my transmission? I hope not. I just traded two good working hondas for this yamaha. I do have to admit .. this is one nice riding and handling bike.. I also couldnt get the cruise control to work either.. Shawn
-
You bought are correct It wasnt a hard decision to make .You think I'd give up fishing . This bike has it all The Poor Man BMW thats what they are called up here,I had a 93 Klr before which was adequate around town BUT this new revamped version is made for Touring Supermoto What a Blast to ride , Boy can you lean into the corners scrap the boots and cruise 75-80 mph all day like nothing and presently Im getting 62 mpg Imperial gallon I still waiting to 2 accessories a taller windshield and a tank bag The engine is the only thing made in Japan The rest of the bike was made in Thailand Even the Dunlop K750 are made there .No wonder we have no jobs on this side. I was surprised that the speedometer doesnt have a dual reading all kms Hopefully I will see some of you next year But definately next year:dancefool:
-
Has any body ever used nitros on a venture, was considering it just to be differant, how do you think the engine would hold up under minimum amount,, i Know it sounds nuts but why not.
-
I'm a big gearhead. changing the engine in a car is not hard for me. Even changing to an engine that is not supposed to be in there is only moderately hard for me. I have a nice tiny IHI RHB31 turbo sitting here that would fit nicely on the 1st gen venture. Has anyone ever tried turboing a venture or Vmax?
-
 Today on my way home from work, I was cruising along on my 99 RSV at 60mph in 4th gear. Radio off, cruise control on. All of a sudden the engine died as if I'd hit the kill switch. Initially I thought that the cruise had just dropped out. Nope. Checked the kill switch, hadn't hit it. Flicked it back and forth a few times and tried to restart. Nothing. I have read all the posts on ignition switch failure and this sounds different. All my lights, radio, dash lights and instruments are working normally. The only problem is that when I hit the starter button nothing happens except for the engine temp light (red light on the lower right of the instrument panel) comes on until I release the button. I can hear the fuel pump run, 4-way flashers work, horn (Stebel) works....everything but the start circuit. I'm thinking kill switch failure. Any of you wizards have any thoughts before I start tearing her apart? Sure am thankful that this didn't happen last week in the middle of my 2000 mile Appalachian mountain range trip! Joe
 -
Hey guys, on my 06 Midnight, I did a bunch of maintenance on it this week that the ol' girl is a teenager again.. full of spirit and light on her feet.. The ONE thing I could never do with this bike is reach the rev limiter when accelerating onto the highway as the engine sounds like it might truly kill itself.. no joke.. I'm almost wondering if the previous owner disabled it somehow.. Yesterday was a a fun day after installing leveling links, flushing hydraulic clutch fluids, tightening the steering head, etc etc.. that I pushed the bike super hard to get a feel of the bike anew again.. no kidding it's like having a new bike.. wow. When accelerating hard and fast yesterday, I tried to reach the rev limiter to see and feel where it was, I was bound and determined to feel the 'tripping of the engine' that indicates the rev limiter kicking in.. but a quick glance to the speedo I spotting the engine oil light coming on and go off as I shifter, though never having reached the rev limiter.. Having just done an oil change, I wondered if I was low, but the fluid level in the sight glass shows half up the glass.. Is the sensation of the rev limiter kicking in on the Venture as noticeable as on the VStar for example? Does your oil light come on when YOU hit the rev limiter.. Is there something else I should be checking as well ? What speeds does your rev limiter kick in when in first gear? My biggest fear is blowing the engine because the previous owner had disengaged the rev limiter and forgot to tell me.. ya know? Wind speed and BUGS.. wooo hoooo
-
Thought I would run this by some of you... I just did an oil change and decided to switch to Amsoil 20W-50 and new filter. Started it and Drove it about 3 miles, shut it off and it set for a little while, when I restarted it, the engine started tapping (like valve noise). No engine oil light came on, but noise went away after about 30 seconds... Oil level was at the top of the fill mark (with engine off). Never did this with Dino oil, just wondered what caused it to start the loud ticking noise.... Sounded like it was coming more from the front of the engine. It did do it again, but not as loud and not as long.... anyone ever experienced this happening to them ?
-
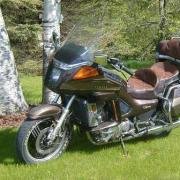
been looking to sell my 86 and can,t seem to get what i want for it so i am considering parting it out on e-bay. i have never done this and don,t want to go thru the time and effort if it,s not worth it. has anybody parted one out recently? is the market fairly strong for this? does the title go with the engine or not? just looking at my options and thanks for any thoughts/ideas. al


.thumb.JPG.bfcefdc0995aabc77d6b4e8cf9125c91.JPG)