dingy
-
Posts
5,403 -
Joined
-
Last visited
Content Type
Profiles
Forums
Gallery
Events
Store
Everything posted by dingy
-
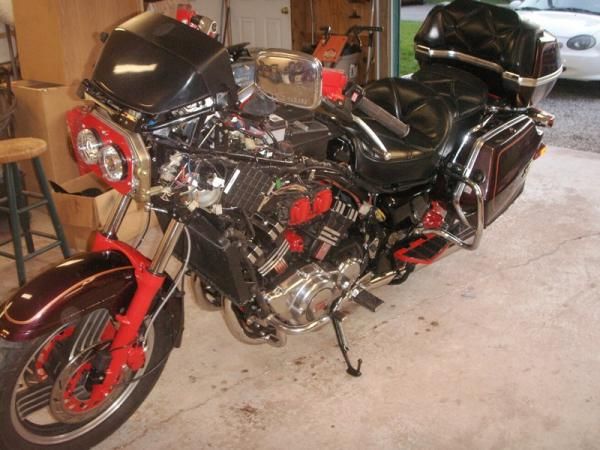
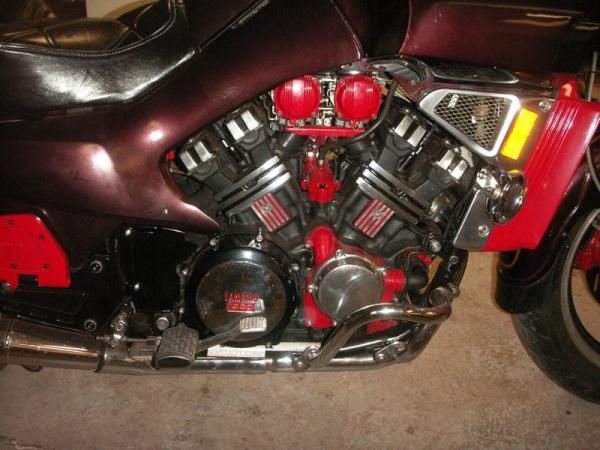
From the album: Rebirth of an 83 Venture
-
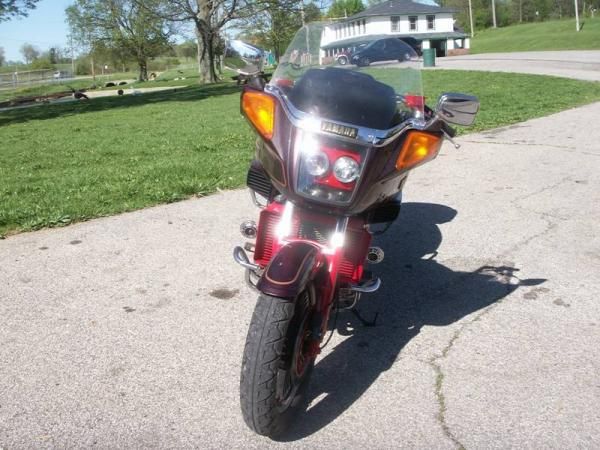
From the album: Rebirth of an 83 Venture
-

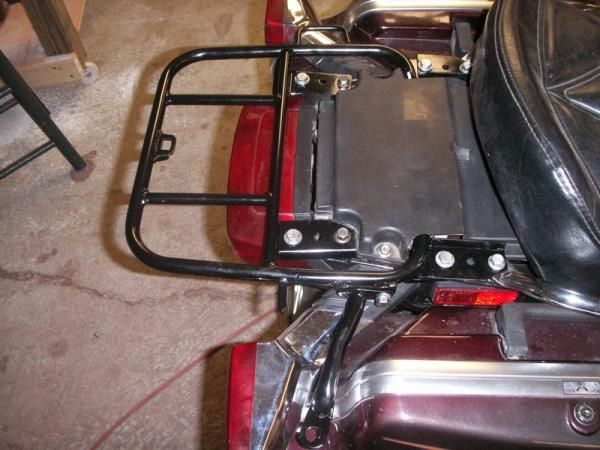
Backrest moved rearward 2" to give passenger more room. Required reworking antenna mount.
dingy posted a gallery image in Member Albums
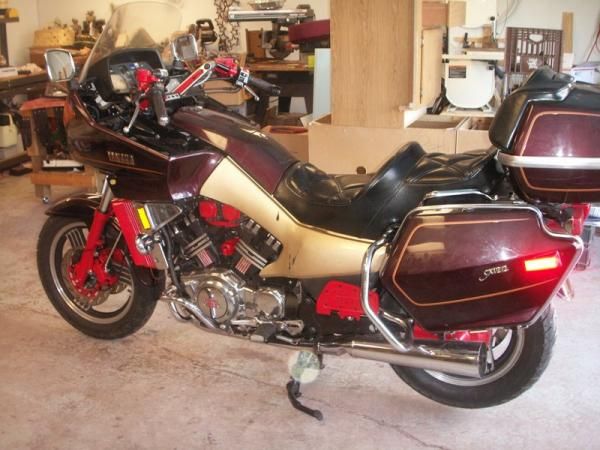
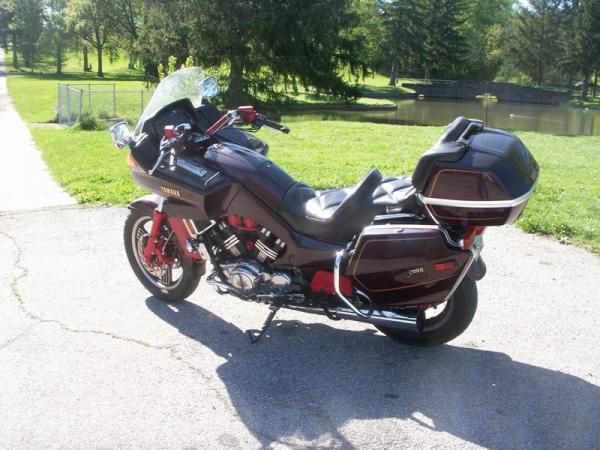
From the album: Rebirth of an 83 Venture
-
From the album: Rebirth of an 83 Venture
-
From the album: Rebirth of an 83 Venture
-
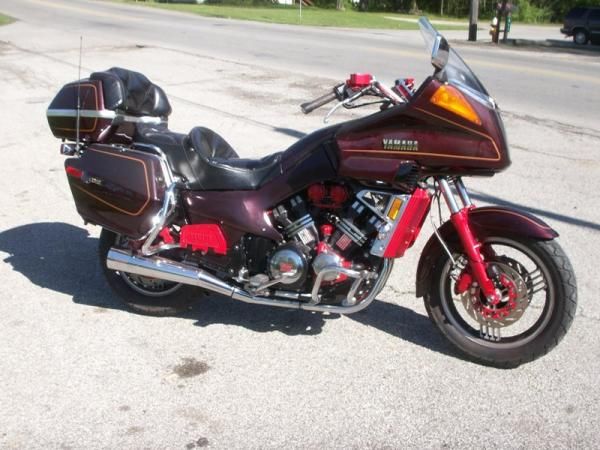
From the album: Rebirth of an 83 Venture
-
From the album: Rebirth of an 83 Venture
-
A little slow on the draw there Bubber. The thread is almost week old. He was there last week. Nice try to suck up. Gary
-
You may also need the right side console cover that was made to hold the CB head. Gary
-
I had an opportunity to resolder the circuit board in a spare CMOS unit from my original MKI instrument cluster. I was able to get a fairly good close up picture of an example of some cold solder joints that I thought I would post. This may be helpful to someone that has never seen a cold solder joint. There are 8 large connections in picture that all show some signs of a cold joint. The circular ridge around the base of the soldered joint is the sign of a cold joint. The worst case is the far right joint. The smaller connections in the upper right corner are good solder joints. For a size relationship, the large row of 4 joints is 3/4" in length. Gary
-
There is an antenna matching box. Ties radio & CB together. Below is a link to an 86-87 bike that shows CB wiring in center area of schematic. http://www.venturerider.org/wiring/86-87%20Yamaha%20Venture%20DS%20Wiring%20Diagram%20Rev%20D.pdf Also, please go to user cp & put your bike info in your profile, it helps people help you. Gary
-
Now stuck on clutch
dingy replied to bkuhr's topic in Venture and Venture Royale Tech Talk ('83 - '93)
Did you have clutch push rod out of engine? If you put it in backwards I believe it will give you these symptoms. There is a dimple in the end of rod that goes towards right side (clutch side) of engine. The ball bearing sets in this dimple. Middle picture is towards slave cylinder. Last picture is towards clutch plates. Gary -
Low vacumn during carb syncing
dingy replied to Scudrunner's topic in Venture and Venture Royale Tech Talk ('83 - '93)
This will be interesting to what is causing it. If it runs decent and idles OK its got to have compression. If its got compression & runs good, it has to be sucking air through the carbs to get air fuel mixture. If its doing all that there seems like there has to be vacuum below the throttle plates at idle. Gary -
I have a few small odds & ends laying around from my MKI rebuild that I don't feel like putting on ebay. I just put a lot of 1st gen stuff on ebay, including a set of side covers & knee fairings that are in good shape. Do an advanced search on seller ID dingy101 if interested. 1st freebie is a louver from a knee fairing. Only one of the louvers is there but it could be moved to another unit. I also have a complete set of brake lines. I really don't advocate using old parts like these, but I understand someone may need them that can't afford new ones. MKI headlights. Plastic engine heat fairings. Couple of sets of MKI cams. Valve covers California air unit. Thermostat housing Horn set MKI clutch - missing one full friction plate. All this stuff is in need of cleaning. All I ask for it is actual shipping costs. Gary
-
I have ordered stuff from McMaster Carr at 6:00 PM and I had the parts by 10:00 the next morning with standard FedEx home shipping. Never have had any problems with them. Gary
-
motor hesitates after tire change
dingy replied to a topic in Venture and Venture Royale Tech Talk ('83 - '93)
Where did you reinstall this piece of baffle? Is it a piece of about 1/8" thick material with a bunch of small holes in it? If it is, it probably came out off collector or one of the internal baffles more rearward on the muffler. I don't know of a specific piece like what you describe in the exhaust. But at any case I don't think it is related to performance issue. Gary -
I am sorry, but that is not a real 2nd gen. I do not see any suedo-air cooling fins anywhere. Other than the radiator, it's a nice looking scooter. The radiator however, looks like an after thought that was swiped off of a Mack truck. Gary
-
electricians please help
dingy replied to curtis's topic in Venture and Venture Royale Tech Talk ('83 - '93)
Look at my next to last post. I linked it there for you. Gary -
Three different situations. Three different responses. Your head light brightens as you increase the RPM's and the stator starts putting out more amperage. Look at next to last post in this thread for explanation. http://www.venturerider.org/forum/showthread.php?t=42853 The slow cranking is possibly due to a poor starter ground path. Also increasing battery cables can help. Look at next post for starter ground fix. http://www.venturerider.org/forum/showthread.php?t=46890 Last problem dealing with class system could be cold solder joints in control head. Look at this link for fix. http://www.venturerider.org/forum/showthread.php?t=493 Gary
-
electricians please help
dingy replied to curtis's topic in Venture and Venture Royale Tech Talk ('83 - '93)
Curtis, Below is link to switch cleaning Evan mentioned. http://www.venturerider.org/forum/showthread.php?t=42433 I didn't suggest this in my earlier post because you said in your post you had opened the switch. My bad. Gary -
If there is nothing behind the bolt, meaning you can drill all the way through, here is an idea. As previously suggested, drill a hole as close to center as possible, which you already have done obviously. Enlarge this hole to as big as possible without engaging tapped threads. I have successfully used a very small 3 corner file, to the file a notch down through the bolt portion of the threads. Do this in two places about 90 degrees apart. Then with a small chisel, knock out the smaller piece. Then the remaining 270 degree piece can be bent in a little to loosen and work it out. This method will cause problems if the bolt is of a sealing nature, because it will leak through the 2 notches that are cut into tapped hole. But otherwise it is a workable solution upon occasion. Gary
-
electricians please help
dingy replied to curtis's topic in Venture and Venture Royale Tech Talk ('83 - '93)
Curtis, Are you getting any icons on the cluster display? Does the display cycle through all icons when you turn the key switch on ? Also check the fuse and verify that the fuse holder is tightly griping the fuse. Sometimes the holders deteriorate. There could be enough contact there to read voltage, but not enough to pass sufficient current to light bulb. Do you have a voltage reading at the headlight bulb connector ? If you unplug the headlight, you should then get a warning on the cluster display. Post what you find, and I can try to narrow it down further. How did fuel gauge end up? Gary -
Below is a link to a source for a number of components & relays. http://www.parts-express.com/home.cfm Very fast shipping & great prices. Gary
-
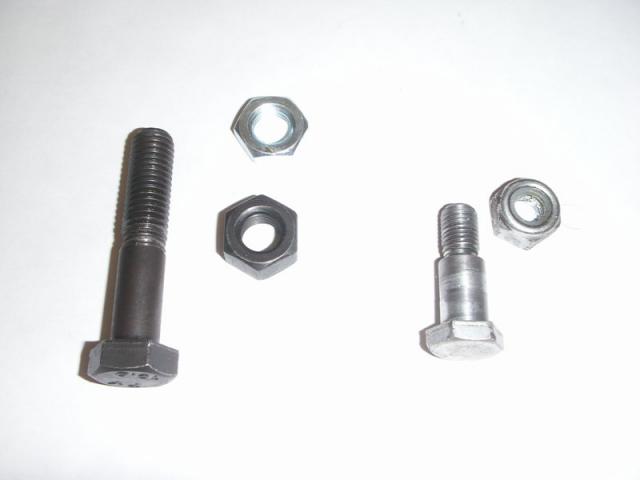
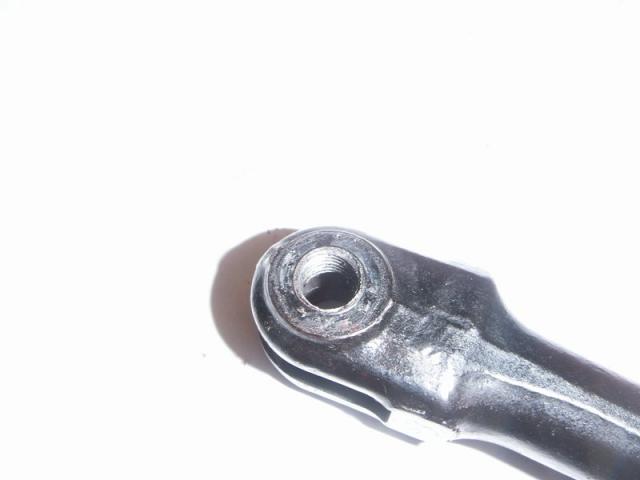
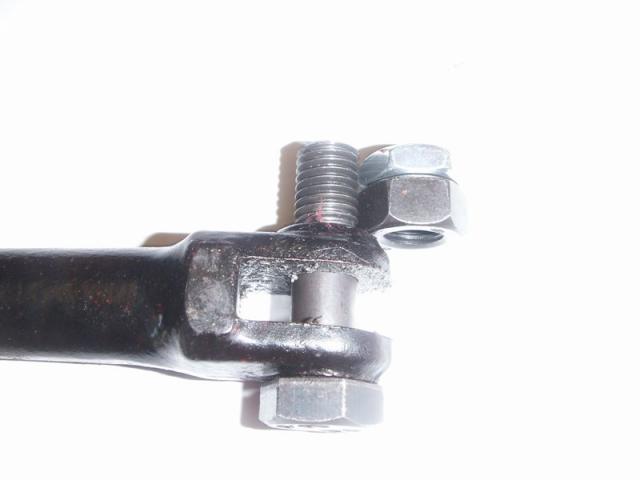
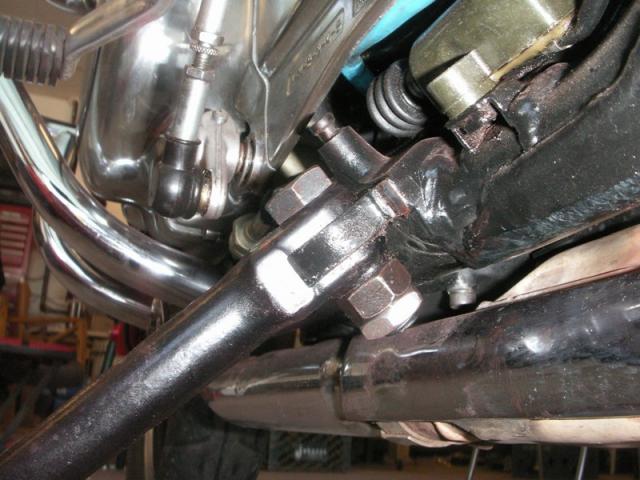
This is in response to snaggletooth's post earlier about his side stand bolt breaking. http://www.venturerider.org/forum/showthread.php?threadid=48307 I started a new thread so people might look at it that had already viewed his. As was noted in previous post, the undercut on the shoulder bolt is deep. The threads are 10 mm on the shoulder bolt and the undercut is about 7.90 mm. This is about 20% of the bolts threaded diameter that has been removed. The shoulder portion of the bolt is 12 mm. I used a grade 10.9, 12 mm x 1.75 mm x 60 mm long partially threaded hex head bolt, a grade 10.9 hex head nut and a standard grade jam nut (hardware didn't have grade 10.9 jam nuts).Grade 10.9 metric is very close to an imperial grade 8. The hardware store had 12 mm x 1.50 mm bolts, but the unthreaded portion was a smaller diameter than the 1.75 mm. I would have rather had the finer threads. I used the 60 mm length because the unthreaded portion of this bolt was just the length that was required to pass through the front and back wings of the side stand. I did not want threads in that area, due to the threads would quickly wear down in diameter and increase play in side stand. The shoulder on the hex bolt measured 11.50 mm, just slightly smaller than the existing shoulder bolt by about .005". I cut the shoulder bolt to roughly 45 mm (1.75") long. Then drilled out the threaded portion of the kickstand with a 15/32" drill. This gave a very snug fit for the unthreaded portion of the new bolt. The drilled hole in the back wing is still a smaller diameter than the existing hole in the front wing of the side stand, so I do not feel it weakened the overall assembly. Replaced the side stand. I used blue loctite on threads. Tightened hardened hex bolt up until there was minimal play in the end of side stand, then ran jam nut up against hex nut. Cost was under $5.00 and took less than an hour including parts run. Comparison of new bolt & existing shoulder bolt. Back wing of side stand prior to drilling Stack-up of new fasteners after cutting hex bolt to length. Picture of side stand prior to spring being reinstalled. Gary

-
Ignition switch heating up
dingy replied to kkent66's topic in Royal Star Venture Tech Talk ('99 - '13)
Attached is a write up I did describing relays & wiring as it pertains to our bikes. On the last two pages there are two schematics for bypassing most of the current that is running through the main switch on an RSV. One is a before & second is an after version. File is 1.5 meg in size. Gary