dingy
-
Posts
5,403 -
Joined
-
Last visited
Content Type
Profiles
Forums
Gallery
Events
Store
Everything posted by dingy
-

1986 VR Running on Three Cylinders
dingy replied to twigg's topic in Venture and Venture Royale Tech Talk ('83 - '93)
Diodes needed are 1N4001 up thrugh 1N4006. 1N4001 are rated at 50V reverse bias. which is plenty, higher numbers just increase rated reverse bias voltage. Won't help performance at all. You can get a pack of 25 from radio shack for about $5. They are random 1N4001 through 1N4006, does not hurt to mix them in this case. The marked cathode end is what is important that it is put in to match 8 diodes being replaced. Very low wattage soldering iron, to much heat will lift traces right off citcuit board. Gary -
1986 VR Running on Three Cylinders
dingy replied to twigg's topic in Venture and Venture Royale Tech Talk ('83 - '93)
If the tach is working when cold, it indicates that the #2 cylinder is firing at the TCI. Could be a coil problem still. Tach trigger is connected to wire in wiring harness between TCI and coil input leads. For the idle condition not firing on #2 I would suspect low speed circuit in carb. A dirty connection at the TCI will also cause the tach to be 'jumpy' or nonresponsive. 8 pin connector at TCI, Gray wire is the suspect here. Gary -
I am sort of puzzled by the ebay disclaimer that this model does not require bending or flattening the cross brace? Considering that the adapter is circular and can tighten up at any given point on its axis, and the filter is also circular, it would seem the only way to accomplish this would be to use a smaller diameter spin on filter than the other guys use. Smaller diameter filter means less filtering area and an increase in back pressure on system Not saying the cross brace is an issue, but there only seems to be one solution to this. And it may cause unwanted side effects. Gary
-
Just another Educated Consumer. Gary
-
clutch reservoir screws stuck
dingy replied to jdsauter's topic in Venture and Venture Royale Tech Talk ('83 - '93)
I will send you 4 new screws for the front master cylinders on a 1st Gen for $6 including US & Canadian shipping. Also will fit rear master cylinder. 6 of them for $8 These are made from 316 Stainless Steel which is very corrosion resistant. These are Flat Head Socket Cap Screws. A metric allen wrench is used to install. Have used these for three years and they are great. PM me. Gary http://i1007.photobucket.com/albums/af193/gdingy101/mastercoverscrews.jpghttp://i1007.photobucket.com/albums/af193/gdingy101/MasterCover.jpg -
Ignition issues 83 Venture
dingy replied to jeffg's topic in Venture and Venture Royale Tech Talk ('83 - '93)
PM me. I have an 83 unit that came out of my bike. It has had the diodes replaced that have been known to kill the TCI's. This was done as a preventitive measure. TCI runs fine. Gary -
That is correct, I got the Home & Student version of Office and it wasn't in it. Home & Student was about $139 for three licence package and they want another $139 for Outlook. I didn't realize I wasn't getting Outlook when I got the H&S package. I have tried Mozilla Thunderbird but I can't figure out how to import my legacy Outlook 2003 data into it. Gary
-
I got the same thing Monty got !! A put it together your self computer. Also got Windows 7 by MicroSucks, they have decided not to include Outlook (email program) in Windows 7. That is being an issue. GAWildKat (Tricia) helped me with parts selection. Thank You !! Wife got a Kindle Fire that she has discovered Scrabble on. Kids & garndkids were here, they got a boatload. My wife gets everyone 5 lottery tickets & my 8 year old granddaughter won $50. I know, bad Santa, terrible role model. Trash man has lots of empty boxes and crumpled paper. Gary
-
Ignition issues 83 Venture
dingy replied to jeffg's topic in Venture and Venture Royale Tech Talk ('83 - '93)
The manual is wrong. The pickup coil common is black. The six pin connector you are checking at has one unused pin. Black wire is one with blank spot above it. Gary P.S. Attached a picture of connector, this is reason I specified wire position as these can sometimes look the same after almost 3 decades. Common is lower left in picture. -
I'll take the shredder. I have 5 lottery scratch off tickets I wil put up for it, pre scratched off. Gary
-
Engine Side Covers
dingy replied to cabreco's topic in Venture and Venture Royale Tech Talk ('83 - '93)
Here is a couple of pictures of sideplates on my 83. They have been cut down in length to clear the different configuration of the Vmax heads. They were polished, then powder coated. Then I sanded through the powdercoat to expose aluminum & polished them back out. Gary
-
I have thought about getting a camera for the bike. I think I can take a standard mirror used on many bikes and modify the bar to allow the camera to be mounted just out side the windshield line. This would be fairly easy to put on & off. The threading is on the clutch & brake masters on the 1st gens. Similar concept is what I used for my radar detector mount. I took a mirror and basically cut out the bends in the middle & brazed it back together. Just a random thought, I have had several that didn't work as planned though. Gary
-
Here is ebay item #, put it in ebay search field. 120833017792 I prefer the Kevlar (or Organic) pads over the harder EBC 'HH' pads. One reason is the kevlar is not as abrasive on the rotors so they will last longer. The kevlars do take more lever/pedel effort to achieve equal power to harder pads, but they don't suffer from heat related fade off as much. I would rather have a pad that is consistent in braking power. The Kevlars will not last quite as long as the harder coumpounds, which is the trade off. Pads are $75 a set, rotors can be $500 or more a set. Gary Below is a cut from a Wiki link pertaining to brakes and the coefficient of friction they have. Brake pad materials range from asbestos to organic or semi-metallic formulations. Each of these materials has proven to have advantages and disadvantages regarding environmental friendliness, wear, noise, and stopping capability. Semi-metallic pads provide strength and conduct heat away from rotors but also generate noise and are abrasive enough to increase rotor wear. Ceramic compounds and copper fibers in place of the semi-metallic pad's steel fibers accommodate higher temperatures with less heat fade and generate less dust and wear on both the pads and rotors. They also provide much quieter operation due to the ceramic compound that helps dampen noise by shifting its resonant frequency beyond the human hearing range and reduced metal use (approximately 15% metal content by weight). Ceramic brake pads typically are suited for light-duty applications and not severe duty applications as encountered by medium duty trucks, etc. There are environmental factors that govern the selection of brake pad materials. For example, recent legislation in Washington State (SSB 6557) and other states will limit the amount of copper that is allowed to be used in friction materials, to be eventually phased out to trace amounts. Other materials like antimony compounds will be monitored as well. Asbestos was widely used in pads for its heat resistance but, due to health risks, has been replaced with alternative materials, such as mineral fibers, cellulose, aramid, PAN, chopped glass, steel, and copper fibers. Depending on material properties, disc wear rates vary. The properties that determine material wear involve trade-offs between performance and longevity. Newer pads can be made of exotic materials like ceramics, aramid fibres, and other plastics. Vehicles have different braking requirements. Friction materials offer application-specific formulas and designs. Brake pads with a higher coefficient of friction provide good braking with less brake pedal pressure requirement, but tend to lose efficiency at higher temperatures, increasing stopping distance. Brake pads with a smaller and constant coefficient of friction don’t lose efficiency at higher temperatures and are stable, but require higher brake pedal pressure.
-
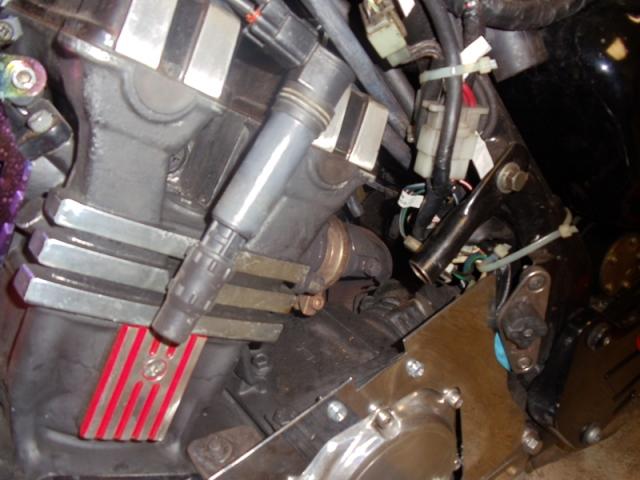
Also check & clean the connector coming from the pickup coils inside the stator. This connector can cause plug firing problems. 6 position connector with 5 wires in it. Gary
-
Dave, I never had this on a bike. I have a 1st gen. I got this from a member here earlier this year. I knew Freebird had been making them, but quit doing it. I got this one to see if it was something I wanted to persue making, but then I decided not to. Don (Freebird) looked at pictures I had taken and thought it was an intact stand with a set of extra brackets for it. He did not indicate if it was one he had built. 1st option would be to confirm it was installed per the thread below. http://www.venturerider.org/forum/showthread.php?t=1427 I hope Don will see this and offer and suggestions he may have, or send him a PM. I attached some of the pictures I took of this so maybe other members that have one can help. One of the pictures is from the install thread showing the mounting closeup. Gary
-
Those are the leads that are shown in the sears parts manual for this welder. Go to sears web site and search for the part number on the tag. Gary
-
In general, your son's experience aside, the lottery is a self imposed tax on people who are bad at math. Gary
-
That's recommended way of doing it in general. I didn't do it to mine because I am always tinkering with it and I wanted the connector in there. I have direct replacement connectors in the classifieds for this. I didn't think the 83's had this smoothing condensor in the wiring harness, maybe the Royales did. Mine wasn't a Royale, but all wiring has been changed over to an 88 style, so I can't verify this. Gary
-
That is the smoothing condensor. If you are looking at schematics I did, the 86 & up schematics show it just above the stator connector on the full wiring diagrams. On the simplified schematic, it is on the left side just above the starter solenoid. Just tagged as a condensor. Did you replace the harness on the bike? The MKII bikes did not use the brown wire to the voltage regulator. Your 83 harness will have the brown wire at the regulator plug, but the newer (I'm guessing) regulator you are putting on does not have the brown wire. It will work OK. The brown wire is just a switched duplicate of the red wires that was eliminated. Gary
-
The online 83-85 manual that is most commonly used has 10 pages in it that are corrupted. With Snaggletooths help I have created a complete copy of the manual, just don't have a good place to put it online. It is rather large at 68 megs. Gary
-
7.2 ft/lbs 86.4 in/lbs Gary
-
Probably first thing to do is pull CLASS controller and resolder joints. http://venturerider.org/forum/showthread.php?t=493 If it works in manual & not in auto, I would think pump end is functioning OK. Gary
-
It's SMoothing condensor. Reduces staic in the electrical 12v system. 1st gen MKII have 2 of them, 1 near the shock damper (about 1 1/4" dia x 3" long 2 wires). Another in the radio pocket, this on is more of a square mount. Gary
-
There is a green 2 wire connector on the left side of bike near the upper frame rail, near carbs. This goes to an evaporation canister gizmo. There is no benefit power wise in removing it that I am aware of. Only Cal. bikes use this connector. Gary
-
These do help. Blue dots from a 2001 R1. Front end from a n 86 Venture, no anti dives. Gary