Search the Community
Showing results for tags 'holes'.
-
 A FEW WEEKS AGO MY 93 STARTED TO BACK FIRE WHEN I ROLL OFF THE GAS ONCE IN A WHILE,SO I WAS THINKING IT MUST HAVE A EXHAUST LEAK SOME WHERE, TODAY I WAS CHECKING IT OUT AND FOUND MY COLLECTOR IS LEAKING FROM THE SMALL HOLES IN THE BOTTOM. SO IF ANYONE OUT THERE HAS ONE I COULD BUY TO REBUILD OR A GOOD USED ONE IM IN NEED OF IT. THANKS!
 -
now i'm really confused. purchased 07 RSV right off the showroom floor - zero miles. after reading several threads - ordered the Diamond R leveling links. finally got around to installing them this afternoon - for the trip to Rogers. sonofagun - i thought the Diamond R were supposed to be longer than the stock links. but they're not. Factory link is 6 3/4" center holes and 8" long - Diamond R link is 6 5/8" center holes and 7 3/4" long called a riding buddy who bought the RSV next to mine in the showroom - knew he swapped the dogbones some time ago. he agreed that the Diamond R were about an inch longer than the stock ones. i'm confused.... any thoughts???? note: i've ridden this thing 35k miles in the last year. it has not been out of my sight except for service ...
-
 So I bought 4 new cylinder head fin covers. The pretty black ones with the silver tips along the fins, like all the Midnight RSV's have for my '99 RSV. I have had them about two weeks, when I got them, I took off the old ones, made sure the new ones fit, and when I went to fasten them on, lo and behold, the holes in them were too big - HUMPH I said, looks like I forgot to order some additional parts. I need 12 of these wedge round things that go into these holes and somehow wedge themselves in there so when you bolt the fins on they stay attached to the cylinders. So those things arrived the other day. So the help I need is: How do I get this part - SKU: 4NK-15316-00-00 DAMPER, ENGINE MOUNT, into this part - SKU: 4XY-1111H-20-00 COVER, CYLINDER HEAD SIDE 4? See attached - I need to get #45 into #44. TIA!
 -
I'm in the process of changing to the Flanders bars. Last night I took the faring, windshield, seat and gas tank off. I plan on taking everything off the old bars tonight. I have new grips and cables. I have never replaced the grips, bars or cables on a bike before and am looking for advice inspiration and insight. There is a good procedure on another site, but it talks about drilling holes in the flanders bars, and I keep thinking what holes. Any advise or help is appreciated.
-
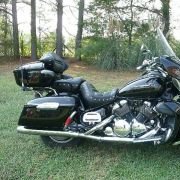
Do the stock pipes that come on the bike have any holes exiting the back except for the large hole in the center? I noticed tonight that my pipes have about 8 holes drilled into the back around the center hole (and they don't look very professional). So I'm thinking the previous owner drilled them out to get some more sound. Just wondering...thanks!
-
I know this is a Motocycle site but I trust the members here more than anybody else. Thinking of buying a used boat. Wanted to know some of the things I need to watch for. I know its not suppose to have holes in the bottom ? Right ? Found this one close. http://www.boattrader.com/listing/1986-BAYLINER-16-92184658 And this one a lot further away. http://cgi.ebay.com/ebaymotors/ws/eBayISAPI.dll?ViewItem&ih=017&sspagename=STRK%3AMEWA%3AIT&viewitem=&item=270233744559&rd=1 Any recommendations would be great.
-
Greetings friends, I have decieded to have my trunk rack re-chromed. While it is at the plater, I need some hole plugs to plug the holes till it gets back. I need to do the same thing to my fiberglass trailer too, which will be permanent. The holes are 1/4"-5/16". Can someone suggest a type, and tell me where to find such an animal. I prefer some that are low profile, chrome or non-chrome; it dosen't matter. And as always, thank you.
-
Will it hit last night he in Van Buren Arkansas. Tennis ball size hell. my truck looks like it has the chicken pox,the back of my house has holes in it, and the new roof I had put on 2 month ago has holes and we all know what that means yep wet celling. The good news is no one hurt. well I will try to make the eat N meet (OK at pops) that may be what I need right now. Here I go black jack in hand to the roof. :7_6_3[1]::7_6_3[1]::7_6_3[1]:
-
hey i put new gaskets on mufflers where slips on. then checking them with engine running. i found the mufflers have three holes on the bottom which i thoight where drain holes . but they all three on both sides have pressure exhause leaks . is this normal .i have a 02 venture . and i am a half way self do it your self guy.
-
 Does anyone know anything about installing these? If you do, why do the 4 threaded holes (female) on the light mounting bar for the wind deflectors not take the stock screws that I took off the original Yamaha Venture light bar? I tried to tighten with my fingers before I put a tool on all 4 bolts in all the 4 mounting holes and they would not thread. Any ideas? The lamps are stamped made in USA so I'm thinking maybe they are SAE and not metric?
 -
i have a 93 venture and i was cleaning out my carbs when i got to the diaphrams i notice there are three holes in the diaphram the holes are spaced far apart from each other it seems like they might belong there however on one diaphram the hole seems as if it has ripped wider than it is supposed to be. is this something that i should consider replacing? ive shopped around for them and they are kinda pricey. if i do need to replace them do you know any place where i can get them cheap or do any other ventures interchange the diaphrams? i will be posting some pictures a.s.a.p. so you can see what im talking about thank you, -mike
-
I noticed the other day that the 83 was smoking some on high rpm's sitting in the garage did some checking and found that my diaphragm's had pin holes except #4. Also checked the plugs all but #4 was trying to foul out - wet fuel. #4 excellent shape. diaphragm's that had pin holes also had traces of fuel in them except #4 which was dry. So what I'm asking is will a bad diaphragm cause the plugs to stay wet with fuel? #4 diaphragm is in good shape and the plug look great as well tan color. If not what would I be missing to cause the plugs to stay wet ? maybe float levels to high? plugs -caps-wires replaced first of last season - carbs synchronized What's funny is how well the beast runs too. good idle runs out good no dead spots just noticed it started smoking on high rpm- fuel. buddy
-
Now we know how you get to your fishing holes :rotf: file:///C:/DOCUME%7E1/VICTOR%7E1/LOCALS%7E1/Temp/moz-screenshot-4.jpghttp://www.pashnit.com/forum/attachment.php?attachmentid=609&stc=1&d=1100645013
-
I ordered today from Mustang, a 3 Pouch studded windshield bag to match the studded seat from my midnight venture. But I'm afraid that the mounting support is to short ... can I drill 3 little holes in the windshield and use windshield bolts to attach it…and do I need a special drill bit for drilling holes .. I don’t like to take the risk that I may crack my new windshield.
-
Guys, Dynojet kits generally consist of a needle, main jet, and spring for each carb, as well as a drill bit to enlarge the slide lift holes. What is the effect of enlarging those holes? What if I put in the parts but don't drill the slides? It seems to me that enlarging the holes will increase the RATE of slide lift, but not the overall lift. Will that have more effect on airflow or fuel flow? Could NOT drilling it cause a lean stumble on quick throttle opening? Your opinions please! Thanks, Jeremy
-
What are the luggage and the fairings made of? Plastic of fiberglass? I am currently preping for paint with bondo. Will this work to patch holes on the luggage. I am using PLASTEX for the front fairing repair. Any insight would be helpful. Thanks, Derek
-
I wanted a cargo carrier for a cooler and a bag rather than purchasing a trailer. Rivco makes a nice cargo carrier, 2 sizes, but rather pricey. Since I already had a Hitch Doc hitch on the bike, and no trailer, I had removed the hitch part, leaving two places for a 5/8" rod to fit in. Hmmm, I thought, How about making my own cargo tray? Had a guy weld up a tray out of stainless steel, drilled 1/4" holes in each corner to drain out water, several 1/4" holes around the lip. Welded some angle iron on the bottom for stability, and two pieces of 5/8" rod, drilled 1/4" holes to bolt it on where the hitch part was bolted on - and wallah - it worked just fine! Hope the pics come out OK.
-
The holes in the ears that hang down just beneath the frame. Just behind the oil plug and in front of the little shelf that the smog canister, for the California models, gets bolted to. The ones that the pin, that holds Carbon One's Lift adapter adapter to the bike, goes through. Anyone know what they were originally designed for. One of mine has a plug clipped into it to fill the hole so I wondered if they were actually designed for some purpose or if they may have been used at the factory and that's it. Inquiring minds want to know.
-
Ok - the Zumo pkg is here -- nicely thought out. But where does that huge magnetic XM antenna go? There does not appear to be mounting holes on the back of the mc cradle. Suggestions appreciated, DREBBIN
-
When I got the 90 Venture there were a couple of holes in the seat. I used black vinyl and vinyl cement to repair the holes. The vinyl and cement are actually tarp repair items. Most places that repair tarps for big rigs should have it. The adhesive works like contact cement. You clean both pieces with alcohol, then put the adhesive on both parts and let tack over. Once it tacks over just put in place and push together and it is done. If you have a seperated tear you can stitch it together to hold and glue a patch over that. I have included a couple of pictures. If anyone can't find the materials locally they can pm me as we use this stuff at work.
-
 I bought Mudflaps for my RSV today. I want to mount them but dont have any idea where to start. They have 2 holes in them to mount but I do not want to drill holes in the fender. How did you install yours and how secure are they. I really dont want to lose them.
 -
Freebird Centerstand Installation Note: Since I am no longer making these stands and there have been some requests for the measurements, here they are for those who wish to make their own. The large holes on the U Braket and straight bars are 16mm. The ground out slot on the bottom of the bars are so that the stand will break over the proper amount. If it doesn't break over far enough, the bike will roll off the stand. If it breaks over to far, it is almost impossible to get the bike off the stand. You want it to break over so that it is just past vertical. The stands all vary just a bit so I always assemble them first and then grind the slots on each one until I get it right. I also grind all the sharp corners before painting. Just enough to put a nice rounded corner on them. You don't have to but it just looks nicer. You will notice that this one has the tab welded on. I later started having these stamped out at a machine shop so that they were one piece. It was just easier for me that way but welding works fine. The installation of the Freebird centerstand is pretty simple. Before proceeding in purchasing or installing one of my stands though, I should point out a couple of things. 1. Will this stand lift the rear wheel off the ground? Yes, if your suspension is STOCK it will lift it maybe a half inch off the ground. If you have installed the Diamond R leveling links, it will NOT lift the tire off the ground. I have the links on my bike but even though my tire is no longer off the ground, I find the stands very useful for oil changes and etc. 2. Can you still use a bike lift with the stand installed? I do. The lift WILL rest of the stand at the rear but I just let it. It has worked fine for me. If not, it only requires the removal of 4 bolts to drop the stand off. 3. This is just a note more than anything else. These stands are made from used centerstands off first generation Yamaha Ventures. I have them available as I can locate stands. I have the brackets available all the time so if you have or can find a used first gen stand, I will sell you only a bracket. You can also buy NEW first gen stands for somewhere around $85.00. So even if you buy a new stand and one of my brackets, you will still have less than $150.00 in a centerstand. 4. This is not an exact science. There are some variances in the old stands and I've seen some cases where the angled tab on the bottom of the second gen or RSTD have been slightly bent...or mashed down. I have test fitted every stand that I sell on my own bike but I sometimes get an email that the holes do not line up perfectly. That is usually not a problem. If you follow my directions and leave everything loose until all the bolts are in, you should then be able to tighten everything up and it will work fine. If there is a small space between the U Bracket and where it rests on the bikes frame...don't worry about it. I promise that the first time you put the 1,000 lb. bike on the frame...that space will go away. 5. I grind the inner part of the foot pad off so as to prevent it from hitting the exhaust shield. It will still be very close but should not touch. If it does, simply remove the stand, lay it on the ground and WHOP the foot lever with a sledge hammer. It will bend enough to clear. So...after all that...here are the instructions. This picture shows the existing tabs on the bottom of the bike where the stand will bolt up. Place the stand under the bike and insert the rear bolts into the holes. The existing holes are a metric size just ever do slightly smaller than 5/16". I supply 5/16" bolts so you will need to run a 5/16" bit through those holes...or you can purchase slightly smaller metric bolts. It's very easy though to run a bit through the holes. Now just swing up the horizontal bars and place the 3/8" bolts through the holes. The bars of the bracket go OUTSIDE the tabs on the frame. If they don't line up perfectly, just wiggle it around until you get them in. Tighten all the bolts and the stand is now mounted. Installing the spring is the next step. Place the LONG end of the spring through the small hole on the left horizontal bracket and take the spring OVER the top of the bikes frame. The other end of the spring connects to the existing tab at the bottom of the left stand leg. This picture shows how close the foot pad comes to the exhaust. If it touches or you feel it is too close. Just take the stand back off and bend it out a bit. Do NOT spread the legs of the actual stand...just hit the arch of the foot extension so that IT bends a bit further out. This is how it looks all mounted. On the stand from the side. Close up with bike on stand. From the back