cowpuc
-
Posts
14,966 -
Joined
-
Last visited
-
Days Won
49
Content Type
Profiles
Forums
Gallery
Events
Store
Everything posted by cowpuc
-
Indeed,, Nothin wrong with making one,, you could even take a block of aluminum - use your stock brace for a pattern and gain just by tripling the thickness of the stock brace.. Hey Boss, you might want to check your frontend and see if the forks have twisted in the triple tree.. I have an easy way of checking this that I have used for years,, its especially prudent when looking at used bikes. All you have to do is have someone ride your directly at you while you look straight down the alignment of the tires. You have to almost lay down on the pavement to do this but it works. Just line the side wall of the front tire up with the rear tire while the bike is rolling across a parking lot toward you. You will be SHOCKED at what you'll see if the forks or the frame are twisted. To reset your forks, loosen the triple tree clamps - hold the front wheel between your legs and twist with the bars, retighten and check again.. Play with it till you get a good alignment onthe pavement and you will be amazed at how much better it drives.. A lot of times you can also tell alignment by how the bike tracks when you let go of the bars.. If you have to sit side saddle to get her to track straight no handed you may very well have twisted forks... Some thoughts.. 'Puc
-
IMHO, the correct way to wire the 12VDC lighter/power source would be off your fuse panel, there should be an ACC terminal that only works when your key is on. You then would wire the plug on the load side of the fuse in the panel. If this is already used or not available and he really wants to wire directly off the battery then indeed, he should fuse it close to the battery terminal itself. The "plug" should be fused to its capacity (probably 10 amps) so if someone plugs something in other then an Ipod (spot light, cigarette lighter ect..) it will operate like it should.. He then should fuse his Ipod line at the Ipods rated wattage to protect it (it probably already is).. General rule of thumb is that circuits (in this case the plug is the circuit) are fused to protect themselves not the devices operating on them, devices (the Ipod) are fused (or should be) to protect themselves.. This way everything gets protected. I was a machine tool electrician years ago and did a ton of panel work. Everything from 3 phase high volt to installs on servo drives and p.c.'s, lots of control wiring.. I have never heard of fusing negatives, neutrals or grounds.. About the closes my pea brain can imagine something even remotely related to that practice would be ground fault - where the grounding system senses even a slight current and it,like a fuse, kicks out.. If thats what your after your gonna need something other then a normal fuse to accomplish the task.. ANother something to remember is that amperage is not being forced into the Ipod, thats not the way it works. The device (Ipod) takes what it needs and any available amperage left over is just that - left over and available for other devices.. VOLTAGE is the force, the PUSH as it were.. Unlike amperage, high voltage will instantly destroy the internals of his Ipod. THink of it like this,, you can take a little 1157 tail light bulb out of your car, take a small 12volt 3 amp battery out of a moped and lite the bulb with it.. YOu can also take a 12volt 25000 amp farm battery and do the same thing in the same way.. Now, take 10 little watch batterys that are 3 volts each and stack em on top of each other (in series) and your voltage from positive to negative will be 30 volts (still very low amperage available though - less then an amp). Now attach that 1157 to those little watch batteries and POOF - no more filment in that bulb!! My 2 cents 'Puc
-

Strange Noise
cowpuc replied to SuamicoBob's topic in Venture and Venture Royale Tech Talk ('83 - '93)
Did it sound like it was in the front of the bike?? Might wanna check the pads on the front. Maybe getting close to change time and a pad got cockeyed or a stone got into the caliper some how.. It only takes a second to pull the calipers and examine them.. Also check the rotors too.. -
No Spark - Dead 83 Venture
cowpuc replied to a topic in Venture and Venture Royale Tech Talk ('83 - '93)
TJF, how did you diagnose that it is spark related? Did you pull the plugs, ground them and visually check them? Just wanting to make sure we are side tracked.. Anyway, another thing you could check is the resistance in your plug caps.. I have seen those caps fail on more then one occasion. Just unscrew them from the wire - maybe even just swap them over to the other side so you KNOW it works.. Also dont forget to double check plug gap to spec.. Just for kicks you could take a little gas line and dump a teaspoon of raw gas into each non-running cylinder, put the plugs back in and see if it'll run off that.. That will at least tell you that its getting gas.. Exactly where on the bike is the TCI located guys? Also, what does TCI stand for? Total Capacider Ignition, Thermal Cathode Igniter, To Cause Irritation hahahah Thank you Lord I LOVE this site!! Aint nothin funner then hangin out with a bunch a gear heads is there.. 'Puc -
Speakin about running the dog of er, here is what I did earlier this year and have been having a RIOT with her. I got tired of having the HOG boys that I run with out toning me,, heck guys - I couldn't even hear my scoot running most of the time.. Sooooooo,, I built a set of custom pipes for her and I absoulutly LOVE them so much I havent taken them off in 4 months!! I built them out of galvanised thin wall chain link fence pipe, made my own fish tail ends.. I built the tails wide enough and long enough so I could squeeze them and get the "tones" I want.. As it is right now, at idle and up to 2500 it sounds pretty "V-twinish".. As a matter of fact, its a BLAST to pull into a gas station with a buch of Hoggers and get into a sound contest with them.. This baby BARKS and backs off with the best of them... Of course,, my favorite part is drag racing those new big cubes!! Just goofing off the other day I ran against a recently done 110 inch (high comp so he has to run Torco but non-alchly). He was right there by me until the V-4 tapped into er fresh air at 5g's.. I was grinning from ear to ear as I knew he was about to get an ear full - he was about a half a bike length down so his head was in just the right spot... With these pipes - when the ol girl hits 5 grand her tone changes from the tone of a high performance V-twin into a Formula race engine INSTANTLY!!! When we finally came to a stop and he caught back up to me he says "WHAT THE HECK DID YOU DO TO THAT MOTOR!!!!".. The real shock for him came when I said - NOTHIN = its stock hahah Gonna try a couple shots of my pipes here.. May have to go to Firefox to post em so please be patient.. What a blast! 'Puc
-
Stranded with brakes sticking and heating up? Read this..
cowpuc replied to cowpuc's topic in Suspension, Brakes, Tires, Etc.
Soooo Okay,, Netscape couldnt do pics so I am trying Firefox.. If they work, the first one will be of the master and L together. Second one will be of the plugged return hole at the top of the cup that recieves the L. Third will be of the wire sticking out of the return orfice.. Sorry about pic quality but I tried! Hope this helps someone!!! 'Puc -
again
-
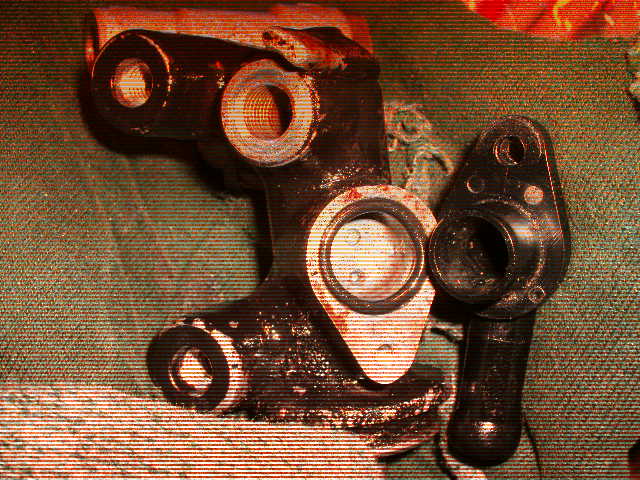
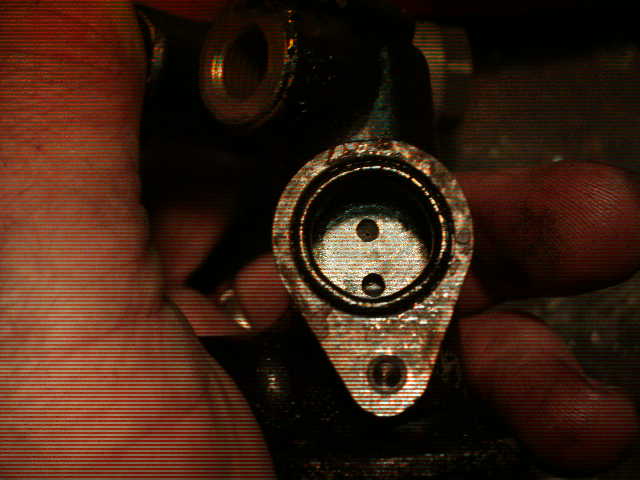
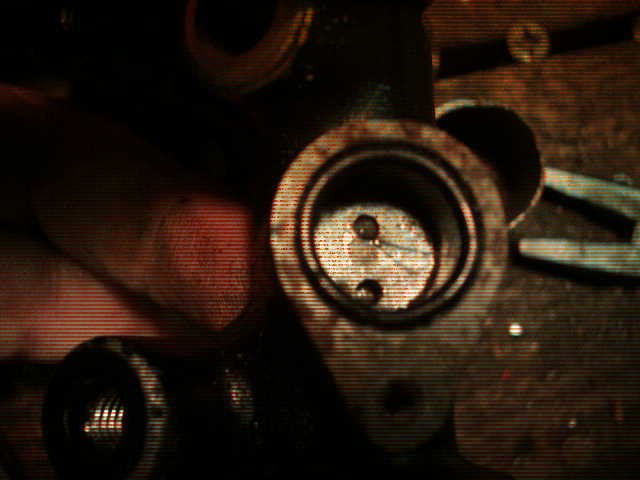
Okay, if your on the road and your brakes stick on what do you do? I just finished solving this on my 1st Gen (83) and this may help you!! I am going to try and include pics with this!! I replaced my pads for a 10 day cross country ride coming up and ended up with a sticky Rear/front brake system.. If something like this happens to you here are some suggestions.. 1. If your bike feels like its lost power, is hard to push back and forth or if you just plain smell hot brakes - STOP and check them! 2. With a damp fingertip (spit works great) carefully touch the surface of your rotors (like testing a hot clothes iron). 3. If both left front and rear rotors are hot - its the rear system. If its just the right front its the front brake.. I am only dealing with the rear system at this time.. 4. If its the rear system, take an 8mm box end or a socket and open the bleeder on the front left caliper - have a rag hany cause if it is a stuck system your gonna get fluid out and you dont want it on your rotor.. 5. Push the bike back and forth or put it up on the center stand and see if the she rolls easy now.. If it does and the problem had effected both front and rear brake rotors (remember - your back brake pedal is activating both front left and rear calipers) check these items.. 6. Look at your master cylinder - at the bottom of it is a rod sticking out and an attachent for the pedal. Gently hold that rod between your thumb and finger and see if it has movement back and forth and a small amount up and down.. If it doesnt, you may need to clean the pivot for you pedal and/or adjust the freeplay screw to get play in it.. Now try your brakes - if still stickin go on to 7. 7. Pump your pedal HARD!! ALthough it is BEST to remove the rear brake master cylinder to do the following, so you can take it all apart and clean it thouroughly, I am going to give you some info for "on the road" fixen!! It also may be worth just doing this first BEFORE doing a complete take down - always start with lesser surgery first - I learned that from my NeuroSurgeon! 8. Expose the rear master. 9. Notice where the hose from the Fluid Resivore attaches to the Master. It is attached with a small phillips screw. Remove this screw. 10. Take a pair of pliers and squeeze the rubber line about 3/8th inch above the little plasic elbow that you just removed the screw from.. ITs best to have an extra set of hands there to do this as youwill want this line held closed during surgery. 11. Gently turn the hose back and forth to move the plastic "L" in its holder. Pull out while doing so.. The "L" is held in by an O-ring. 12. Make sure you dont loose the O-Ring when the L coomes out of the master - maintain squeeze on the hose (by the way, I carry a small set of surgical forcept pliers in my tool kit - VERY handy for all kinds of this stuff!) 13. Look at the pics I have attached - If you look closely you can see the little wire I have protruding from the return bleed hole back into the fluid res hose. This little hole is the hole that is on top of the cup that recieves the "L". 14. You WILL need a small wire to unplug this hole. I am using a bristle off a wire brush - someone who responded to my original thread about all this suggested this and it works GREAT!! I also use wire brush bristles for carb jet cleaning!! On the road I wouldnt be afraid to take a strand of wire from piece of wire (ya'll carry a little spool or wiring in your bag dont cha?).. 15. Push the wire into the top orfice and be prepared to get a SQUIRT! WHen I did this on my 83 it SQUIRTED out like a high pressure squirtgun!! 16. Work the wire in and out to clean out the orfice real good. 17. Wipe the insideof the cup where the L goes out real good. 18. Clean the surface of the "L" and the o-ring real good. 19. Relax the squeeze onthe hose and let a little fluid out. FLuid should RUSH out!! 20. If the fluid barely trickles. 21. Squeeze the hose again, point the opening of the L that goes into the Master down toward the ground. 22. Squeeze the hose above the pliers with your fingers. 23. Let go of the pliers a little so the fluid is forced out - you may be shocked what you get out of the hose - I WAS!! Re-Squeeze with the pliers as soon as it bleeds a shot!! 24. Replace the end of the L into the cup on the Master. 25. Release the pliers and squeeze the hose so fluid is gushing out around the L while pushing it in. 26. Replace the phillips screw!! 27. Pump your brakes and they should release and the wheels roll free. 28.. Put her back together and RIDE!!!!!!!!!!!! Oh yea, you might want to check your Brake Fluid first chance you get!! Special thanks to ALL who responded to my other thread about this!! Lots of GREAT info there folks!! "puc

-
I tryed..
-
Hi Guys.. Just wanted to say THANKS again for ALL the great points on the brake issue!! Anyone reading this should take all the points made to heart. I got a chance to work on the scoot tonight and found the anwser... I am making a new thread - with pics - of what I found just in case someone else has these problems and wants a "quick fix" that may work... 'Puc
-
If you want a easy way to find a short, Run a compass along the wire. it will point right to the short. Biker Bob: I have GOT to know more about this BB - do you attach an ohm meter and run a low voltage current thru the wires to get the compass to work? COncerning the problem this thread was started over: I am not real fluent with the 89's but on the 83/84's drawing to much of an amp load did infact shorten the lives of many stators. Yamaha had a recall on those stators back then and it involved placing a small "bleed" holed bolt in the end of the crank and placing a splatter plate on the backside of the stator cover to spray oil over the stator - this worked great UNLESS you were prone to run lots of extra lights - then the stators would still get hot and burn down.. If I had your bike, besides doing a Regulator check, I would do an amp count and/or stick an amp probe on it and see what total draw is. If your running extra light, CD player, compressor running to much because of an air leak in your boingers ECT ECT - you CAN be literally burning up the stator from heat being produced from constant draw.. Another good point is to check your stator area and make sure any/all oil points are open so oil is getting to it to cool it. I highly doubt that the problem is getting high voltage (over charge) thru your regulator - because that would show up in bulb burn out first - remember, VOLTAGE is the pressure - amperage is the flow.... 'Puc
-
BINGO TIM!! That is exactly what I have been doing here. I also have a syringe with a hose that connects to my bleeders and its full of fresh fluid in it - PERFECT for "on the road testing".. I am about to disconnect the pedal completely from the master and then try a c-clamp on the piston on the rear caliper and see if I can force fluid back thru the return orfice in the master without a complete tear down.. Anyone have any idea where the return orfice is located in the rear master?? You all are AWESOME!! Thanks again for the assist - all greatly appreciated! 'Puc
-
and THAT is exactly why I am in the middle of all this.. I know from experience that right here in my own little garage with all the internet help (thanks again) and my tools and salvage parts and a place to sleep and shower is WAYYYYYYYYYYYYYYYYYYYYYYYYYY better then having this baby decide to lockup out in the middle of Moab/Utah in 128 degree temps!!! Carl,, NO wiser words have ever been spoken!!
-
Thanks for the FAST replies folks.. I am having the problem with the cap off the rear master, I also bled a bunch of fluid off at the caliper bleeder(s) so I am pretty sure its not an over filled master. Could it still be Yammer? Wouldnt a sticking proportioning valve show up as not letting either the front or back - not both - release? As it is now, both front and rear stick the same and both release if I open the bleeder on either caliper.. I did check the "slack" in my pedal and it has plenty, another very good suggestion though. I thought that was it earlier today when working on it cause my pivot arm was very sticky and holding the pedal down a little.. I even pull up on the pedal and hold it up so I am pulling the actuator arm out of the master cylinder,, doesnt help.. Has anyone ever had a master apart and know if I can clean the return port orfice out without a complete tear down?? I dont want to open the system if I dont have to (remove lines).. All great suggestions though!! THANKS AGAIN GUYS!!!!! 'Puc
-
Here's the scoop:
-
I would pull the carbsk, drain them, shoot wd into the bowls, shake em a little and drain em again, squirt the slides with wd and work em up and down a little, spray the whole assembley with fogging oil and wrap in a clean rag sprayed with fog. Pull the plugs, rotate crank until you can spray fogging oil into each exhaust/intake port and see it going into the jug - covering the valve faces and seats. Fog her down thru the plugs real good, put the plugs in, stuff the exhaust/intakes with clean oily rags. Make a wrap around the ports with duck tape. Spray the motor down with fogging oil and store it and the carbs in dry area.. If it does set for a few years before you go to use it again I would take the valve covers off and pre-lube the valve train before I fired it up again.. No sense in scoring cam journals on a good motor... 'Puc
-
You got some good advice going.. Never lift from the aluminum on the engine - you never really know how thick the casting is that your lifting on and if you hole it you WILL be sick.. ANother point to NEVER forget is to stablize your scoot once its up - I tie mine down with tie downs so there is no way it can move while working on it. This is especially important if your removing a wheel or gonna be wrenching.. The last thing you want is that baby to come over on you!!
-
Dont forget that our scoots use an electric pump to move fuel to the carbs - they are NOT gravity feed. The fuel tank is below carb level so, without a fuel pump the carbs would get no fuel.. THerefore, the ONLY time that shutting off the valve is going to assist in anything would be if you forgot and left your key on and kill switch activated and start button on..
-
I have had several snowmobile trailers over the years I have used for hauling bikes on - they all served well.. Then about 5 years ago a friend bought one of those cheapy ($240) little 4x8 bolt together flat beds from Farm and Fleet. He bolted it together and used it for about a month to haul his dirtbike on, he complained about it being way to flimsy and I offered him 100 bucks for it. I wanted it to tow behind my Ford Festiva. He was happy to kget rid of it! I took it and welded all the joints up, put a sheet of 3/4 inch wolmanized for a deck on it and 2x8's flat along the sides and down the center.. This little trailer went from a flimsy worthless little snot rag to a VERY firm - GREAT pulling trailer! I hav towed big bikes all over the country on it behind my little car - getting 42 mpg the whole time!! I believe that Harbor Frieght is now carrying this cool little trailers - CHEAP! If you go this route, make sure you get the one with 12 inch wheels with tires rated at 1200 pounds. Also, as I recall the axle under the trailer is rated at a ton.. Also you WILL have to weld up the seams - bolting it together just dosnt work!! Five years of countless trips and I am almost ready for another one myself! Hope this helps! 'Puc
-
Please keep in mind that the same rule of tire pressure on cars applies directly to scoots - low tire air pressure = heat build up = early tire wear and possible tire failure.. Run air pressures at sidewall PSI.. Of course, if you get stranded out in the desert sand running your tires down to 10 pounds will get out of the sand (works great) BUT not on the highway hahaha 'Puc
-
Also I might add, low voltage on a battery is the number one cause of starter failure... give your starter a fighting chance for a long life - keep a good battery onboarc! 'Puc
-
I had exactly that same thing going on with my 84 Royale.. Went thru several clutches with it - course,, I didnt ride like a sane person either.. Anyway, my "NEW" 83 began acting up right away as soon as I got her on the road. I had done all the previously mentioned maintenance and had done so on my 84, didnt help.. I decided that I was going to fix this sucker come heck or high water.. I read somewhere about weak springs on the pressure plate of our scoots.. Pulled the side cover, pulled a plate spring, started pickin thru my supply of springs (been a biker both dirt and street for years - got tons of old bike parts at my disposal).. ANyway, found some old springs that measured up off a 92 KDX200. Measured the spring strength and the KDX's were WAY stiffer.. Stuck em in and guess what - NO slippage at ANY R range in ANY gear.. WORKS AWESOME!!!!!! 'Puc
-
Got a pic of those Jardines..
-
oope
-
There was also an update on the cooling for your stator. It only amounts to a different crank nut (has a hole in the center to deliver oil) and a splash piece as I recall.. The reason those early model stators failed is they got so hot they fried.. I think Ricky Stator would be your best bet - I got my update from him a long time ago and it has worked perfect all these years. Their number is 1-800-521-0277. Electrx is another - 1-888-369-8359. Good luck 'Puc