Squidley
-
Posts
9,980 -
Joined
-
Last visited
-
Days Won
14
Content Type
Profiles
Forums
Gallery
Events
Store
Everything posted by Squidley
-
I like mine because it's simple and cheap! I dont drink coffee so it works great for me. It will fit an insulated mug as you can bend the holder being it's Aluminum.
-
Ken, I have built several of them, 3 this year alone, here are a few pics. I have used the harbor freight kits and they work out very well. Here's the trailer that I have used to build the bases, just cut them down to the size you need them to be. http://www.harborfreight.com/cpi/ctaf/displayitem.taf?Itemnumber=90153 I have also used a car topper and sold that one to one of our members here. Your choices are as limitless as your imagination BTW the trailer in the pics below I have logged better than 20000 miles on with absolutely no problems.
-
Rich, I have run Avons for the last 3 years and I have NEVER had any problems with traction wet roads. These tires are very sticky and will carve a corner like nobody's business. The only reason a tire has tread in it is to disperse water and give traction in wet conditions. Obviously one has to use good judgement with road conditions, slowing down when wet or adverse road conditions are present. I have never encountered any problems with over 30000 miles on Avon Venoms. The Michelin Commanders are a good tire also, Freebird has a set on his '99 and he really likes them. They are a good tire and obviously another choice to look at....Just .02 worth from the peanut gallery
-
I guess I'm just Frugal...here's mine, $5.99 @ Kmarts
-
Thanks for the followup Goose I have had the same descrepancies with my '99 as the bike has gotten squirrely now that the rear tire is shot. I figure I got about what you did as far as mileage 13K and I'm just going to replace both tires at the same time. Lonna and I did a 10K trip this summer with the smaller front tire and I will stay with it upon buying a new set. I am totally impressed with the Avons and have mentioned that until there is something better, I will buy nothing else
-
There was a thread started by Doug about drying the bike with a leaf blower. http://www.venturerider.org/forum/showthread.php?t=3984 What I would like to know is what kind of blowers do you folks use. We were at Lowes yesterday and there is so many choices and different MPH of wind speed. Freebird mentioned he has an 18 volt cordless, I have seen them from 120 MPH to better than 200 MPH. I like the idea of a cordless but would like to know who has the least MPH one that drys the bike well. I dont have any leaves to blow so I dont need a balls out unit. ....looking forward to some insite here
-
Light up the back lollypops?
Squidley replied to JeffC's topic in Royal Star and Royal Star Tour Deluxe Tech Talk
The rear factory lights are a single filament type, you would have to change them over to dual filament receptacles, which is what the front ones are. The site that Tartan posted up is a better bet, as there would be a lot of rewiring to install dual filaments. You'll want the setup on the bottom of the page item # 4710 Rear Run-Turn-Brake Controller, Splice-in Type I plan on putting this on my bike here over the winter -
Black Ice has a good point there, after our 10000 mile trip this summer my rear tire is shot and flattening out and cupping. I have noticed that it feels funny like the steering head is loose. Check the condition of your tires, it may be the culprit as I'm sure that is what is causing my shimmy.
-
But it would be true...sometimes the truth hurts
-
Ed, Thats not true, I have hauled several Ventures both 1st and 2nd gens. I always hook the fwd tiedowns to the forktubes just above the lower triple tree bracket. This is not going to hurt anything. Now I have 6 ratchet straps (dont use the pull tight ones as they are junk) that I hook onto the bike. Some here will argue that is overkill but I learned the hard way once, so overkill it is. 2 on the front fork tubes, 2 pulling from the rear and 1 going across the seat to the opposite side of the floor (2 total) I think Freebird did a write up about tieing down a Venture, dont know if it was lost in the crash.
-
Scott, Thanks for following through with your research, this is important info for folks who want to get tires. Jack, Your not dumb....just goofy but this is why we love you like we do
-
That would be a foul air vent!
-
I'm no expert on motorcycle tires but I do know that you dont mix the 2 (Biased and Radials) and if I'm not mistaken you shouldn't put Radials on a bike that was designed for Biased. The Avon Venoms are a biased tire and will work on all the Ventures. If I'm mistaken in any of my statements....there will be someone here to correct me I'm sure
-
Question for metalurgists and welders, Professional or amateur.
Squidley replied to fixit3546's topic in General Tech Talk
That is some excellent welds Randy I doubt I could have done any better. This should help out folks that have this problem...Good job Buddy! -
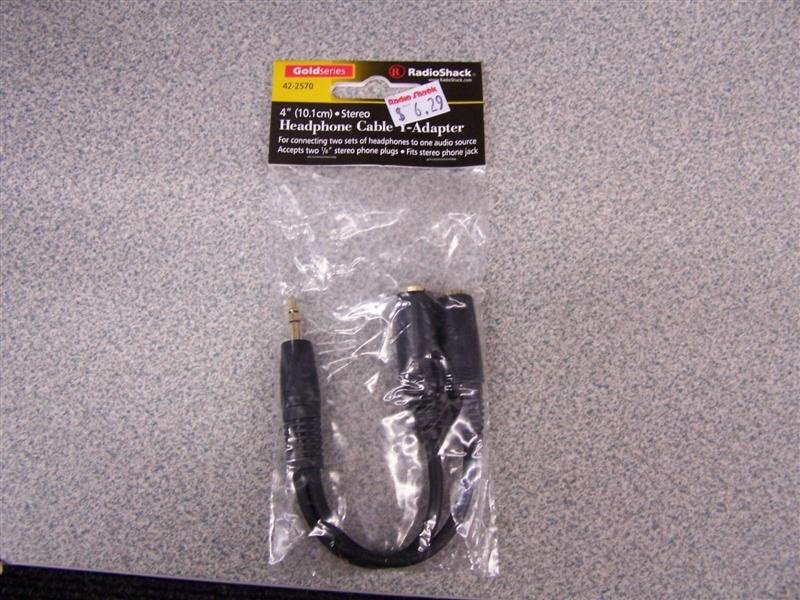
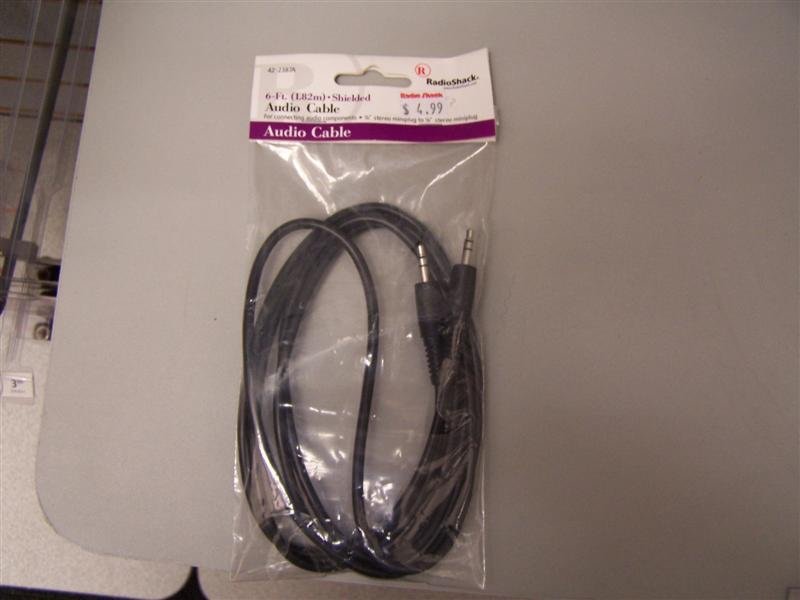
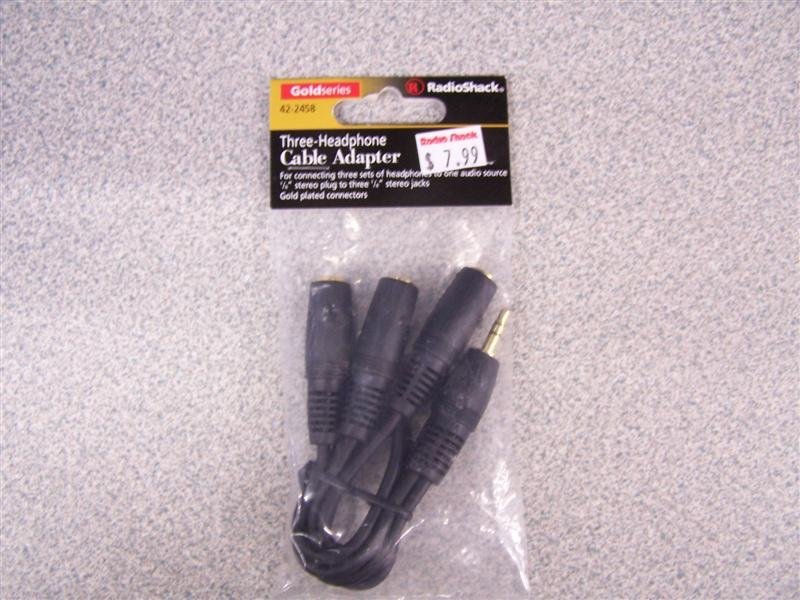
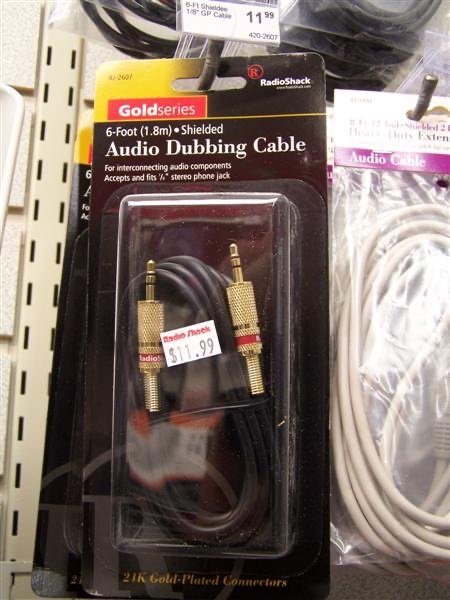
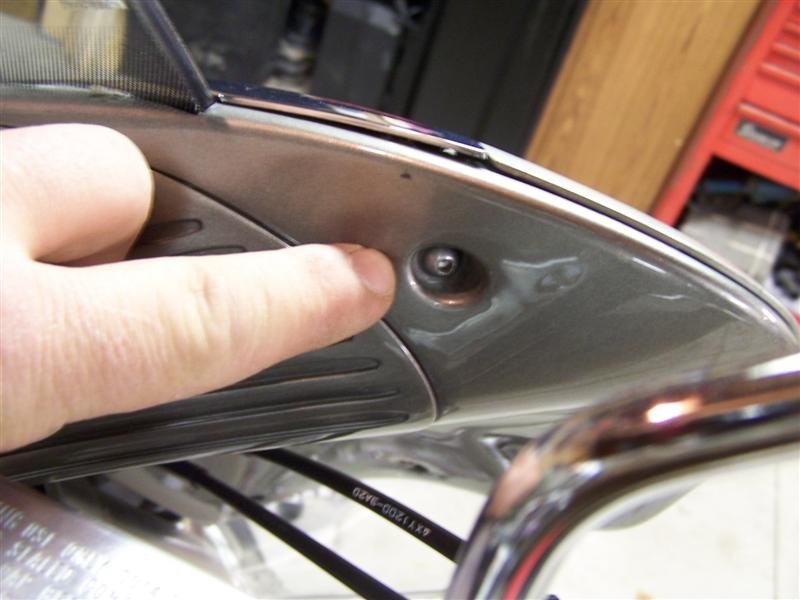
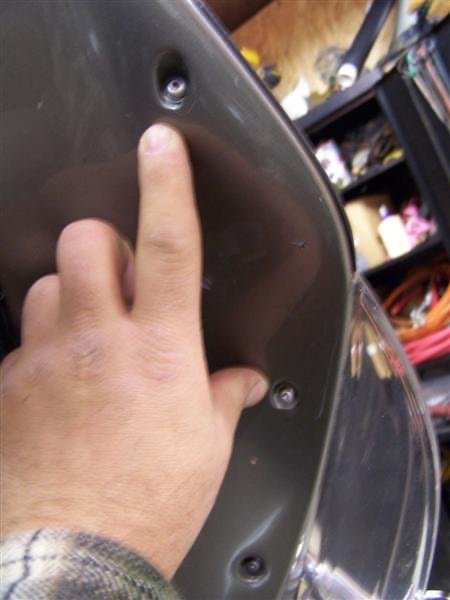
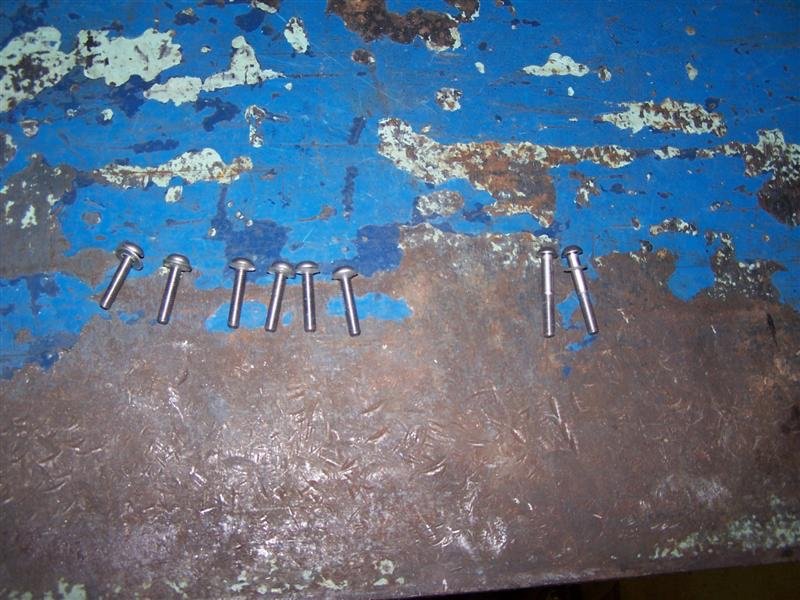
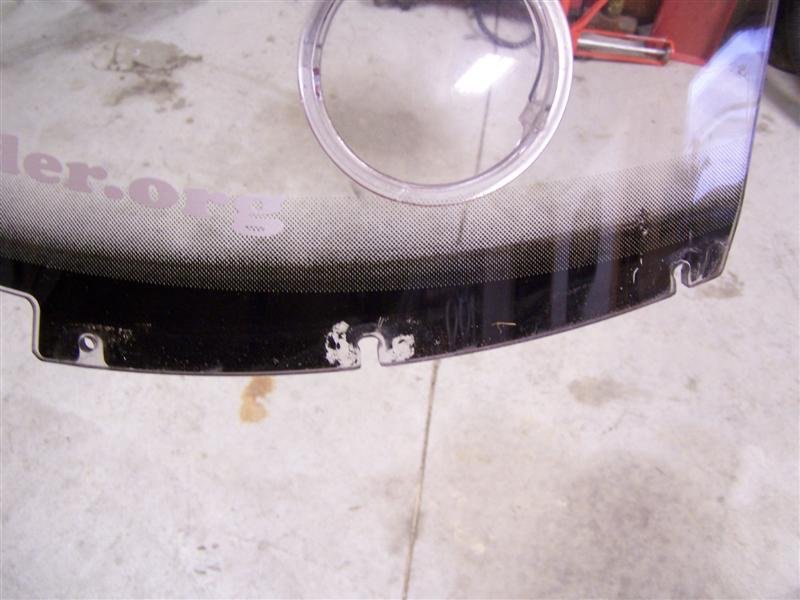
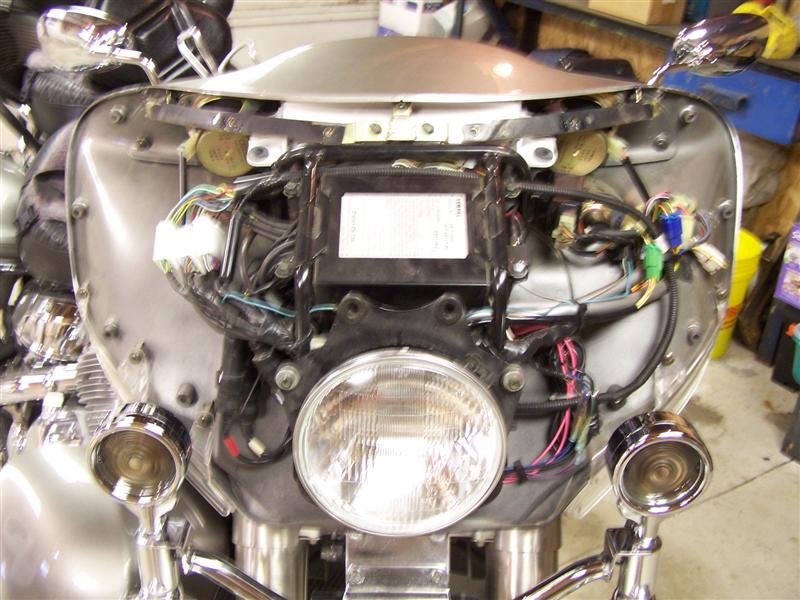
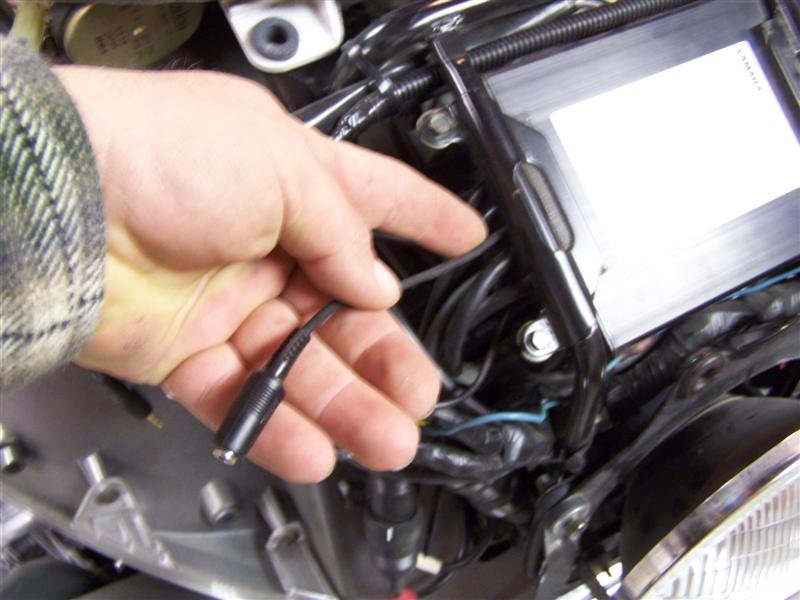
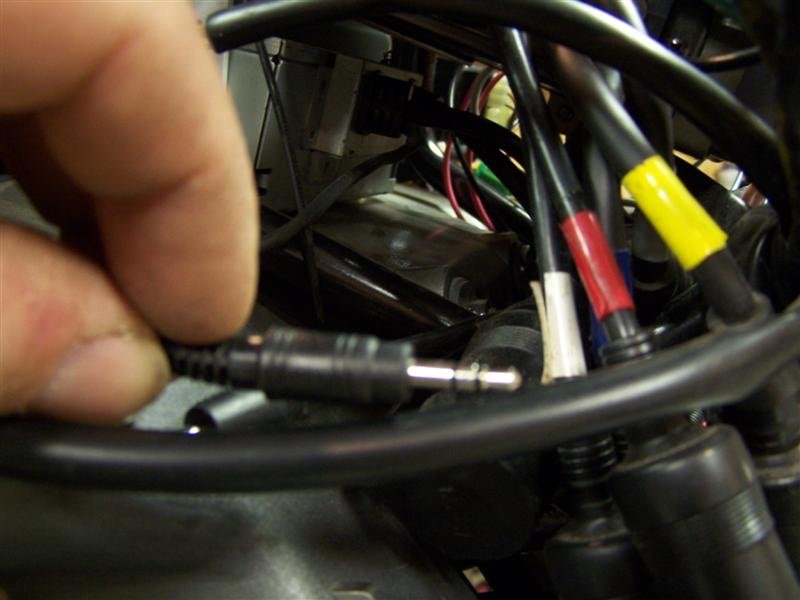
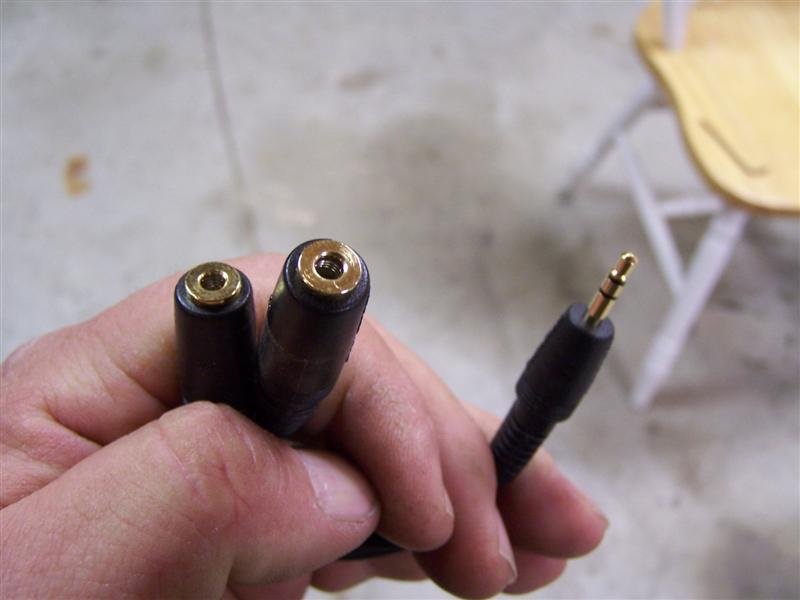
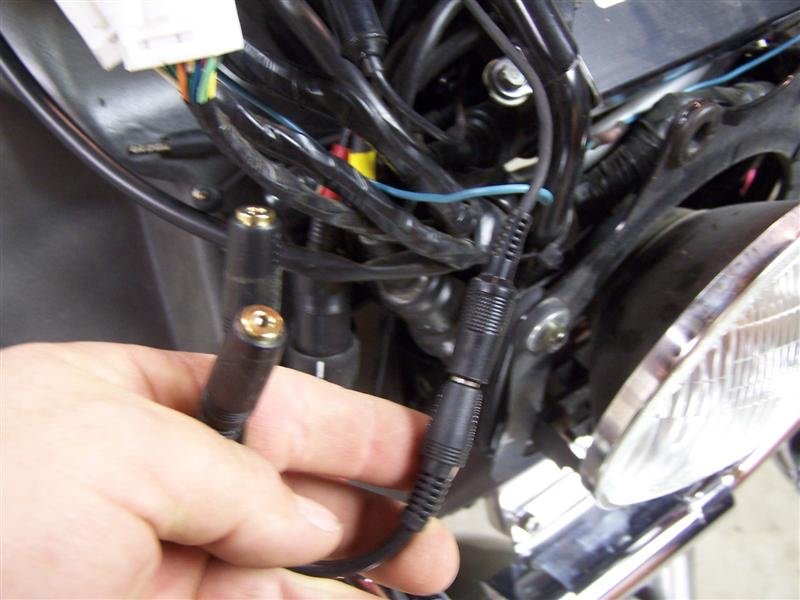
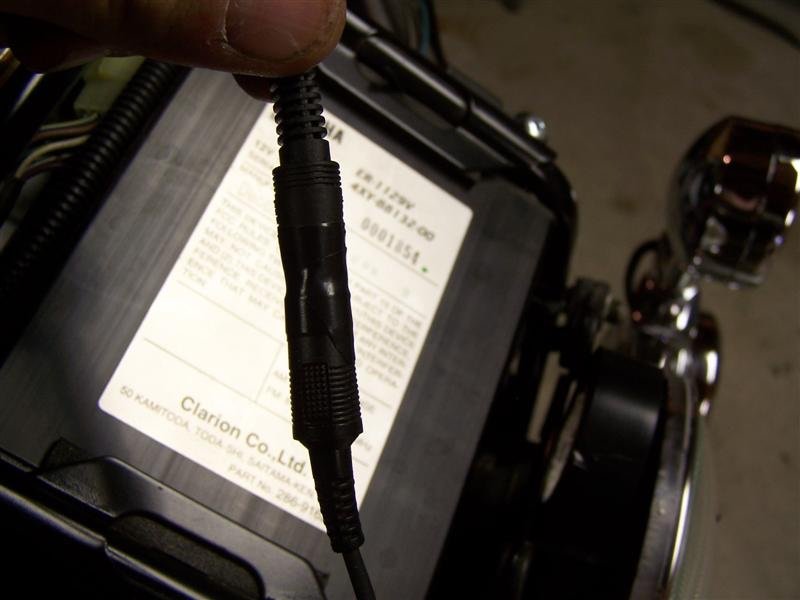
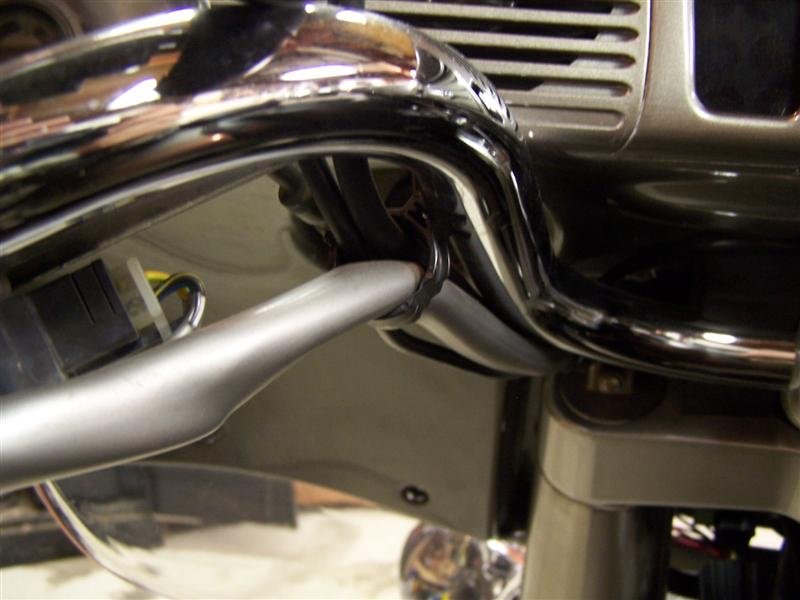
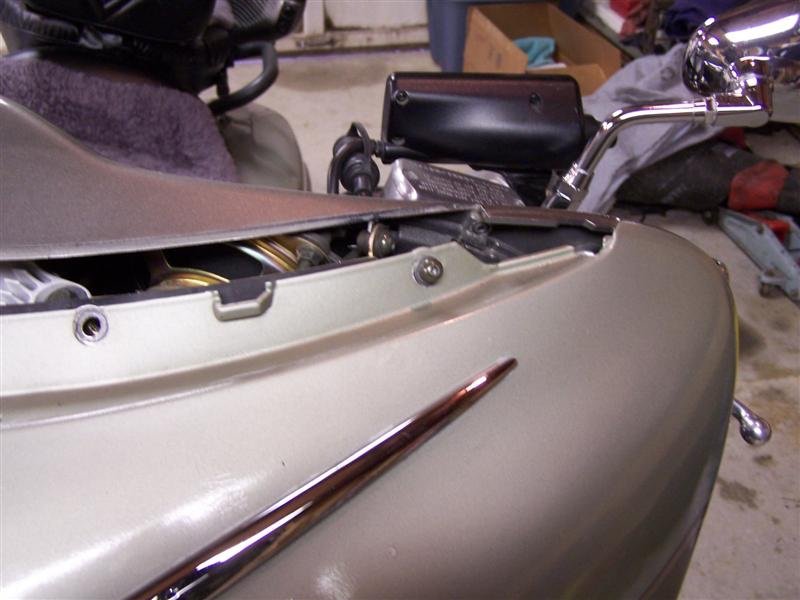
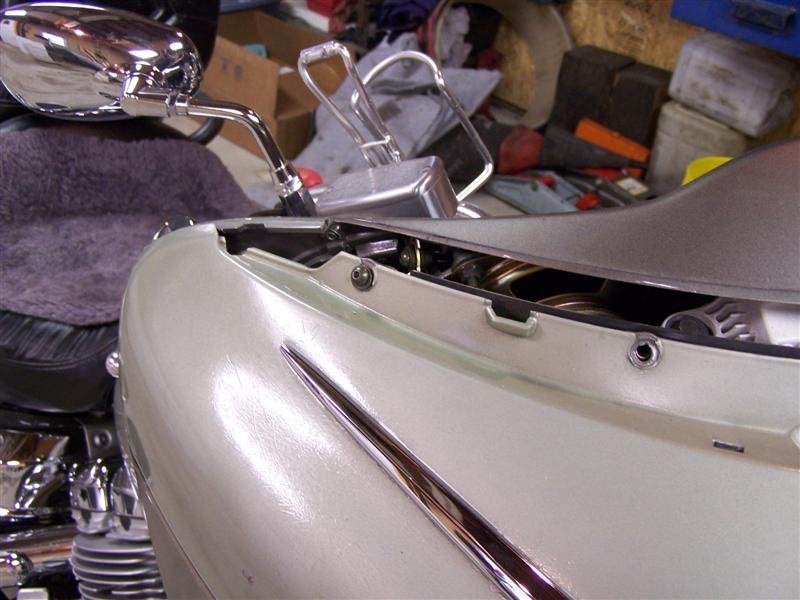
Well I have some time and decided that I will put up how to split the front fairing and install the audio cable to hook up MP3 players, Sat radio or GPS units. This is not a hard thing to do and it just takes a little time. Here is what you will need to accomplish this, all these cables can be purchased at you local Radio Shack for less that $20 2 Way splitter part # 42-2570 6 FT Audio Cable part # 42-2387A You can also use a 3 way splitter if you choose for more hookups Part # 42-2458 and if you want the ultimate audio cable then here is the gold series 6 FT cable Part # 42-2607 First thing to do is take off the chrome windshiled trim, it is held on by 2-3mm hex bolts (Pic) when you remove the bolts you need to get your fingernails under both outer edges of the chrome piece and lift strait up, working it slowly. You can rock it back & forth strait up and this will help it along. If yours has never been off it will go a little hard and your going to be puckered. Dont force it! work it a bit and it will come off. Next is to remove the additional 6 bolts that hold the fairing on from behind, there are 3 on each side and are 3mm also, You'll also notice that the 2 bolts that hold the chrome windshield trim on are longer than the others, they need to go back in those 2 top holes on reassembly The next bolt to remove is the 4mm below the headlight You will see 6-3mm bolts along the top of the fairing, these hold the windshield on and the top of the fairing. There is a trick here, remove the 1st bolt to the right of the center completely out. Then you will loosen the remaining 5 but dont take them completely out. You will see that the windshield has slots and that it slides over the other bolts. Once you have them loose and the one out you can lift the shield strait up and off the bike. Take out the remaining bolts and you can now remove the fairing. If you have driving lights that are not on an extention you will have to take the bracket loose to remove the front of the fairing. Now the bike will look like this You will now have to dig around inside the wires to free up the connectors for the Aux jack, here is the wire to which it is connected on the amplifier unit. This wire has the female end on it and is what you will plug the new splitter into. And here is the male plug that goes to the back of the cassette deck. You will plug this into 1 of the female ends of the splitter should you want to hook up the aux jack behind the cassette door. What you now need to do is take your splitter, which you can get from your local Radio Shack and install it onto the female end that is on the amp. I just wrapped it in electrical tape for seal out any moisture and debris. Now you can plug the male end from the casstette deck back into the splitter so it's still useable if you wish. Remember to wrap it in electrical tape so it is sealed and wont be pulled apart. You can now plug in your 6 ft Audio Cable that you will be running to whatever device your hooking up MP3 GPS or Sattilite radio. If you want to hook up 2 of these then just omit hooking the tape deck line back up and purchase 2-6 ft leads. You will then need to run your Audio Cable from inside the fairing to the handlebars or where ever you are hooking your components up at. I had mine run throught the cable loops that the bikes wiring and cables run through. There will be some extra length with these audio cables, just wind them up inside the fairing and put a zip tie on them to keep them neat and orderly...it makes getting around so much easier when you have to go back in there. Once you run your Audio Cables your ready to put the fairing back together, here is a little trick that will help you out. Put the outer 2 bolts in the upper fairing and start to thread them in before you slide the windshield back down into place. Many times the small brackets that hold the steel backing plate are broken and when you try to install the windshield it pushes the threaded guide holes out of position...dont ask how I know this. Install the windshield and then the right of center bolt, now the shield wont fall out. Replace all the additional bolts but be sure not to tighten any all the way up until all the bolts are threaded in....Tighten all the bolts Thats all there is to it! you now have additional hookups for the aux position. Mind you this will not work with the CD changer in the bike if you have one as it will use the auxillary on the bike. This works great for MP3 players, GPS systems and Sat radio.

-
Sam...Welcome to the site! That is a common problem on some of the G2's, if you need any ideas or help just ask away. There are no dumb questions here and we'll get any problem you have squared away.
-
Question for metalurgists and welders, Professional or amateur.
Squidley replied to fixit3546's topic in General Tech Talk
Dan, I dont believe that a quality weld can be accomplished other than the way Randy did it (upside down). #1 it would have to be perfectly clean to make sure of good penetration and # 2 it is difficult at best to weld with the MIG upside down from the underneath. That area is very tight and it really should be done while flipped as Randy did. -
Gary, Do you have any pics of it? If the HD one isn't compatable with the RSV I'm looking for all the options I can get
-
Absolutely...let us know and we'll get hooked up with you folks for a bit of a ride
-
This will be another of the upgrades I make on my bike also...along with the 100 others or so to make it just right I know Rick H has them for the 1st gen, not sure on the G2's
-
There you go Scott...ask and ye shall recieve That does look good Randy
-
Rick, That is perfect! I dont need all of that other crap thats on most of the MP3 players. As far as the price goes most of the MP3 players on the market are $200 + Thanks for posting that up, I am going to check that out and see how feasable it is
-
Question for metalurgists and welders, Professional or amateur.
Squidley replied to fixit3546's topic in General Tech Talk
Jim, Mig welding the frame will be fine, thats how they come from the factory as it's all automated and done with robots for the most part. The biggest things you need to do is make sure the pieces your welding are clean steel. I would also heat them up a bit prior to striking the arc as mig wire will flow better if it's started on a preheated surface. As mentioned use a good machine to do this with plenty of power. I would NOT use a 110 vac welder or a flux core to do this, Use a 220 vac unit as it will give better current for a better weld and better penetration. If you have problems or other questions give me a shout, I just happen to be a welder by trade -
Looks decent...but I haven't had much luck with MP3 players that have all the doo dads. I wish they would make one that just handled music, all the other crap just makes it more unrelaible. I'd really like to get another one for the bike, but I hate having to keep taking them back due to them going bad
-
Scott, Nothing against the Diamond R, they have great quality items. I have a venturedad hitch and I love it I too was looking for something to make an adapter to haul a flag on PGR missions.