Search the Community
Showing results for tags 'splitter'.
Found 13 results
-
I just received the mic splitter from Edset. Anyone has pics on installation? Gaetan
-
I have a 2008 Venture. I am considering doing the Marshal Mod. The instructions refer to keeping the current two antenna set up. Can the AR-1A splitter be used to convert to a one antenna system on the 2nd generation Ventures?
-
I originally posted this on one of the Goldwing sites and got no response. For the last few weeks I've been trying to get my telephone synched up to work through the Zumo like I had it on the RSV. When I connect the mic splitter I get a lot of noise that sounds like alternator whine and I really don't know what to try next. The noise is coming through the mic circuit. Without the intercom on I don't hear it on the bike but the person on the other end of phone call does. I could live with that. However, when the IC is turned on the noise is unbearable. So far I have checked all connections and grounds. I replaced the noise isolator on the AUX input. I've tried both an MP3 and Edsets mic splitter. I tried unplugging the mic from the GPS but the noise is still there on the IC. If I take the mic splitter out there is no noise on the IC. I have the Honda rear passenger controller which gives you a filter that is plugged into the mic circuit. I've tried with and without it and there is no difference. I can increase or reduce the noise by moving the wires around but I can never eliminate it. Would a torroid magnet on of the wires help? Is there anything else I can try? Thanks for any help, Dennis
-
Yes I really did say that, but there’s a good reason. You see, if it was riding season I would be missing out on riding for at least a few days because of a little mishap earlier today with a 20-ton log splitter. The wife and I were splitting more firewood this afternoon because “Global Warming” hasn’t kept things nearly as warm as advertised and we’ve been burning wood since late September. You’d think that I would be an experienced “hand” with the log splitter by now, but apparently not as I managed to insert my left index finger between a log and the end stop on the splitter. OUCH! Nothing appears to be broken, but I did lose some hide and the ‘meat’ appears to be pretty mashed. Darn thing is still leaking a bit and the little accident happened seven hours ago. Looking on the bright side, at least its still winter and riding season is at least a month away, probably more than that here. I think it will be a while before my finger can stand the little vibration we get in the handlebars.
-
What is the best way to do a twin antenna setup on a 1st gen? I have them both with extra mount. Should I run 1 antenna to the CB and eleminate the splitter, and the other directly to the stereo? Or go 2 into 1, then into the splitter?
-
just installer an ant splitter from a vr on the voy,it has an match pot on it,is that the same as setting the SWR's,how do i check the setting,installed a COBA 75,
-
Back in 2006, squidley posted an article (http://www.venturerider.org/forum/showthread.php?t=3905) on how to install an aux line splitter on the back of the amp/radio. I would like to be able to connect my SkyFI-2 to the aux in. My 08 RSV has an aux jack on the front of the casette player, but wire hanging all over the place looks butt-ugly. Plus...I can't close the casette cover when the input cable is connected. Does anyone know if an 08 RSV have an aux input on the back of the amp/radio to accomplish what is outline in squidley's article? I was hoping to get a definitive answer BEFORE splitting the fairing and attemping this "upgrade". Thanks!
-
I just picked up a Venture CB with the splitter. Hope I did not make a mistake. What else will I need to complete this. It is just the CB and the splitter.
-
I'm wondering if these '85 Venture CBs will like typical "truck stop" CB antennas as long as the SWR meters out. Also, can't a splitter be used to incorporate the stereo with that one antenna? AND aren't TOP LOAD antennas better than BOTTOM LOAD for bikes?
-
Hi, I'm posting this in 1st gen tech and also the Audio forum. Sorry for the repeat, but I wasn't sure which would be best. My CB was working OK. I had dual short antennas. I recently switched to a single 3' Wilson Flex fiberglass antenna and a Firestik splitter, which should work better. I got it all hooked up and now the CB is stuck in receive mode whenever it is on. I disconnected the antenna and splitter and it stays in RX mode even with no antenna. It's like the squelch is turned to max sensitivity, but adjusting the squelch doesn't change anything (it used to function normally). It did work, now it doesn't. Timing is conincident with antenna change, but problem is independent of the antenna being connected. What could have happened? Second, I've read that the Firestik splitter/duplexer is very efficient for signal transfer. The CB, while stuck in RX mode, is successfully receiving signals. But they are stronger (voices sound louder) when the antenna is connected directly to the CB, compared to when wired thru the splitter? What gives? Does the "Matching" pot affect receive strength or just transmit? Thanks, Jeremy
-
 Hi, I'm posting this in 1st gen tech and also the Audio forum. Sorry for the repeat, but I wasn't sure which would be best. My CB was working OK. I had dual short antennas. I recently switched to a single 3' Wilson Flex fiberglass antenna and a Firestik splitter, which should work better. I got it all hooked up and now the CB is stuck in receive mode whenever it is on. I disconnected the antenna and splitter and it stays in RX mode even with no antenna. It's like the squelch is turned to max sensitivity, but adjusting the squelch doesn't change anything (it used to function normally). It did work, now it doesn't. Timing is conincident with antenna change, but problem is independent of the antenna being connected. What could have happened? Second, I've read that the Firestik splitter/duplexer is very efficient for signal transfer. The CB, while stuck in RX mode, is successfully receiving signals. But they are stronger (voices sound louder) when the antenna is connected directly to the CB, compared to when wired thru the splitter? What gives? Does the "Matching" pot affect receive strength or just transmit? Thanks, Jeremy
 -
Conversion to Single Antenna Thanks to Steve Bumgardner (Bummer) While removing the gas tank I managed to lean in too far and snap the center load on the CB antenna. Guess I should have put it up while I was working on the bike. Live and learn. Problems: The stock antenna is $140 or so, and it's obviously not very stout. The twin antenna system reduces the efficiency of the CB antenna. Probably not enough to worry about, but it's there if you like to sweat that sort of thing. Solution: One antenna serving both radios. Note: Some splitters reduce output power. Testing indicates that the Firestik splitter does not reduce final output power to the antenna. 4 watts in, 4 watts out. Many thanks to Marshall Gammon for his site http://bludolphintravel.com/gmg/marshallmod.htm It was a wonderful starting point. Preparation: Read the manual with the splitter. Read and understand the manual that came with your SWR meter. Check out the help files on the Firestik site http://www.firestik.com/Tech_Docs.htm If you've never worked with coax you should probably read http://www.firestik.com/Tech_Docs/Coax_Procg.htm for tips. Parts: 1 Firestik Firefly 3 foot CB antenna $18.00 http://www.walcottcb.com/product_info.php?cPath=28_97&products_id=897 1 300-340 stud mount base $5.00 http://www.walcottcb.com/product_info.php?products_id=251 1 folding mount $15.00 – This part is way too sloppy but it works if you require a folder. http://www.walcottcb.com/product_info.php?cPath=29_112&products_id=262 1 90 degree PL-259 adapter $5.00 http://www.walcottcb.com/360359-coax-right-angle-adapter-p-233.html 1 CB FM splitter $18.00 http://www.walcottcb.com/product_info.php?products_id=221 1 PL-259 male plug $2.50 1 PL-259 reducer model UG176 $.50 http://www.radioshack.com/product/index.jsp?productId=2103401 1 Motorola female $1.50 2 Motorola male $2.00 Solder and shrink tubing Installation: The CB lives in a plastic box under the trunk. The lid is held in place with two rubber straps. This mod assumes access to the CB by removal of the trunk as needed. (Remove six screws in the bottom of the trunk, then close the trunk and carefully rotate the rear up and forward. There's wiring up front. I used the 'balance with forehead' technique to hold it up whenever I needed to get to the CB. The red spot's almost gone. Be careful. It's way too easy to put a nasty scratch in the trunk while you're doing this. Sigh.) Remove and do as you will with the old antenna. Mine may eventually grow up to be a flag mast. Remove and retain the wire between the antenna and the CB. Place the stud mount base on the antenna support with the nylon washer at the top. If you are using one place the folding mount in the stud mount, with the fold pointed front/back. Screw the antenna into this. Don't get carried away with the antenna itself. All else should be tight. Screw the 90 adapter into the bottom and aim it toward the radio. http://www.venturerider.org/antenna/image002.jpg Antenna base. I had to use a file and cut two notches in the stud base. Most PL-259 females have notches all around so that the locking points on the male can keep it from rotating while maintaining good contact. This one had none. A half dozen swipes with an edge of a triangular file did the job. http://www.venturerider.org/antenna/image004.jpg The notch Use the old wire to measure where to cut the CB Antenna Out wire on the splitter. Solder a PL-259 male plug on the wire you cut off. This is your new antenna wire. Put a male motorola plug on the CB Antenna Out wire of the splitter. http://www.venturerider.org/antenna/image006.jpg Wiring details. http://www.venturerider.org/antenna/image008.jpg Finished wiring – I didn't shorten the FM antenna wire the first time. It doesn't have to be, but it makes the box a bit crowded. Screw your new antenna wire into the 90 at the base of the antenna. Test for continuity and shorts. The tip of the antenna should have continuity with the center of the CB antenna wire. It should not have continuity with the outside of the plug. The CB antenna wire shield (outside of plug) should have continuity with the antenna support that came with the bike. Screw the end of the antenna wire into the splitter's Antenna In plug. Route this wire through the hole the old antenna wire went through. Plug the CB out wire into the CB box (gray plug). Remove the FM antenna, base and all. Cut the end off of the FM wire and solder the female Motorola plug on. The core goes to the center of the plug. The shielding goes to the body of the plug. Use some shrink wrap to cover the whole thing. Cut a notch in the side of the plastic box and route the FM antenna wire with the new plug into the box. I made a notch in the lip of the top and a matching one in the slot of the box. I kept this a tight fit to keep water out. Plug the splitter's FM Out lead into the FM antenna wire, fold it up into the box beside the CB. Place the splitter under the wires coming into the box on the left. Massage all the wiring to fit. Close it up. http://www.venturerider.org/antenna/image010.jpg In the box. Now that everything fits, it's time to set the Standing Wave. THIS MUST BE DONE or you'll toast your CB output transistor. Remove the plug from Antenna In on the splitter. Remove the plug between the splitter and the CB. Add a male PL-259 to male motorola patch cord to the antenna input wire (gray plug). Let the patch cord and the antenna wire dangle outside the box. Put the trunk back in place. Plug the antenna wire into Antenna on the SWR meter. Plug the wire from the radio into Radio on the SWR meter. Set the standing wave as per meter instructions. I got a meter at the Rat Shack. I got a http://www.walcottcb.com/product_info.php?products_id=934 and a http://www.walcottcb.com/12mfpl-pl259-to-motorola-female-12-long-p-198.html to connect the meter to the antenna system. I had to screw the adjuster on the antenna most of the way in. After some tinkering with the tip I got a 1.3 on 20 and just under 1.7 on 1 and 40. Once the antenna SWR is set you have to tune the splitter. Connect the antenna to Antenna In on the splitter. Connect a male motorola to male PL-259 patch cord to CB Out on the splitter. Connect these to your meter and check SWR. You'll have to turn the CB adjusting screw on the splitter to bring the SWR back down to where it was when you set the antenna. Mine is turned all the way down. You can now set the AM as per splitter instructions. When the antenna and splitter are both set disconnect the meter and the patch cord. Put the antenna wire back on Antenna In and the CB out wire into the gray socket. Pack everything back into the box, put the lid on, and bolt the trunk back in place. Breaker, breaker, two nine. End result: Single antenna system for under $75.
-
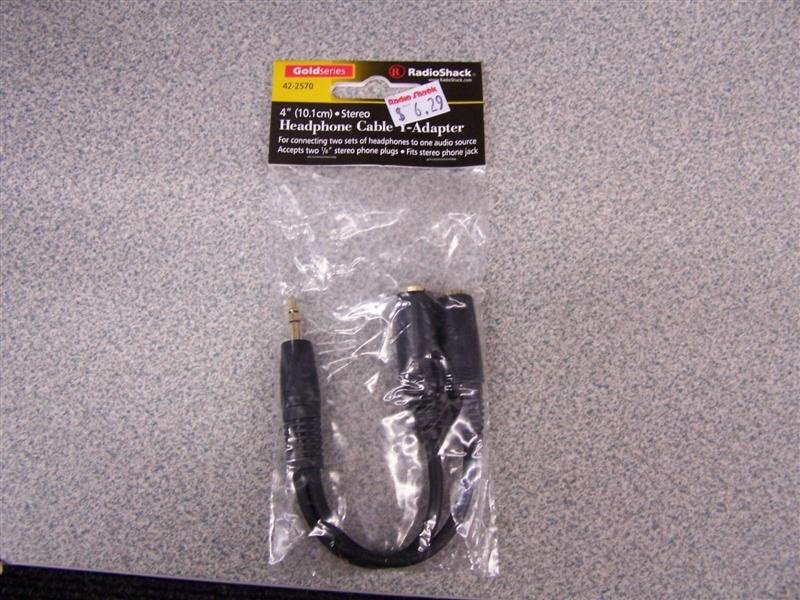
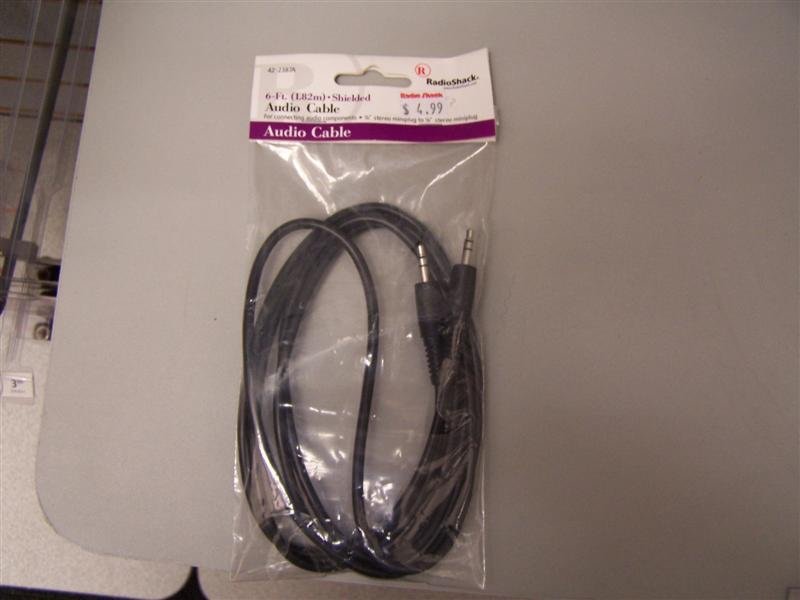
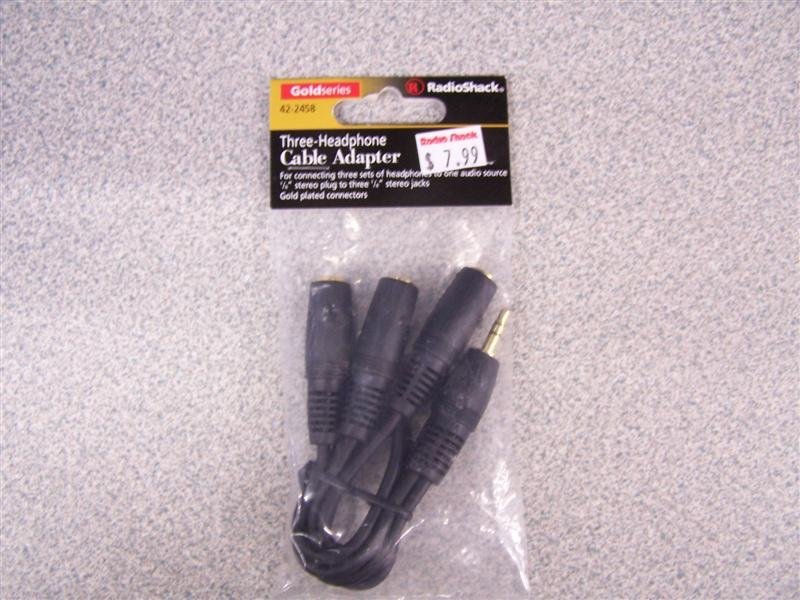
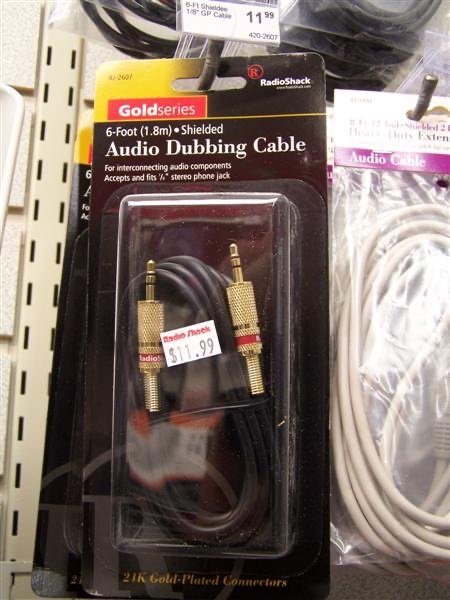
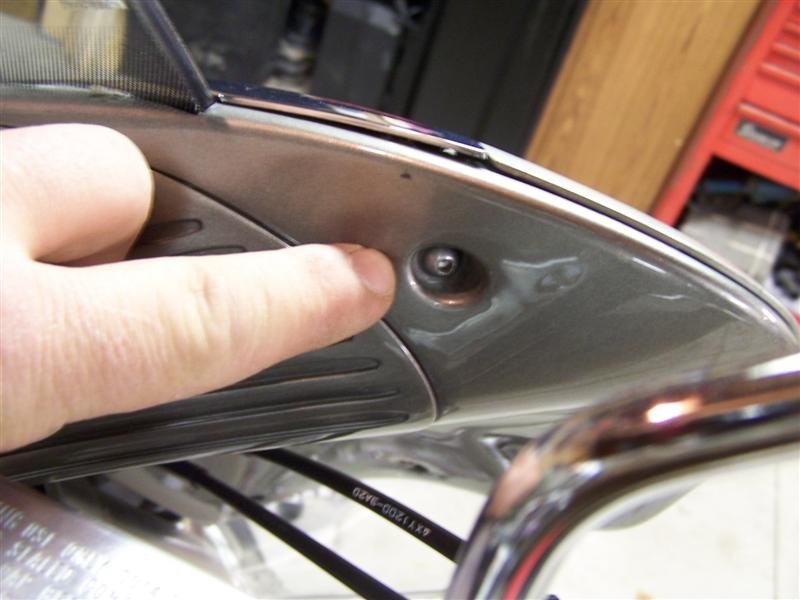
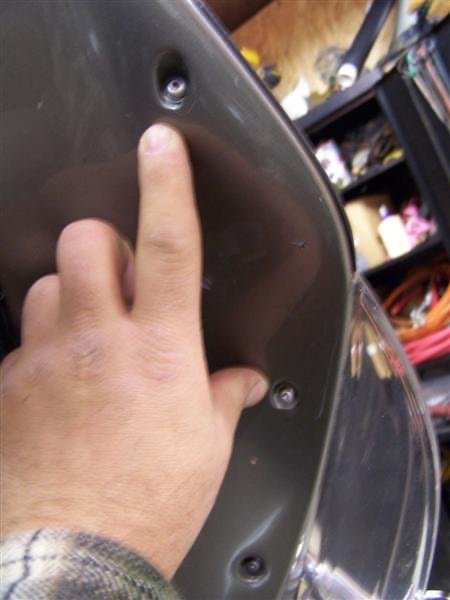
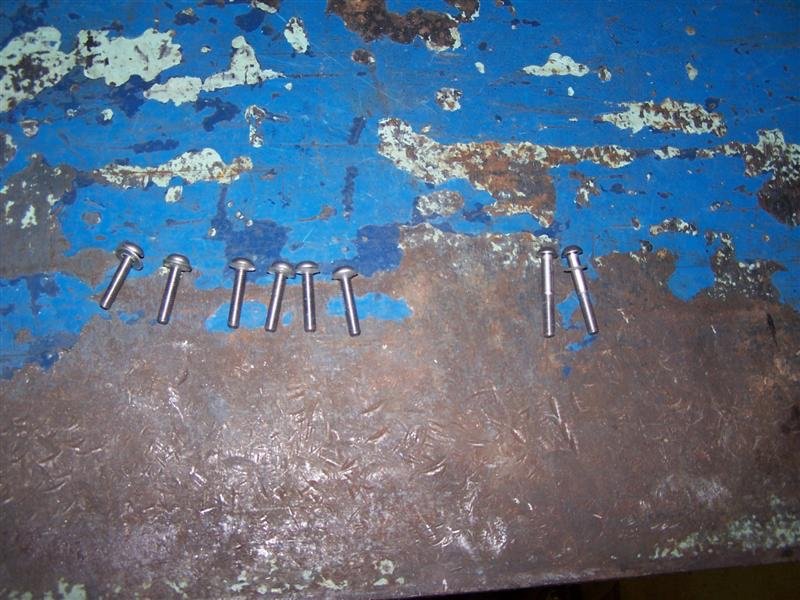
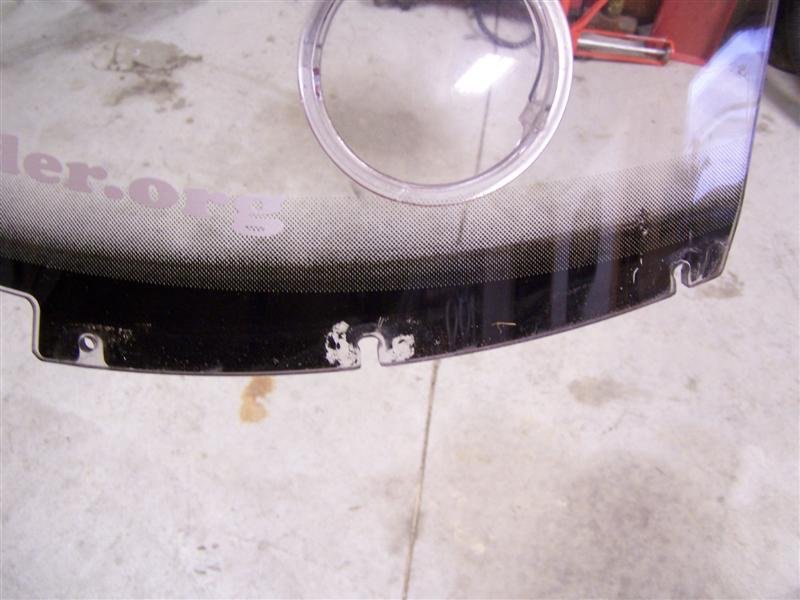
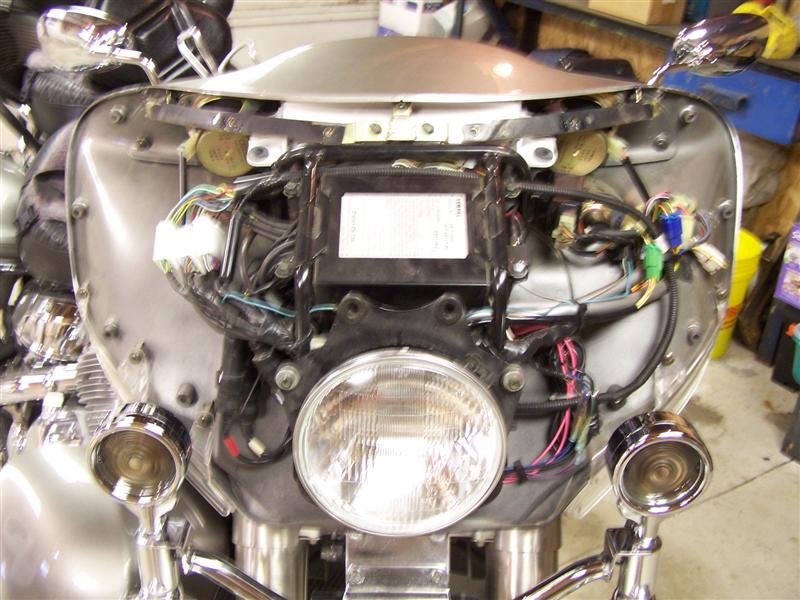
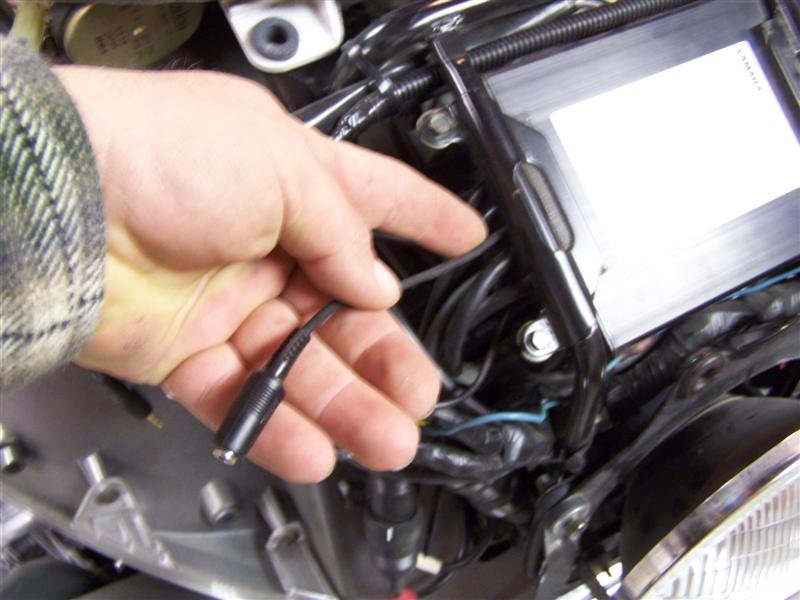
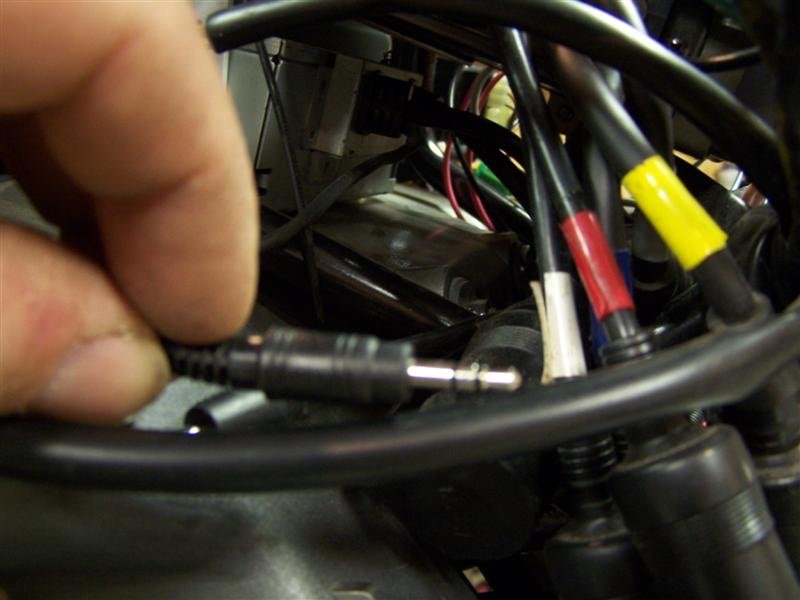
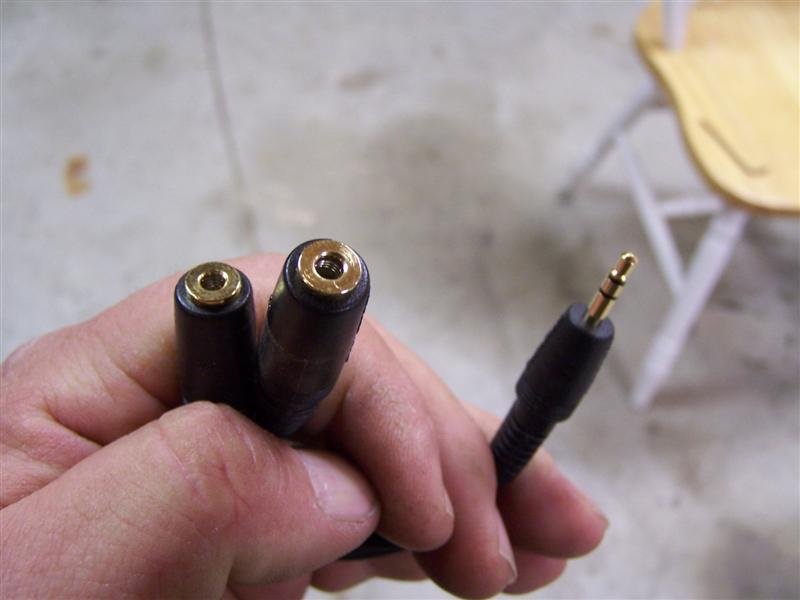
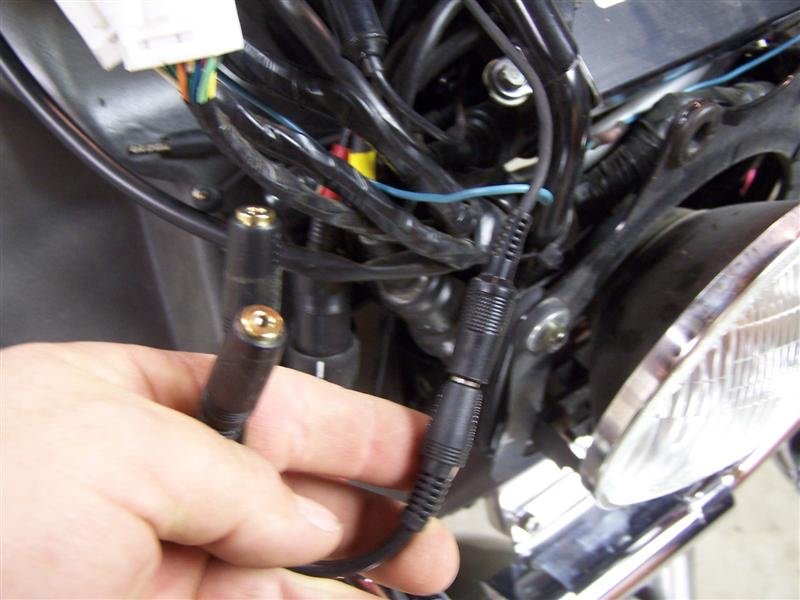
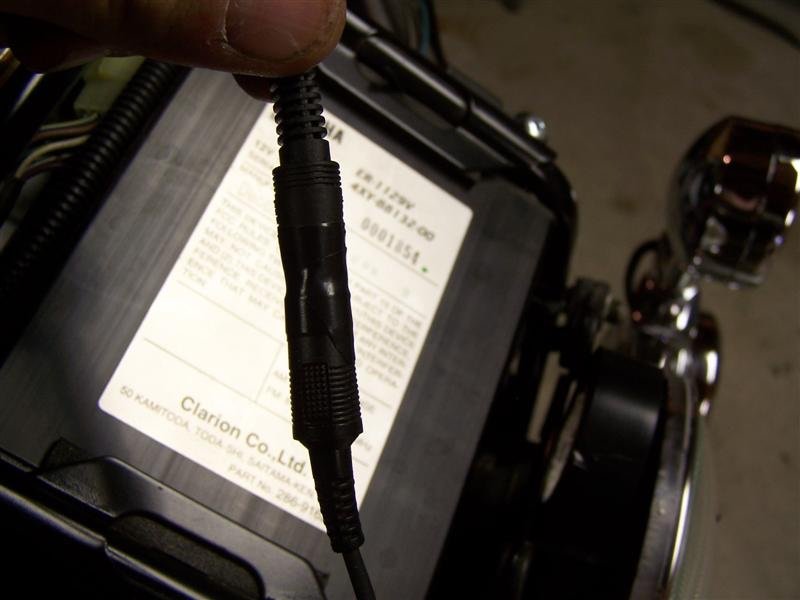
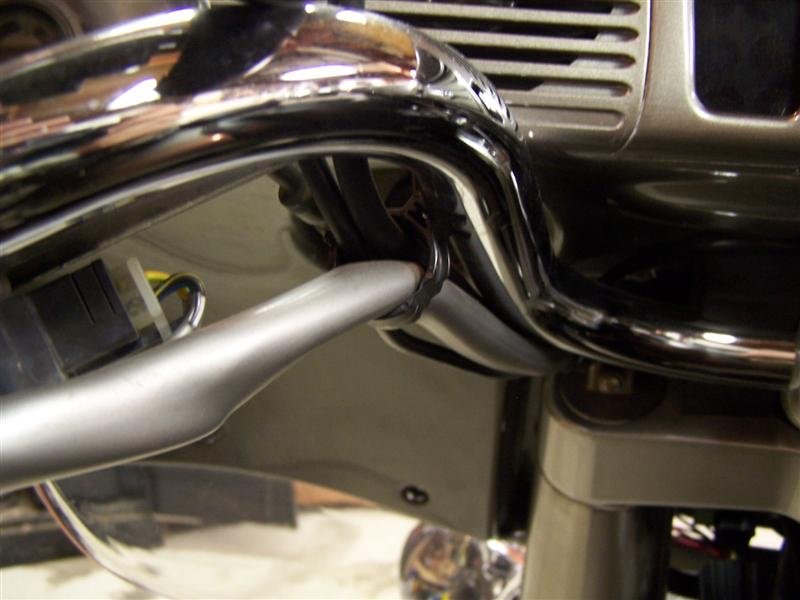
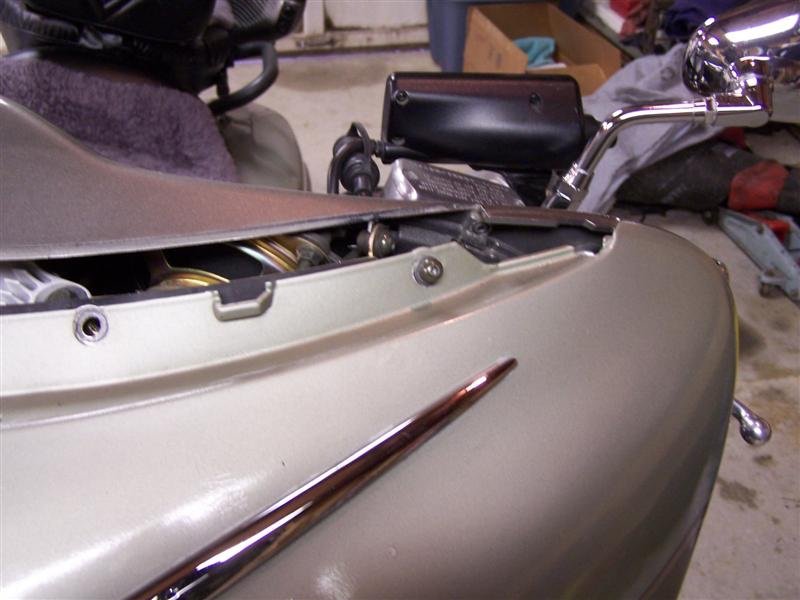
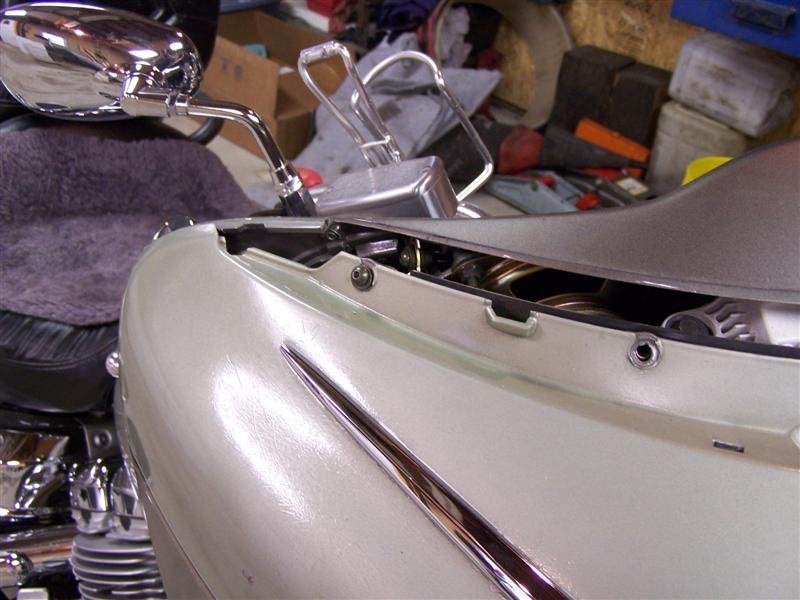
Well I have some time and decided that I will put up how to split the front fairing and install the audio cable to hook up MP3 players, Sat radio or GPS units. This is not a hard thing to do and it just takes a little time. Here is what you will need to accomplish this, all these cables can be purchased at you local Radio Shack for less that $20 2 Way splitter part # 42-2570 6 FT Audio Cable part # 42-2387A You can also use a 3 way splitter if you choose for more hookups Part # 42-2458 and if you want the ultimate audio cable then here is the gold series 6 FT cable Part # 42-2607 First thing to do is take off the chrome windshiled trim, it is held on by 2-3mm hex bolts (Pic) when you remove the bolts you need to get your fingernails under both outer edges of the chrome piece and lift strait up, working it slowly. You can rock it back & forth strait up and this will help it along. If yours has never been off it will go a little hard and your going to be puckered. Dont force it! work it a bit and it will come off. Next is to remove the additional 6 bolts that hold the fairing on from behind, there are 3 on each side and are 3mm also, You'll also notice that the 2 bolts that hold the chrome windshield trim on are longer than the others, they need to go back in those 2 top holes on reassembly The next bolt to remove is the 4mm below the headlight You will see 6-3mm bolts along the top of the fairing, these hold the windshield on and the top of the fairing. There is a trick here, remove the 1st bolt to the right of the center completely out. Then you will loosen the remaining 5 but dont take them completely out. You will see that the windshield has slots and that it slides over the other bolts. Once you have them loose and the one out you can lift the shield strait up and off the bike. Take out the remaining bolts and you can now remove the fairing. If you have driving lights that are not on an extention you will have to take the bracket loose to remove the front of the fairing. Now the bike will look like this You will now have to dig around inside the wires to free up the connectors for the Aux jack, here is the wire to which it is connected on the amplifier unit. This wire has the female end on it and is what you will plug the new splitter into. And here is the male plug that goes to the back of the cassette deck. You will plug this into 1 of the female ends of the splitter should you want to hook up the aux jack behind the cassette door. What you now need to do is take your splitter, which you can get from your local Radio Shack and install it onto the female end that is on the amp. I just wrapped it in electrical tape for seal out any moisture and debris. Now you can plug the male end from the casstette deck back into the splitter so it's still useable if you wish. Remember to wrap it in electrical tape so it is sealed and wont be pulled apart. You can now plug in your 6 ft Audio Cable that you will be running to whatever device your hooking up MP3 GPS or Sattilite radio. If you want to hook up 2 of these then just omit hooking the tape deck line back up and purchase 2-6 ft leads. You will then need to run your Audio Cable from inside the fairing to the handlebars or where ever you are hooking your components up at. I had mine run throught the cable loops that the bikes wiring and cables run through. There will be some extra length with these audio cables, just wind them up inside the fairing and put a zip tie on them to keep them neat and orderly...it makes getting around so much easier when you have to go back in there. Once you run your Audio Cables your ready to put the fairing back together, here is a little trick that will help you out. Put the outer 2 bolts in the upper fairing and start to thread them in before you slide the windshield back down into place. Many times the small brackets that hold the steel backing plate are broken and when you try to install the windshield it pushes the threaded guide holes out of position...dont ask how I know this. Install the windshield and then the right of center bolt, now the shield wont fall out. Replace all the additional bolts but be sure not to tighten any all the way up until all the bolts are threaded in....Tighten all the bolts Thats all there is to it! you now have additional hookups for the aux position. Mind you this will not work with the CD changer in the bike if you have one as it will use the auxillary on the bike. This works great for MP3 players, GPS systems and Sat radio.