Search the Community
Showing results for tags 'wiring'.
-
 I just discovered a wiring slot inside the right side of the faring (89 VR) to the outside towards the battery so one does not have to cut a hole in the faring. Has anyone else found it also or was I just blind.
 -
 Is the Stebel horn bracket and wiring harness still available for purchase somewhere on the site, I can't seem to find them in the classified section. Thank you..
 -
For those of you that have trailer wiring harnes, where did you route all the wires? Did you drill a whole on the rear fender to run then inside the fender or run them some how along the outside of the to the hitch? I bought a plug and play set up that connects under the seat. Thanks
-
Where does one attach the power wire to the accessory side of the electricial when adding a set of additional lights, so the key controls when the additional lights get power?
-
I'm helping a Friend add the Kisan vectraLight - Brake Light and Turn Signals to his 08 Electra Glide Classic. I'll need to splice into the existing run, turn and brake wiring. To simplify this, Does anyone happen to know what the color code for these wires are? Thanks, Rich
-
 Had a little incident with my bike & need to replace the fairing, maybe both the front cowling and the front panel (or inner piece). The front cowling comes off easy by just removing a bunch of screws, no problem. How about the front panel inside piece? How much of the wiring has to be disconnected to remove that piece? I could run out & take a look but it's late & I'm here so thought I'd ask! Is it just a matter of unscrewing the headlight, tape deck, etc and then lifting it off over all the wiring while still connected? Or does the wiring have to be disconnected one by one and fed thru holes in that piece? Just wondering how big of a job that would be ...of course if I do it, the tape deck will NOT be reinstalled!...I'll be hitting up Ponch for a set of gauges instead!
 -
Back in July I bought a chrome Stebel air horn from Hornblasters.com. I also bought the Carbon One wiring harness and mounting bracket. Last weekend I finally got around to install the horn but the horn I received was the Nova Chrome version. This horn has a chromed plastic cover that looks great but because of the cover it's a little larger. Needless to say it doesn't fit in the space where the factory horn goes without some modification. The first thing I had to do was add a spacer (1/4") between the mount on the back of the horn and the Carbon One mounting bracket. Then I had to trim some of the plastic cover from the upper right side of the compressor so the horn wouldn't touch the engine. I used a dremel tool . Lastly I had to change the clips on the wiring harness that go the the horn. This horn has the electrical connections coming out of the bottom of the compressor. I changed the wiring harness connectors from straight to 90 degree other wise the wires would have touched the pipes. Moral to the story, when you by parts online make sure you get what you thought you ordered. Also, if you are going to add a Stebel horn make sure you don't get the Nova version.
-
you might have noticed I just picked up an 84 Standard venture. Wondering if the wiring harness is the same as a VR? Meaning....could I buy the goodies and make a standard into a VR or are all the plugs and connections just not there?
-
 I have a fan over ride switch but lately my fan seems to work only when IT decides to. Usually only when cold, not when I need it to work. Fan failures haven't been brought up here but figured I'd ask before troubleshooting the wiring.
 -

MKII wiring harness ?'s
bald josh posted a topic in Venture and Venture Royale Tech Talk ('83 - '93)
I ordered a wire harness for my 86, the ad on ebay was for xvz12/13 so i assumed the harness would be interchangable, its not! the guy i bought from has been INCREDIBLY helpful and will refund my $ + shipping, but he says his parts fiche shows the same for mkI and II.are they the same? a few harness connectors like the coils, pick up coils,tail light, match up but alot of stuff does not. he says he has a few harnesses and they all look the same but as soon as i took it out of the box i knew some things were wrong. any thoughts? and does anyone have a harness they want to sell. im looking for one in good condition and that will just plug and play, royale or standard is fine. -
Anyone on that can answer a question about the wiring of an ignition by-pass switch?????????? errrghhhhh 770-624-4569????
-
i need a wiring harness for my rear speakers on my second gen(06).i also need some speakers but figured i go with some new polk or alpine. also instrestead in the chrome plates that cover the carb springs and if its not to early to make a christmas list dose anybody have a set of j&m intercom system for a full face helemet? guess i'll stop there for now c-me later.p.s. i guess when yammer dan passed me he sucked the speakers and the wires out!!!
-
Its my understanding that the 1st gen is rather limited in electrical capacity. Is there a way to improve this? I guess a new stator with slighty more power but dont you run into destroying your wiring. Is there another way to get upgraded power to other items heated seats grips etc. Like a transformer or something with its own wiring system? I dont know much about electricity so I'm sending out the challange to those out of the box thinkers that do.
-
:soapbox:From a thread here I purchased the HID head light kit from a manufacturer in Canada. This was a plug and play easy install. Before I putit all back together I tried and it worked as promised. Then testing again and all was fine. When secured all wiring I tested again and nothing. I hear the igniter but no light. I checked all wiring and all tested fine. Tested again a nothing. No ignitor buzz or light. So I took it all off. Any clues, suggestion other than returning it. Thanks:confused24:
-
Had a problem start this year. When I hit a bump the speedometer needle would shake a little. While on my long trip it got worse, sometimes to the point where it would drop right to zero, then come back when I hit another bump. This also takes out the odometer and the cruise control. I have removed the fairing and lowers and checked all wiring since it seemed it was when the front hit a bump the problem occurred. I also took all the connectors apart, checked them and put back together. Still same. Any ideas? Thanks in advance
-
2006 RSTD 23K miles OK gentlemen and ladies, I just went out to take a ride with my wife. Rolled the bike out of the garage, packed the bike, got helmets and stuff then tried to start the bike. When I turned the key I had lights etc. I hit the starter, did not fire the first time. Pulled the choke a little and went to hit the button again. I must have not pushed hard enough because it sounded like I hit the button two times real close together. It was then that the lights went out. I have checked all fuses including mains, all wiring that I can see with seat off and cowling/covers off. I have nothing. Battery appears still good as it will still light my accent lights that are not run through the switch. Any ideas, hints or suggestions? Thanks in advance everyone.
-
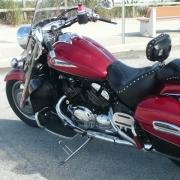
While wiring in the isolator circuit for my trailer wiring harness, I came across this rubber hose.... it's to the right (throttle side) of the battery, up against the inside of the frame. The one end can be pulled out to expose a small hole (as seen in the second photo). It looks like the other end attaches to the housing around the rear shock. I'm sure one -- or many -- of the experts here can educate me as to what this is? Thanks, in adavance.
-
just wondering if anyone has info. on how the bike should be wired for a 5 wire flat plug. Left signal, Right Signal and ground are easy enough. I want to concentrate on the brown and blue wire and what they should be connected to on the bike. Just going over the wiring to make sure it was done properly from the previous owner.
-
I bought a used amplifier on ebay and the previous owner had changed the plug with one that wouldn't match my wiring harness plug. Most of his leads were labled and I have them all wired up except two. They are the orange and yellow lead coming out of the amp. I think they go to the sb (sky blue) and lg (light green) lead that go to the remote controller but I don't know which goes to which. Could someone help me out. My bike is an 89 Venture Royale and some of the wiring colors may have changed with the models. The wiring diagrams I found all are just "block" diagrams that don't show the exact pin locations, etc. I don't have a headset to try the remote controller if I wanted to connect them one way and then the other to see which one works. I'd rather not do that as I don't want to damage the controller. Thank you for your help. Sam
-
I fixed the cracks in my trunk lid (I hope) and was reconnecting the wiring for the vanity mirror and the tail light when I noticed that there was a crimp in one of the wires where it was pinched by the lid. This has happened before on my bike. Anyone have a good way to protect this wiring and give it the flexibility it needs to open and close the lid? Iowa Guy
-
 Hi everyone! So I figured that I wanted to make my first post a good one, so here it is. Pics at the bottom. I had been looking into my options for a tachometer for quite sometime and was rather unimpressed with the steep price tag and the style of the available motorcycle tach's. So I did some internet hunting and found a company based out of Michigan that makes Retro style tachometers for classic and muscle cars. You can find them at Classic Instruments. I thought to myself, oh now wouldn't that look good on my RSTD. Before I knew it, I was whipping out my cards to make a purchase online. With a lots of humming and hawing about which model to get, I ended up getting the All American Nickel 3-3/8" Tachometer and the chrome cup insert. Total $198US. Took about 4 days to ship to Canada! Not bad eh~! http://www.classicinstruments.com/images/products/AN80SHC.JPGhttp://www.classicinstruments.com/images/Tach%20Cup.jpg Once I received my new purchase I went to work right away. However, I had to really think about where to mount it, how to mount it and how to get it to work. So in case if anyone is wondering, read on. First off, where to mount it. I have a Uniq Cycle Classic speakers system (long story, I have the system but I currently waiting for a replacement amp because the first one was faulty. Not happy with those guys.) that will occupy the left and right portions of the handle bar, so that was a no-go. I decided to mount it dead-center about the speedometer display because that would give me enough space to not interfere with the windshield. Second, how to mount it. I was stumped for a while on this one. One of the problems was the chrome cup insert was far too long. If I were to mount it, the tach would stick way out over the front of the speedometer unit. I noticed that the tach itself was quite a bit shorter than the cup, so I decided to cut the cup insert down. I cut about an inch or so from the opening. I also cut down the screws (the ones that you bolt on the wiring to) on the back of the tachometer to shorten it down some more. After the trimming work I had reduced the length on the tach enough for the front of the gauge to sit flush with the speedometer unit. I spent a good amount of time trying to figure out a way of fixing the tach to the top of my speedometer without having to drill holes or welding to the pretty speedo casing. So I took an old stainless steel stirring ladle from the kitchen and went to work bending it into shape. I apologize for not taking step-by-step photos of the process, I was just... lets say... in the groove. I ended up bending the ladle with a slight arc, following the curve of the speedo casing, and a sharp 'S' shaped bend at the end. I drilled a hole in at the end of the 'S' shape and easily mounted it to the one screw that holds the speedo casing in the front (if you stand right in front of your bike and look at the speedo casing, you will see the bolt). The ladle works perfectly because it has a slight curve to it already and it follows the curve on the speedo casing. I then took the cup insert and the ladle and welded them together. I would assume that you could use some kind of adhesive or jb-weld. But since I have a MIG that I am always trying to find uses to justify its purchase, it was quick work . It was a simple one bolt job from there to permanently but non-destructively fix the tach to my bike. Third, the wiring. Not fun trying to figure this one out on your own. I will just write down what was the winning combination. Then tachometer has a 4 position selection screw on the back for calibrating. 4 cylinder, 6 cylinder, 8 cylinder, 12PALT. Sorry V-Twin friends, this mod is only for us!. I basically ran a wire from the 'signal' terminal on the back of the tach to the ignition wiring. It runs with many of the wires that are located above the ignition coils. The one you want is the only wiring harness that is made up of just two wires, white and black. I hooked up the signal wire to the white wire, set the tach calibration to 12PALT and SUCCESS! For me, the 12PALT setting works. It does act a little funny at about 4000 rpm while accelerating, where the needle with suddenly retreat slightly and the advance forward. Now I know there are other ways to set up the tachometer. Classic instruments sells a multiple ignition coil adapter gadget, or there is this one that you can build yourself. I'm going to live with my setup because its totally livable in my books. I also wanted to have a nice clean look for the tachometer wiring, and didn't want any ugly wiring exposed. I tried to look for some nice 'chrome' plastic wire covering but couldn't find any. So I ended up going to the plumbing section at the local Canadian Tire and buying a 20" braided steel flexible hose. I cut off each of the screw ends and slipped the wiring through it (I bought a pack of trailer automotive wire while I was at crappy tire for the tach wiring). I slipped one end of the steel hose through the rubber grommet that is supplied with the tachometer and the other end of steel hose around the speedo unit and into the steering cover. From there you just wire up the tach + and - terminals to the auxiliary wiring harness that is located under the seat. I also jumped a wire from the + terminal to the 'light' terminal on the tach, which keeps the tach light on all the time. I will try to take some night-time pictures. From there I just bought a small tube of silicone caulking/adhesive and put it around the rubber grommet, braided steel hose, tachometer and cup, and between the bottom of the cup insert and the speedometer casing. The last one is important, it prevents the tach cup assembly from scratching the speedo casing, and it eliminates and noise from vibration. The tachometer unit does not interfere with the windshield in any way so it can be used with or without it. One thing that I did notice that when I went for a ride on a hot day, I got a bit of condensation on the inside of the gauge glass. I remedied that by drilling two holes on either side of the gauge just behind the glass. This should prevent the build up of condensation. It also allows you to use a can of compressed air to clean any condensation that may build up (and it works really well too!). All in all it was a successful modification. I am really happy with my cool retro tach, its easy to read (due to its large size) easy to see placement, and its lower price point. http://i924.photobucket.com/albums/ad85/phertwo/retro%20tachometer/IMG_8552.jpg?t=1275937176 http://i924.photobucket.com/albums/ad85/phertwo/retro%20tachometer/IMG_8554.jpg?t=1275937176 http://i924.photobucket.com/albums/ad85/phertwo/retro%20tachometer/IMG_8553.jpg?t=1275937176 http://i924.photobucket.com/albums/ad85/phertwo/retro%20tachometer/IMG_8545.jpg?t=1275937176 http://i924.photobucket.com/albums/ad85/phertwo/retro%20tachometer/IMG_8547.jpg?t=1275937176 http://i924.photobucket.com/albums/ad85/phertwo/retro%20tachometer/IMG_8564.jpg?t=1276000546
 -
What is the best place to get the hitch and wiring harness? Is there a "best" hitch? Saw the postings on the wiring...reluctant to take it on...should I be?
-
I got to wondering why so many techs were having trouble diagnosing radio/audio related problems on RSV's. So I was looking through the service manual wiring diagrams thinking things should be pretty straight forward. What I discovered is a lot of missing information. Neither of the headset connections or the rear remote are shown on the diagram. None of the interconnect wiring for the CB or anything else is shown. Only some of the wires and connectors from the MCU are shown. No antenna connections are shown. None of the repair messages the radio presents were shown in the troubleshooter. No wonder this is such a 'guess how' fix area on these bikes. If anyone has a complete wiring diagram for the audio system on the RS Venture how about posting it. Mike
-
I've been looking at purchasing the J&M CB Radio. Does anyone have experience with this product? The only thing I'm concerned about is the dual mode one for two riders with all the necessary wiring, head sets, antinnia can cost up to $700! Any thoughts suggestions? Thanks Mark
-
I am looking to hook up my heated gear.My plan was to run a relay off of a wire that is only hot when the bike is running. Does anybody know of such a wire on the RSDT? I have them on my cars and have had them on 2 Yamahas. I have studied the wiring schematic but I can't find one. Thanks