


Monty
-
Posts
2,768 -
Joined
-
Last visited
Content Type
Profiles
Forums
Gallery
Events
Store
Everything posted by Monty
-
AC/DC-For Those About To Rock.
-
I wonder if anyone here who has parted out one of their 1st gens has all of the parts, where I could add this system to my '83 standard?
-

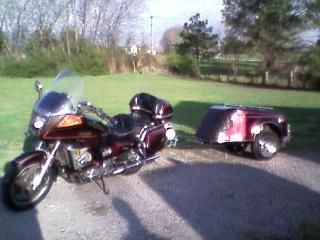
From the album: Monty
-
-
-
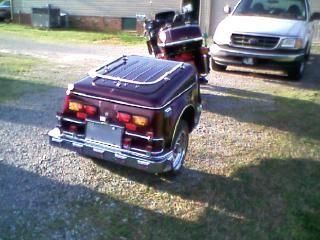
From the album: Monty
-

From the album: Monty
-
From the album: Monty
-
I see now...it's a whole light bar/bumper wraparound.
-

Car engine oil for the RSV ?
Monty replied to FL-Venture-Rider's topic in Royal Star Venture Tech Talk ('99 - '13)
I always use Castrol 10W40, and have never had any problems with shifting or clutch slip. -
Thanks. I had let some air out before, and that's when the seal started leaking...was dry before that. The manual calls for 12-18 PSI, so I had set it to 14. I will get some fork oil and drain/refill with what 5lbs? I will replace the seals and springs when I can allow it to be down a day or so. Too busy right now.
-
Correct. The groove also helps to cool the pad.
-
Nice! Mine is nowhere near that complicated. Very simple, and very strong. Randya, are those '83 saddlebag rails? Where'd you get 'em?
-
They are easy to make. If I can get my son over here with his digital camera, I'll take some detailed pics for ya if you want. I don't have a digital camera. http://i74.photobucket.com/albums/i274/13thAFMonterey/Rear.jpg
-
I have an '83 standard. Lately, I have noticed alot of bouncing in the front end. I've only had the bike for around a month, and I didn't notice it at first. I do know that one fork seal is leaking some. I am running 14 pounds of air in the forks. It also takes a second or two to raise up after I lift the bike off of the sidestand. Fork rebuild is not an option at the moment, and I was wondering if I just drain the fork oil and change it out, if that will help for a while. Could the bouncing be from the forks being low on oil?
-
California.
-
I looked all over Lowe's, and could not find those rubber stoppers. I think he got 'em somewhere else. I did buy the tubing there though. Gonna look at WallyWorld next.
-
Do you have the little switch on the back set to 4,6 or 8 cylinders?
-
Mk2 Brake System Question
Monty replied to bongobobny's topic in Venture and Venture Royale Tech Talk ('83 - '93)
Mine is mounted on the neck, right behind the vin #. It is centered in the neck. The steel line from the back comes into it from the right, and the arrow points to the back of the bike, with the front caliper hose attached there. Rotate your picture 90 degrees to the left, and that's how it sits. -
Elite 3 Front Tire Color - --, Size - MR90H-18 SKU# 170233On Order$116.991$116.99Elite 3 Tour Rear Tire Color - --, Size - MU90HB-16 SKU# 119997On Order$117.991$117.99 I didn't use the VR discount though. I had forgot all about it.
-
I just bought a set of Elite 3s from them last week. I installed them last Friday, and have about 500 miles on them. I like them so far.
-
I found this from Gearhead, but no pics... "So I did the brush-plate-ground-wire mod. It's pretty much how I envisioned it, as I described above. Here are a few specifics. There is plenty of room in the end cap. Both brushes fit in one "hemisphere" (misused, but the best I can think of), so the other is just free space between the commutator and the cap. My ground wire is around 2" long, 12 ga, ring terminals soldered each end. One end is under the existing screw that secures the ground brush lead (the brush that is not isolated from the plate). The wire then goes maybe 120 degrees around thru the empty space to a screw I put in the end cap. I drilled and tapped for 6-32 and installed with Loctite a 1/2" long screw from the outside. The ring terminal goes on the protruding end inside, with a lock washer and nut, also with Loctite. I made the wire go as far around the circumference as possible to allow some extra wire length while installing the wire in the cap and the cap onto the starter. I did notice that the 3 bent ground tabs weren't bent up very far for firm contact, and the mating surfaces were pitted. I cleaned them up and bent them more for better grounding that way as well. This is the most promising opportunity for improvement I've seen so far, thanks Squeeze! I'm also resoldering the ends of the batt cables and supplementing my ground wires."
-
84 Starting Problem
Monty replied to uthpda's topic in Venture and Venture Royale Tech Talk ('83 - '93)
Please don't hit the starter with a hammer. I know it will make it start sometimes, but you should only do that if you're stuck sitting beside the road, and just have to get it going. Smacking the starter with a hammer can break the magnets inside, and you don't wanna do that. It doesn't take that hard of a whack to break them either...they are brittle. -
New 85 VR owner needs help
Monty replied to englishwheeler's topic in Venture and Venture Royale Tech Talk ('83 - '93)
Here is one thing that will make the rear brake drag... If someone has had the rear wheel off, there is a thin spacer on the right side. This spacer goes between the rear caliper bracket and the swingarm...NOT between the caliper bracket and the wheel (this will hold the caliper at a small angle to the rotor, and make the brake drag, getting the rotor very hot). Don't ask how I know this. -
I sure hope he doesn't stop, or we may hit him. Can't see a thing.
-
I use the two-wrench thing alot too. I also have short and long-handled ratchets, some with swivel heads. Putting a pipe on a ratchet is not real good for it. A breaker bar with a pipe on it is much better.