Search the Community
Showing results for tags '1983'.
-
 83 Venture Rear Wheel Bearing Replacement (This document in Word format attached)83 Venture-Rear-Wheel-Bearings-Replacement.docx. My apologies for the formatting below - outlines don't come out very well in plain text. See the Word doc. I was experiencing some rear noise and vibration when leaning to the left and it was becoming progressively worse. I had never done the ‘Venture Rear Wheel Service” as documented in the forum (Ozlander 09-17-2015), so I decided to undertake that. I took the original write-up, and broke it down into numbered steps so I could check each one off as I went (I just find that a little easier to follow). I have included that below. I did not find any problems until I came to the bearing inspection part of the process, I did notice a little bit of roughness in the gear-side bearing (the needle bearing), but even more unusual, there was significant play in the inner bearing collar that forms the inner race of that bearing (it would slide in and out about 3/8’s of an inch). So I decided to undertake a replacement of the entire set. I searched the forums high and low for information on how to do that, and found a number of them, but there are differences between the different generations (to be expected), and there may be differences between the 3 years of the first gens. I can only speak about my experiences with this 83. After reviewing the various forums, I began the process of ordering the parts. Here is the complete list of parts as extracted from the YAMAHA parts website (https://www.shopyamaha.com/parts-catalog/parts/star-mcy?ls=Star&dealernumber=#/Yamaha/XVZ12TK_-_1983/REAR_WHEEL ) 1983 XVZ12TK & TDK per Yamaha's web site Item # Part # Description Yamaha price 3 93317-32635-00 BEARING, CYLINDRICAL | Use w/Item 28 38.78 kit 2 90560-20235-00 Spacer 19.37 4 90387-200J2-00 COLLAR 14.22 5 93306-30417-00 BEARING 32.18 kit replaced by part # 93306-30437-00 6 99009-52500-00 CIRCLIP 6.41 7 93102-25064-00 OIL SEAL 7.64 kit 12 93440-45022-00 CIRCLIP 6.67 13 93210-68347-00 O-RING 4.72 kit 14 2H7-25315-00-00 FLANGE, SPACER 5.5 partzilla 15 93106-40027-00 OIL SEAL 8.27 kit 28 90387-203H7-00 COLLAR | Use w/Item #3 15.41 partzilla Total $ 159.17 Don’t let the Yamaha price scare you, as you can’t order any of this from them anyway. I listed it just for reference purposes as I shopped around. I found a reference in one of the forums to a kit from OEMCYCLE (Pivot Works part # PWRWS-Y23-000) and it was available for $55 so I ordered it. The only drawback was that they did not list the detail parts that were included in the kit. So I waited until it arrived to find out exactly what was in it – those are noted in the list above by ‘kit’ - it was missing two critical parts – Item 14 (FLANGE,SPACER), and Item 28 (COLLAR). The name for Item 28 is a bit of a misnomer as it is actually the inner piece of the needle bearing that functions as the inner race for that bearing (and is the piece that I noted above was moving in and out suspiciously) – the YAMAHA site specifically states that it should be ordered in conjunction with Item 3 (the outer portion of the needle bearing). OEMCYCLE did not list that part as orderable (nor did the Pivot Works site either), so I was able to find it on Partzilla (along with the SPACER FLANGE – more about that below). The parts I did not order and reused were the two circlips, the SPACER (Item 2), and Item 4 (COLLAR) which is more of a washer that is external to the bearings and seals. I should note at this point, that in my original Service Manual for the 83, the Rear Wheel Diagram (Page 5-7) does not show Item # 28 (the COLLAR that forms the inner race for the bearing) – it is present on the Yamaha Website diagram – I have now penciled it in on my manual. REMOVING THE OLD BEARINGS: I searched the forums for some details on this, and was not confident that what I found would actually pertain to the 83. I was able to find a webpage (by searching for the bearing part numbers) which documented bearing removal for an XS11 and looked exactly the same as what I was seeing on the 83 Venture. It was good up to a certain point, but then deviated from the reality of the 83 as I will note below. So here is the link – good pix and text – I will summarize the steps my buddy (Tim Tucker) and I actually took and where we had to deviate from the XS11 procedure. Link to pix from XS11 Yamaha – had same part # for one of the bearings: http://www.xs11.com/xs11-info/tech-tips/repairs/32/193-rear-wheel-bearing-replacement-pictorial.html 1. Starting on the brake side, we used a seal puller to remove the oil seal, exposing the circlip underneath. 2. We removed the circlip, so the bearing could now be pounded out from the opposite side (in theory, once you have that side opened up). 3. We turned the tire over (setting it on a pair of wood 2x4’s to protect the brake disc) and tried to follow the step in the XS11 procedure – it shows using a seal puller to remove the seal and collar – that does not work for the 83 – the seal and collar are a different part. The seal on the 83 is rubber/vinyl with an external metal ring (that is pressed into the hub) but more importantly, it contains a tiny embedded coil spring – the spring is what prevents the collar from pulling completely out of the bearing. We ended up cutting the outer rubber portion of the seal all the way around until we exposed the spring, then pulled that out with a pair of needle nose pliers. That allowed the inner collar to slide completely out. With the extra room, we were then able to grab the rest of the seal with a pair of diagonals, distort it, and twist it completely out. So what you are left with at this point on the gear side is the outer race and needle bearings. 4. The XS11 procedure now states to hammer out the big bearing from this side, by shifting the flanged spacer over, to gain access to the outer race of the big bearing. This is an oversimplification of what needs to happen (for the 83 at least) and is a good time to describe what is actually in this hub and how it is meant to fit together. The design is that the long Spacer aligns with the inner race of the large bearing and with the inner race (the ‘collar’ noted above) of the needle bearing so that those parts remain relatively stationary while the wheel itself rotates with the outer races. The Spacer Flange is there to maintain the proper alignment of the long Spacer with the center of the large bearing – because the cavity at that end of the wheel hub is the diameter of the large bearing, so there is all that space for the long spacer to flop around. The Spacer Flange is basically a donut that is the same diameter as the large bearing, and the long spacer fits inside the donut hole, lining up with the inner race. At this point in the removal, we did not understand that. We could not get the spacer to ‘shift’ as the XS11 procedure stated – it would wiggle very slightly, to reveal the edge of the inner race, but no more. We eventually resorted to hammering on the spacer with a large drift pin, which basically distorted the Spacer Flange until the long spacer came loose from the center of the Spacer Flange and was then free to slide all around the inside cavity of the hub, revealing the outer race of the large bearing and making that accessible to hammering with the drift pin. Of course the Spacer Flange was sitting on top of the large bearing, but being thin metal, it was perfectly fine to hammer on it to pound out the large bearing. Once that popped out, the mangled Spacer Flange came with it, and the long Spacer fell out as well. Knowing what we know now, we suspect that it would have been possible from the needle bearing side to pull the Spacer/SpacerFlange assembly up thru the needle bearing (the Spacer is the same diameter as the needle bearing collar we removed above) just enough so that the Flange portion would clear the housing above the large bearing – it might pivot just enough to get a drift pin down thru the spacers and catch the outer race of the large bearing, allowing you to hammer it out – the next person to follow this procedure will need to update this document with their findings. 5. That left just the needle bearing still in the wheel on the gear side. The XS11 procedure had a picture showing two cutouts in the inner wheel housing that would allow you to insert a small drift pin to hammer out the needle bearing from the opposite side. Unfortunately, there were no cutouts on the 83’s hub. The hub completely blocks any access to the bearing from the opposite side. I considered drilling my own holes, but eventually decided against that. So at this point I cried uncle, and took the wheel to a local bike shop. For a half-hour labor’s charge, they told me that they ripped out the needle bearings form the outer race, then used a small bearing puller that budged it enough so the inside edge of the bearing was then exposed enough to catch it with a drift pin from the other side, and finished by hammering it out. 6. Installing the new bearings: we laid out the parts and slid them onto the axle to verify we understood how it needed to go back together. Started with the large sealed bearing, then the Spacer Flange (open side against the bearing, followed by the long Spacer, then the Collar (Inner Race of the needle bearing) and then the needle bearing itself (which we had not yet greased up and so we did not actually slide the collar into it). This is the point where we first really understood how it all was meant to work. When we initially slid the Spacer Flange up against the large bearing, it was contacting the bearing’s rubber seal and wanted to turn with the outer race. We knew that couldn’t be right, and it finally dawned on us that the long Spacer was meant to fit through the Spacer Flange and thus keep the flange from contacting the rubber seal. a. So the next step was to insert the long Spacer into the Spacer Flange. This is accomplished simply by laying the Spacer Flange on a flat surface (open side down) and tapping the long spacer through the center until it comes into contact with the flat surface. The end result is the long Spacer protrudes thru the flange to allow it to contact the bearing while preventing the outer edge of the Flange Spacer from touching the bearing seal or outer race. We verified that by sliding everything back onto the axle and now the only parts touching were those that lined up with the inner race of both bearings. b. Lay the wheel with the large bearing side up c. Insert the Spacer/Flange Spacer assembly into the hub (long spacer first – it will protrude out the other side of the hub). d. Insert the new large bearing into the hub and gently hammer into place. We used the tip from the XS11 instructions and had already cut a notch out of the old bearing, so we laid the old bearing on top of the new one and hammered on that until the new one was completely seated. The old bearing pops right out of the wheel housing when squeezed with a pair of plyers. e. Install the circlip f. Install the new seal g. Flip the wheel over – the Spacer/Flange Spacer assembly should slip back down and sit on the newly installed bearing h. Grease the new needle bearing i. Install new needle bearing – again we used the old needle bearing (which we also had notched) as a hammering tool. j. Apply a little grease to the new Collar (inner race) and insert into the needle bearing (smaller end first). It should butt against the Spacer inside the hub. k. Install the oil seal l. Reinstall the hub per the instructions in the Rear Wheel Service document i. Apply grease to the inside of the hub and to the six posts that fit into the wheel. ii. Check the o-ring on the wheel to be sure it is in place before you replace the hub and circlip. 7. The wheel is now ready for installation. Venture Rear Wheel Service You may ask, "Doesn't my dealer do that?" NOT UNLESS YOU TELL, HIM THAT YOU WANT IT DONE. This service should be completed every tire change or 10,000 miles (16,000k) or at least every two years; but in most cases it isn't done because we don't always have a dealer replace our tires and/or we don't tell him to do the work. So if you just bought the bike or you are not sure it has been done, it would be a good time to think about servicing the rear wheel of your Venture. The procedure is fairly simple to do on bikes without a trailer hitch and only a little harder if your bike has one. 1. Remove the rear bags 2. Remove the right muffler 3. Remove the rear brake caliper 4. Deflate the tire; then remove the rear wheel: a. Remove the axel cotter pin, washer, and axel nut b. Remove the caliper and loosen the pinch bolt c. While supporting the brake torque stopper plate, pull out the rear axel d. Move the wheel to the right side and separate it from the final gear cases and remove the rear wheel. 5. If your Venture is a 1983, 84, or 85 you will need to remove the rear drive or differential and remove the drive shaft: a. Remove the final gear case assembly b. Remove the drive shaft. 6. Clean the drive shaft and coupling, then grease both ends before putting it back in (note: make sure that the shaft goes back into the u-joint. If you are not sure, remove the spring on the boot covering the u-joint and check it. Next clean the spline or gear on the rear drive and grease it with a good quality grease, personally I use a medium Moly based grease. 7. Wheel cleaning/inspection: a. Now find a couple of 2" x 4"s and place the rear wheel (spline side up) on the boards. b. When you clean the hub and splines off you will see the spring clip or circlip that holds the hub in place; i. remove this clip and before you remove the hub mark the position of the hub so you can replace it in the same holes it came from. ii. Now clean the hub and inspect it for wear iii. Then apply grease to the inside of the hub and to the six posts that fit into the wheel. iv. Check the o-ring on the wheel to be sure it is in place before you replace the hub and circlip. v. Check the bearings inside of the wheel and check the bearing movement; if they are rough or worn replace them. 8. Now for the mono shock pivots: a. Place a jack under the rear drive to take the strain off of the mono shock then dissemble. b. Clean and grease all of the pivot points and reassemble (if you have a 90 - 93 or you have had grease fittings installed, just give them a squirt). 9. Before you install the rear wheel take the axle and put it back through the swing arm into the final drive to check the alignment. If you find that it is in a bind you will have to change the wedge shim between the final drive and the swing arm. 10. Check the oil level in the rear drive or replace the oil if it has been 10,000 miles since it was serviced and check the brake pads for wear. 11. You can now reassemble your bike and have another year or two of trouble free riding.
 -
So, I've heard alot about this infamous 2nd gear issue, I don't seem to have that on my bike, by struggle is getting into 3-5, the shifter won't budge past second, first,neutral 2nd all work, but it won't go further , i tried adjusting the shift , but after doing that I just ended up putting so much force into I bent the adjustment screw, any advice on what I should do or where to get a new screw?
-
 Just wondering if you can get a key made from the serial number from a dealer
 -
1983 to 1993
-
I just found a 1983 Venture for sale for $1900. Add says great shape and good running, has 51,000 miles. I'm thinking as a project bike if its a nice bike. What do you guys think? Whats a good price? How about finding parts?
-
 I have just pick up a 1983 venture xvz12. I found out that it has a few problems. 1st is the elect fuse box is done , some of round fuse clamps are gone and someone has tried to repair it and wires are taped and spliced together. 2nd is there is the red warning light flashing . 3rd the computer monitor has the battery, brake fluid and head light indicator on. 4th I am getting about 60 miles to a tank of gas and i smell gas when I stop and today it made ao popping are a back fire sound down around the carbs going down the road. 5th The consoles are split are cracked. 6th the paint is faded and some of the fairing tabs are brokin off. I sure could use some help and guidance because I dont have any idea where to start to fix all this.
 -
the front right brake line that links to the fork (see Photo). Does anyone know where to get one? It's for a Venture Royale 1983... Thank you for the help.
-
Do the 1983 tires take tubes? In other words do I need to order tubes along with my new tires? Thanks
-
I have a new to me 1983 venture that i just got running after a complete carborator cleaning. Now the starter seams like there is not enough power in the battery to turn it over, but this is the same battery that i use on my other 1983 venture and it starts it fine. It almost seams as if it might be something in the starter, not sure if brushes would cause this kind of problem. I also have a high amp batter charger with a start option, that i tried, but it still cranked very slow then it will start. Does anyone have any ideas where i should start. Thanks Dave
-
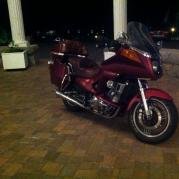
Hello, Being new here, it looks as though I originally posted a question in the wrong section. Freebird sent a Utopia link in response to this, but I am still looking for something more like the Markland or Ventureline product. Now that I have found the correct location, here is the post again. Hi, I am new here, and am hoping that someone might be able to help me out. In 1983, I bought a brand new 1983 Yamaha Venture. Bright red, and nothing special. Over the years, I have added a Ventureline driver's seat backrest and luggage rack, and an aftermarket radio from Best Buy. I still have the bike, and ride it regularly. It seems to put a lot of newer bikes to shame in terms of handling and engine performance. Brand new, out the door, it only cost a fraction of what bikes cost now. Here is why I joined this board. My son has followed in my footsteps, and this last summer, he purchased a 1983 Yamaha Venture too (see pic). First thing that we noticed, was that all 1983 Ventures are not the same. Things like clock location, anti-glare glass, helmet holders, turn signal cancelling switch type, and other little knick knacks, are different. The one thing that he would like to be the same though, is that he would like to have a backrest for the driver seat. He currently lives four hours away from home, and he enjoys riding the Venture when he visits. I would like to buy a backrest for his Venture as a Christmas present, but have come up against a wall of stone. Nobody seems to carry them anymore for a 1983 XVZ1200. I tried Markland, Babbit's, E-bay, Google, Craig's list, the local Yamaha shop (Ventureline), and several aftermarket shops. Nobody can even give me any leads. At this point, I would be happy to find even a used backrest. Can anybody give any suggestions? Thank you, Greg
-
Does anyone know what the napa part # for the gas filter for a 1983 venture royale
-
 Hey all, I've been in the market for a bit for either a Venture or Goldwing. Someone in my hometown has an 1983 Venture Royale with 19,000 miles on it and is asking 1,800 bucks. He says it starts and runs fine and is at his auto dealership so he is going to drive it back to his house tomorrow to sell (about 40 miles). Sounds like an honest guy overall and he said he has owned it for only two months and intended on keeping it (just got the plates for it last week) but he is hard up for cash and has to come up with 10 grand for something to do with his business partner. He said he's had at least 25 emails on the thing. He said he just bought it 2 months ago for 2,500. Could someone tell me if this is a good deal and also could it be a bad idea to buy this? Any recommendations? I'm 5'7 and currently own a vstar 650...just looking for something me and the wife could go on longer trips and be more comfortable. Thank you
 -
I'm going to look at a 1983 venture with California 2 sidecar this week. It has roughly 50k miles on her. The owner states they have put several grand in it fixing it up to near perfect. It has all the bells and whistles and supposedly everything works. Pictures look good. There is no leading link for the sidecar though. He says his bottom dollar is 3700. Seem reasonable? I may ditch the sidecar if I really like the bike but have trouble steering. I'm coming from a new Harley ultra classic which is nice, but not nice enough for the payments I'm making. Any thoughts are appreciated. He did say the transmission has been fixed I saw that was a problem on these forums.
-
hi from sunny England just been given a driver back rest but with no brackets does anybody know where i can get them. on back REST YAMAHA VENTURE LINE 1983 VR:innocent-emoticon:
-
Hello Everyone, Just got my 1983 yamaha Venture last night. the bike is Very clean I will post pics soon. The Issue I need help with is the Sony radio the power is on it searches switches to all the modes but no sound. the first time I turned it on I heard the little pop on sound through the speakers but now I don't even here that . the guy I got it off of siad it worked but he never used it. it's almost like it muted but it doesn't show that on the screen. there is a scan button on the laft handle bar and it also seams to work but I don't see anything about a mute on it either. no static no sound any thoughts anyone??? Thanks Mike
-
 What carb can i use on my 1983 venture that i can bolt it on and just go:confused24:
 -
Will a carb from a 1988 venture work right on a 1983 venture:confused24:
-
 I have a 1983 Venture that I am trying to rebuild and the rear brake caliper was missing. The question is will any other year or model brake caliper work or do I have to find a 1983 model caliper? Thanks!
 -
I am considering purchasing a 1983 with 33k on it. Could someone tell me, do all 2nd gears go out? If so, is there a typical mileage? Can anything be done to help prevent it? When/if it does go out, can one still ride the bike without 2nd gear without fear of further damaging things? Thank you from a newbie to the forum.
-
can i use a 1988 carb on a 1983 venture will it work:starz:
-
hi from England just got 1983 xvz1200 but not sure has some parts i bought dont fit vin JYA47T008DA000175 WOULD LIKE TO KNOW WHEN THE BIKE CAME TO ENGLAND AND WERE FROM AND IS IT 1983 MANY THANKS DELLBOY WHAT A GREAT SITE THIS IS [could you let me know where i can get it dated]
-
I have purchased a 1983 venture from an acquaintance and need some assistance. when i bought it it started and ran. I was told that it needed some work to get it running better. so I took it to a recommended shop. after months of waiting, the mechanic told me that the left bank wasn't getting signal to the coil to fire. ( something about a coil near the camshaft) . I brought the bike home frustrated with the time frame, and now the bike won't run at all. I am not a great mechanic, but am capable if necessary. I would like to find a manual for the bike , and some ideas for what to do. none of the local bike shops want to work on it because of the age of the bike, so it looks like I have to do the job myself. Any help would be greatly appreciated.
-
there's a 1983 venture with 71,000 miles.what should i look for if considering a purchase? thanks
-
 I recently bought a 1983 venture and when I test drove it it was pretty snowy so I never had a good chance to run through all of the gears. Later on I found that It wouldn't shift into 4th or 5th gear. It's like they just aren't there. It's my first bike so I am pretty new to this. I'm hoping to have it up and running for spring time. Anyone ever have this problem? I appreciate any help Trent
 -