Search the Community
Showing results for tags 'valve'.
-

83 fuel petcock valve
DesertRider posted a topic in Venture and Venture Royale Tech Talk ('83 - '93)
I changed out my fuel filter this morning - hate lining up that set-screw that holds the clamp to the fuel tank. When I went to open the fuel valve back up, the little plastic square knob on the fuel shut-off valve shattered like glass. As a temporary measure to get the gas turned back on so I can use it, I'm going to try to jb-quick weld a make-shift knob onto the sheared off plastic that's fairly flush with the metal valve body. If that don't work, anybody got any other ideas ? Also - when I cut the gas off, the indicator in the knob was vertical for on. I think I turned it one/quarter turn to the left to turn it off. Before I put any turning pressure on a glued on know, I wanted to ask if anyone with a working petcock can check and make sure that as you face the valve from the right side of the bike, that the valve needs to go 1/4 turn to the right (if it was a screw that would be the tightening direction to turn it on). Anybody got a petcock valve for sale ? -
I found this thread about the correct positioning of the coolant bypass valve with a couple of images of the valve that snaggletooth posted (thanks snaggletooth) and thought I would check mine since I checked the fan already and it's working. I found that my valve needs to be turned a little further to be fully in the off position, but what I also saw was that there is no plug in the small holes on the top and left of the valve and I know there never have been since I've owned the bike any way, 10 years or so. The valve in the other thread shows a screw plugging the left hole but I can't see the top. Also, I've only drained the coolant in this thing twice in the past 7 or 8 years and I drained the old coolant by pulling the hose off the top of this valve. Should I pull the bypass valve to drain old coolant, and how does the valve come out of the valve-body for draining? Turning the valve always makes me nervous. It's hard to turn and really creaks and I'm always afraid of breaking it.
-
Someone was looking for a valve last night. Here is entire thing. http://cgi.ebay.com/ebaymotors/1983-Yamaha-XVZ-1200-Venture-rear-brake-master-cylinder-/370425478537?pt=Motorcycles_Parts_Accessories&hash=item563f143d89
-
Had a nice thing happen to me today (not), the valve stem on my front tire separated. I am curious however other than losing all my air is there any symptoms prior to all out failure I should have noticed? It had only been a few days since my last air pressure check. Joe
-
OOPS I am in trouble now While installing my rake for the Trike I broke off an air schrader valve on the top of a fork.:mad: I really don't think there was any air in it/them, but that isn't the problem. The problem is where to find just the schrader valve. Does anyone have one that is in their tool box that some how came up as a spar,,, In short HELP !!!! I know Dumb Ass Move?!! but if you knew the hassle I have had with this triple tree you would understand. Mill work, and fit of this new design sucks.
-
I've got an '83 that seems to run great when cold, but once it warms up it seems to drop a cyl.until you hit about 2500, then runs good, it seems to idle fine too. I've replaced the plugs and diaphragms. years ago I had a similar problem [i think] and it had a bad diaphragm. stumped now,think it might be valve adj? or electrical? If I just rev it up it sounds good, but on the road it doesn't matter how much I wash it, it looks like dung under 2500
-
after reading on this site and deciding that im not happy with my brakes I have decided i only want to do this once so I am going to rebuild all 3 calipers and both master cylinders, does anyone have a good source for parts? also can i install a bleeder valve from a mkII in my 83 and anyone have one for sale or know where i could get one?
-
I removed my tank and when I pulled the gas line off - the brass sleeve going into the the shutoff came out instead of the tube coming off the sleeve. Can I just push it back into the shutoff valve or do I need to do some repair here? HELP!! It is such a nice day and my day off so I want to ride!!
-
 I am sure there are a few on here that have dealt with leaky valve covers. My 83 with 122,000 miles on it have the original valve cover gaskets. I did do a valve clearance check years ago, but still used the same gaskets. Mine has gotten so bad that it was normal to have a couple of drips off the engine while parked. I also had oil residue on about everything, even my shoes. So, here is how I fixed it. One of the characteristics that was used on the valve covers was using shoulder bolts. This limits the amount of torque or squeeze that can be put on the gaskets and also keeps everything uniform. This is not a bad idea as long as the gaskets have some spring left in them. What I did was I stopped by an auto parts store and bought a buck or so of 1/32nd thick gasket material. I then removed the side covers and the plastic covers that sit on top of the valve covers. I then removed the two outside bolts on the valve cover. I put the bolts in a vice and using a screw driver, pulled the rubber seals off along with the metal washer. Using a hole punch, I made a hole in the gasket material slightly smaller than the bulge on the bolt. I also took scissors and trimmed the outside diameter about the same size as the washer. I then put the gasket on the bolt, then the washer and then the seal. After I seated the seal, I then screwed the bolt back into the valve cover hole, snugging it down, but not bottoming the bolt. I then removed the other two bolts on that side and put gaskets on them. After all eight bolts were back in place, I tightened them down until the shoulder bolt bottomed out. This actually caused oil to squeeze out around the cover gasket. After I tightened all eight bolts, I replaced the plastic cover and went to the other head. After doing this last week, I have put about 300 miles on the bike and the engine is still clean of oil residue and my shoes are also clean. This is not a hard job, costs a buck or so and it works. RandyA
 -
with the help of the fantastic write-up by v7goose, everything went great and nary a leak! Did find I was able to remove the rear valve cover by sliding it back, after removing the side and middle battery covers. Used dingy's xcel sheets, and was able to reuse a few shims because of it. Also transferred all hand data to new sheet and saved as new file, so I have a record of what shims are in now. Buddyrich came through big-time, lending me the shim kit/tool. Put all my 272's and other odd ones in kit, but wanted to replenish the ever popular 270's. Went to http://www.albaaction.com , and talked to Paul there. They're no longer doing a 'shim swap', but asked him about Sudco since the Yammi's were so expensive. He called back and is now set up with Sudco, so I ordered some at $6.75ea. Will add them to the kit before I send it back. Thanks again to these members and this great site!! Between the valve adj and sync'ing the carbs, she's a new (scarry fast) ride, and good for another 50K miles.
-
"Brown Sugar" has decided to start leaking pretty bad on valve covers. mostly rear one. I'm going to try snugging them down but that can cause them to get worse. I know they have a shoulder on these bolt so easy does it. Question is which 2nd gen gasket is the easy to install one? Any of them? Or certain year.
-
 One side of the caliper for my front right side brake was seized, so I took it off and cleaned it really good. I managed to get the pistons moving again. When I reinstalled it on the bike and bled the brakes, I can't get any pressure to the lever. Fluid is moving into the caliper and will shoot out the bleed valve, but I still can't get pressure. So far I've tried holding my finger over the bleed valve to use as a check valve while pumping the brake and I also pulled the line off the caliper to make sure it was getting fluid. The caliper is full, fluid is coming out of the check valve, but I still can't get pressure. What gives??? I'm totally lost. I had good pressure before and I can't see a leak anywhere. Any help is greatly appreciated. Thanks.
 -
Ok gang, I have a question and this is the place to get lots of opinions! I have installed Vmax cams and springs in my 1987 Venture 1300 engine. Venture intake valve lash is the same as the Vmax. However, exhaust valve lash is different; Venture: .16 - .20 mm Vmax: .26 - .30 mm Which lash will be right for my Frankenstein?
-
I could use a little good advice about a situation I have. I was checking my valve clearances on my 89 Venturer. Things were going pretty well. I bought the special tool and after struggling with it I was able to make a map of all the pads and their numbers. Out of 16 I had 10 that needed attention as some were minimum. I had no shims so I ordered some from Sudco at $6.55 each. I got antsy and decided to move a couple around to fix the clearances. It worked fine when it was on a pair of exhaust or intake. I repaired one and then looked for more. I had no spare shim but I thought I could take one exhaust shim out and then put it in where the intake shim needed replacing. When I rotated the crank I heard a metallic crunch. Not good. The exhaust cam chipped a piece from the lifter where the shim was removed. I was able to put the shim back in but the lifter doesn't rotate like it is supposed too. It will move up and down. I ordered a new lifter. I was trying to confirm my course of action to remedy the situation. If I take the cam out I should be able to replace the lifter. If it works then and spins like it should all should be well. If it doesn't I would use a compressor and check the springs and anything that didn't look right. If that didn't work I would pull the head and check the valve and cylinder. Am I on the right track with this? Any help would be greatly appreciated. Thanks. Sam
-
ok, so my water light keeps comming on. I've been reading back through the 1st gen forum and i've seen 3 different positions that the valve is said to need to be at. one person said that it should have off pointed at the 5 o'clock position. another pointed out 2 o'clock, and someone said off pointing to the 10 o'clock position .. anyone know for sure? i know i'm building pressure (although i don't have the tool to measure the specific amount) and my radiator is full, as well as the bottle in the fairing being over half full. so the only areas i'm not sure about are the tubes, and if the valve is letting water through. it's been cold enough that the thermostat gauge doesn't even move, so i can't tell that way.
-
I wanted to share this with you DIY guys out there. I bought this valve spring tool at a local tool discount store. It is too large for removing my VR valve keepers and I had to use the old stand-by . . . a deep socket and rubber hammer. However, it worked great for installing the valve springs. To hold the valve closed I placed a rubber sanding block under the head and in the dome. I then stacked the valve springs and top plate, set the keepers in position, and pressed the tool down on the top of the valve stem. The tool has a spring loaded pin that helps guide the keepers into position. It took a little muscle to press down, but, it worked!
-
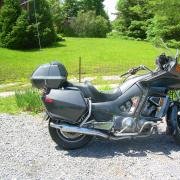
Got the valve shims all taken care of with help from Scooter Bob. None were more than 0.06mm tight, but they are now all on the loose side of the valve clearance tolerance. I had to drill and chisel off one of the allen bolts holding one of the chrome covers since it would not release. Once I get the stud removed and the hole retapped, I will be able to put it all back together again (I hope). As of now, I have pieces and parts all over the garage workshop. It is a real mess. Not really good pictures, but this is my steed in all her naked glory. Thanks again Bob for the help today. Took hours off the time required to get this taken care of. RR
-
gaskets for 1984 xvz12 and is there an easy way to change them thanks Gord
-
Question for you guys, didn't find anything on the forums ( but i might be blind! ) My draincock is leaking, and i see that there is an O-Ring that goes on that valve, but i have three questions: 1. is it ok to use a Viton O-Ring in there? 2. How do i get the darn thing out? 3. which position is it supposed to be in during regular opperation? the book shows you turning it to "on" for flushing the system, but does that mean that normally off is supposed to point to the left (as you face the headlight, looking at the valve) thanks again!
-
bought a 2007 with 492mi a month ago. Took to dealership last week and got registered in my name. then I decided Sunday to check on air pressure in tires and shocks. First off I need to find a guage to fit between the rotors and valve stem of front wheel , what a pain. The rear tire wasn't that bad as it has a 90 deg valve stem on it, much better to check and fill(only wish it was turned to the opposite side of the kickstand) The bad news is when I checked rear shock it read zero. I thought no problem Ill just put some in. well I did and in about 60 seconds it was back to zero. Riding without air in the shock shouldnt have hurt it ? I've put close to 400 mile on it in the last week or so. Maybe somethings loose? I checked valve stem and its tight and there isn't any preceivable air leak sound or oil anywhere???
-
well, i lucked out while mounting my tires, and i've got metal valve stems.. problem is i can't measure the pressure in the tires because all of my pressure tools don't have long enough depressors to check the pressure. any ideas? i'm toying with the idea of seeing if they simply screwed the schrader in too far, or replace the schrader with a longer one, but i'm not positive that'll work.
-
 Ok.....I'm at that point. Got all my other stuff done and pulled the valve covers to replace the seals and gaskets due to a seep on the rear head and check the valve lash. Thought I was being the bright guy and removed the "hard" one first. The front. Only had to remove the bolts from the radiator and pull it ahead a bit. Pretty much slid out except for a little drag across the chain sprockets. Then the "easy" one....the rear.....oh yeah! Not so easy. Hung up pretty good on the sprockets and was a bear to work out of there. (Should have done this when I had the gas tank out) Now I got the covers all cleaned up.....got the 2nd gen gaskets sealed into the covers....got all 16 of the plugs on the bolts replaced. So.....any advice on what else I can do to give myself a little more room to work the covers back into place without scraping the gaskets back off? Bike is naked.....fuel line and overflow lines are out of the way. Do I need to pull the coolant lines to the heads? Maybe take the coolant hose off the top of the radiator to give me more room? Suggestion? Just trying to avoid a fist fight with my sweety. She does give me a hard time now and then. LOL! Thanks Mike
 -
I have finally got my 1987 replacement engine taken apart to install the Vmax cams. I decided to pull the heads and do a valve job. The seller said it had about 40k miles on it and it looks very good inside. The manual says to install new valve oil seals when reinstalling the valves. These little guys are almost $12 each and there are 16 of them! Anybody have experience or opinion about reusing these oil seals?
-
Hi All, any ideas on how to get rid of the discolouration on my valve covers (and some other engine pieces)? I have seen a suggestion that paint remover and steel wool be used, but that seems awfully aggressive on these soft aluminum parts. Any suggestions?
-
Hi there, I am in need of the "roving" valve shim/tool kit... does anyone know where it might be and how I might get in line to use it?? Thanks very much Gary


.thumb.JPG.bfcefdc0995aabc77d6b4e8cf9125c91.JPG)