dingy
-
Posts
5,403 -
Joined
-
Last visited
Content Type
Profiles
Forums
Gallery
Events
Store
Everything posted by dingy
-
As far as I have found, the Ventures went to a 35mm in 86. The VMaxs always were a 35mm. Gary
-
 Here is copy of PM I sent Julie for reference. First thing that comes to mind is the difference between the 1200 rotor/pickups & the 1990-93 rotor/pickups. In 1990 the venture went from a 4 pickup coil to a 1 pick up coil setup. There was a change on the rotor as well. The pre 90 had two magnets & the 90-93 has one magnet. The 83-89 TCI will do nothing on a 90-93 motor. Dead, no spark. Two options, 1st replace TCI with a 90-93 version, I think model prefix # is 3JJ.. 2nd replace rotor/pickup coils with units from the 1200 motor if you still have it. It should bolt right up. Finding a 90-93 TCI may be a challenge. Another option on the TCI is the Ignitech aftermarket unit a few of us are using. About $200, but instead of a 20 year old TCI, it is new and much more programable. http://www.venturerider.org/forum/showthread.php?t=40414 Gary
 -
Houston, we almost had a problem !!
dingy replied to dingy's topic in Venture and Venture Royale Tech Talk ('83 - '93)
I have an AGM in it now, but I think it would take remounting the coils to get it to fit in on its side. At $180 for the lithium battery, I would rather use the AGM though. Gary -
Houston, we almost had a problem !!
dingy replied to dingy's topic in Venture and Venture Royale Tech Talk ('83 - '93)
Some of the Vmax guys have went to the pod air filters with the flat side carbs, but I don't know of anyone using them with the 35mm Mikunis. It's possible, but it would be a re-jetting education for sure. And plenty of dyno time to get it right. Attached is a picture of VMax air box & stock air box setting in frame for comparison. Gary -
Houston, we almost had a problem !!
dingy replied to dingy's topic in Venture and Venture Royale Tech Talk ('83 - '93)
Skydoc mentioned doing that last time I talked to him on the phone. He said someone had put a battery is each rear bag to balance weight. I have an MKI, and it is nice to be able to pull the bags in 30 seconds to clean or work on it. Battery cables would complicate this. Just ordered 10 foot of #4 gauge welding cable with fine strand wires. There is suppose to be over a 1000 strands in the cable. This will help with cranking power. Also got a 4 brush VMax starter for it. I'm not sure how much compression increase is gonna hinder start cranking RPM's. Bike always started on about first revolution though when it was warm outside. Gary -
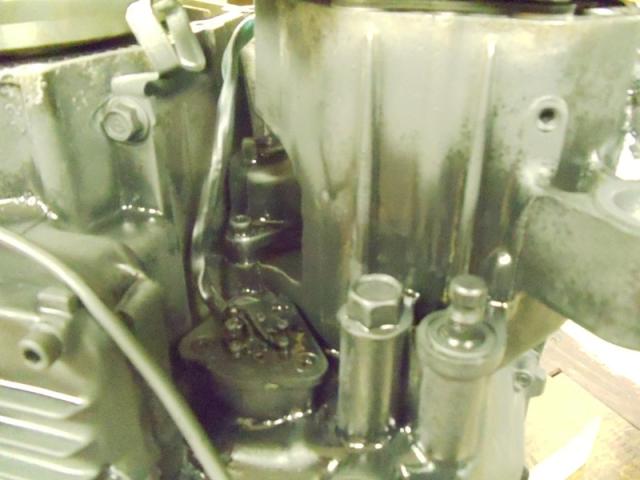
Got motor back into frame this weekend. Encountered another small issue mounting up the VBoost intakes though. I had the block face milled down .040", this is to raise compression. The block needed to be milled due to there not being enough material on the heads to do this. When the block is milled (or the heads for that matter), it lowers the heads by the amount taken off. Also moves heads inward at the 35 deg angle from vertical. The VBoost intake is a rather rigid unit that did not react well to its mounting holes getting moved. I could not get the screws started. I had to ream the mounting holes in the intakes out 3/64" to allow the screws to engage. Fortunately with the VBoost's rigid intake, the carb rack should mount up fairly good. This same head head movement will also create some additional fitment issue with the exhaust system, but it will be easier (I hope) to deal with. Next is onward to getting carbs mounted on intakes. Rick Butler gave me a heads up that the carb pull cable bracket will need modified to clear the frame, due to the taller intakes, but I know that is coming. Already had to modify the "twinkie" to get the cooling hose on it oriented different. May be going to put a Lithium battery in it to allow the bigger VMax air box to fit up. These new batteries are on back order so I may need to work around the air box issue. And, yes I am replacing that old red fuel line this year !! Gary
-
Another cold coolant leak.
dingy replied to BrileyR's topic in Venture and Venture Royale Tech Talk ('83 - '93)
The brass threads are only there to assist in removing plug. A spark plug end will thread in there and it will pull straight out. This goes to the cavity surrounding the cylinder sleeve. P/N 90338-11152-00 About $6 Gary -
I'll bet it is a set of carbs. Gary
-
Here are a few pictures of a 1st gen shift indicator segment. From the parts fiche, it looks like the RSV is very similar, you may not use all the contacts though .The segment is sealed by an an o-ring. Probably can be reused, but might as well get it, about $1. On the 1st gen, the middle drive cover has to come off to get to it, so you will need that gasket. Once removed, the switch can be cleaned with a scotch brite pad or something similar. What may have worn out is the pin on the end of the shift segment, shown in last picture. This can be replaced once the switch is removed. Also get the spring behind it. You have to remove 3 phillips head screws to get switch out. Switch is $25.42 from partshark.com Gary

-
Main bodies and sliders are different. 1200 is 34mm, 1300 is 35mm. Gary
-
Cylinder wall coolant plug question
dingy replied to VentureT's topic in Royal Star Venture Tech Talk ('99 - '13)
On the first gens, that screw hole was to be used to remove the plugs. I think the service manual said to screw a spark plug end in there and use it to remove plug. I just got new ones for my 88 motor and they had the screw thread in them. Gary -
Torque is King. Torque is the force that the piston develops on the crankshaft. Torque is what develops HP. HP is the most often talked about number in part due to torque numbers have to be taken into context of the rpm range over which it is developed. This is not to imply that HP numbers are meaningless, they aren't. You need to know if the HP rating talked about is crank or RWHP. Crank HP is an almost arbitrary number that a manufacturer puts on their motor. It is determined , as the name implies, at the end of the crankshaft. This number disregards any degradation of HP by things such as water pump, alternator, transmission losses. What is meaningful is the RWHP (rear wheel HP) after all drive train losses are factored in. Crank HP is always higher than RWHP so it is the advertised rating. Stroke length vs bore is a major factor in RPM potential. Short stroke motors (stroke is less than bore) will rev higher than an equivalent sized long stroke. Engine size is not always a determining factor of output. Other factors such as intake style( carburated, EFI, turbo) can greatly influence output. Compression is not a good gauge of potential. For a given motor, increasing compression is a source of more HP, but turbo equipped motors run at a lower compression ratio than an equivalent carburetor motor and deliver more power. This probably doesn't go very far towards explaining this though. Google is your freind, just search on those three terms or something like "HP torque displacement relationship" and you will find a lot of material. Gary
-
If the write up on Wiki is factual, your gonna get spanked. Indicates Kaw will do a 12.06 1/4 mile @ 108.7. . 71 crank HP at 48 ft/lbs. 440 lbs curb weight for the 2009. RSTD is rated at 98 crank and 787 lbs curb weight. Kaw 6.19 lbs per HP. RSTD 8.03 lbs per HP. Don't look good for you. Gary
-
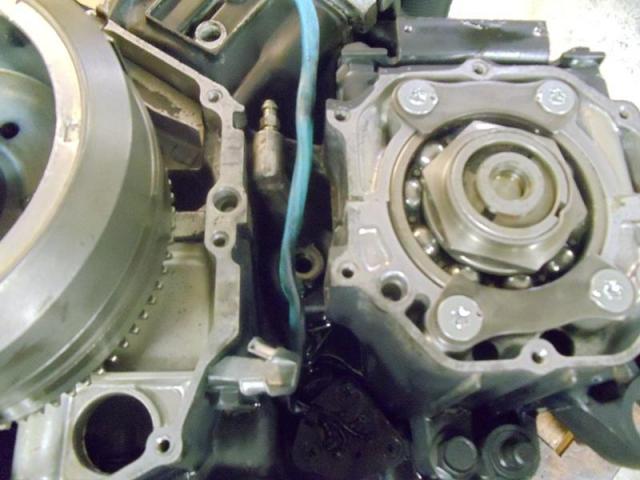
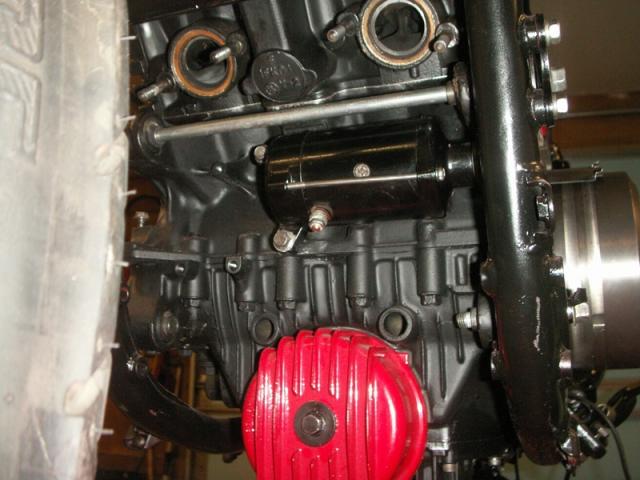
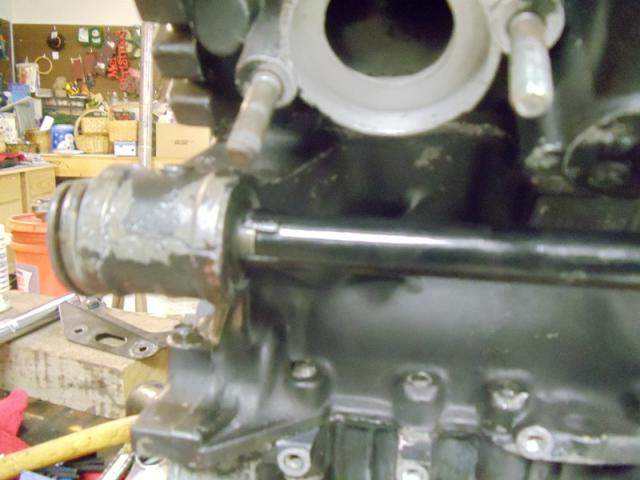
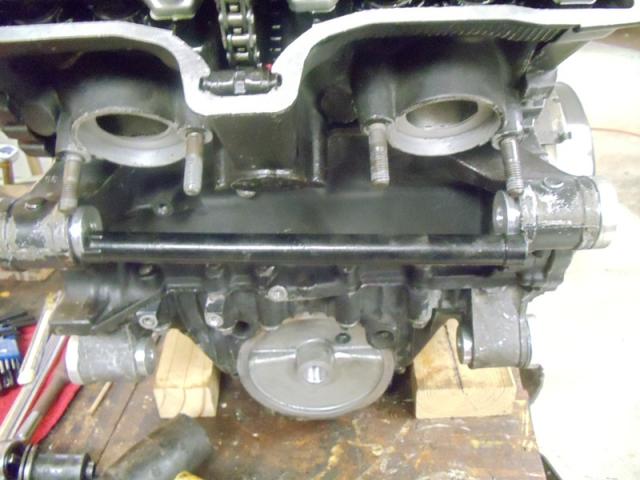
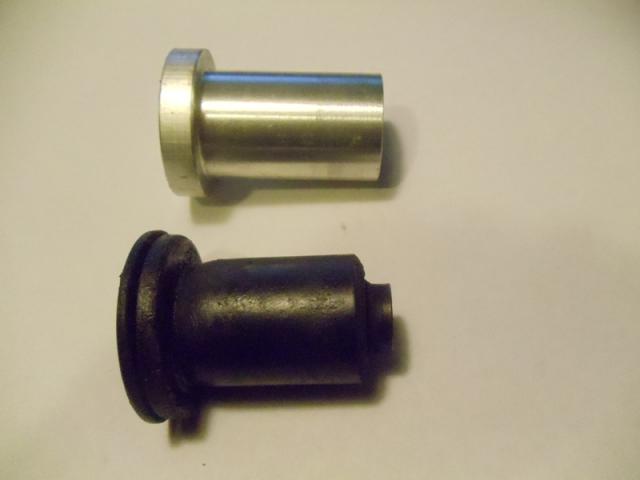
For those of you putting the solid motor mounts in the 1st gens, I have encountered a minor issue with them. The solid mounts are interfering with the upper spacer that goes between them. The solid mounts are the exact same length as the stock rubber ones. They have a 1.10" dia. shoulder that fits through the mounting boss on the block. This 1.10" dia on the solid mounts is the same dia. to the end of the mount. This differs from the stock mounts. The stock set has another diameter reduction to .58" at .23" from small end. A comparison of the two mounts is shown in the 4th picture. On the upper front mount this smaller diameter is used to capture the Spacer, Engine Mount (2H7-15336-00-00, located in crankcase section of fiche). There is a welded on collar on each end of this spacer that fits over the small end of the stock mount. Shown in last picture. I really don't don't see a structural purpose for these two collars, so the solution seems to be to grind them back to allow the spacer to fit in between the new solid mounts. I think the spacer does perform a function by maintaining the distance between the two mounts, and not allowing the long bolt that passes through both mounts to pull the motor mount ears inward. Omitting this spacer could lead to one of the motor mount ears snapping when the frame is under stress. The other four mounts are fine as far as I can tell at this point. The block did require a very thorough cleaning to allow the solid mounts to be inserted. I used a dremel with a sanding drum on it to clean. This is a view of the upper mounts and the long bolt in place. The spacer rod is not installed yet in this picture. This is a view of the stock upper mounts with the spacer in place. Stock mount with spacer shown over small diameter. Spacer shown with solid mounts in block to illustrate length issue. View of solid mount next to stock MKII mount. MKI mounts differ slightly in that there is ribbing around the larger diameter rubber portion. View of spacer next to stock MKII mount. The welded on collar on the spacer is what can be ground down to allow use of spacer. Gary
-
Cylinder Head Removal
dingy replied to twigg's topic in Venture and Venture Royale Tech Talk ('83 - '93)
If you are going to pull them and open them up, at a minimum I would recommend you get a basic rebuild kit for each carb. Consists of 5 orings, float bowl gasket, jet block gasket and fuel level float valve. I think MiCarl is selling them. Check with him. Gary -
Cylinder Head Removal
dingy replied to twigg's topic in Venture and Venture Royale Tech Talk ('83 - '93)
You can. I am assuming you mean the ports on the intake manifolds. But you want the seafoam to go through the carbs. Its stock in trade is cleaning the junk out of the carbs. It is not a top end oil for the valve train. Not that it won't do a little good up there. Gary -
TCI & pickup coil ???????
dingy replied to StuD's topic in Venture and Venture Royale Tech Talk ('83 - '93)
Are you getting any spark from either of these plugs? If you are, I would think TCI is functioning. Not saying it could not happen, but for the TCI to internally change its timing output, would seem implausible. If it is firing at all, I would then suggest a timing light and marking the rotor in some fashion with the cylinder in question at TDC. There is a 1" approx dia plug on the front of stator cover for this purpose. I don't kmow if there is a timing mark for both cylinders though. I am fairly sure there is one for #1 cyl at TDC. This would be a start. Gary -
What year 1300 motor did you put in? 86-89 should fire. 90-93 will not. Did you use original carbs or newer set? Are you getting any spark at all? Gary
-
Nothing that I have noticed. I am putting SGN's solid mounts in soon and that should tighten it up some more. Motor is almost back together. Now to mount the VBoost. I got the twinkie modified so it clears new intakes. Rick Butler said I had to modify the pull throttle cable mount on the carbs also. Then I need to decide on the Vmax air cleaner or modify the stock one. Battery size is issue there. Still haven't decided on tires for it yet. I hate to pay for a set of Avons, knowing I am going to destroy a rear tire in 6-7000 miles. May go with the Pirnelli Route 66's. Pinwalls got a VMax rear wheel with a nice 15" Pirnelli on it for $125 I might get. Gary
-
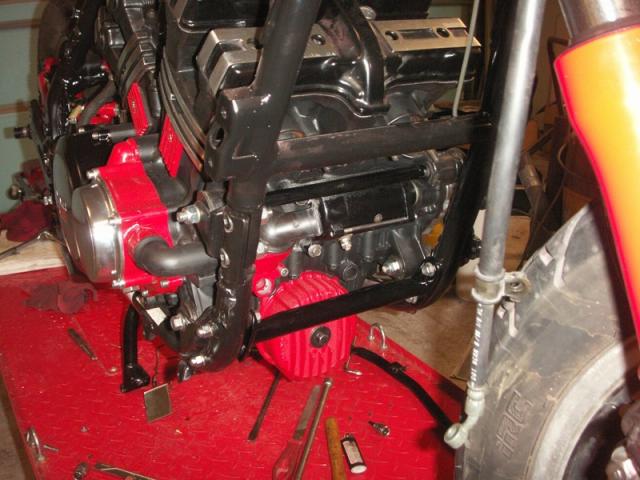
Who needs those lower fairing pieces. Picture this without the red & the black motor. Gary http://i1007.photobucket.com/albums/af193/gdingy101/DSC00596s.jpg
-
1st a car, then what. Expecting any day now Yammer will be posting, LOOKING AT A 2009 RSV !! Gary
-
Twigg, An unsolicited piece of advice. If you jump the bike from a car, do not jump it with the car engine running. Due to the electronics in the regulator/rectifier this could cause it to destroy the reg/rect. This is because the cars alternator can put out more current than the bikes circuitry will handle. Car does this because it senses the lower voltage when bikes battery is hooked up, then alternator kicks in and there is an inrush of a large amount of current. Jumping with car not running is fine. Almost any car should be able to crank one of these for a long time. Gary
-
Your only reason to put heat on it is if you think it has had red loctite on it. The heat will break the bond of the red loctite. Otherwise, it would be counterproductive to heat the screw. Heat expands objects, other than water. You would need to get the heat on the aluminum case, which is not practical, to do any good. So what heating it would do is to expand the screw, thus making it tighter. Have you gotten the other 3 screws out? If you have, without heat, chances are this one doesn't need heat due to loctite. If you think it does need heat, due to loctite, only heat it to around 500 degrees, not anywhere near red hot. Gary
-
I think this might be what you are after. It is shown on the radiator hose page of the parts fiche. PIPE,BREATHER 1 47G-11166-00-00 Gary
-
Why send a flock, when just one will do! Think of it as a smart bomb, a cruise missile if you will. Gary http://i1007.photobucket.com/albums/af193/gdingy101/mini.jpg http://i1007.photobucket.com/albums/af193/gdingy101/wtf-monkey-2.jpg