

RossKean
-
Posts
246 -
Joined
-
Last visited
Content Type
Profiles
Forums
Gallery
Events
Store
Everything posted by RossKean
-
Hi Looks like we may FINALLY get at least a short break in the weather so I'm planning a solo three day trip that will take me from New Brunswick, through Maine and New Hampshire, into Vermont (July 09). I expect to stay overnight in the Barre/Montpelier/Burlington area, take a ferry across Lake Champlain, circle through the Adirondacks and stay the second night (July 10) in the North Conway area. Return to NB via Hwy 1. This is my tentative route: Trip I don't know much about that part of Vermont so I was wondering if someone can recommend a reasonably economical place to stay between Barre and Burlington? I'll be rolling in fairly late so I want to make arrangements before I go. Also looking for restaurant recommendations and alternate routes that might be worthwhile. I can't really extend the total distance because of time limitations. Thanks Ross
-

rear tire change procedure
RossKean replied to Hummingbird's topic in Royal Star Venture Tech Talk ('99 - '13)
I agree. Much easier to engage the splines. -
rear tire change procedure
RossKean replied to Hummingbird's topic in Royal Star Venture Tech Talk ('99 - '13)
Adventure 1943 I did mine for the first time a couple of weeks ago and it was a piece of cake. You need to have something to adapt your MC jack for the Venture. Other than that, it takes ~10 minutes to remove the bags and less than that to remove the right hand exhaust. Brake caliper, axle nut, pinch bolt, axle, caliper bracket. Wiggle the wheel off the splines and raise the bike enough to pull it out from the right. There are some variations possible but this is what I did. Took awhile the first time but I think I could remove and re-install the rear wheel in a half hour or so the next time. Lots of reading to do and lots of good information on this site. Make sure you grease splines and clean/lube the drive pins when it is apart (need snap-ring pliers to take the hub apart). A little more complicated if you remove the drive shaft and service that but not a big problem; just a little fussy getting it back together. I was quite apprehensive when I first tackled it but with the documentation on this forum, I didn't have any major difficulties. It would have helped my confidence to have someone to talk me through it but in the end, I didn't have any trouble. (Take Freebird's offer for help, if you can but if its not possible, just go for it!) Good Luck! Ross -
its right here... http://maps.google.com/maps?f=q&source=s_q&hl=en&geocode=&q=twillingate+nl&sll=48.79239,-56.557617&sspn=5.19719,9.832764&ie=UTF8&ll=49.645847,-54.757233&spn=0.31923,0.614548&z=11&iwloc=A Copy and paste into your browser if a "click" doesn't work. North coast of Newfoundland. Need a ferry to the island of Newfoundland from North Sydney Nova Scotia. Twillingate is actually on an island but there are bridges. I strongly recommend Newfoundland as a MC destination. MANY beautiful things to see and probably the friendliest people you'll find anywhere. Ross Edit: About 2800 miles from where you live.
-
Keith We had a beautiful day in Twillingate last year (see pics), but no bergs. Started raining on the way from Twillingate to Grand Falls-Windsor and was at least damp for the rest of the trip. Ross Edit: I'll let you know if I'm going to be in your neck of the woods.
-
Keith Where is that one? I did a Newfoundland trip last summer and covered a large portion of the coast. Didn't see icebergs, just whales in the water and moose on the land. (This was end of July/early August). Going back this summer to see the bits that were rained out! Likely the same time of year and will focus a little more on the west and north rather than the east (had good weather for that part). Ross
-
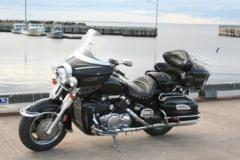
The wife of a fellow VentureRider (johnny-canuck) took this picture of me on a ride last weekend. I thought it was pretty good. Ross
-
I'm slow, but I get there eventually!! Just need to get my butt kicked from time-to-time. DONE Ross
-
See if this article is any help http://www.venturerider.org/forum/showthread.php?t=2220 Ross
-
Leveling LINKS installed..
RossKean replied to Seaking's topic in Royal Star Venture Tech Talk ('99 - '13)
The bike is already a bit tall for many riders. The links will raise the rear by an inch or so. Can't think of any other reason. -
Some Tips on Changing the 2nd Gen Coolant
RossKean replied to V7Goose's topic in Royal Star Venture Tech Talk ('99 - '13)
The first flush was quite green but there was quite a bit less color in the second flush. This only means anything if there isn't a dead zone where the AF doesn't circulate. Anyway, I'm happy with the change and will probably give it another flush in the Spring. Ross -
Some Tips on Changing the 2nd Gen Coolant
RossKean replied to V7Goose's topic in Royal Star Venture Tech Talk ('99 - '13)
Goose Good point!! I hadn't thought about running long enough to open the thermostat. I guess there was a little more left over than I thought. I suspect that I managed to change out 80% or so and as a result (and the method I used to refill), the overall glycol concentration is a bit higher than the recommended 50%. Better than no change at all but I think I'll run it for awhile and change it again the same way - next time I have a reason to have the tank off the bike. With a couple of thousand km of operation and a second change/flush, there would be VERY little of the original AF left although it does use more antifreeze. Thanks Ross -
Tightening the steering Head attempt
RossKean replied to Seaking's topic in Royal Star Venture Tech Talk ('99 - '13)
I used a 1 1/16" crows foot wrench (pretty close to 27mm) to loosen the top nut and then a flat blade screwdriver with a hammer to tighten both nuts (together) from the right side of the bike (bars turned all the way to the left). They do not tighten in relation to each other but move in unison. It needs a fair whack to move the nuts - at least on mine. The nuts go in a clockwise direction to tighten the head. Mine were pretty loose and I ended out moving them close to a half turn. Ross I see you just got three almost simultneous responses! Where are you in Nova Scotia?? -
Some Tips on Changing the 2nd Gen Coolant
RossKean replied to V7Goose's topic in Engine and Drivetrain
I don't know whether its as good but it sure a lot easier to do it the way I did. Warmed up the engine and then removed the seat, tank, side cover and lower fairing. Loosened the radiator cap and drained the rad. I just siphoned out the overflow tank. Put the plug back and filled it up with distilled water. Ran the engine for 30 seconds or so and drained the rad again (there is enough fuel in the carbs to do this). After one more distilled water flush and drain, I put 1.75 qt of undiluted antifreeze in and topped it off with distilled water. The two distilled water flushes gets rid of almost all the old antifreeze and putting in half the total required amount of undiluted antifreeze with water to top it off accounts for liquid (mostly water after flushing) that didn't get drained out of the system. Although perhaps not quite as thorough, it was quite easy. Ross -
Some Tips on Changing the 2nd Gen Coolant
RossKean replied to V7Goose's topic in Royal Star Venture Tech Talk ('99 - '13)
I don't know whether its as good but it sure a lot easier to do it the way I did. Warmed up the engine and then removed the seat, tank, side cover and lower fairing. Loosened the radiator cap and drained the rad. I just siphoned out the overflow tank. Put the plug back and filled it up with distilled water. Ran the engine for 30 seconds or so and drained the rad again (there is enough fuel in the carbs to do this). After one more distilled water flush and drain, I put 1.75 qt of undiluted antifreeze in and topped it off with distilled water. The two distilled water flushes gets rid of almost all the old antifreeze and putting in half the total required amount of undiluted antifreeze with water to top it off accounts for liquid (mostly water after flushing) that didn't get drained out of the system. Although perhaps not quite as thorough, it was quite easy. Ross -
A good motorcycle mechanic is worth his weight in gold; especially if you can find one who knows and truly UNDERSTANDS a Venture. I have not had much luck with those in my area and I would not hesitate to take the bike to someone good anywhere within a couple of hundred miles. For now, I am relying on my own (very modest) skills and help from this forum whenever I have to do something. Anybody recommend someone within a few hours of Fredericton, NB? Heck, I would even do an overnight somewhere, if I had to. Ross
-
I just replaced both front and rear with New Dunlop Elite IIIs on Thursday. Rained Friday so Saturday was my first ride - 300 km. Went to a club breakfast meeting today and the bike was not handling right. Checked the tires and the rear had 9 psi in it!! Picked up a little piece of metal. Think I'll try a plug in it or maybe I'll patch from the inside (or both). 300 km (190 miles) just isn't enough for a tire!!! Can anyone recommend a good type of patch kit one could use on the road in the event of an emergency? There are a number of different kits out there but I would be looking for something that can work without removing the wheel from the bike. Ross
-
Rear End Reassembly
RossKean replied to RossKean's topic in Royal Star Venture Tech Talk ('99 - '13)
Hi John New tires, cleaned up rear end, coolant, oil change, tightened steering head... Lots of stuff and I hope I can get it all back together in time for a test ride before the Toy Run. Hope to take part of the afternoon off work and finish it today and then leave early for tomorrow's event. Ross -
Rear End Reassembly
RossKean replied to RossKean's topic in Royal Star Venture Tech Talk ('99 - '13)
The spring stayed stuck to the differential and I didn't pull it loose so I will ass-ume that all's well. Its raining pretty hard here today so I won't have a chance for a test ride. Gotta change the oil and coolant anyway. Ross -
Rear End Reassembly
RossKean replied to RossKean's topic in Royal Star Venture Tech Talk ('99 - '13)
Ruffy All back together now. I did not pay any attention to the spring on reassembly - I think its OK. What are the symptoms if its not? Followed the technical service bulletin on the reinstall of the rear wheel. Thanks Ross -
Rear End Reassembly
RossKean replied to RossKean's topic in Royal Star Venture Tech Talk ('99 - '13)
Thanks Squeeze I couldn't see any way to check if the seal went in. I guess I'll have to assume that its not an issue. Ross -
Quick question... I'm in the middle of reassembling the rear end of my 2002 Venture. Did the hub maintenance and pulled the driveshaft to clean and lube. Managed to get the front re-inserted but my question is about the rear. How can I be sure that the grease seal slides into place in the rear differential? Do I just put it in place and tighten it up? Don't want a bad seal or ruined parts if I force it by snugging down the acorn nuts. Thanks Ross
-
Can't get the Drive hub Pins out???
RossKean replied to Reaney in NH's topic in Royal Star Venture Tech Talk ('99 - '13)
I just got my 2002 RSV late last year and yesterday it was time to change the rear tire. Got it mounted and balanced. The splines looked like they had been greased fairly well but I thought I should check the pins on the drive hub. I knew about the retainer clip and removed it. I had some significant difficulty removing the hub anyway. I am fairly certain this had never been dismantled because the pins were totally dry with a lot of surface rust. Took me over an hour to clean it up before reassembly. Reminder to everyone - CHECK THE DRIVE PINS, every time the rear wheel is removed. Don't assume that because there is no clicking or other odd noises, everything is OK. (Mine didn't make any noise). Later today, I'm doing to pull the driveshaft and sincerely hope its condition is better than the pins! I drained the oil in the rear hub and it was a bit dark but seemed reasonable. There was a small amount of material stuck to the magnetic drain plug (normal???) but this was very fine black material - no pieces or shavings. Still have a couple of evenings worth of work before I get it back on the road. Ross -
Noisy front brake and squeaky rear shock
RossKean replied to greyghost's topic in Royal Star Venture Tech Talk ('99 - '13)
Robert While the oil in the Schrader valve might be a temporary (or permanent) fix, it might just void the warranty on that particular item if the dealer gets wind of it. See if you can get Yamaha to replace the shock for you instead of messing with it. You could do it now or wait until you are closer to your warranty expiry. My original shock is still holding out (2002). Groans but doesn't leak. Ross -
Issue When Starting Last Few Days
RossKean replied to Sleeperhawk's topic in Royal Star Venture Tech Talk ('99 - '13)
I agree with GeorgeS...The best way to check the battery out is to do it independently from the bike. Remove the battery, charge fully at a rate not over 2 amps (slow is best, but a trickle charge won't do it for a flat battery). Let the battery sit undisturbed for 24 hours (enough time for a weak or partially shorted cell to bleed down). Take it somewhere to have it load tested. If it gets through the load test, then I would start looking at the overall health of the charging system. Start with grounds and hot leads, followed by stator and regulator. I would also check for ignition-off power drains using an ammeter in series with the battery. Ross