Search the Community
Showing results for tags 'gasket'.
-
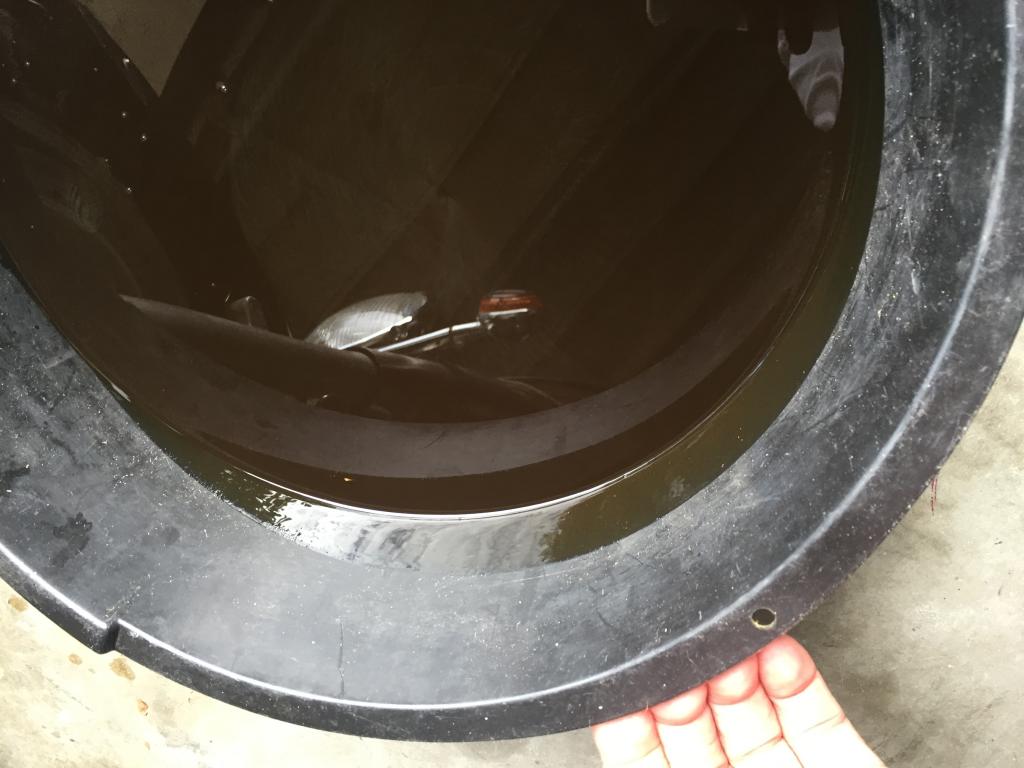
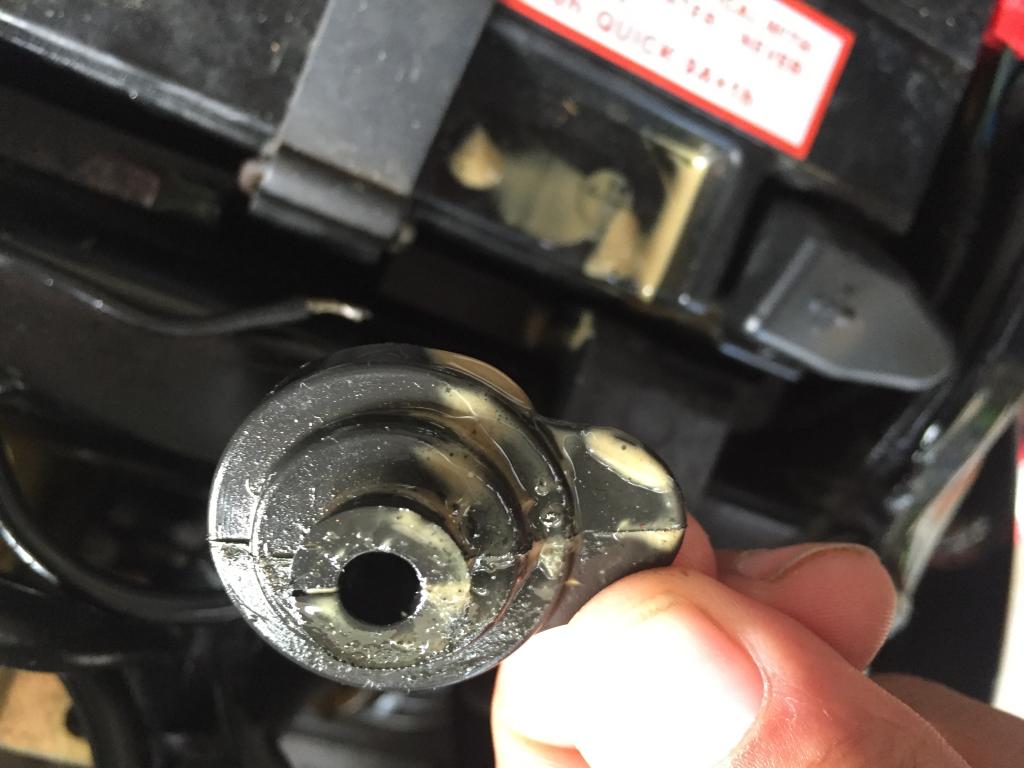
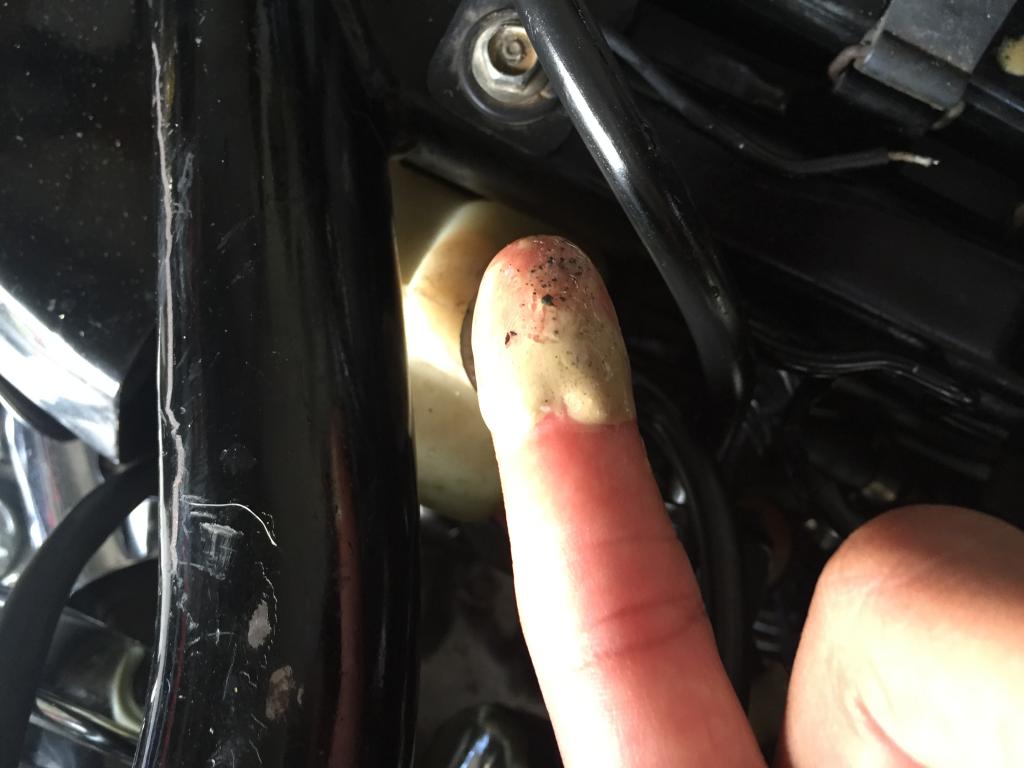
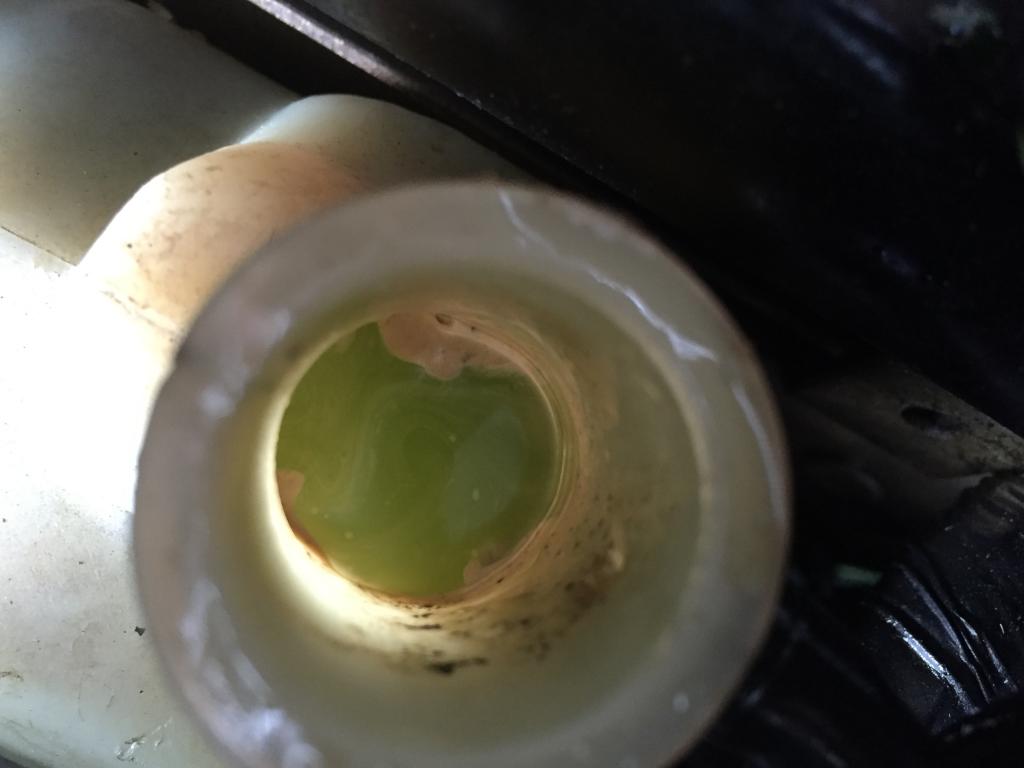
 ok so new to me bike 97 royal star ran fine during test ride no problems get it off the trailer and here we go clutch master cylinder goes out on me on my way to school make it back home somehow coolant spewing from under my seat soooooo here are the pics doesnt look like the oil so im ruling out head gasket correct? but look at my finger and the coolant tank and cap ..... is it the water pump? do replace the whole pump or just the seal? who will be the winner? thank you in advance for your help .
-
My sons' little dodge mini van seems to have blown a head gasket. The oil is like creamy pudding. How the heck do I clean the oil system up? I know it is going to take a couple of oil changes but should I be adding a cleaner to the oil ? This van has a 3.0 liter V-6 in it.... when I went to pick up the gasket set the guy at the parts store asked me if I wanted new Head Bolts. He said the norm is to change them when doing gaskets.... they are $165 for the set. Does anyone know if I need to? This motor has about 145,000 kilometers.... about 90,000 miles Any help would be great Kevin
-
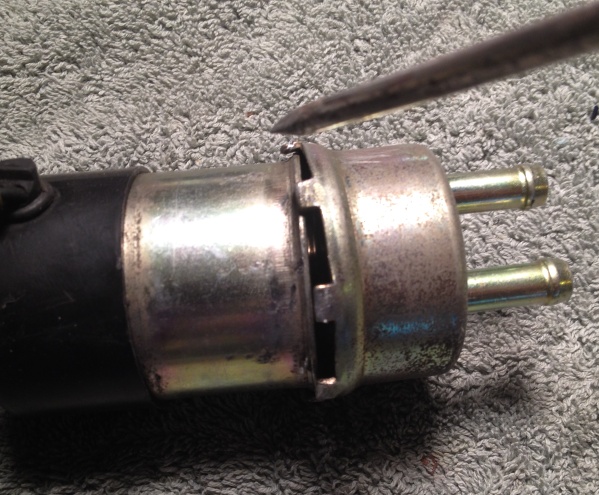
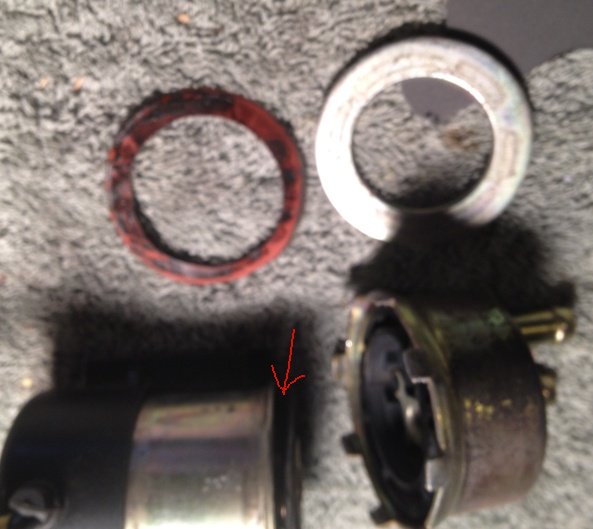
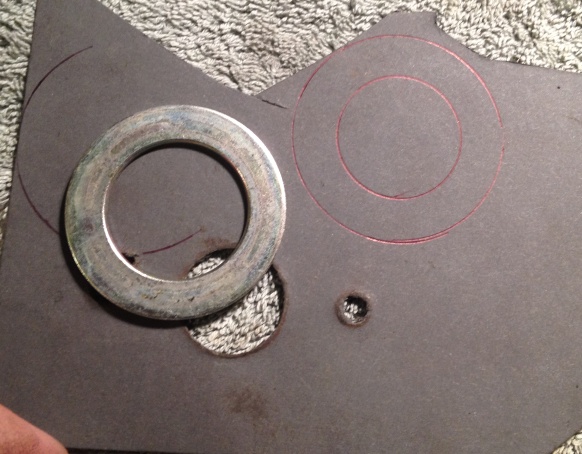
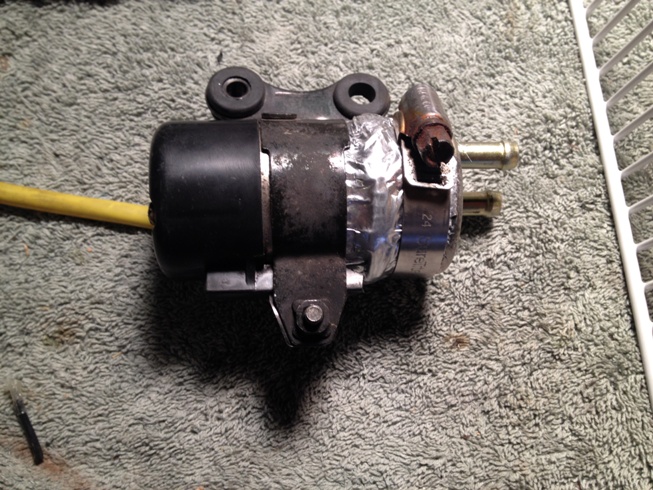
 This will be kind of a long one, so read the first paragraph then you will see if you want to skip the first section on fuel pump rebuilding. The other two sections are not very long. If you want to read about gravity feed (fuel pump bypass) go to my next post in this thread. If you want to read about the Cheap Ebay Fuel Pump, go to my third post in this thread. Last week my RSV was leaking lots of fuel while I had it running to warm up for a ride so I had to abandon my ride and figure out what needed fixing. It turned out to be the fuel pump; it was leaking lots of fuel from the seam where the two halves come together. Apparently this is not a common failure and I could not find a diagram of the fuel pump exploded into component parts. It is only listed as a complete assembly, although you can replace the points if needed. New pumps cost approx. $200 for OEM so I began researching what my alternatives would be: Repair, replacement, or bypass Since I could not find a diagram of what’s in the pump, I decided to see if I could have a look for myself. Hopefully I would see something that can be tightened, patched, or replaced! Nothing to lose right? I removed the pump from the bike and took off the metal mounting clamp that secures the pump onto the bike. I wiped the pump clean and concluded that what holds it together are the little tabs that are bent over the middle seam. In this pic I have already pried them open to separate the two halves. (Now I wonder if the first thing I should have tried was to just hammer all the tabs down tighter!) The next pic shows the two halves apart, and a large washer and very thin gasket that were inside. The half on the left has a rubber diaphragm that is ‘pinned’ to the unit at its center, so the metal washer and gasket had to be pulled up from under the diaphragm by flexing the diaphragm through the hole in the washer. I hope I explained that well enough, because I don’t have a good picture of that. Anyway, the washer and gasket went where the red arrow points, with the flimsy little gasket going between the metal washer and the metal pump body. After looking things over, I decided it seemed that the most likely cause of the leak was the little gasket. Did I mention it was really thin, floppy, and flimsy? I tried to put it back together but couldn’t get the washer and gasket over the diaphragm again without distorting or wrinkling the gasket. It looked like it needed to be seated perfectly and in such a tight space, I wasn’t sure I had done it. (To shorten this part of the story up….it didn’t work. Gas still came out of the seam so I took it apart again, still pretty sure the gasket was the problem.) Next, I went to the local Napa and asked if they had thin, gas-proof gasket material, and showed the guy my pump. He went in back (they are an auto repair shop also) and came up with a partial sheet of 1/32 gasket material that he said should work, and gave it to me for free. I traced the washer on the gasket sheet and then cut it out with a razor. I reassembled the pump and hammered the tabs back down. I gently blew into the ‘inlet’ stem and it made kind of a honking noise, which I took as a good sign because no air was coming out of the seams as far as I could tell. I installed it and turned on the key. It made the usual clicks for a moment, then stopped once pressurized, and did not appear to be leaking. I started it and let it run for a few minutes and then turned it off. I felt around the pump and my fingers did not get gas on them. I let it sit for a while longer then felt it again and there was a very small drop on my finger from the underside of the pump. I pulled it out again and looked it over. I wiped it off and blew in it but still no obvious air leak and a good ‘honk’. Then looked at all the metal tabs and realized some of them could be tapped down a little tighter and more evenly. Doing this did seem to tighten things up and may have been good enough, but I decided to do one more thing. I have some metal HVAC tape so I wrapped the pump body with it twice around. I put the mounting clamp around the middle of the pump, which helps tighten the tape like a hose clamp would and put a hose clamp on the other side. See pic I went for a 30 mile test ride, stopping frequently to feel for gas on the pump, and so far it is working. I’ll leave that side cover off next time I ride so I can keep checking until I am satisfied it will hold.
-
I finished replacing the friction disks in about an hour. No small accomplishment for someone who is generally all thumbs. Of course then there was the hour and 1/2 with goo gone and a few scrapers of assorted shapes and sizes to get all the old gasket off. I just wanted to thank everyone who has contributed to first generation tech talk. The picture and tips are great. Also... When putting the cover back on, do I need to coat the new gasket with RTV or other gasket sealer? Thanks, Bob
-
Has anyone ever mounted a Mr. Gasket 42S fuel pump on a 1st Gen. If so, where and how did you mount it. My stock fuel pump has gone out and I already have a 42S that I used when I was trying to get my '83 running. I would like to use it if possible but I haven't found a good place to mount it. It's a little too big to fit in the location of the stock pump.
-
Well its for sure the head gasket I pulled the head today and found a gasket that was in bad shape. The heads looked good and the cylinders look good. But I am wondering about the bearings the engine still sounded good but I have no idea of how long it had been drove this way. I did find that they had put stop leak in it so I am sure the PO new about this and thats why he traded it off, Is there a way to test the other head with out pulling it . Orlinhttp://0358/
-
 I'm fixing to replace my slave assembly pretty soon, getting tired of topping off my clutch fluid every 2 weeks or so. I want to have everything ready so I ordered a new slave, which looks like it has the piston and spring inside (big wad of grease inside). I can't find if there is a gasket for the middle drive gear? Do y'all use permatex or am I missing this gasket in the parts diagrams somehow? Thanks in advance
 -
Had a leaking valve cover gasket dealer said they could do it or I could, if they did it, it would have been cover under warranty, like a idiot I said no I would do it hardest part is remving the tank.... WRONG....All day doing that gasket just putting on and keep in the slot as I installed it was a PITA....Never again it will be at the shop next time.. Never seen one that hard to put on I'm sure there is a trick to it..
-
Roadside Marine in Williston VT. When I did my clutch upgrade I must had either pinched the gasket or didn't scrape it off good and now I have a very small leak. I stopped to get a new gasket and the one they had was broken but he gave me a tube of stuff they use and said try this with the broken gasket and just drop the tube off when I have a chance. He gave me the broken gasket no charge. They are great people there.
-
I have to give my dealer credit where it is due, my rear valve cover gasket is leaking on the left rear he order a new gasket and said he can put it on, or he would me let whatever I chose to do.. Being how the bike was going to be there for day or 2 I chose do to the repair.. Not many dealers like that anymore.. Oh and the gasket was no charge and so would have been the labor...
-
...got around to installing skydoc's clutch upgrade today. What a day I picked...it's 6:45 p.m. and the temp is still 93 F. I just had supper then went out to finish what has to be the most difficult, complex and frustrating part of this job ... getting the old gasket off the case. Naturally, it wouldn't stick to the cover, so out came the utility knife blade and away I went scraping! I needed a break to cool down (It's more than 93 in my garage - oh to be rich and have an air conditioned garage!) so I just stopped for a few minutes. I heard that the Yamaha gasket has a built-in sealant but this is ridiculous! I even had to trim the silicone-like sealant off the edge in a couple of spots! Oh well, it should take no more than 15 or 20 minutes to finish the job now that the gasket is gone. The urge to use that nice, easy to remove Loctite from-a-gasket was strong (a lot easier to remove), but heck, I've got the new gasket now anyway. The nice article with pictures in the tech library made the job go very smoothly, although finding that little wire holding the last disc was a bit tricky. I'm looking forward to trying out the bike. Interesting note here: I knew that the discs should be covered in oil before installation, so I checked out the recommendations from several sources. Here"s what I got - 1) no need for any oil as they'll get covered when the bike is started (Hopefully they won't overheat and burn out first!); 2) Coat with oil before installing; 3) Soak for 10 to 15 minutes before installing; 4) Soak for 2 hours before installing, and finally 5) Soak overnight before installing. Personally, I was taking no chances and had the plates soaking in oil since yesterday. Andy
-
I bought a set of OEM mufflers off ebay but didn't realize I would also need gaskets since aftermarket pipes don't use a gasket. So, does anybody have two gaskets for sale? Part #3xw-14714-00-00. Thanks.
-
I'm ready to blow a gasket with my dealers service. Twice I have Taken my bike to the dealer to get my twinkie leak fixed and still the same thing. Never notice it leaking when the bikes running or hot always after it has set awhile after being ridden. Any clues at to what is going on I'm about ready to tackle it my self and be dam the warranty just hate to have to buy the freakin parts myself. Sorry but I'm pi never mind any suggestions. http://http://www.venturerider.org/forum/attachment.php?attachmentid=63668&stc=1&d=1327596171http://http://www.venturerider.org/forum/attachment.php?attachmentid=63669&stc=1&d=1327596171http://http://www.venturerider.org/forum/attachment.php?attachmentid=63670&stc=1&d=1327596171http://http://www.venturerider.org/forum/attachment.php?attachmentid=63671&stc=1&d=1327596171
-
A friend of mine suggested that I use Hylomar universal blue non-hardening gasket sealant to cure my alternator cover leak. After looking it up on-line, it looks like it'd be great. Anybody ever use it? http://www.newmantools.com/chemicals/hylomar.htm Frank D.
-
 Okay. So I'm out in the garage doing the clutch upgrade. It looks really simple and straight forward. HOWEVER, the old gasket is brittle and stuck pretty good most of the way around. (like 99% of the way around). Does anybody have any old gasket removal tricks, or am I just stuck carefully scraping for a while? I'm gonna go scrape for a while, then come back and check for answers. I'm using a glass scraper (handle with a safety razor blade that locks in place. thanks. dana
 -
The dealer wants $25.00 for an Exhaust/Collector gasket. I'm thinking of making one. I'm looking for copper sheet but so far can only find brass, aluminum, zinc sheets. Was wondering if anyone knew if one should stay away from brass, aluminum or zinc. I will be checking Home Depot and Lowes tomorrow for copper sheets for I was told that the earlier years the exhaust gasket were made from copper, but the newer ones are some sort of silver color material. Welcome any comments.
-
My venture max, now thinks it's a Yamadavidson, it has left it's mark on the floor of the shop here at work. (looks like the valve cover gasket, and I'll have to clean the floor) I should never have put the H/D tour pack on the back.
-
I have a 93 Cougar v-6 needing a new head gasket, I'm an old scholl kid so when I see a kit with graphic head gaskets at the parts store I back off real slow... Like I said, I have no familiarity but always thought a good ole metal head gasket sealed well but also REALLY helped transfer that heat. And I still say aluminum heads are junk! Anyone have some real info on this variant? I know Ford offers the metal ones but they want my next born for them... but if that's the proper route...
-
my fuel pump went out the other day took pump off connect the two lines got it home no problem. i am going to buy a MR gasket fuel pump will the connector work or do i need to cut and splice the old plug on to it? thanks
-
Went out riding yesterday and on the way home ran slap into a major downpour:depressed: (***note to self: stop and don rain gear :doh:before you hit wall of water:rain2:) Anyway, stuff in the trunk and bags got wet, I know there is a "gasket" running through the lid, can these still be had and if so where? If not, what are the alternatives? Thanks
-
 So I have what is likely a dumb question, but I'll ask it anyways. My neutral light functions intermittently and it has been this way since I have had my bike. I presume that the switch itself it faulty or gummed up. If a new switch wasn't $30+ (partshark) or ~45+tax from my local stealer, I would just replace it and be done with it. What I would like to know is the following: 1) Can the neutral switch assembly be removed from the bike without loosing a significant amount of oil? 2) Is this switch something that CAN be cleaned and put back in (I have no idea how it works or what it looks like which is why I am uncertain about this. 3) Is it correct to assume that if I remove this puppy I will need to find a new gasket for it in order to reassemble? To be a little more clear about what I mean by it functions intermittently is that sometimes it works and sometimes it doesn't (when I am in neutral). There does seem to be a correlation with how warm the bike is but not an absolute since it comes and goes. That is it almost always functions just fine when the bike is cool. After a couple hours of riding it may function or it may not. It doesn't usually flicker on and off or anything it is either ON reliably or it is reliably OFF (again, YES I am in neutral :raspberry:). Anyone else have (and resolve) this issue? Further input? Thanks! Overall this really is not that big of a deal as it doesn't really affect anything other than I cannot leave the engine run and put down the sidestand when it stops functioning. But I am one of those people that likes things to work like they are supposed to and if it is going to be a quick fix, I just assume do it. Also, if the gasket wasn't ~$15 or so I wouldn't question replacing it; but thanks to my local stealership they do not have them in stock and assess a 'special order' fee for any parts they do not have on hand (not to mention their RIDICULOUS markup from the MSRP). Needless to say they get as little of my business as possible.
 -
 Does any one know what the stock head gasket thickness is? I am going to pull the heads off my motor this winter & put new valve guide seals in it. I am getting a some smoke from exhaust under acceleration. Compression is near spec. on all cylinders, so I am confident rings are OK. They measured OK when I had engine apart last winter. Heads came off a 97 VMax that was supposed to only have 17,000 miles on it. While I have the heads off, I want to increase the compression ratio on the motor. One way to do this is to mill the heads or block. The other way is to put a thinner head gasket on. Head gaskets are available in varying thicknesses. One of the VMax guys gave me the thickness for VMax gaskets, but it seems thinner than the set I put on this winter. Also going to put a Vboost on while I am in there. I am going to run it from the Ignitech TCI module. This work should put to rest that nasty rumor that Brown 1st gen's are the quickest that has been coming from someone in West Virginia. Gary
 -
Noticed yesterday I had some oil on the motor and today started to look for the problem. Looks like it's coming from the long upper crankcase breather cover between the cylinders. The crankcase vent mod has been done but does NOT seem to be coming from filter or connecting hose. In the service manual I cannot tell if there is a gasket or not. I see they are supposed to be tightened to only 7.2 ft lbs. Anyone know if there is a gasket before I mess with it. ALSO. For some reason my oil sight glass is BLACK, can't see through it at all. Just last week it was clear. Oil has not got many miles on it. Is there any way to check oil level on these things without using the sight glass? I looked in some older posts and some said to put Seafoam in crankcase to clean glass. How much do you add and how long do you run motor? I ASSUME it has to be drained fairly soon so it doesn't thin the oil to much. Of course the bike has been running and doing great BUT since I have somewhere to ride this Saturday it just has to act up.
-
OK, just curious here, I changed the coolant a few weeks ago and have had a slight drip out of the plug under what I am assuming is the water pump (what I used to drain the coolant). I went into the local shop and ordered the gasket for it (part 13 on the attached diagram). This is a metal part with a lip on one side. Is that the right part and if so, which was does the lip go. I was expecting a rubber gasket or something to hold the fluid in! http://images.powersportsnetwork.com/fiche/images/YAMAHA/1989/Motorcycles/327_waterpump.gif
-
For those of you using or contemplating using the Mr. Gasket #42S fuel pump, be advised that the design has been "improved". Formerly, the input and output nipples were threaded into the pump. That allowed us to insert right- and 45 degree-pieces between the pump and the nipple, allowing the Mr Gasket pump to work for us. The new design has a fixed output nipple, and a long one at that. Consequently, I do not believe that the Mr. Gasket fuel pump will be an acceptable replacement. I went to a different store, and they had one old style pump in front of three new pumps. I snarfed that up, just in case I ever need another.