Search the Community
Showing results for tags 'mounting'.
-
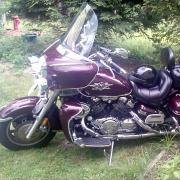
I have a back rest for my 83 I am not sure how it is mounted I have parts. Could some one post a pic of the mounting so I can see if I can put it back on. Thanks, Dale
-
I have looked all over and could not find any articles on mounting these on a Venture, I have an '06. I picked up a pair on EBay which are real left and right hand Hyperchargers from a Harley with a CV carb mount. I have mocked up the right side and the mounting is a lot easier then it looks. I'm waiting for some parts to come in so I can have the right side finished mounted before I start the left side. Now I am mounting these for looks alone and I have no intensions of setting these up to work as ram air intakes because I do not want to cut holes in the lower fairings and route the duct to them. The mount I have working so far is by using the original Yamaha intake mount and by cutting it down to basically a flat surface. After getting it to fit reasonably flat to the Hypercharger I drilled the mounting holes through it using the Hypercharger hole pattern as the pattern. Next I glued a piece of 1/4 inch rubber to the mount this helps cover the rough surface and will allow the 5/8 spacer (5/8" CV bolt pattern Spacer: J&P Cycles) something to seal against. You need around 1 inch spacing between the Yamaha mount and the Hypercharger to get the right side to mount without any interference. I have been looking over the right hand Hypercharger and I noticed that even if you bought 2 right side units (standard with the CV Mount) one of them can be converted to a left using a hot glue gun to mount the screen to the opposite side of the case. This is how they did it and the mounting hole locations are of no difference because of the way I'm mounting them. You need to buy the CV Mount Hyperchargers because they have 3 mounting holes and the back surface is flat and the bolt pattern is in a circumference around the hole. Once I have them completed I'll upload an updated install with pictures. Now as a side note I worked on least a 1/2 dozen different ways to mount these right down to machining my own adapters and mounts out of aluminum. After planning everything figuring prices and not counting my own time I found that buying the Yamaha intake mounts (SKU: 4XY-14431-02-00 $13.00 +/- each) and cutting them to fit (they are a rubber / plastic material) was a lot cheaper and easier, You can cut it with a hacksaw and then belt sand it flat. The CV spacers come in 3 different sizes 1/4, 5/8, and 7/8 from J&P Cycles. The 1/4 inch thick rubber I had but I did lookup on EBay and there is some 1/8 inch thick on the site and with the 7/8 thick spacer it should work just as well. Attached is the picture of the model of the Hypercharger I am using. I also have tried to lookup the left side unit (600178 number on the side of the box) and can't find it anywhere.
-
I know this is kinda late before Don's maintenance day, but just thought I'd check while making plans on what to bring: I'm just riding up for the heck of it - nothing I really need, so I am available to help with anything. I know Don has a tire changing machine, so let me know if anyone wants to change tires there so I can bring some balance weights, rim protectors, etc. Windshield mods? I will bring my hole saw - if anyone wants to put in a set of pop vents you have time to order them for delivery to Don's if you do it NOW. Get them from Aircraftspruce.com. I think I have one set of vents I can bring with me. I can also help with cutting down a shield if anyone is interested. I'll bring a hollow-ground blade and hope Don has a jig saw. LED lights (engine highlights, extra brake or signal lights, etc.)? Order them now from JCW or superbrightleds.com for delivery to Don's and they will be there by the weekend. Superbrightleds normally gets stuff here in three days, and JC Whitney is almost a quick for many things. If somebody will tell me what they intend to do with lights I can make sure I have whatever wires, fuses and relays might be necessary. But be quick, I plan on leaving here Wednesday morning, as I gotta run through North Carolina on my way up there to pick up new pipes. Gauges - these are a little trickier, since the problem includes deciding how and where you want to mount them. But I can pick up the 1 7/8" white ones I used on my 07 here, or you can order the black ones from JCW now. Even if we cannot complete mounting them in one day, I can show you how to set everything up - it is quite easy. Mounting air horns, making extensions for the light bar mounting spacers, changing bolts for trunk rack, etc. Most of these are easy, but do require buying a few parts (like bolts) ahead of time. If you tell me what you want, I'll see if I can bring the necessary stuff with me. Don't know if anyone is interested in these offers, but thought it couldn't hurt to ask. Ride safe and see you in a week, Goose
-
Looking for the mounting brackets for the HD mufflers that mount below saddle bags. The ones I am looking for are the ones that are only about an inch or so wide and not the big big ones. I had seen them before and those are the ones I want. So if anyone has them for sale let me know also let me know if you will be at maintance day June 6th if not we will do by mail or pick up if you are close. Joe
-
 Here's a pic of a stock RSTD passenger backrest converted to a removable driver backrest. The mounting brackets left over can then be used as a removable trunk mount.
 -
The trunk rack on my 05 RSV has started to rust. I want to replace it, but I don't know what brand it is. Is there a way to tell if it's a yamaha brand, or some other. Also are the mounting points the same for any rack made for the Venture. Maybe some one can give me some mearsurements of the mounting points so I can get a replacement. Thanks
-
Hey Guys Looking to add more electrical goodies , where are U mounting your 2nd fuse panel Gambler:banana:
-
 Does anyone know anything about installing these? If you do, why do the 4 threaded holes (female) on the light mounting bar for the wind deflectors not take the stock screws that I took off the original Yamaha Venture light bar? I tried to tighten with my fingers before I put a tool on all 4 bolts in all the 4 mounting holes and they would not thread. Any ideas? The lamps are stamped made in USA so I'm thinking maybe they are SAE and not metric?
 -
Ok finally got my driving lights mounted today...all this talk about them in another thread got me motivated...(and they look and work great!) but I noticed something...the little plastic mounting holes that the metal bar mounts to, under the windshield, have already cracked and broken off! Son of a %$%^$$&()%#@!!!!!!! I guess it would be repaired under warranty if I nudge the dealer, but that would buy me what...another few thousand miles before it happens again? Ok...so what I may try to do, is make a couple of metal brackets, supports if you will, and brace those mounting tabs down to the bolts that hold the speakers to the fairing..I have done something similar to this before...on my Ultra, something similar happened at around 30,000 miles, the metal braces under the fairing fatigued and broke....so I fabricated some metal braces to provide more support. Hey what can I say? We got some crappy roads in this little town...lots of cobblestone, or brick, type of roads. And they are ROUGH! I had started to hear a bit of a clinking sound in the front when I hit some large bumps with the front tire, but chalked it up to something in the fork tins or maybe the fork deflectors . If you guys start to hear this noise, I'd recommend looking for the cause...it could have eventually broken the center mounting tab, and although the windsheild is not likely to fall out...its still something that is a concern. Maybe someone can fabricate something that addresses this and sell it to the members? Here I was looking forward to 100,000 miles of trouble-free ownership. Dang.
-
I fabricated a trunk mounting bracket that requires no drilling or mods to the bike. The bracket uses u-bolts to mount to the backrest mounting points. I mounted a VIP Tour Pak clone trunk. I put a few pictures in my gallery to show how it was made in case some of you want to make you one. AL GUY
-
I have some lights that I am thinking of mounting on the front of the fairing as passing lights I really don't like the look of the bar for a passing light set up and don't want to mount of the deflectors or forks if I can avoid it. I am thinking of doing the following Mounting about 6 to 8 inches outside of headlight centered on the center horizontal plane of the headlight. Drilling necessary hole in fairing with rubber grommet for the hole. Making a small (about 2" x 2") metal plate with matching rubber plate side drilling hole in plates slightly smaller than hole in fairing. Mounting bolt for light through fairing, rubber plate, metal plate, lock washer and nut. Taping into the headlight wiring Thoughts, suggestions, hints cautions???
-
 Guys, A while back I installed a Stebel Nautilus on a friend's 99 using Carbon One's bracket. After I installed and heard it, I got to thinking this horn would work great under a saddle bag or inside the fairing. But when I looked over the instructions again, I beleive I read that this horn must be mounted vertical or 15 degrees from vertical. Is this in fact one of the restrictions on mounting this horn? Because a friend of mine just recently bought a used 2000 and I noticed that the OEM horn was not connected. When I asked him about it, he said he wasn't sure what it was but it was loud and mounted in the fairing. Well I'm helping him replace the fork springs and when I took the front clowling off I found a Wolo Bad Boy tie wraped to the frame next to the radio (see attached). What I'm asking, for those of you who are familiar with mounting this horn, should I relocated it to the right side in place of the OEM horn or just leave it where it is. Thanks, Rick
 -
.thumb.jpg.4e1b3809c4633f365ba67afc212f21df.jpg) Just about everyone thinks the stock mounting for the Yamahaha saddlebag chrome trim rails is poorly done. Not only do the rails slant upward from front to rear, which makes them not match the lines of the bags, but they almost always rub on the bottom of the turn signals. There are a couple of easy fixes for this. Others have advocated drilling a new mounting hole in the bike trim below the stock one with the welded nut behind it, thus lowering the rear of the rails. This works just fine, but for some reason I didn't want to drill a new hole in the bike. So I tried an alternative - I just drilled new holes in the upper corners of the rails themselves, next to the original mounting hole. This does not lower the rail quite a much as you probably would if you drilled the new hole in the bike instead, but I think it is good. Here are a couple of pictures to show how they look when mounted this way. Sorry for the poor quality - took them with my cell phone instead of finding the good camera! Goose
Just about everyone thinks the stock mounting for the Yamahaha saddlebag chrome trim rails is poorly done. Not only do the rails slant upward from front to rear, which makes them not match the lines of the bags, but they almost always rub on the bottom of the turn signals. There are a couple of easy fixes for this. Others have advocated drilling a new mounting hole in the bike trim below the stock one with the welded nut behind it, thus lowering the rear of the rails. This works just fine, but for some reason I didn't want to drill a new hole in the bike. So I tried an alternative - I just drilled new holes in the upper corners of the rails themselves, next to the original mounting hole. This does not lower the rail quite a much as you probably would if you drilled the new hole in the bike instead, but I think it is good. Here are a couple of pictures to show how they look when mounted this way. Sorry for the poor quality - took them with my cell phone instead of finding the good camera! Goose -
 My 06 RSV came with Bridgestones and I’ve put 13,000 miles on them. I bought new Dunlop OEM model (but in white wall) tires via the web (OK, my wife did, because she’s the web shopping guru). I’ve read a lot of posts about tire preferences and handling and mileage life and opinions are all over the map. I figured I would try the Dunlops and next time, probably the Avons and after that the Michelins, etc. until I had my own opinion based on how I ride. Anyway…I’ve got a torque wrench, lift and Carbon One’s adapter and I plan to remove the wheels and take them to a tire place (not a MC dealer) that will break off the old tires and mount the new ones, then I will reinstall the wheels (replacing brake pads and greasing the rear splines like I saw at Freebird’s Maintenance Day and tightening the fork head) utilizing the combined knowledge of 3000 experts/mechanics/advisors/family that is VentureRiders. Some specific questions though: 1. The tire mounting shop prefers I remove the rotors – do I need to reinstall the rotors in the exact same (hole for hole) position as they come off? Torque requirements? Tightening sequence (like lug nuts)? 2. The tire mounting shop has no means to balance a MC tire – how much does this really matter? 3. I know the tires are directional. The rear wheel can only go on one way, so I only need to confirm that they mount the tire so the forward direction results in the rotor mounting on the right side (facing forward). The front tire is also directional, but does it matter how they mount it on the wheel? 4. I know the brake pads on the rear wheel are exchangeable (inboard to outboard), but are they the same configuration for the front wheel (a pad is a pad is a pad)? 5. I have come across several threads that I’ve copied for procedures for rear wheel removal, greasing the splines, tightening the fork head, etc. I hope they will be as helpful when my hands are covered in grease “in the moment” as they appear to be sitting at the computer. Not sure if I have all the right wrenches and socket sizes for the various tasks – I have the “normal” sizes 17mm and smaller. Anyone have a list of “special” sizes or tools needed for these tasks (or substitutes, like Crescent wrenches)? Thanks in advance for all who contribute. David
 -
Ok - the Zumo pkg is here -- nicely thought out. But where does that huge magnetic XM antenna go? There does not appear to be mounting holes on the back of the mc cradle. Suggestions appreciated, DREBBIN