Search the Community
Showing results for tags 'valve'.
-
 Well Friends, I have finally decided to go ahead and start packaging my Speedway Proportioning Valve and Galfer stainless brake line to be sold to VentureRiders. I have done this franky because I got pissed off and decided that I just needed to "Just do it"! But before get to the details, I need to tell a story. I came to this realization after coming back from a week of riding with my friends in the Big Bend area of Texas.......where we left a close friend in the hospital in Odessa, TX with a collapsed lung, bruised ribs, a ruptured spleen and a slight concusion. This accident happened on a new Tour Deluxe that only had about 500 miles on it. And the sad fact was that my friend had just come off of a FJR and still owned a GL1800, but fell in love with the way the TD rode. However he was not yet accustomed to the rear brake. His close friend had told me that he had already locked up the rear several times so he knew about the sensitivity of this brake. And in hindsight, I know I should have spent some time with him the evening before our ride to reinforce the proper braking on this bike, but I didn't. Regardless that next morning we took off from Study Butte and headed down the River Road to Presidio. And after we left Lajitas, it was nothing but a fabulous road that just "rocked and rolled" all the way to Presidio. We were about half way there when we came upon a slight 50mph curve that broke right on top of a small rise and was basically blind until you toped the rise. Well Murph entered this curve in the right track (early entry) and came into the apex of the curve on the center line (out high). I guess it startled him and he hit the rear brake, slide for about 10 ft, let off the brake where the bike high sided and slammed him into the road where he slide into an unconscious crumpled pile on the shoulder. Well we managed to get him comfortable while we waited on an ambulance, where they cut all of his clothes off, stabilzed and loaded him up for an ambulance ride to Presidio where a CareFlite was waiting to take him to Odessa. So for the next 2 days until we got home, I was internalizing the entire episode knowing that it could have been prevented (1.) with the right information about this bike and (2.) with a modified rear brake. Murph was a seasoned rider that I have spent countless miles riding with him over the past years, but he just wasn't used to this bike. Well, in the past few months I have both assisted in helping folks build and install the components of my proportioning valve themselves as well as making the modification to the valve, putting it together with the Galfer stainless line myself and then sending the completed package to folks that have asked me. And for bikes that are local friends of mine, I have installed several sets myself. So now because of Murph's accident, I have decided to start putting kits together for sale. When all of this started I wasn't that interested putting these components together into a so called product. But when I did I decided to only charge for the cost of the components and only $10 for my time, which came out to $130 delivered. However because most of us like the ease of using PayPal, this eats into that $10 for $4.07. So I have just ordered the components for 5 more sets (one of which is already spoken for) of which I'm going to sell for $140 delivered to anywhere in the US, which I think is a fair price. The entire kit fits perfectly into a small 5.5" X 8.5" Priority Mail box. Yeah, I know that applying proper braking techniques of using more front brake sooner will certainly take care of this issue, but sometimes your right leg and foot has a mind of its own and does something stupid. And when the rear tire starts sliding on this big bike, it's not a very good feeling. Because if you don't get off of it soon enough, the rear is going to start coming around. Then if you let off too late the bike will high side, which is going to hurt. This adjustable proportioning valve will provide that 1 or 2 second of cushion when the brake pedal is jabbed before all of that brake fluid makes its way to the 4 pistons in the rear caliper. So I'll list this in the Classified Section tomorrow and let's see what happens, Rick
 -
For those who check their own valve clearances and occasionally need a different size shim, how about the idea of someone on the board here running a valve shim bank, where unneeded sizes could be traded in for a needed size, with the only cost being shipping? These things cost a lot new, and I figure there have to be some laying around not needed by one guy that another guy could use. Thoughts? Yay? Nay?
-
 I have replaced my installation instructions for the Bulter Mod with some very good instructions that Rick was nice enough to put together. You can find them here: http://www.venturerider.org/forum/showthread.php?p=116327#post116327
 -
Those of you that have put this in your tires: Was there any problem getting the stuff in with the 90* bend in the valve stem?
-
hey guy's, The manual I have state's that at TDC on the compression stroke on #1 cylinder that it can be acknowledged by the cam lobe's being opposite or facing away from each other. When I achieve TDC the cam lobe's are facing each other. Am I missing something hear or has 15 years of wrenching on cage's diminished my sense's? Is there a procedure listed here somewhere or have any of you done your own valve shim check? Thank's for any info, Jake.
-
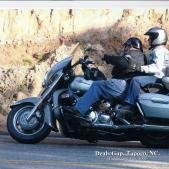
I have finished with the installation of the Rick Butler Brake Modification and the installation of the TCB in companion with his original installation. I wish to stress to all of you, either one of these installations, in or by itself or in companion, will not prevent lock up of the rear wheel, as neither will the installation of the TCB on the front brakes. What these things do is give you great control over the brakes and stop the instant lock-up so common with the rear brake. You will have to practice with these installations...learn their limitations and yours. I am personally delighted with Ricks proportioning valve installation, the TCB devices......used on the front, I give a thumbs up.....used on the back by itself, thumbs down, used in companion with Ricks proportioning valve, it adds a bit of smooth control to the braking. I only put these things on this afternoon and went to a large parking lot to practice......I kept it down to 35 to 45 mph for a bit........got used to them, then romped it up to 60 and put the binders on, took me a bit to get used to how to use these new installations.......but you have such great control with the use of them.....in the space of two parking lot spaces , I can stop Crickett from 60 mph in that space with the front wheel about a foot past one of the spaces. I had no tape with me and it is those back to back spaces in the middle of a parking lot and I am traveling the full length of the two spaces with an over shot of about a foot. Any harder and the wheels lock up. Thats pretty good folks........somewhere in the neighbor hood of 40 to 50 feet. I really do wish to stress to all of you.......this is not a magic cure.....it is a means of gaining more and great control of the brakes...you will have to practice with these things......get used to them, and train yourself to use them, I cannot stress that enough...simply bolt them on, do not ever practice and the day you need them......yes the wheels will still lock up, you have to learn how to use these devices. I tried all kinds of settings......as lowas turning the proportioning valve adjustment out one turn(this was a bit too soft for me) all the way up to three turns out. With the TCB used in companion, I have settled on two turns out on the valve. I tried it without the TCB first and used one turn out......with the TCB installed two turns seems to suit me just fine. I have then safety wired the valve to prevent accidental adjustment of the device. The bottom line is if you practice with these devices......they do give you great control of the brakes on this bike.......hope the photos turn out, they show the parts.......the valve and the tap and adapters installed into the valve....The TCB installed front and rear and my safety wire job. Kit
-
I've got a stuck float valve. How do you remove it to clean/replace it ? Jim O'D. Darwin, Australia.
-
I know from real world experiance that the 2nd Gens have a much too touchy rear brake. Or at least in the two that I have owned. I plan to install the TCB Lifesaver Valve and I'm not sure which level of slip I need. I thinking either the 30-40 green or the 40-50 red. Anyone have one already mounted and can post results?
-
I am wanting to install the spin on oil filter adapter and have one question. On the original canister type the bolt has some type of pressure regulator in the bolt. Does these adapter plates have this valve or does the bike really need it? I would love to add this to my bike but was afraid of damage to the bike by eliminating this valve.
-
 Hi, Is there a drain plug for the coolant somewhere on these engines? Or does one have to improvise like on a VW where they tell you to pull a rad hose to act as the drain? Also, I think I need a new O ring for the coolant by pass valve as I have a leak there now. Any suggestions for a non yama solution? Thanks, Brian H.
 -
Hi everyone I parted with my cash and bought Yanoosh's 86. He wasn't kidding, it is a nice ride. Needs a few things to bring it into A-1 status. Valve covers need resealed and one valve might need a shim. The tick is so slight I had to lean down on the tank and hear it. I need to Sea Foam it tomorrow and possibly synch the carbs. He was 110% truthful on every detail. I can say I am proud to have met him. Attached are some low reolution pictures. My connection is slow so I will wait until I get home and then pick a spot to publish them. So, off I go in the morning. I am in Manassas Va. right now. Rode it down from Springfield Va. right in the middle of rush hour! Ready to ride now. Gonna stop and pick up new boots tomorrow and a pair of riding gloves. My soles are worn out and when night falls, the gloves will feel good. Oh, might need advice on battery - seems to be a bit slow/weak on the start. J. B.
-
While riding my bike today I hit something metal on the road and one of the two hoses going into the reed valve broke off. I noticed a sound like air being forced out of the metal tube. Since I have my AIS valve plugged, can I just plug the broken hose also? Or do I have to replace the rubber hose with the L-shaped connector going into the reed valve? Any answer greatly appreciated!!!
-
This new product is hydraulic brake control valve. This little valve replaces your existing banjo bolt. You can use this part in the master cylinder or caliper. If you have 2 calipers in the front, but it it the master cylinder to run both calipers. The reason for that is, we are relieving the initial grab in the brake system, or a pressure spike. There are four different levels of this part depending how you like to ride or how you like the feel of the breaks. This part also gets your shocks involved. The shocks absorb majority of the wieght instead of the ground or tire. This part also saves 3 times the wear and tear on your pads. The easiest way to discribe how it feels is, like the brakes in a car without the ABS reaction. The hard you apply the faster you slow down. The TCB valve will not completely prevent lock up. The lock up is later in the braking prosses.Just lock up happens when you want it to. Please ask as many questions you might have. Again thanks for the support. Regards Zach
-
 Where can I find a valve assembly for the suspension on my 86 Venture Royale?
 -
what is the purpose of the plastic covers (2ea) extending completely across both front & rear valve covers. Are they necessary to keep in use? Thanks for your expert advice I've used already.
-
I have got a leak on the left side of the tube that you drain the coolant. I think goes in to the thermostatic valve is that an o ring I cane replace or is it more . Dale
-
The other thing I got done today was adding the proportioning valve to my rear brakes. This is a modification that Rick Butler came up with to make the rear braking on these bikes a bit less sensitive. This is another easy modification if you get the parts from Rick as I did. I did take pictures of the installation and will try to get a tech article posted tomorrow. Basically what this is though is a mini proportioning valve. You simply remove the rear brake line and screw this proportioning valve right into the rear brake master cylinder. You then install the new stainless steel line between the proportioning valve and your rear brake caliper. Bleed the brake and you are done with the install. The proportioning valve is adjustable. Rick sent it calibrated the same as the one on his bike and for initial testing purposes, I left it there. These things are hand adjustable and very easy to change. The first thing I did when I got a little ways down the road was to see if I would lock up the rear brake. Yep, I still can. It took more pressure than before the modification though and that is what I was looking for. To be honest, I think it actually still locked up easier than I want it to but like I said in another post, it has rained here off and on all day so it was really not a good time to be testing it. I am pretty much convinced though that this is going to end up being one of the top modifications available for our bikes when it comes to safety. Hopefully things will dry out around here a bit before the weekend is over and I can do some better testing. I may adjust it down a bit more so that it is even less sensitive yet but when I get on truly dry roads, I may find it to be fine just as it is.
-
I am thinking of purchasing this air compressor, http://www.slime.com/product.php?product=40001, and mounting it in my saddle bag. I thought I could hot wire it with a fuse and a switch on the handle bars or fairing and a gauge and release valve so I could adjust the air in the rear shock while riding (just in case the road conditions change. Has anyone done this or does anybody have any advice?
-
The “Butler Mod” Installation Instructions Click on pictures to see larger versions. The components of this device are basically a Galfer steel braided brake line attached to a Speedway Motors compact adjustable proportioning valve (APV). The technical name for this is a “flow control valve” and it will allow you to "fine tune" the rear brake system and thus prevent severe rear brake lockup under moderate-to-heavy braking. If you can replace your OEM rear brake line with a steel braided replacement brake line then you can easily install this line. http://www.venturerider.org/butlermod/image002.jpg So let’s start first by evacuating the brake fluid. Take the lid off of the reservoir and then either use a MityVac at the bleed valve on the caliper to suck out the fluid or attach a clear hose that will empty into a bottle or other container, and pump the brake pedal until the reservoir is empty. Now you can disconnect the brake line from the caliper and the master cylinder. At the caliper, remove the 12mm banjo bolt and use a rag to catch and brake fluid drips. Where the line goes toward the master cylinder, you will see one hose clamp on the side of the swing arm and then another on the underside of the frame next to the AIS valve. Use an 8mm socket to remove these clamps. The hose now goes forward toward the engine behind the horn on the right side of the engine. Remove the horn so you can get to the frame hose holders, where the one to the left is up under the frame swing arm housing. This spring-like holder is not removable where the rubber line grommet can be pushed out away from you. The second line holder is a heavy round rubber grommet that is held by a frame holder that looks like a large wire. You can grab the end of this wire holder with a set of vise grips or pliers and pull the end open to where this circular grommet will slip loose. Then when you put it back in with the new line you can take a flat blade screw driver and press the end closed to tighten up on the grommet. http://www.venturerider.org/butlermod/image004.jpg One quick note on assembly. When you take this line out you will find 3 flat rubber grommets and one thicker circular one (above), all of which can be taken off and used on the new line. Just slit one side and then just peel it off the rubber brake line. The replacement steel line is a smaller diameter, so just cut about ¼” off one end and then place it on the new line and wrap it with a couple of wraps of electrical tape. http://www.venturerider.org/butlermod/image006.jpg Now you are at the frame line cover just under the right foot board. This cover is taken off by removing the two 8mm bolts that attach this cover. You now are at the adapter going into the master cylinder. The short adapter that goes into the master cylinder is a spinning collar and when the line is held by a 14mm open end wrench, you can loosen this collar with another 14mm open end wrench and it’s off. Now when you put the cover back on when you are finished, it works better if you cut the front part of the cover back 1”. You can see from the picture below that you cut it down to about 3/8” from the bottom and then across from the front mounting hole. This cutout allows room for the line coming out of the valve so that there is no pressure on this connection. http://www.venturerider.org/butlermod/image008.jpg Now you are ready to install the new line. For now just work with the line off of the valve and start by threading the line back toward the rear from the horn area at the rear of the engine. Remember there are two flat rubber grommets that go on the swing arm with one flat one that will slip into the spring holder and the round one into the wire holder, where you can press it in to hold the grommet. Once you get the line threaded through to the caliper, attach the 30 degree end to the caliper and tighten the banjo bolt with new copper washers on both sides of the line banjo hole. On the rear line, I usually use the stock steel banjo bolt just because it’s stronger than the brass one that comes with the line. That way you can torque the bolt to 20ft/lbs (the manual says 22ft/lbs which I haven’t been comfortable with). Now attach the two line holders on the swing arm. http://www.venturerider.org/butlermod/image010.jpg Don’t put the line cover on until you are finished bleeding the line and making sure there are no leaks. Next attach the proportioning valve to the master cylinder by threading the spinning collar on the master cylinder to the front adapter with the knob turned down toward the ground. The adapters on the valve side with the copper washers are already tightened. The end that goes into the master cylinder is the adapter with the course 10mm X 1.25 pitch thread. http://www.venturerider.org/butlermod/image012.jpg Just snug this spinning collar to the point that if feels firm. Now thread the end of the line to the output side adapter on the valve and snug it up. Now with a 16mm open end wrench, hold the valve and with a 14mm open end wrench tighten the collar on the master cylinder until it feels tight. Do the same thing to the spinning collar on the line end. The threads on the line collar are a finer thread so do not over tighten. http://www.venturerider.org/butlermod/image014.jpg Now it’s time to bleed the line, but first open the knob on the valve all the way open by turning it counter clockwise (like a faucet). I usually use a MityVac at the caliper bleed valve to get the fluid started to the caliper. Then I use the conventional method of (1) closing the bleeder (2) pumping the pedal a few good times (3) hold the pedal down (4) release the bleeder to let fluid through and then (5) close it. Now go back to (1) and start over until all the air is out of the line and the pedal feels good and firm. Now check the spinning collars at the valve to see if any fluid is seeping at the connections. If so, snug them up just a bit more being careful not to strip a thread. Wipe the fluid that has seeped and then pump the pedal hard and let it sit for a few minutes to see if it is still seeping. Once you are assured there are no leaks, attach the line cover. http://www.venturerider.org/butlermod/image016.jpg Now turn the knob clockwise until it stops. At this point the valve acts like a shutoff valve, so turn the knob back out two turns. You can see the color rings under the knob, which indicate how many turns you have made. If you see 2 colored rings, then the knob is two turns out. This is only a starting point because from here you need to take the bike for a ride on a good concrete surfaced street to test the braking. It’s best to use a street with not much traffic on it Get up to say 40mph or more and gently apply the brakes pressing down more and more until (1) the bike comes close to stopping or (2) the rear wheel locks up. If it locks up, release it quickly. The latter condition means that you need to close the valve more by turning it clockwise. Adjust the valve to the point that you feel comfortable with the amount of braking resulting from how far you have to push down on the pedal. When it is right, you should be able to come to a complete controlled stop at 30-40mph with just the rear pedal. Of course remember that it’s very important to use both brakes when stopping, so in addition to the rear brake, be sure to apply an ample amount of front brake to help slow the bike down the most. But I have found that just as you are coming to a complete stop, release the front and use only the rear brake to come to that complete stop. Sometimes when you use the front brake at a complete stop, it may off balance the bike as you are putting your foot down. The rear brake now becomes more settling and comfortable at stops. Once you are comfortable with the feel, it’s time to lock the knob down. I first did this with a piece of safety wire which worked well but required a small hole be drilled through the knob. But since I started working with this valve, I have found the product information on this valve from the manufacturer (Deltrol Fluid Products) where it described a set screw in the side of the knob that could be used to lock the knob in place. This set screw can be turned in with either a 1.5mm or 1/16” hex allen wrench and will keep the knob from backing off. However, I still have drilled a small hole in the knob and have included a piece of safety wire as a secondary safety measure to make sure this knob stays where you have set it. http://www.venturerider.org/butlermod/image018.jpg If you have any questions concerning this installation, you can reach me by either e-mail or phone: Rick_Butler@verizon.net 972-442-9840 Home 214-926-3905 Cell
-
 what a miserable job. As if getting the covers out is not bad enough, trying to but them back in and aim for the gaskets can make a grown man cry. Combine that with some tremendous back pain when bending over and it takes you most of the day. Good news is that the engine is perfectly clean inside after 70k miles of Yamalube 20W40 and all valve gaps are well within specifications. Well, I ran myself out of steam, going to bed early. Can't wait to get up to Ft Collins. Klaus
 -
I ordered some tires from americanmototire.com and probably need to change the valves also. Are the valve stems universal? I want to use the 90 degree type.
-
Have removed the coolant bypass valve by removing the phillips screw on the side. When I pulled the valve out, I dropped it so I'm not sure if I lost any parts. There is a small spring for the a/m screw. Any other loose parts that might be lying on the driveway somewhere that I need to look for? This is from an '87. Could use a quick response. Thanks
-
This should be posted under Most Embarassing Moments. Anyone have a valve cover they can sell me and ship to Prince Edward Island Canada asap. I was installing the engine on my 84 after doing the 2nd gear repair and it rolled off my jack and cracked the front valve cover. I got the engine in OK after that noticed the crack when I started bolting the side rail on. I want to put the rest of the bike together next weekend and so I'm looking for help. There are some on ebay so I can try that if no one here has one. Thanks Ventureriders.
-
Folks, I’m finished with this project and I am happy to report that installing a proportioning valve in-line to the output side of the master cylinder, has exceeded my expectations. Attached is my analysis of this project. Rick
-
I've seen some posts dissing the Supertech oil filter, so I decided to tear a new one apart for my own peace of mind. What I found was a surprisingly good filter for the $2.29 you pay at Walmart. This filter has all of the right parts in a well made package. See the pictures below for details. What you get for you money: A good anti-drain back valve. This is important in our bikes for two reasons: one, the filter is mounted horizontally. If the anti-drain back valve fails then dirty oil can leak back into the crankcase. Second, if the oil drains out of the filter then the engine oil pump has to fill the filter before it starts pumping oil to the engine at startup. The anti-drain back valve in the ST7317 was well made of a flexible nitrile material. The paper filter element had 43 pleats that were evenly distributed, except where the seam was. This gives about 86 square inches of filter material. For a comparison to other filters check out this link http://motorcycleinfo.calsci.com/Filters.html#OilFilters The top and bottom of the filter element are metal. The filter element was sealed and glued at both ends. I've heard some manufacturers use a paper end on the filter element. I guess this is OK if you have a good bypass valve arrangement. This filter needs the metal end for the bypass valve to seal to. The filter I opened had a very normal coil spring bypass valve on the top of the filter element. This is more than adequate to protect your engine from lack of lubrication in the event of a clogged filter. By the way, if this feature gets used frequently in your oil filter you need to either let your bike warm up longer before you redline it, or change your oil more often. The filter gasket was smooth with no defects.So here is my challenge: if you have a different filter you like, tear it up and post some pictures. Lets see how they stack up.