


SaltyDog
-
Posts
123 -
Joined
-
Last visited
Content Type
Profiles
Forums
Gallery
Events
Store
Everything posted by SaltyDog
-
From the album: Engine side cover repaint
-
From the album: Engine side cover repaint
-
-
-

Draining the coolant system.
SaltyDog replied to PBJ's topic in Venture and Venture Royale Tech Talk ('83 - '93)
The drain cock under the radiator is actually a valve that can be rotated to bypass the coolant flow around the thermostat. It is used when filling and draining the system to insure a complete drain or to get all the air out of a new refill of the coolant. The drain plug under the waterpump housing is used to drain the engine block completely. See this thread on the drain cock settings http://www.venturerider.org/forum/showthread.php?t=52580&highlight=coolant+drain+valve -
I just looked at the owners manual at the Garmin website and it says that the Zumo 550 is made to pair with your phone for handsfree operation AND and bluetooth headset also. The MP3 player in the Zumo will play music through the bluetooth connection and when you receive or make a call it will automatically mute the MP3 music. Go to the Garmin website and download the owner manual and look in the bluetooth pairing section for all the setup and priorities.
-
Solid Motor Mounts revisited
SaltyDog replied to Bob Myers's topic in Venture and Venture Royale Tech Talk ('83 - '93)
Bob you have a payment for a set of the DELRIN motor mounts for my 1983 XVZ12 standard. Thanks for your work! -
Solid Motor Mounts revisited
SaltyDog replied to Bob Myers's topic in Venture and Venture Royale Tech Talk ('83 - '93)
When you are ready to accept orders, let me know and I will send the payment. -
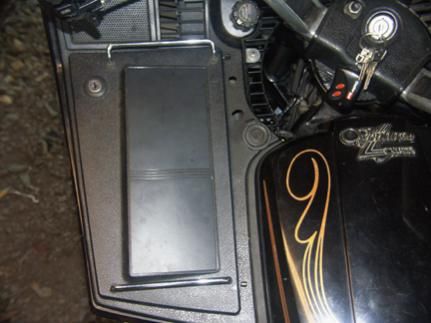
I have pictures of my radio mount converted to glovebox I completed in 2009. http://www.venturerider.org/forum/album.php?albumid=1040 It's made out of OEM radio cover and ABS sheet.
-
Converting 1983 radio position to covered glovebox
-
-
From the album: 1983 Fairing pocket conversion
-
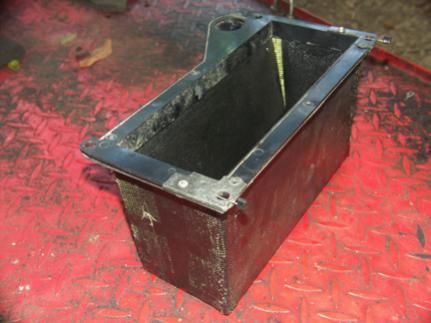
left storage box used to hold registration and handy items for easy access on the road
SaltyDog posted a gallery image in Member Albums

From the album: 1983 Fairing pocket conversion
-
From the album: 1983 Fairing pocket conversion
-
I just installed the later Vmax 4 brush starter as is. It still works fine. I would recommend this to all the bikes running the older 2 brush starters. Along with the upgraded positive cable to the starter and I also ran a large additional ground wire to the starter mounting bolts. All this is to make as low a resistance current path as possible.
-
Shindengen voltage regulator
SaltyDog replied to frankd's topic in Venture and Venture Royale Tech Talk ('83 - '93)
I believe the FET's in the shindengen FH012AA don't just short or shunt all excess/unused stator current to ground. The use of the FET instead of a regular high current diode means the control module can shut off the conduction of each FET individually depending on the voltage level on the output rails. The low conduction resistance of the FET and the ability to control WHEN it conducts is the great advantage of using the FET in a rectifier application. This results in low heat buildup and longer life of the unit. -
I used a small plastic trash can. Like the type for the bathroom or bedroom. They are made of flexible plastic and are close to the size of most tank bags. They are really inexpensive and are easy to cut. The plastic is already formed into a retangular shape and have rounded corners. I used three sides of a small trash can to stiffen up the front and side walls of a textile (cordura) tankbag by cutting out the bottom at the right height and removing the rolled over top edge.
-
Are the differences between the latest generation of the IgniTech TCIP4 hardware based or is it strickly a firmware/programming upgrade? I would like to see if the older V80 units (1 year) can be made compatible with the latest version V88 TCIP4. It's maybe wishful thinking, but I hate it when the electronics get left in the past when the units get an upgrade. I asked the people at IgniTech last year if they could help me fully utilize the MAP sensor input function with the V80 TCIP4 and they said it wasn't needed or possible. Fast forward a year and here we are.... I may be making a fuss over nothing, but I keep all my bikes for a long time and I like to see them operate to their best potential.
-
clutch sight glass leaking!
SaltyDog replied to alvald83's topic in Venture and Venture Royale Tech Talk ('83 - '93)
gotta get a faster connection and type faster. -
clutch sight glass leaking!
SaltyDog replied to alvald83's topic in Venture and Venture Royale Tech Talk ('83 - '93)
I haven't used them but I keep the link for the future. http://newrivercyclesalvage.com/sight-glass.html -
Aftermarket TCI available!
SaltyDog replied to tvking63's topic in Venture and Venture Royale Tech Talk ('83 - '93)
I looked on the IgniTech website and couldn't find the V88 TCIP4 file. Could you send it to me when you get a chance? My current version V8 is still working fine and the bike is very responsive, but I never know when to leave well enough alone... -
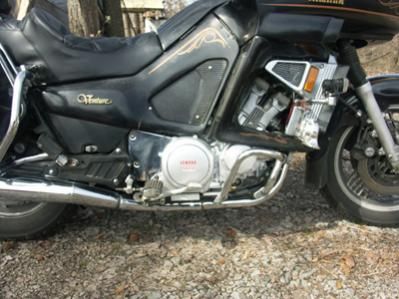
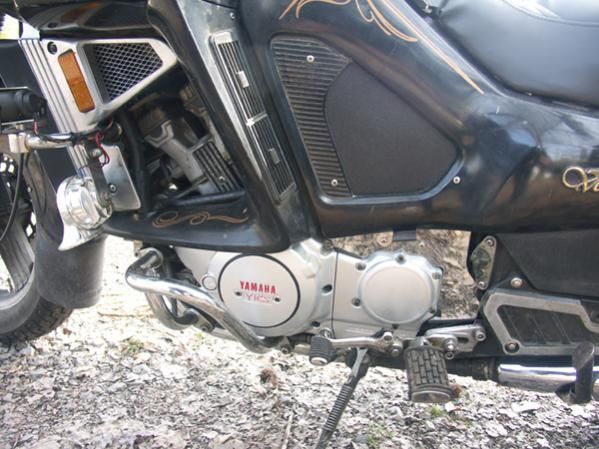
On my 1983 Standard, I had the same issue with removing the radiator cap. When I looked underneath the cap at the tabs on the cap and the radiator neck, I saw that the plastic radiator grill also had a tab sticking up and preventing complete rotation. I removed the grill and cut off the offending tab (not noticeable from above) and the cap rotated correctly allowing the cap to be removed easily. I work on my bikes on a bike lift so getting a good view of the interferring tab was pretty easy. So you can loosen up the grill on the right side or take it off and inspect for interference, either will get you there. By taking the grill off you can cut the tab off and prevent future trouble.
-
These guys have a pretty good looking product. It may be what you were looking for. I have seen them talkied about on another site I frequent (Advrider.com). http://www.polarbearcoolers.com/
-
I finally got tired of the slow cranking when hot with the original 2 brush starter. Since the temps around here are in the upper 90's now, I am always anxious when I stop for gas and have to endure the slow crank of the hot engine. I put new brushes in last year and added the additional ground wire also. I have also routed a large ground wire from the battery to the starter mounting bolt. All my battery cables are the size of car wires. I have a AGM battery and my Shindegen R/R keeps the system up to voltage under all loads. So with all that work I was still stuck with a 28 year old starter that has seen better days. I decided to start shopping for a more modern design starter to end all my troubles. The Vmax 1200's use a permanent magnet starter on the later bikes that will draw alot less current (amps). I use this type on all my other bikes and have had zero problems with hot starting in the summer. I searched on Ebay for later Vmax starters and found one from a 2001 Vmax 1200 for less than $44.00 including shipping. It looked the same as my old one from the pictures in the Ebay ad so I said "what the heck" and bought the unit. I got the starter today and it fit perfectly into the engine case. The only difference between two starters was the newer one has a slightly longer output shaft (~1/4 inch). I looked into the engine case and could see plenty of clearance so I gently pushed it into position and checked for interference. NO problems. When all was hooked up, the starter spun the engine faster and was quieter than the old starter. I ran the bike in the shed (>100 degrees air temp) untill the bike came up to operating temperature and then shut it off. I waited about ten minutes then tried to start the bike, NO difference in turning speed. I repeated this a couple of times thoughout the afternoon while I was working on the bike and the starter worked perfectly. I will put all the plastic back on in the morning and go out for a real ride to see if it makes the same improvement out on the road during fuel stops. Either way I got a starter that is newer in technology and 18 years younger.
-
Aftermarket TCI available!
SaltyDog replied to tvking63's topic in Venture and Venture Royale Tech Talk ('83 - '93)
I know when I first wired up my 1 bar GM map sensor for my ignitech install, I didn't get any output either. I went online to verify the connections and I had the 5V line on the wrong pin. I went online and found this layout for the connections. Just make sure you have the 5V, ground and sensor output wires correctly hooked up to the Ignitech unit. -
Aftermarket TCI available!
SaltyDog replied to tvking63's topic in Venture and Venture Royale Tech Talk ('83 - '93)
I installed my new Ignitech TCIP4 ignitor this last weekend on my 1983 XVZ12 standard. I had started to get the dreaded tach/#2 cylinder dropouts, so I went ahead and ordered the unit on the 9th of this month and received it in less than 2 weeks. I made sure to include the request for any extra pins needed to add additional sensors to the unit. I received nine (9) extra pins for the 20 pin ignitor plug and I used three of them for the MAP sensor install. In the mean time I went ahead and replaced the glass diodes with new 1N4001 diodes. The diode install went fine and the stock TCI works perfectly. But I still don't trust it for any long distance from the house. I will keep the stock unit for a backup since I can just plug it back up in minutes without any alterations, I left the stock boost pressure sensor wired and plumbed up since it wasn't in the way. I used the 1 bar GM MAP sensor as recommended and a inline fuel filter as a vaccuum cannister to help smooth out the pulses along with the vaccuum line restrictor in the vaccuum hose. I picked up my vaccuum signal from the #1 cylinder YICS vaccum port (the YICS chambers were removed years ago). I wanted to use this source for the vaccuum so I wouldn't have to pull the hose when I sync the carburetors. The vaccuum signal is really good and with all the inline components the pulses weren't too large. I used two vaccuum guages to compare the #1 sync port and the #1 YICS port with the additional canister and restrictor to verify the reduction of the pulses. I downloaded the .ign file (for use with MAP sensor) from the first page of this thread and so far it works fine. Since we have had alot of rain and thunderstorms lately, I just ran the bike in the shop to check for any overheating problems or hot start issues. Today I got a break in the weather and jumped on the bike to run to town (10 miles) and fill up the gas tank. The bike ran fine for the short run and I plan to get it out this holiday weekend and get some more testing and check out the power and mileage through the hills. My Windows XP tablet didn't have a serial port but I used a USB to serial cable and didn't have any problems with the communication with the TCIP4 unit. My thanks to all who have posted in this thread. I printed out all the pages and read and highlighted items I thought I would need to watch out for during the installation. If anyone has a different .ign file that they are running and would like to share just give me a shout. Any changes I make to the posted .ign file I will let the group have a copy after I verify the correct operation. -
Throttle cable rebuild help
SaltyDog replied to dingy's topic in Venture and Venture Royale Tech Talk ('83 - '93)
I have bought various items through these guys in the past and they stock a wide selection of motorcycle parts. Check out the link http://www.flandersco.com/FlanCableSearch.html for the cable making/repair parts. Hope this is helpful...