Search the Community
Showing results for tags 'dingy'.
Found 12 results
-
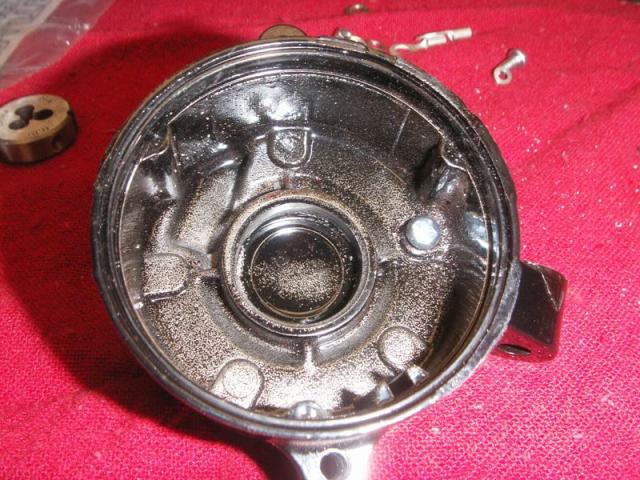
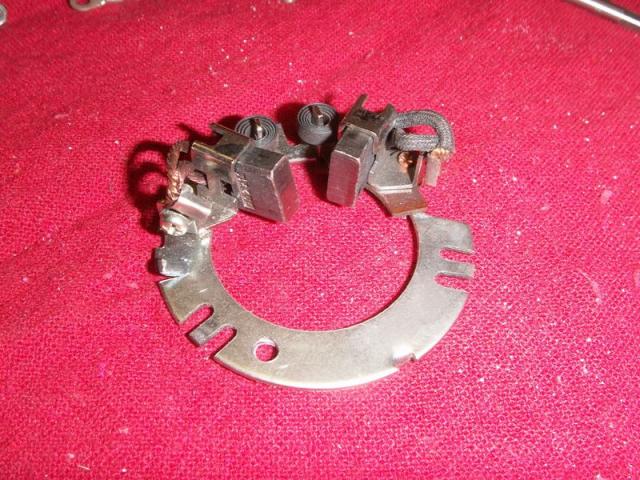
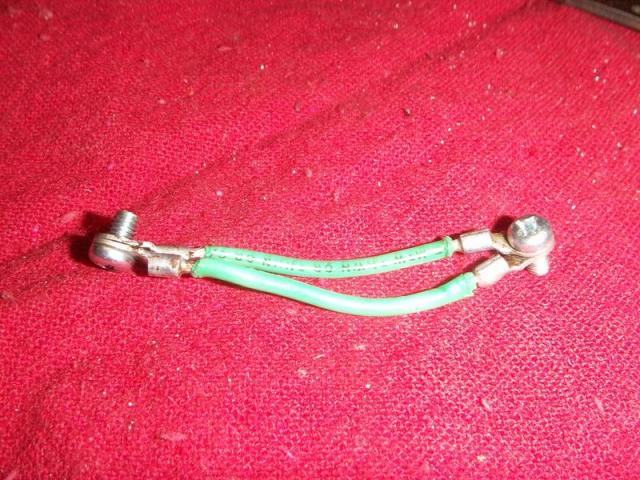
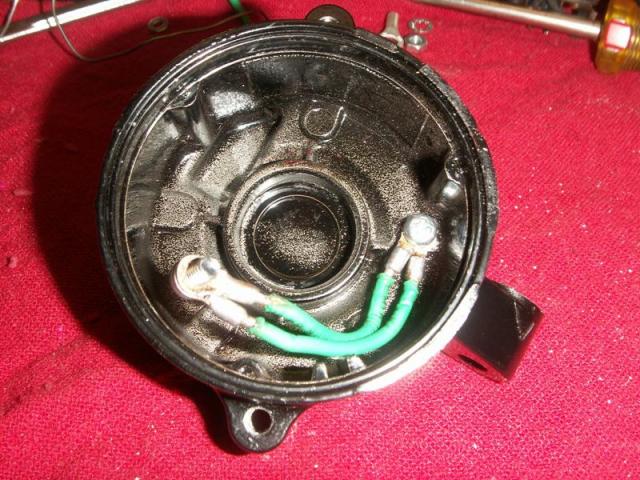
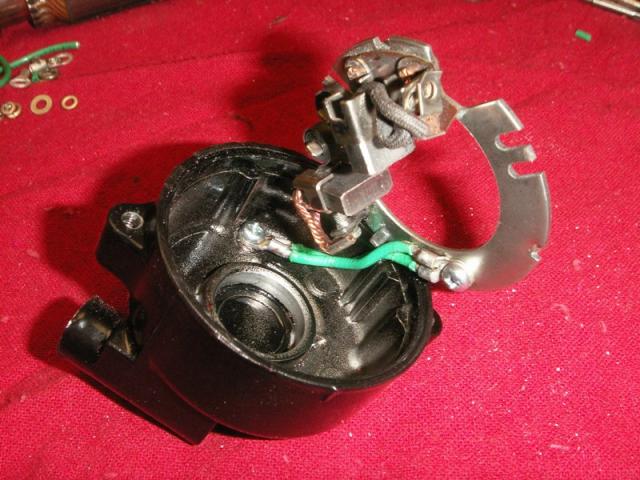
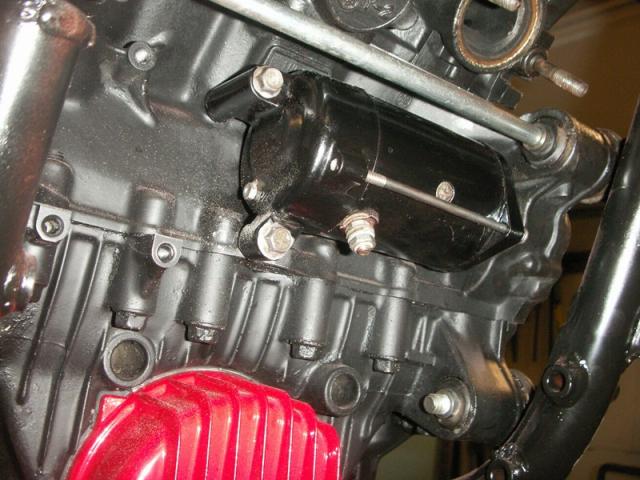
Attached are some pictures of the modification I made to the starter on my 83 1st gen. The purpose of this is to give a better path to ground for the brush plate. Stock version allows a path to ground through the tabs around the plate. Snaggletooth had posted about this mod several weeks ago, but I do not know of any pictures that are available to show it. Gary This shows the location of the drilled & tapped hole. I used a 4mm screw to attach wire with. Hole is at 2 o'clock position. This shows location of hole from outside of cover. The hole in the brush plate is shown at the 7 o'clock position. Picture of grounding wires. I used two 14 gauge wires. The terminals for 12 gauge and up had too large of a mounting lug for mounting screw size I wanted to use. Wires attached to end cover. Wires attached to brush plate. View of starter mounted on engine. I have since added an 8 gauge wire that runs from the bottom mounting bolt for the starter to the right side of the engine block. I attached wire to the block at the same point the main ground wire from the battery attaches.

-
I want to check the float level on my 89, and I've read the directions and other posts. If you've done this, how have you connected the tubing to the carb. drain screw so that it doesn't leak? I read where Yammie has a special tool for this, but I saw that it looks like Dingy had something just pushed into the hole that he was able to connect a hose to. What's worked for you? Frank D.
-
Hey Dingy, just sent you a PM.
-
 Attached are PDF scans of a 1987 Venture Service Handbook for Technical Training. I got a copy of this on Ebay a while back and got around to scanning & posting it today. It covers Ventures from 83 to 87. There are quite a few interesting tidbits in the information contained in this material. I don't think this is all the service bulletins up to this point. In the Front End Noise, I found a reference to a bulletin M83-015 which I don't have, relating to Instrument panel noise, but this is not listed in the contents section. I broke the scans up by sections so I could get them uploaded. Gary Files moved to tech library here: http://www.venturerider.org/forum/showthread.php?t=71406
 -
Picked up a blue 83 Venture today. Going to be known as Papa Smurf. Looks better in pictures than it does close up, but he is 29 years old. Serial # shows it is the 45th one built in this series. Its not a Royale, but the serial number is a different prefix than my standard 83 Venture. But it does have a Royale instrument cluster on it. Lots of aftermarket chrome on this one. Has a 2nd gear problem, but I think I have a short block 1300 motor lined up to fix that. Don't know what I am going to do to this wonderful machine, can't see letting it languish in this state though. One of the first things to go is going to be the drivers floor boards. I can't see liking that heel toe shifter. Probably won't due much with it for a while. Speedy (soon to be renamed Tweety Bird) is getting prepared for a new paint job, going to be bright yellow soon. Gary
-
Headlight adjuster knob? I forgot to secure mine on the shaft a few days ago and today I discovered it was gone. Whoops. Come on Dingy, I know you've got one.
-
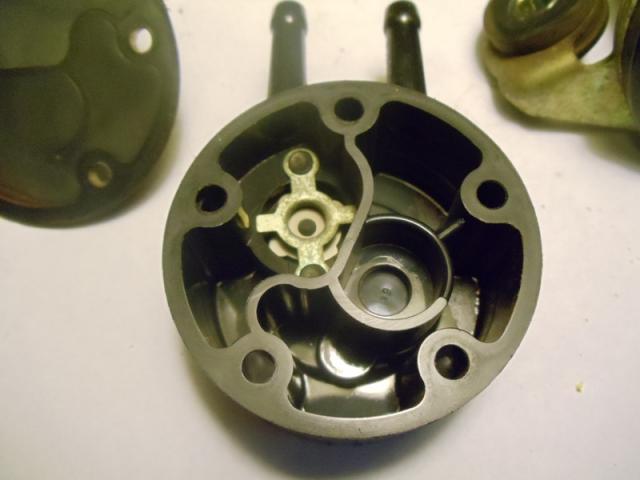
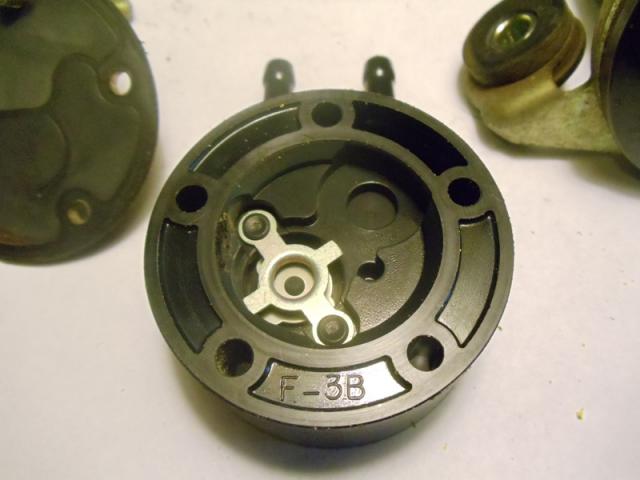
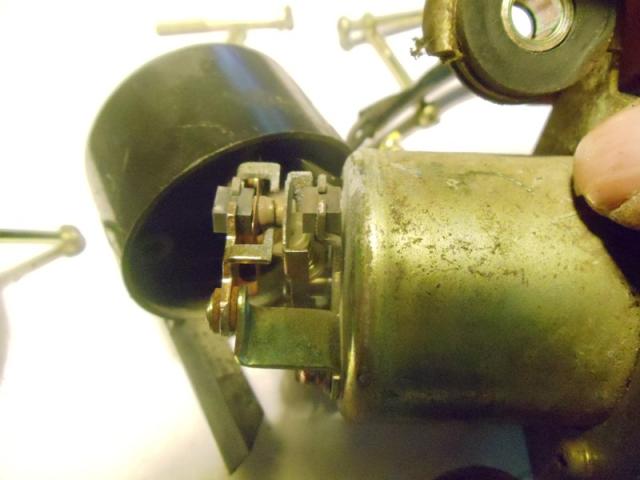
I was going to post this in reply to a members fuel problems, but decided to start a new thread so it could be located later for reference. Here is a bunch of pictures I took of a 1st gen fuel pump a week ago just for S&G's. The RSV is probably similar, but I don't know. Just offering this as maybe some help in understanding the mysterious fuel pump. It is not a really technical description below, but the basic operation. In a nutshell, the pump operates by energizing a coil and pulling the plunger towards the contact end. This pushes in the contact assembly on the other end, breaking the current path to the coil. The plunger returns to rest position, contact closes & cycle repeats. When the plunger pulls towards the contact, it pulls gas in from the tank into the pump cavity via a one way valve. On the Return stroke the fuel is pushed out another valve towards the carbs. This happens until 1 of 2 things occur, first is pump builds up pressure in line and and the plunger does not return forward to complete pump stroke. 2nd is the fuel pump circuit times out after 4 seconds of not sensing motor running and cuts off current to pump. On pump end there are two diaphragm type valves, one allows fuel to be pulled in to pump cavity, but not pushed back out. Other allows fuel to be pushed out towards carbs, but not flow back into carbs. Not my best tech write up. Gary
-
I have received the parts to upgrade my 99 venture clutch and also bought a new horn from Harbor Freight that I would like to get some help with putting on. Also bought a wrench form Dingy to tight my steering. Please post when is the best time to meet with all of you and thanks again for offering to help. Dana
-
Congrats there friend!! Ya made it another year!!!
-
Below is a brief description of a circuit modification to the CLASS system wiring to allow the system to be adjusted while the bike is running. This can be done with only removing the faux tank cover. I mentioned doing it in the thread below and a couple of members requested some details on it so I started a new thread detailing it. http://www.venturerider.org/forum/showthread.php?t=51557 I would like to preface this by saying that caution should be used if you choose to do this. Use care if you adjust air pressure in system while riding. I do not feel it will adversely affect the handling of the bike, but it will distract you. Not anymore than adjusting the CB or radio, but be careful. Yamaha states in the manual to put the bike on the center stand to adjust the air levels. A lot of people do not do this. I prefer to adjust it when sitting on bike so I can adjust ride height so I can see over the windshield. This adjustment varies depending on bike load. On 1st gen bikes with the Class system, there is an extra contact in the ignition switch that is energized only when the key is in the ACCY position. This circuit then goes to the CLASS fuse that is in a separate holder, located on the right side of the fuse panel above the battery. This fuse holder is shown in the first picture. All that is required to energize the CLASS system is to wire in a switch and fuse holder to provide positive 12 volt battery to one side of the CLASS fuse holder. I strongly recommend that you do use a switch on here so as to not power up the CLASS system all the time. I measured the current draw on the CLASS system, it pulls a little under 1/2 amp at rest and 5 amps when the compressor is running. The additional current draw full time on the system is avoidable by using a switch. The 1st gen's are known for having little extra capacity in the charging system as is. The second picture shows a switch with a fuse on the positive side. The blue wire is spliced into the existing CLASS fuse holder on the wire opposite the locking tab on the connector. This is the bottom wire in the first picture. The fused side wire is spliced into an accessible wire that is switched on when the key is in the on position. I used the wire that feeds the Accy block on the fuse panel. I attached this wire before the fuse to the Accy terminals. I did this so as to not overload the Accy fuse. The Accy terminals are energized when the key is in the ON or ACCY position. I mounted the small toggle switch in the fairing side cover. The use of a lighted switch would be helpful to show the system is energized. A lighted switch would also require a wire being run to ground to operate the switch. 16 gauge wire and a 10 amp fuse is sufficient to for this. Also attached is a partial wiring schematic showing this mod. The additional wiring is in the red 'cloud'. This is only a partial schematic, I deleted a lot of the wiring to make it easier to pick out. Complete schematics for 1st gen Ventures are at the thread below. http://www.venturerider.org/forum/showthread.php?t=42358 Gary
-
Sam Almgren came over from Ga today to try and help me fix my dim highbeam. Thanks Sam!!. Alas we (he) had no luck! Actually Sam seems to think the computer module has a problem since I don't have 12 V going to the high beam. Anyone have one of them dar puppies laying around? In the absence of that, a Mk1 dash with 30K miles? After that, anyone interested in disecting the old one or trying to fix it (Dingy?)?