Search the Community
Showing results for tags 'heat'.
-
Just got to experience my first flat on my '07 RSV. Exiting the interstate I felt the bike wobbling and the back tire went flat. Ended up having to have a wrecker come with a cycle trailer to get me. In 106°F heat it was a "trying" experience. Guess 9k on the tire indicates that it is time for a new one. The rear tread looks like there is quite a bit of wear left, but with the heat and running 75 mph or so for 60 miles might have taken a toll on the tire.
-
We head out this morning for several days of camping..... original plan was to go to asheville.....but withgas prices etc we decided after the MD trip and the $$$ we spent we'd stay closer to home this week. We are heading up to Omaha area to camp and hit the zoo and childrens museum, water park and several other things. Wish us luck as we taking a friend of haylies along...2 six yr olds will pretty much wear us out fast !! And as hot as its been here....there is a excess heat warning out for the next several days///dont it figure............looks like we will just melt away . the heat and humidity combined are horrific right now......105 heat index theyre calling for from today thru monday.... hopefully the ac in the camper comes thru for us...... its an older camper we picked up and we put a new window ac in it last week. dont know f anyone lives near that area from here......but we will be at the two rivers sra west of omaha til the 7th. Dales cell # is in his profile
-
Attempting to change my starter clutch however, the flywheel won't budge. OK so, I took the centre flywheel bolt out and inserted the puller's pointy end into the cavity below the washers, so I surmise (hope) I have it against the end of the main shaft. I have the puller tightened up pretty good. I am applying heat with a 1200 watt electric paint stripping heat gun, whacking the f/w with a mallet but it isn't shifting. To tighten the puller, I am levering with a steel bar about 24 inches long in one hand and a piece of iron pipe extending the wrench handle out to about 15 inches in the other. I have pushed this combo till its just about as tight as I can get it, so the puller is pretty tight. I have been playing the heat into the centre of the f/w trying to be even with it around the f/w. Any thing else I need to know? Is 1200 Watts enough heat, or should I break out the flame? Thanks, Brian H.
-
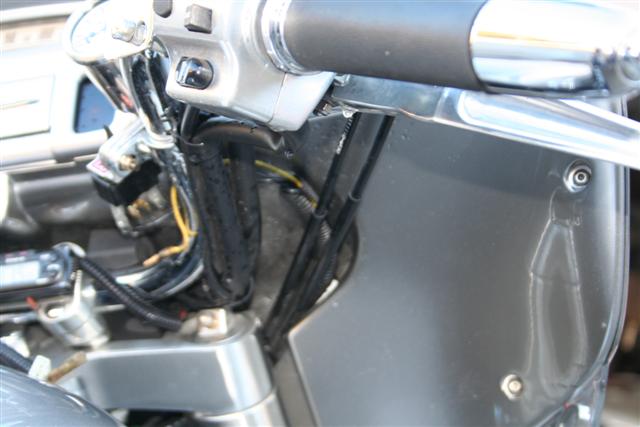
I have noticed the Saddle bags get really hot due to being close to the pipes. If I were to go to the grocery and get anything cold or produce, it would heat it up if I left it there very long. Has any one installed heat shields under their bags or any mods to fix this? I was even thinking of venting the bags along with a heat shield of somekind.
-
 Some folks here have noted that there is quite a bit of heat buildup around the feet and floor board areas of our 2nd. Gen Ventures due to the placement of the exhaust pipes. I was wondering if anyone has tried wrapping the inner exhaust pipes with the insulation wrap you see on some choppers and sport bikes? I recently read a magazine article that discussed doing this procedure on a Honda ST1300. - Has anyone attempted this? - What was the result of your efforts? - Would there be any potential negative effects? Thanks for the thoughts. MickO
 -
Hello, Im a new member with no more hot foot. First off, I'd like to thank ventureriders.org. I thought I would share my experience with you of my '06 RSTD. It's very disappointing when the temp. rises above 75+ degrees off the engine. I've heard other members complain about the heat. I have no problem with my right side, but the left side of my bike is bad. And I also noticed that when the fan comes on at a stop, the heat blows down on my left foot. The same thing happens down the road and it makes matters worse. To solve this problem, I thought I would install a small heat shield and see if this helps. This all was before I installed lower vents and kuryakyn foot pegs. So I decided to make a small heat shield out of stainless steel, its very light and easy to bend. First off, I pulled off the rubber foot pad and then cut it to the length of 8 inches long, and then bent it to a 90 degree angle on one side. I made it 4.5'' tall in the front, 3.5'' in the rear. It gives it a nice taper. Then I put a radius on each corner at the top. The easy way to find a center hole, take a little grease, put a dab in the center of the bolt head. Now you can set it in place, lean it towards the bolt head, and there's where to drill your pilot hole. Make the hole just large enough to fit over the groove on the linkage. If you need to, you can tweak your bend so it leans tight against the linkage. Now you can put the pad back on, and tuck it in against the shield, holding it secure. This seems to work out great for me when its warm out. Give it a try. Maybe paint it, or a different metal, or whatever works best for you. Now you can take it in, or out, whether its cold or warm outside, or for just cleaning matters. I hope this helps fellow members out. Here are some photos to explain better....(View attachments) Born trucker - Born biker Love to Drive - Live to Ride
-
Throughout the summer I sometimes thought that the engine heat off my new Venture was a bit excessive. However, now that it's wintertime, I have decided that it's not too bad at all. I guess that it's all perspective. Pete.
-
(2).thumb.jpg.ed38114c3594d76e49dd7acc0b8d9f32.jpg) I had to pull my exhaust and collector to find an oil leak that I have been living with for the last 12/13 thousand miles. It started just before Vogel and my trip, and just after rebuilding the clutch and clutch slave cylinder. It turns out that it is leaking at the slave cylinder oil seal. That's on order. In the meantime, I took the collector to a friends because he has a parts washer. The oil was so cooked on that the cleaner barely touched it, so he said "Let's just put it in the bead blaster, then paint it" I said "You've got a bead blaster? COOL!!!" That was fun, but as I was moving it around I heard a rattle. I've read of this dreaded problem, but hadn't heard the rattle while it was on the bike. It was more than a loose piece that could be fixed by "punching" the bottom to press on the loose part. (Like I've read about in threads here) We decided to cut it open and get the loose piece out, it was a corner piece that had broken loose and was rolling all over the place. One thing lead to another and we ended up "cleaning it's clock"! We pulled out all the perforated metal and what appeared to be heat shield. Most of which was gone anyway. My main question is: Do I need to put some sort of heat shield back in the top of it? Does that extra heat on the bottom of the engine create any issues? Has anybody (I'm sure someone has!) done this to their's? Paul, my friend, wants to eliminate the collector all together and bend some pipe to replace it. I said that's already been done but it's a few hundred dollars! So we decided to leave that to others! Sorry, I haven't taken any pictures yet, but I'm gonna take my camera tomorrow and get some shots. I'll post them here then.
I had to pull my exhaust and collector to find an oil leak that I have been living with for the last 12/13 thousand miles. It started just before Vogel and my trip, and just after rebuilding the clutch and clutch slave cylinder. It turns out that it is leaking at the slave cylinder oil seal. That's on order. In the meantime, I took the collector to a friends because he has a parts washer. The oil was so cooked on that the cleaner barely touched it, so he said "Let's just put it in the bead blaster, then paint it" I said "You've got a bead blaster? COOL!!!" That was fun, but as I was moving it around I heard a rattle. I've read of this dreaded problem, but hadn't heard the rattle while it was on the bike. It was more than a loose piece that could be fixed by "punching" the bottom to press on the loose part. (Like I've read about in threads here) We decided to cut it open and get the loose piece out, it was a corner piece that had broken loose and was rolling all over the place. One thing lead to another and we ended up "cleaning it's clock"! We pulled out all the perforated metal and what appeared to be heat shield. Most of which was gone anyway. My main question is: Do I need to put some sort of heat shield back in the top of it? Does that extra heat on the bottom of the engine create any issues? Has anybody (I'm sure someone has!) done this to their's? Paul, my friend, wants to eliminate the collector all together and bend some pipe to replace it. I said that's already been done but it's a few hundred dollars! So we decided to leave that to others! Sorry, I haven't taken any pictures yet, but I'm gonna take my camera tomorrow and get some shots. I'll post them here then. -
We just sold our first generation Venture and are looking at the 2nd gen. My wife's question is "how much heat is generated on the legs with the engine exposed (on the newer bikes)?" TIA Bob & Lisa Salt Lake City, Ut
-
Guys: Want to get a shop/repair manual for an 05 RSV. Who has one, what is the ISBN? Found up to 04 RSV, don't know if there is any difference, really need to find an 05 manual. Sponge Bob It's a dry heat!!!!!!!!!!!!!!!!
-
Hey Guys: Any update on the bigger stators and rectifiers? Has Paul in California come through for us? Haven't seen a post for awhile. Just wanted to know what is the scoop. Sponge Bob It's a dry heat
-
Now that I have my venture on the road, I'm noticing a lot of heat. Heat comes out of the side covers, right onto the backs of my knees, and the clutch cover is so hot I have to use the highway pegs. The temp guage is ok, so i'm guessing this is normal. what do you guys do? :225::225::225:
-
I just recently purchased a dual tourer corbin seat with heat (second hand) for my RSTD. Problem is, it came with no instructions to hook up the wiring. I believe each seat is made for a specific bike and the wiring is also. I went on the corbin web site but could not find any info (installation instructions etc.). If anyone has one and can tell me how to plug it in I would appreciate it. Thanks, Red
-
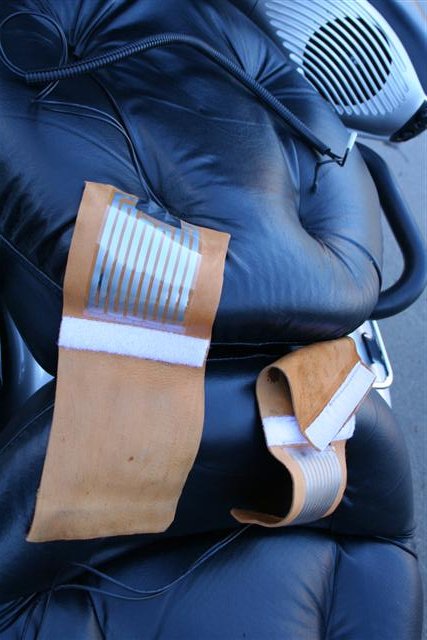
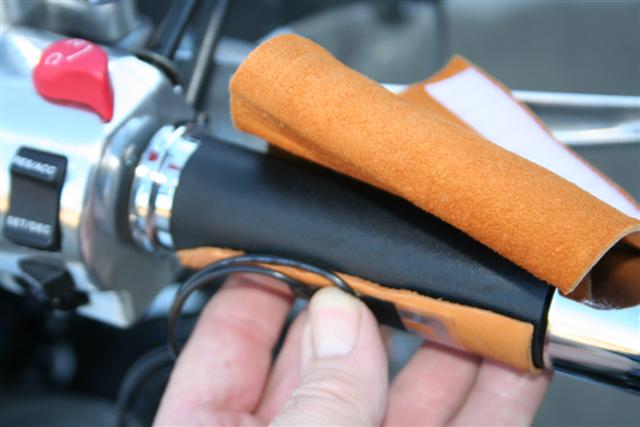
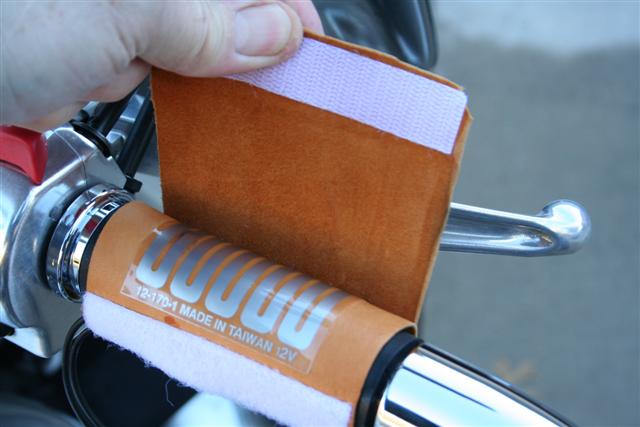
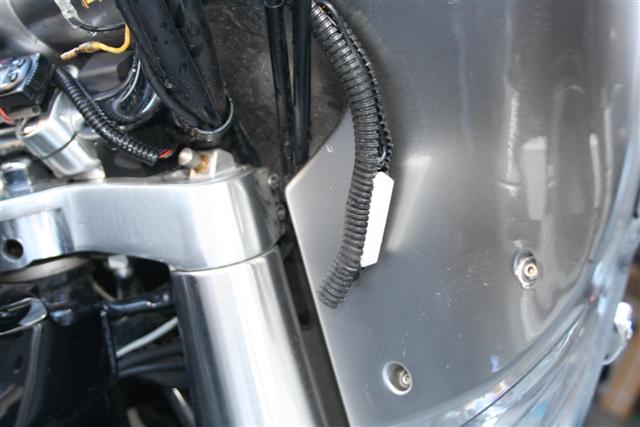
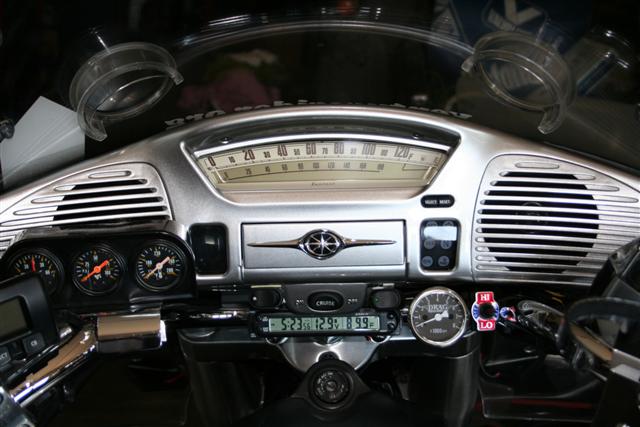
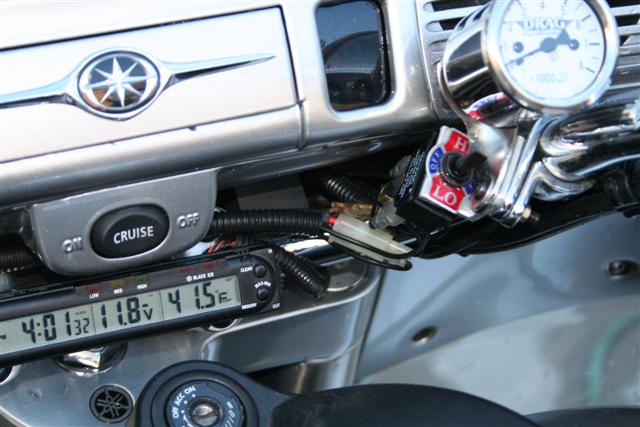
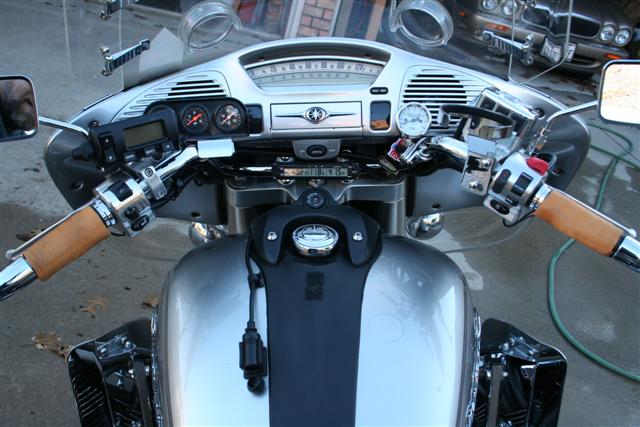
I have been riding year-'round since the late 60s, and I have never had grip heaters or used electric clothing. As I get older, however, I am finding that the painful fingers when the temperatures drop below 30 are less acceptable, so this year, I started experimenting with grip heaters on the RSV. I really like the stock grips on QuickSilver, so I didn't want to just replace them with heated grips; that left either wrap-around heater covers or the under-grip heat strips. I first ordered a set of Oxford HotHands wrap-arounds. These are specifically labeled for use ONLY on 1 7/8" bars, as they will make the grips too large when put over grips on 1" bars. I decided to ignore this and try them anyway since I have very large hands. Turns out, we are both right. The HotHands are quite thick, and when put over the RSV grips, they feel overly large. I was easily able to get used to them, but most people probably wouldn't. In addition, the HotHands only have one temperature - High! To modulate the heat, the only choice is to turn them off and on periodically. My next try was to order a heated grip kit designed to install underneath existing grips. These consist of self-stick mylar sheets with heating elements bonded to the surface. The ones I ordered use a dropping resistor and two position switch to provide low and high heat options. More on the resistor later. Before I tried installing the heater kit as it was designed, I wanted to try and make my own set of grip wraps that could be removed easily when not needed. First, I chose to use buckskin, since I had it available and I thought the deer skin grips would be comfortable and functional. Although the buckskin worked very nice, I think rubberized nylon or canvas would have been a better choice. With the leather, I am concerned about the long-term effects of water, and when washing the bike I have been either wrapping the grips in plastic or removing them. Here's a picture of the heat strips and Velcro on the buckskin: Important: If you are going to make a set of wrap-around heaters like this, you need to be careful to get the kind of elements with the SAME amount of heat on BOTH. Many sets made for motorcycles have one that heats a lot more to compensate for the damping effect of the cold metal bar directly against it on the left side. The dropping resistor is a bit of a problem - these get HOT when the grips are on low, hot enough to burn your fingers. There is at least one other brand of grip heater kit available that uses two separate heating circuits instead of the resistor, and I would use those in the future instead of the more common type with the resistor. I used some plastic wire wrap to hold the excess wire and the resistor (it came all soldered together), and then just stuck the wire assembly down behind the throttle cables and the fairing. (note - after using these for a year, just having the resistor and wires stuffed between the throttle cables and the fairing as shown in the picture has worked perfectly - the heat from the resistor has not damaged anything.) Finally, I just wrapped the wires from the grips once around the existing bar wire bundle and routed the wires from the left grip and the power plug through more of the plastic wire wrap across the front of the handlebars. The tach mount made a convenient place to mount the switch. I am currently powering these from the power plug in the fairing, but will permanently wire the switch next time I split the fairing. I am quite happy with this solution and think this is what I will stay with! Goose UPDATE - one year later: I have used these grip heaters for two winters now, and I love them. In November we took a weeks ride up to Pigeon Forge, Tennessee, and the weather for three days all the way there was low 30s and solid rain. Of course, the buckskin grip heaters got soaked, but that just made them work even better, as the water absorbed the heat and kept my hands "steamy" warm. Even when my winter gloves got so wet that just making a fist would cause water to stream out of them, these grip heaters were too warm to leave on Hi very long. After the grip heaters dried out, they are still in perfect shape. One of the things I like most about them is that I only have to have them on the grips when really needed. Here is an updated picture of the dash and location of the switch between the tach and the right handle bar.

-
Hello everyone. Just bought me the '06 RSTD and love it. Well, maybe except for 1 small thing. Is it possible to ride this bike without the front cowling attached? Down here in Florida, we have been braking heat records lately and the heat from the engine on top of the 90 plus days is killing me. So, is it o.k. to remove the cowling or will it have a negative effect on the air filters? By the way, the bike is an upgrade from a Suzuki Boulevard!! And I do mean UPGRADE.
-
GREAT write-up from Melon13. I recently took my stock mufflers off my new Venture and added Road King Classic mufflers and have been very pleased with the installation. I wanted to keep the Venture heat shield and add it to the RK pipes for a better look so I took the heat shield off the stock Venture pipes and attached to the RK's. For the installation I picked up two Harley Davidson muffler clamps for the RK pipes at the local HD store for $8.95 ea. After installation I also drilled out the rear baffle of the RK's with a bi-metal 1 1/8 inch hole saw and got the sound I wanted from the RK's. Drilling is optional of course and some riders have drilled out both the front and rear baffles using a drill bit extension and others just like the stock RK sound without drilling. I picked my Road King Classic mufflers up on E-Bay, one word of caution, the Classic style RKpipes have the slanted rear which I wanted but there are some RK pipes that do not have this style and have the bullet style rear end similar to the Venture factory pipes, make sure you get the style of RK pipes you are looking for, especially if E-Bay is your source. I also purchased an adapter from our member, SofaPilot who made a mount for mounting a RK pipe to the rear exhaust mount of the Venture, this eliminated the need to cut off and re-mount the stock rear bracket from the Venture pipes. First step is to remove your rear side saddle bags and then remove the stock exhaust, loosen the muffler clamp underneath the front of the pipe and remove the bolt from the rear of the pipe and pull the stock pipes off the bike, since I had a new bike this was a breeze, but this could be harder for those who have older bikes. http://www.venturerider.org/rkmufflers/1.jpg After removal of the stock muffler I took my Dremel tool and cut the three rivets holding the stock heat shield to the Venture pipe. http://www.venturerider.org/rkmufflers/2.jpg Looking at the heat shield next to the RK pipe in the following picture you can see the square opening for the muffler clamp, just below this square opening cut the heat shield in the center, DO NOT cut the top section above the opening, just the bottom section, this will allow the heat shield to expand around the RK pipes. Next drill three 1/8 inch holes in the heat shield, I drilled them near the spot welds. Now put the HD muffler clamps over the muffler end and position the heat shield so that opening is to the inside, hint, the factory dimple in the HD classic pipes goes to the inside, I aligned my opening on the same side as the dimple in the pipes with a slightly downward angle so that I could easily get to the muffler clamp once the muffler is on the bike. Be sure and put the HD clamp on BEFORE putting the heat shield on the RK pipe. Now drill through one of the 1/8 inch holes in the shield and into the RK pipe and put ONE rivet in. http://www.venturerider.org/rkmufflers/3.jpg I then installed the RK rear bracket I got from Sofa Pilot onto the RK pipe. http://www.venturerider.org/rkmufflers/4.jpg Next thing to do is put the muffler on the bike, I used a rubber hammer and with some gentle pings to the bracket area, (NOT THE REAR OF THE MUFFLER) Mine went on fairly smooth and I temporarily attached them using the RK rear bracket. Now carefully align the heat shield so that it is even all around and not touching the muffler, you can then mark the remaining two holes with a pencil or felt tip and take the RK muffler back off the bike, drill the two holes where marked and place rivets in the remaining holes and remount the RK muffler. When I remounted the RK's for the final time I went down to the local auto supply and got some anti-seaze compound in a tube and made sure the exhaust pipe coming out of the Venture was clean and coated it with anti-seaze before the final install. Instead of marking both holes I ended up being able to drill one of the holes while the RK muffler was mounted and the heat shield was aligned, I then took the RK muffler back off and drilled out the third hole and riveted. I then used a standard drill with a bit extension and then drilled out the RK mufflers after installation from the rear of the bike. I used a magnet to retrieve any metal filings left. inside the muffler. RK's installed, you can see the rear mount attached to the RK pipe. http://www.venturerider.org/rkmufflers/5.jpg Finished product. http://www.venturerider.org/rkmufflers/6.jpg Hope this helps anyone interested in doing this modification, I love the sound that I achieved with the Road King pipes.