M61A1MECH
-
Posts
2,338 -
Joined
-
Last visited
-
Days Won
18
Content Type
Profiles
Forums
Gallery
Events
Store
Everything posted by M61A1MECH
-

Y'all Ya'all can help out, if you are of such a mind
M61A1MECH replied to Marcarl's topic in Watering Hole
Oh my, yes still praying done here in Florida. -
Y'all Ya'all can help out, if you are of such a mind
M61A1MECH replied to Marcarl's topic in Watering Hole
Prayers up from Florida. -
Prayers up from Florida, expecting a full and speedy recovery.
-
I like the new format, just finished adding my sig pic back, not to pain full, I like the option to add a cover photo to the header of my profile page.
-
Had to push start the Goldwing today.
M61A1MECH replied to etcswjoe's topic in Honda Goldwing Tech Talk
I have seen this issue many time over on GL1800riders.com. The sensor it self is not hard to get to, it is in behind the front timing cover, it is the connector at the end of the harness that is hard to get to. It is down in the abyss below the shelter, as I recall getting to it is similar to getting to the air filter, but maybe a bit worse, airbag models I am told are the worst one to deal with. If mine goes bad I am going to add a waterproof connector in to the harness behind the timing cover. probably something like these because of the small form factor. http://www.cycleterminal.com/jst-jwpf.html I will also say folks have had their bike's throw that code and it was just a bad battery, it does not take much to spin the GL motor over, but if the battery voltage dips to low when the starter is spinning the electronics for the ignition and fuel injectors will not work and the bike will not start. Have the battery load tested as the first step in troubleshooting. -
Yes I am familiar with them, I find some of the more bizarre patterns to be distracting I prefer a strobe then solid. My Goldwing may be annoying to some, as I have two different patterns of 3 fast then three slow before going solid on all my brake lights. I have changed the OEM bulbs out for LEDs with built in modulators and my light bar in the spoiler and a custom one under the trunk are on a SC-100 modulator that does 3 and 3 and solid, but at different frequency that the tail lights, so I have quite a light show. Having been rear ended once on a bike because the person did not see my brake light come on, I am not taking any chances.
-
Maybe I missed it, but I went back to a reply I made to a post I made earlier today, and did not see a way to edit that reply Is there a method to do this? What did I miss? OK I get the 5 minute rule, other forums are the same, edit function works, Thanks Freebird.
-
I do not believe the SVTC has actual CANBUS, when I was designing my trailer harness set up I talked with the local Yamaha dealer's service manager about that and we looked at the wiring diagrams together and found no evidence of an actual CANBUS controller or computer. There may be something in the ECU that senses voltage anomalies and sends some sort of alert, but that is not really CANBUS. Where Electrical Connections and I plug into the rear lighting for the trigger source for the trailer isolator is a 12 volt line that goes direct to the bulb, so you should be able to interrupt the brake circuit there for that LSC-100 modulator and not cause a problem. That modulator is $5.00 if it does not work, take it out and put the wiring back as it was. Someone will buy the modulator off you.
-
One additional question. What year model Tour Deluxe do you have, Yamaha marketed a Tour DeLuxe model with the 1996 to 2001 standard Royal Stars and then again as a stripped down version of the Venture from 2005 to 2010. Oh also you noted in one of your first posts that you had red turn signals, those are not stock, all Royal Star line models came out of the factory with amber turn signals.
-
I actually have two options on the wiring for you, The one Ilinked to above was for the 1999 to 2013 Venture and 1996 to 2001 Royal Star , here is the one for the Tour Deluxe, 2005 to 2010, it is $16.00 delivered in the lower 48. The other option is to use some bullet connector adapters I make that will plug in to the brake and tail light wires at the triangle housing behind the license plate. A pair ( one for brake lights and one for tail lights) would be $10.00 delivered in the lower 48. With either solution you would need to run some wires from the bike to you new lights. I did a similar set up on my 2007 Venture, but I mounted the dual intensity LEDs between the saddle bag rails and the fender. Here is a link to where I bought mine, they make two different mounting bezels, one for flat and one for side, this link shows the side mount. https://www.ebay.com/itm/USA-Tecniq-EON-Red-Clear-LED-SMALL-Stop-Tail-Light-Motorcycle-ATV-Black-Ver-Case/293139609955?hash=item44407b7963:g:kYIAAOxyUrZSpjrA The Royal Star Tour Deluxe does not use CanBus. it is straight 12 volts DC direct wired.
-
OK easy enough to do, but are you asking how to do it or what type lights to buy? I make a breakout harness that installs under the seat so you can easily tap into the rear lighting without having to cut into the bike's wiring, see my add below. Maybe this helps.
-
Right side tin near the passenger floor board.

-
Good to see us back on line, everyone was having withdrawal symptoms.
-
Older carbs in a newer bike
M61A1MECH replied to Okierider24's topic in Royal Star and Royal Star Tour Deluxe Tech Talk
If the carbs bolt up to the motor, maybe they bought and older set of carbs rather than rebuild the ones on the bike. Mike Eycamp may know he is heavy into carb rebuilding and swapping. -
Older carbs in a newer bike
M61A1MECH replied to Okierider24's topic in Royal Star and Royal Star Tour Deluxe Tech Talk
There was a change to the Royal Star line in 1999 when they introduced the Venture. The carbs on the Venture are different than the carbs on the regular Royal Stars. The 1996 to 2000 NON Venture Royal Stars all had 28mm carbs. The 1999 to 2013 Ventures had 32mm carbs. Just be sure you are looking at the correct parts fiche. -
Go to someplace like Home Depot and get something like this, they may even have smaller diameter ducts for RVs and things. https://www.homedepot.com/p/Everbilt-4-in-x-8-ft-Flexible-Aluminum-Dryer-Vent-Duct-BTD48HD/203626496
-
Close Call.......Them pesky giant rats with antlers....
M61A1MECH replied to MonsterBiker's topic in Watering Hole
Had one run out in front of the group I was riding with on Saturday on the North side of Deland, crossed the road, ran along side of the road and then crossed back in front of the lead rider, just enough to get your attention. -
I noticed a huge slow down in packages going north of the border as soon as the Covid mess started, it was almost like they let it set to decomtaminate or something. Try shipping something to Australia, now that was painfully slow.
-
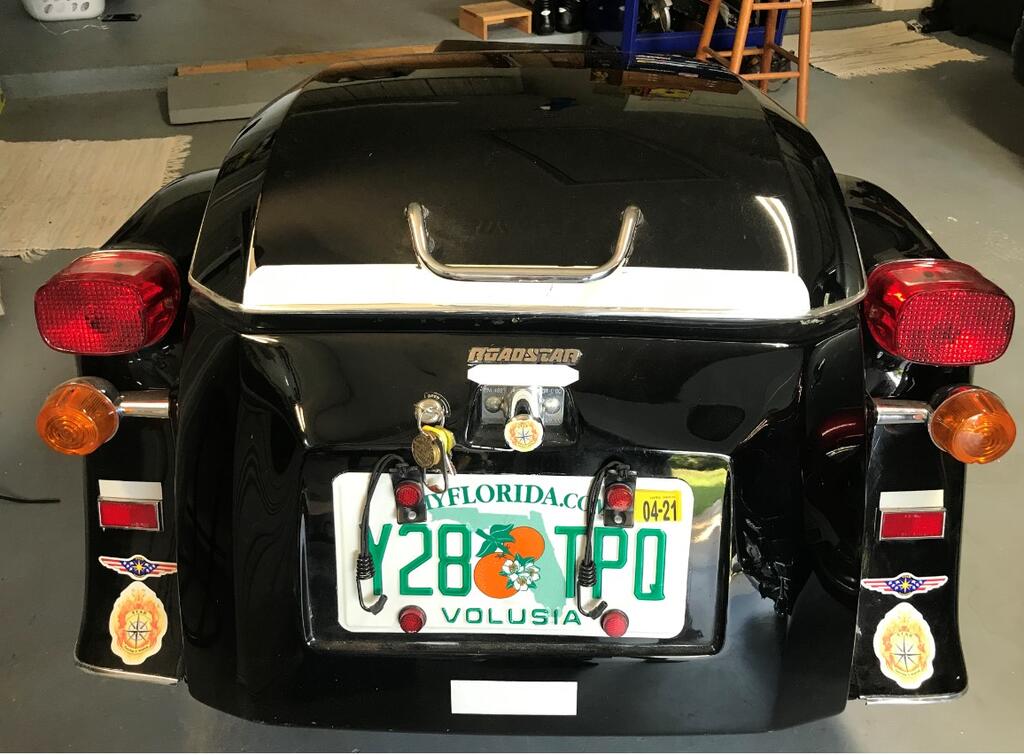
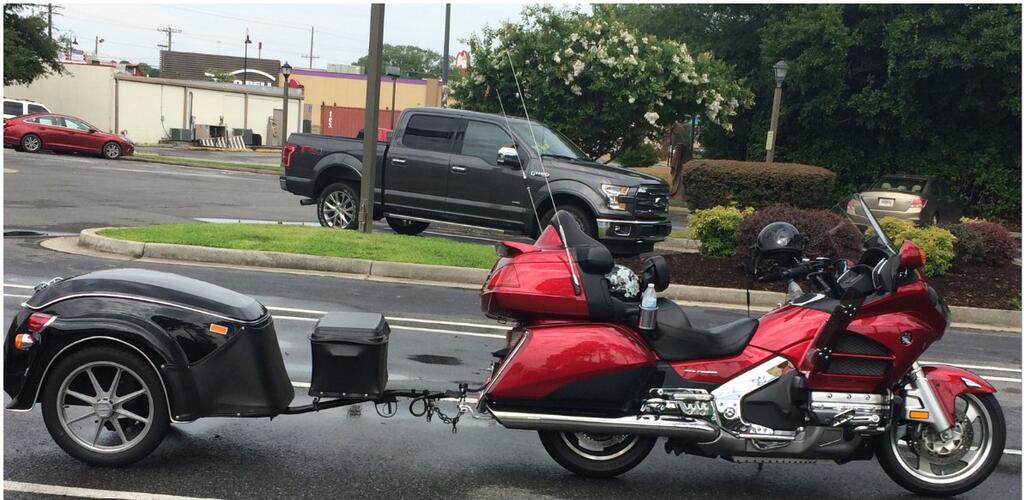
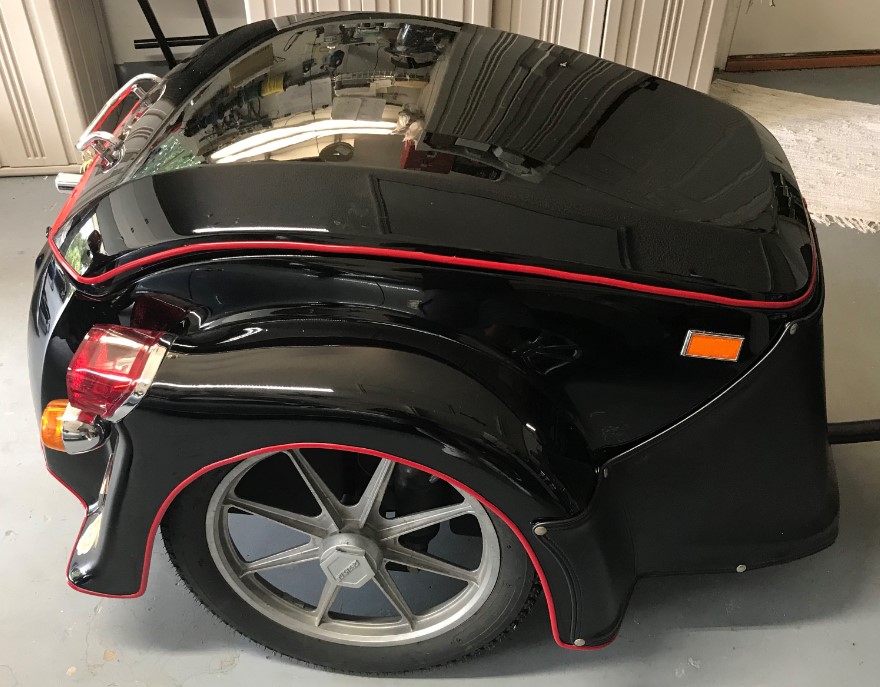
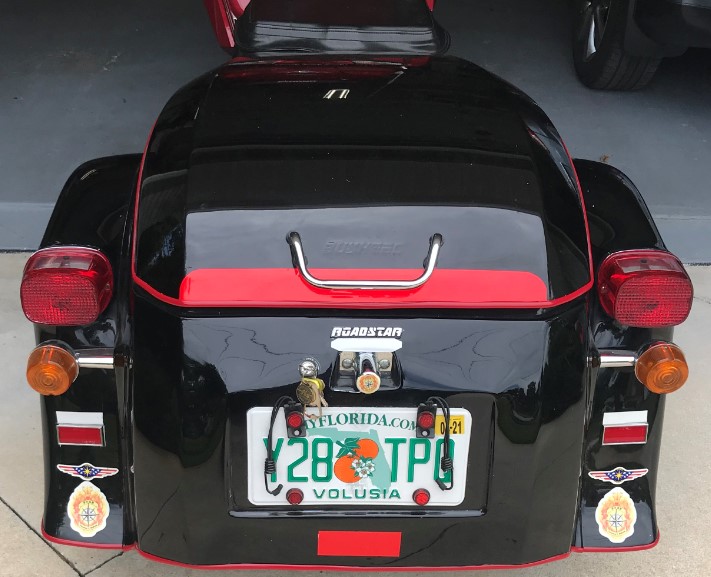
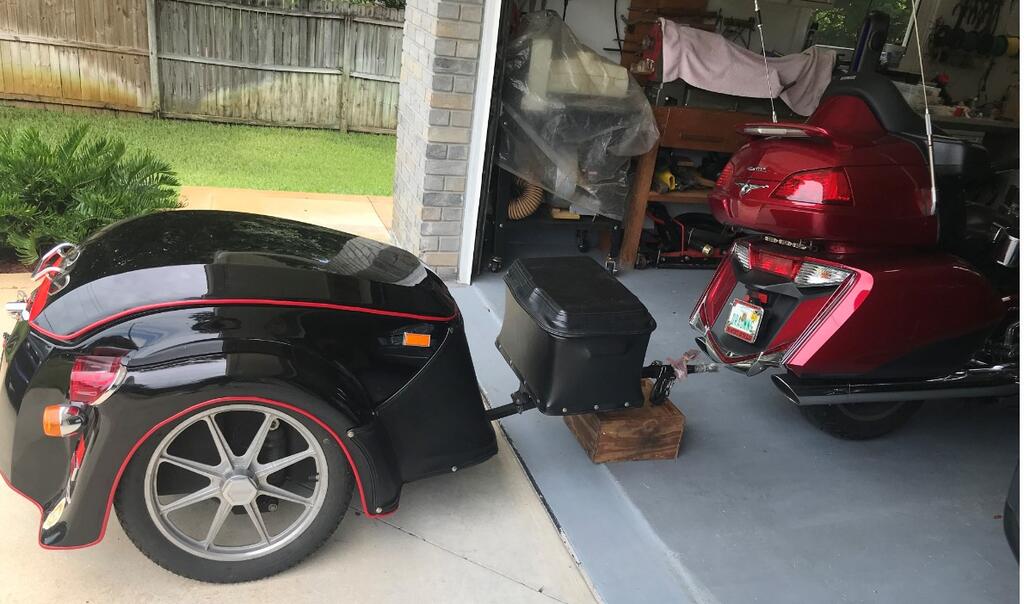
Could not justify painting the trailer, so I did this instead
M61A1MECH replied to M61A1MECH's topic in Trailer Talk
Yeah toyed with that idea, but it was about 1/2 the cost of painting, what I did was 1/10th the cost of painting. -
I never was really happy with pulling my black Bushtec Roadstar behind my red Goldwing, but on my retired budget there was no way I could justify spending the money to have it painted, so I removed the chrome edge guard and replaced it with red edge guard. I think it it looks OK.
-
Read this post from VGoose, it is quite good. https://www.venturerider.org/forum/showthread.php?37353-Some-Tips-on-Changing-the-2nd-Gen-Coolant
-
I had very good luck with both of these methods. 1) Using a new allen in a socket set up , do not use a ball end allen. Use a hand impact tool and smack it hard. 2) Using a new allen in a socket up, do not use a ball end allen. Using a good sturdy breaker bar, apply force in loosening direction and smack the joint on the breaker bar so the shock wave goes straight down the axis of the allen.
-
2nd gen relays and fuses
M61A1MECH replied to OutKast's topic in Royal Star Venture Tech Talk ('99 - '13)
One small correction to VideoArizona’s post, I make a lot of different harnesses and will customize to suit the user, but I am not the member making the ignition bypass harness. That would be Dion DJH3 I think is his screen name. I am happy to help once you know what you want to do, I am also OK with giving out my sources for electrical hardware for those who want to do it themselves. -
I shamelessly stole this from the Goldwing forum I frequent, I have not tried tie tip yet, but thought I would pass it along in case it can help anyone in need. "If everyone else in the world knows this, then I apologize, but as a small way of repaying all the help I've gotten here, I offer this tip for stripped plastic threads: The 2018 has a rear side panel held fast by a screw into a plastic block. If you're ham-handed, it is easy to strip. Which I did. An easy, if inelegant, way to repair this is with steel wool. Tear off a chunk of SOS or Brillo pad, twirl one end into a long point, and push as much of it as you can into the stripped hole, leaving a bulb of it outside the hole. Then press the screw firmly into the steel wool and screw it in until it firms up. Be gentle. This is not a heli-coil-quality or EZ-Lok-quality repair, but it will hold firmishly."
-
If you want to wire to the back side of that power port inside the fairing, I can set you up with neat little plug and play 2 pin break out adapter.