M61A1MECH
-
Posts
2,337 -
Joined
-
Last visited
-
Days Won
18
Content Type
Profiles
Forums
Gallery
Events
Store
Everything posted by M61A1MECH
-
That is true, car anti-freeze has silicates in it that can wreck the seals in the bike's systems, use an anti-freeze that is designed for bikes.
-
I had to replace the thermostat and one of the sensors on my 2007 many years ago, I did not remove the radiator, pulled the tank and did all the work from the top. I do not recall it being overly difficult.
-

Recent voltage drop on my 2011 Venture
M61A1MECH replied to megamile's topic in Royal Star Venture Tech Talk ('99 - '13)
Dion and I were talking yesterday, two other things that can cause a low voltage condition are how much extra load do you have on the electrical system such as powered accessories, additional lights and so forth, as well as low idle RPMs. Increasing the idle speed slightly may help with the drop in voltage at idle. Just thinking out loud. -
Recent voltage drop on my 2011 Venture
M61A1MECH replied to megamile's topic in Royal Star Venture Tech Talk ('99 - '13)
Attached is a snipet I took from Dingy's wire diagram in the tech section, this should answer your question. generator wiring.pdfgenerator wiring.pdf -
Recent voltage drop on my 2011 Venture
M61A1MECH replied to megamile's topic in Royal Star Venture Tech Talk ('99 - '13)
My experience with my Venture was that the regulator went bad and over charged the battery. The regulator should be inside the chin fairing, I did not have to remove the radiator on the Venture, The stock system is plug and play should not require any soldering, just unplug the harness and remove the rectifier, replace and plug back in. I would inspect the contacts in the plug to be sure they are not corroded or burnt. Here is a link on the forum for the tech section that should apply to your bike, https://www.venturerider.org/forum/forums/forum/16-royal-star-venture-and-royal-star-technical-library-99-13-read-only/ I never got into the charging system much on the Venture, but my first suspicion for low voltage word be a failing stator/generator, I think with the rectifier/regulator disconnected you can check for voltage coming direct from the stator/generator, the service manual should tell you how to do that, I do know it puts out 3 phase AC voltage, so make sure your meter is on the correct settings. Hope this helps a little bit. -
I started shooting hand guns just about a year ago and on the suggestion from our good friend Barrycuda, I tried out the Walther line and found they fit me well and work very well. Currently I have 3 all in 9mm, a PPQ, a PDF-F model and a CCP I also picked up a CZ P 10 ported barrel along the way. I would be interested to here from others that are shooting the same or similar Walthers.
-
It is working here.
-
Looking at what McMaster-Carr offers and poking around on some machinist websites I find , you are correct that 1/4" or 1" ACME are typically made with 4 threads per inch and 1 1/8" ACME are typically made with 5 threads per inch. I agree with Ronnie, search out a local machinist to verify what you have, It is possible the vice manufacturer made their own proprietary thread form, that is not really an uncommon practice. The other possibility is maybe it is not a true ACME thread form, could a Buttress thread or a square thread, they look similar to ACME and are similar in strength and would be suitable for the lead screw on a vice. Again a half decent machinist would be able to tell you.
-
Electrical break out and trailer harnesses
M61A1MECH replied to M61A1MECH's topic in Second Gen Parts and Accessories
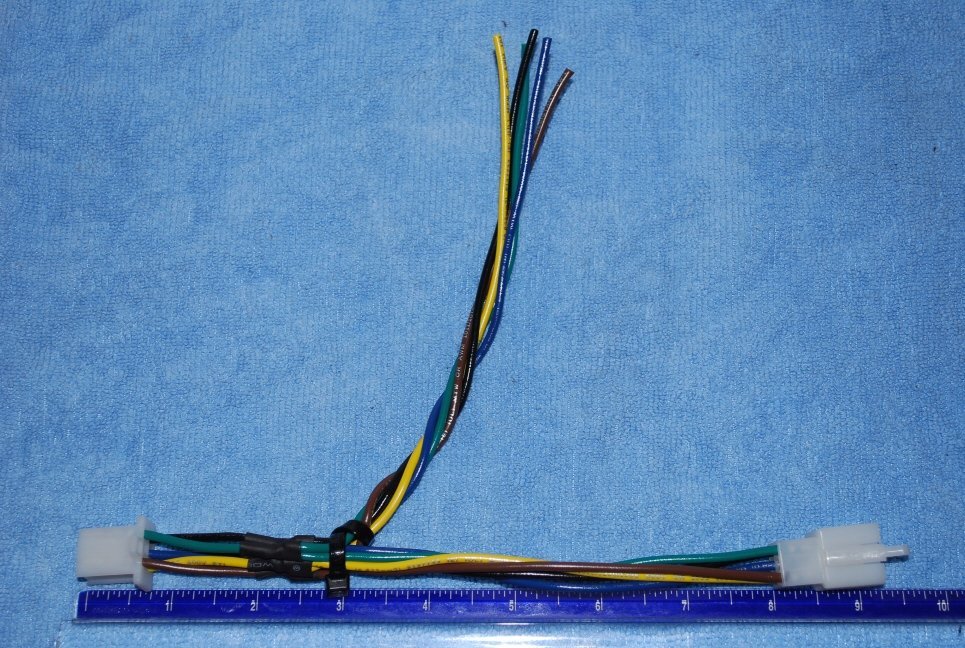
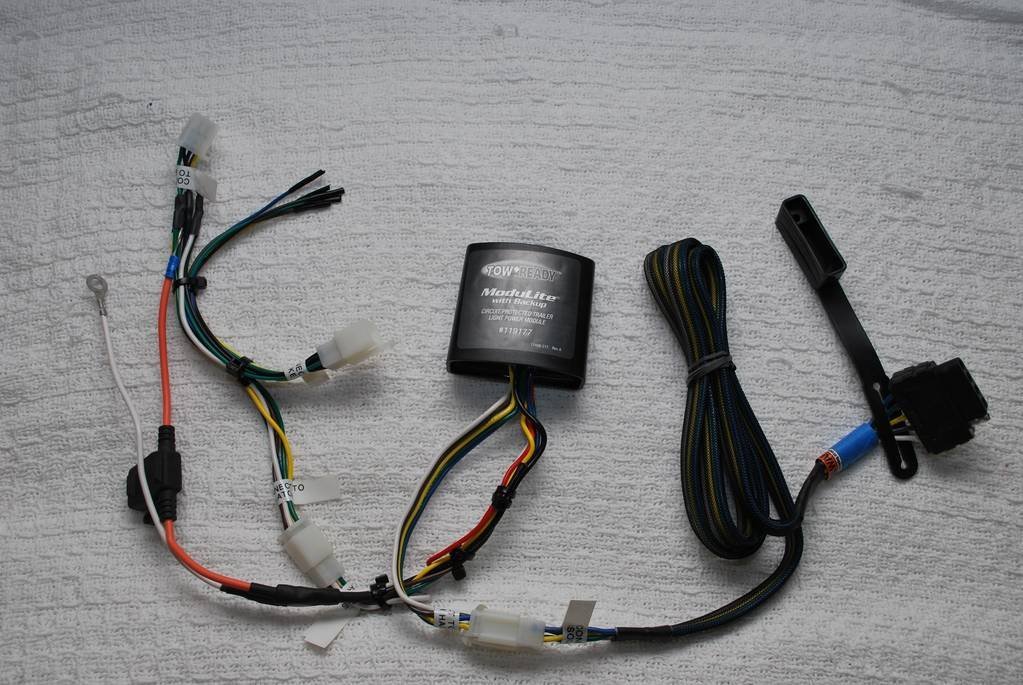
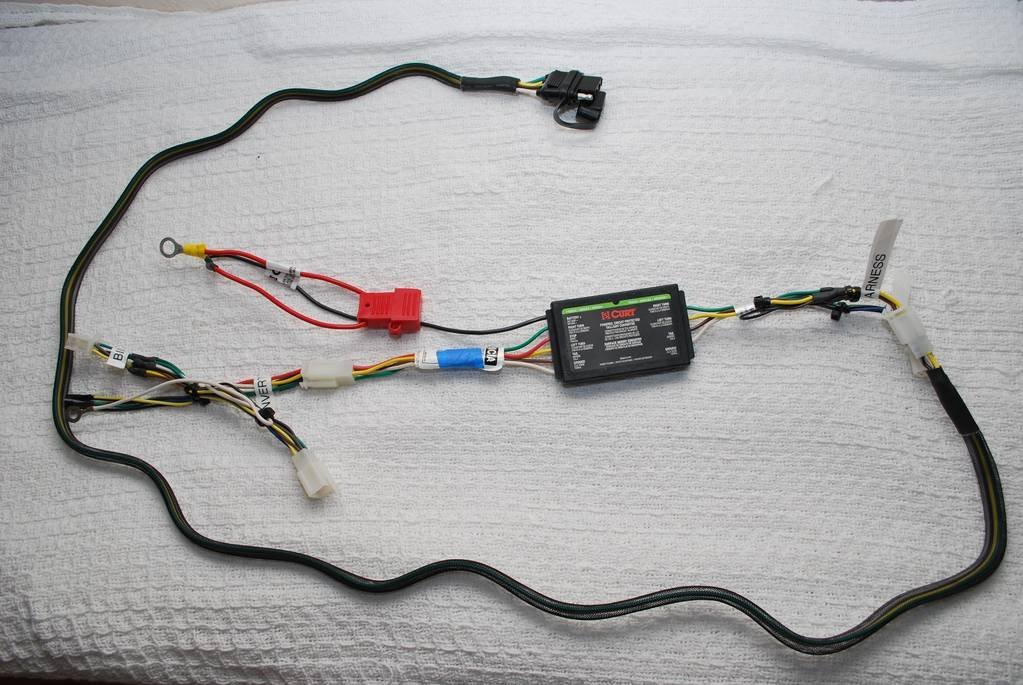
Some pictures as promised. Venture rear lighting breakout harness. 5 wire trailer harness with isolator 4 wire trailer harness with isolator.
-
I build various break out harnesses for lighting systems, rear brake and turns, inside the fairing turns, aux power system and behind the rear tag jumper adapters. Also I have a rear light bar system that mounts under the trunk. I also build trailer harnesses for 4, 5 and 6 wire systems, completely plug and play no cutting or splicing of wires. Photos to come in the near future. PM me for details.
-
No not in the neighborhood, but I do have one at work, I am planning on taking my 2 year old Mini Aussie and the new Toy Aussie to work on Thursday, will see how that goes. My mini does have a red herding ball that he will chase around the yard until he just about drops.
-
We went and picked up our new 8 week old toy Australian Shepard today, she weighs all of 1.9 pounds.
- 3 replies
-
- 11
-

-
Trip to the last unridden states in the Lower 48.
M61A1MECH replied to Steve S's topic in Watering Hole
You will never regret getting a Goldwing, you will be surprised at how well it handles, not sure I am sold on the newest models with DCT transmission and revised front suspension, but then I never did ride one, visit the GL1800Riders forum to get acquainted with the bike. I sold mine after Covid when I realized my attention to details when riding had been compromised by by Covid and lack of riding during the pandemic, sometimes I miss it, but when I do I just take the Vette out for a drive and all is fine in the world.
-
Just to be clear on this, the level in the sight glass is with the bike vertical, not leaning on the side stand. When I had my Venture and my Royal Star, I used a mechanics mirror with an extendable shaft, so I could see the sight glass while straddling the bike to hold it vertical. Alternately a 1-1/2" to 2" thick piece of wood under the side stand will hold it almost vertical, just be careful not to bump the bike or turn the handle bars, as it could cause the bike to fall over to the right side .
-
Brakes are not linked on Royal Star Ventures. May be a collapsed line somewhere. Start at the outlet of the master cylinder break that connection and press on the pedal, if fluid freely flows, reconnect and work your way down the line until you find a point where the flow is diminished, if you get to the bleeder valve on the caliper and do not find an issue, maybe the calipers are stuck or dirty to the point they will not move freely.
-
carb intake size
M61A1MECH replied to Precious's topic in Royal Star and Royal Star Tour Deluxe Tech Talk
The original Royal Stars(1996 to 2001) hade 28 mm carbs. Venture style Royal Stars including the Venture (1999 to 2013) and the Tour DeLuxe (2005 to 2010) had 32 mm carbs. From AI Key Dates for Yamaha Royal Star: 1996: The initial Yamaha Royal Star model was introduced. 1996–2001: This period included the initial Royal Star cruiser and the Royal Star Tour Classic, a version of the Venture with some features removed. 1999: Yamaha launched a new full-dress touring version called the Royal Star Venture. 2005: The Royal Star Tour Deluxe was introduced, which was a standard Royal Star Venture model with no touring features like a fairing, radio, and trunk. -
It has been a long time since I had my Venture, so I have forgotten a lot about it, but if the Venture has any rubber lines in the rear brake system, it may be that those sections have weakened over time and stretch or expand when pressure is applied. If there are rubber sections, maybe it is time to replace them, preferably with braided steel covering. Just a thought. This would not necessarily have anything to do with air bubbles, but could affect the ability to lock up the rear wheel and slide it, which the Venture should do very easily, as the rear brakes are known to do that even of good dry pavement.
-
Brake fluid is hydroscopic, meaning it has a affinity to absorb moisture, water although considered to be an incompressible fluid, often has dissolved air in it, that dissolved air is compressible. Just as a note, Honda recommends the entire brake hydraulic brake systems on the Goldwings be flushed and replaced with new fluid, every two years, that system is a bit more complex that that on a Venture, but replacing your brake fluid at some regular interval be it time or miles, is a good thing to do. Again Speedbleeders make that job way easier to do, just pump the old fluid out into one of their catch bags using the lever or pedal depending on front or rear brakes, refill the master cylinder before it is empty and your done in no time.
-
Have you flushed out the brake fluid to ensure there is no old contaminated fluid in the system? Have you inspected or rebuilt the rear master cylinder? Try getting a speed bleeder for the rear bleeder port, those work great make bleeding a breeze. I would also consider going back to OEM rotor, you can check the specs on the rotor thickness requirements in the service manual found in the tech section here on the forum. Well I see Freebird beat me to it as I was typing.
-
Looking for verification on my rebuild
M61A1MECH replied to muellercandd's topic in Royal Star Venture Tech Talk ('99 - '13)
Did the motor come from a Venture or did it come from a Royal Star. Yamaha built standard Royal Star cruiser models from 1996 to 2000 or 2001. The Ventures came out in 1999 and were built until 2013. They use the same basic motor, but the Venture models and later model Tour Deluxe made from 2005 to 2010 had more horse power, bigger carbs and special fake fins on the front cylinders, those special finned covers had two attach points for the front "dog bones" that support the motor. Also the air boxes for the original Royal Stars are a lot different that the ones on the Venture or Tout Deluxe. If you received a Royal Star cruiser motor instead of a Venture Touring motor there is likely to be small differences in some of the plumbing like for the AIS. Good news is if you did receive a Royal Star cruiser motor, most of the parts from your original Venture motor should bolt right on, bad news is , it still lack in horsepower. If you post photos of the motor it could help us help you. -
I agree with N3FOL, here is a link to the electrical schematic for the Royal Star Ventures, if your regulator is bad and you continue to ride you may well cook your new battery, my regulator went bad on my 2007, and it nearly made the battery blow up. It overcharged it and it swelled up to the point I almost could not remove it from bike.
-
I am pretty sure Gary sold Tweety Bird and Sylvester, not sure if he ever finished Sylvester or not, he was riding a Goldwing the last I talked with him, you may find him over on the GL Forum, but he never did post to often.
-
Metal Stabbing My Left Leg 2007 Midnight
M61A1MECH replied to Midicat's topic in Royal Star Venture Tech Talk ('99 - '13)
I asked a Yamaha rep about those pieces one day at Bike week in Daytona Beach, he told me the left one was designed to deflect gas away from the hot exhaust in the event the tank was over filled. He got a little upset with me when I pointed out to him that their display bike had the left and right sides swapped. He scurried right over to bike to confirm and then found a tech to fix it. Anyway I see no reason why you cannot remove it if it bothering you. I remember burning my legs on those round guard rails they had on the original Royal Stars heads. -
Here is a link to one article about one of the converted Royal Stars, but not a Venture model. https://www.motorcyclecruiser.com/custom-yamaha-royal-star-with-heart-v-max-from-archives/
-
If it quits on you again like that take the gas cap off and see if you can hear air rushing into the tank, that will be a dead give away that the vent is plugged. The vent hole for the tank is visible in the neck of the fuel filler hole, if you take the bezel plate off that holds the speedo you should see a tube exiting the filler neck, that connects to a rubber hose that exits below the motor, You can take some canned air and try blowing air through the hose from the top to the bottom after you take it loose from the metal tube, sometime critters like mud dauber wasps will build nests in the end of that rubber hose. The 98 year model of the Tour Deluxe and the Tour Classic have the ignition switch mounted up front on the frame right behind the radiator they get cooked with all the heat from the radiator are are prone to failure, I had to have the ignition switch on my 98 Tour Classic replaced under warranty, supposedly Yamaha knew about the problem and when the shop replaced them they used a heavier duty switch than the OEM. Mine would some time fail just as you described, before the replacement, never did it again after the replacement and that bike went well over 100,000 miles. Hope this helps