skydoc_17
-
Posts
2,283 -
Joined
-
Last visited
-
Days Won
41
Content Type
Profiles
Forums
Gallery
Events
Store
Everything posted by skydoc_17
-
Hey Pucster, You Sir are a lifesaver! PM sent! Thanks, my friend, Ill post pics when I get this bike finished! Earl
-
Hey Rich, Thanks for the reply! Trying to find one of these calipers is like trying to find "Chicken Lips"! They are just not to be had. Earl
-
Currently, I have a 1984 MKI Venture Standard at the shop that among other things has a completely destroyed rear brake caliper. Unfortunately, all of my parts bikes are MKII bikes. If anyone has a rear brake caliper for the model years 1983, 1984, or 1985 (2 piston caliper) I am willing to PAY for it, and the shipping as well. Even if the caliper needs a rebuild, I have the kits here, but his caliper body was damaged. I am trying to get this bike back on the road for the owner, and any help would be greatly appreciated. If I put this in the wrong place, I apologize. Earl
-
Hey Ronnie, Both Jean and I wanted to convey Congratulations on making it to retirement! These days, just making it is a full time job! Personally, my stress level has dropped greatly. I hope this happens for you as well. Welcome to the "Club"! Earl and Jean.
-
 Hey Pete, Welcome to the Forum, and congrats on your "New To You" bike! Another issue I have seen is when the Starter Switch on the right side handlebar is shorted, or corroded. When you push the ignition switch, it turns off the lighting to give more cranking amps to the starter motor. If this switch is shorted, (contacts closed all the time) not only will the bike not start, but the lighting will be off as well. I suggest you open up this switch, clean the contacts, add a bit of contact grease, and close that switch back up. Another thing to check would be the Ground Cable that goes from the battery to the engine block. Remove the bolt at the engine block end of the cable, wire brush the cable end AND wire brush the mounting point where the bolt screws into the engine block. Corrosion and paint on the engine can reduce the conductivity of that cable. I hope this helps, and again, Welcome to the forum Pete! Earl
 -
Help... looking to buy 2000 Venture and need input beforehand
skydoc_17 replied to byekryam's topic in Watering Hole
Hey Woody, Glad to see you back! I did a quick search on "The Marketplace" and found a few that would be worth looking at. 02', 34K: $3800. https://www.facebook.com/marketplace/item/1306445940160832/?ref=search&referral_code=null&referral_story_type=post&tracking=browse_serp%3A0bc7a572-6c3f-47c5-85b1-300f1982c521 99', 49K $3200. https://www.facebook.com/marketplace/item/776268213529373/?ref=search&referral_code=null&referral_story_type=post&tracking=browse_serp%3A0bc7a572-6c3f-47c5-85b1-300f1982c521 99' 79K $3500. https://www.facebook.com/marketplace/item/334332262202738/?ref=search&referral_code=null&referral_story_type=post&tracking=browse_serp%3A0bc7a572-6c3f-47c5-85b1-300f1982c521 99' 69K $3300. https://www.facebook.com/marketplace/item/554932786275668/?ref=search&referral_code=null&referral_story_type=post&tracking=browse_serp%3A0bc7a572-6c3f-47c5-85b1-300f1982c521 06', 45K $3500. https://www.facebook.com/marketplace/item/748285946515624/?ref=search&referral_code=null&referral_story_type=post&tracking=browse_serp%3A0bc7a572-6c3f-47c5-85b1-300f1982c521 The last one I listed, The 2006 with 45K looks to be a real nice bike! I realize a few of these bikes would be a drive, but there are bikes out there within 150 miles of you that would give you a very good value for the time and money you would spend on them. As we get closer to the end of the riding season here on the North East Coast, the prices are going to go DOWN, or can be dickered down IMHO! If you waited a few months, you could EASILY save $500 to $1000 on ANY of the bikes I have listed, and I am SURE there would be many more listed at that time of the year. Give it some thought Woody, and all the best on your search for your next "New To You" scoot! Earl -
Hey Jeff, If you two have "Puppies" from that meet up, I sure would like one!! That's a great looking pair of scoots! Tell the truth, did either of you accidently get on the wrong bike during your meet?!?! All kiddin' aside, what a wonderful way to spend an afternoon. It must be great to get out and "stretch your legs" after the lockdown. My hat's off to ya'! Earl
-
Well well well, Venturerider still lives! I'm so happy!
skydoc_17 replied to BigLenny's topic in Watering Hole
Hey Lynn, You old varmit you! Boy, is it great to see ya' back! Heck, if we'll let those Gold Wing riders hang around, surely we can let a few Spyders hang out!! Fill us in on what you have been up to since the bike change. I am sure the forum members would be interested in your opinion on the pros and cons of the Spyder vrs. the RSTD. I know I would. I recently test drove a Ryker that my nephew was thinking about buying. (Not enough ponies for me, but that's another story) The dealer had them marked up WAY above MSRP so we passed. What's your take on two wheels up front? Thanks for the props, Jean says, "Hey", Earl -
Where to find a fuel pump
skydoc_17 replied to Pop's topic in Venture and Venture Royale Tech Talk ('83 - '93)
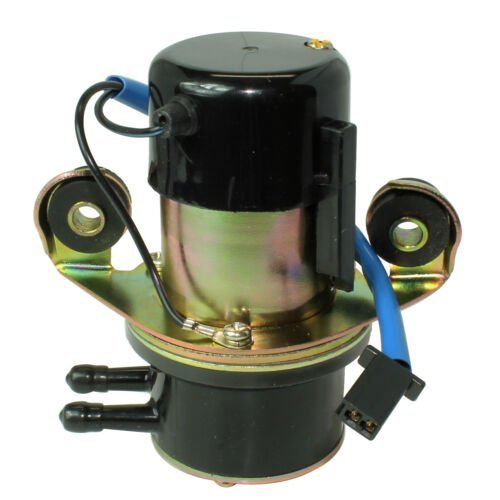
Hey Pop, On Ebay, Caltric sells a brand new unit for $50 +/- a few. I have installed them a few times with no issues. Here is the link: https://www.ebay.com/itm/291760653742 I have attached a pic! Hope this helps, Earl
-
Hey Fred, Over the years, here at the shop we mounted quite a few "crazy" tires on motorcycles due to there being everything from dirt drags to street riding to ice racing. (I'm in Pennsylvania) I am assuming that this is a 4 ply steel belted radial tire, where your Metzeler tire is a bias ply tire and most likely has 6 plys. With your bike being 800 lbs. divided by two, basically you are looking at 400 lbs. on the rear tire. (feel free to add rider, passenger and gear, and redo the math) The point is, you are WAY below the weight rating for this tire. The method I used was to baby powder a piece of cardboard, (with the bike at a 90 degree angle to the card board) and roll the tire across the card board at the max pressure the tire was rated for. Then I would increase the tire pressure until 1/2 of the contact area of the FIRST inner and FIRST outer row of tread stopped making contact with the card board. This pressure became my baseline air pressure number, and I would adjust up or down to further fine tune the ride for comfort cornering and tread life. The object of 1200 lbs. at 36 psi is to keep the tire from overheating under heavy load, so with the rear of your bike conservatively at half that weight I don't see an issue with over inflation. Not to mention the whole steel belts vrs. bias ply belts. I don't see an issue with air pressures in the mid to high 40's psi before you find the "sweet spot" for that tire fully loaded with rider, passenger, and gear. The other issue you mentioned was when you installed the new tire, and the rear being lower, (you removed weight from the front end of the bike) you noticed that the bike became harder to control. The two areas that will cause this issue are the steering head bearings, (either needing to be tightened, or replaced) and the bearings in the swingarm. (there is no adjustment, only replacement) Because our bikes have a Mono-Shock swingarm, it is very important that the contact point of the swingarm to the frame has NO play in it what so ever. Also the mounting bushing for the lower shock mount should be checked as well. You didn't mention the mileage on your bike Fred, but as the miles go up, the integrity of these parts becomes suspect. I hope this helps, and I hope you enjoy your new tire! Earl
-
Hey Tom, I was wondering what your average speed was on your trip. For me, if I ran much above 65mph, the gas mileage started to fall off pretty quick. The other reason for lower mileage would be running through mountain twisties in a reduced gear. Also riding 2up with a bunch of "To Go Boxes" full of all that wonderful food you were eating will lower the mileage some! LOL!! Sounds like a great Tom! Earl
-
Hey Ray, We met at Don't Maint. Day many years ago. Your RSTD was then, and has always been a real Work Horse/Beauty. God has a plan for you, my friend. And it looks like that FJR1300 is part of that plan. I personally sometimes hesitate to embrace something new, because as I have gotten older, "If it fits my hand and my head, It fits my heart"! My wife has to remind me that I am worthy of something newer, and better, being humble SUCKS sometimes! So taking a page from my wife's book, (God I hope my wife doesn't see this post, she'll have me washin' dishes if she does!!) Embrace this new motorcycle Ray, make it your own! Show it the love and care you showed your RSTD, and maybe someday you will have a whole new bunch of stories to tell us about this wonderful machine that got you home every time, just like your RSTD! Lastly, I just wanted to say "Thank you Ray, for your service to this country"! If there ever was a person on this planet that deserves a newer, better motorcycle, It's YOU my friend! Enjoy your new ride Ray, and perhaps we will share some road together some day. Earl
-
91 Venture Royale in NY
skydoc_17 replied to BanjoBen's topic in Links to Classifieds, Craigslist, Ebay, Sales, Etc.
Hey Ben, Did your bike sell? I tried the link to FaceBook MarketPlace and it said the item could not be found! I was just wondering?!?! Earl -
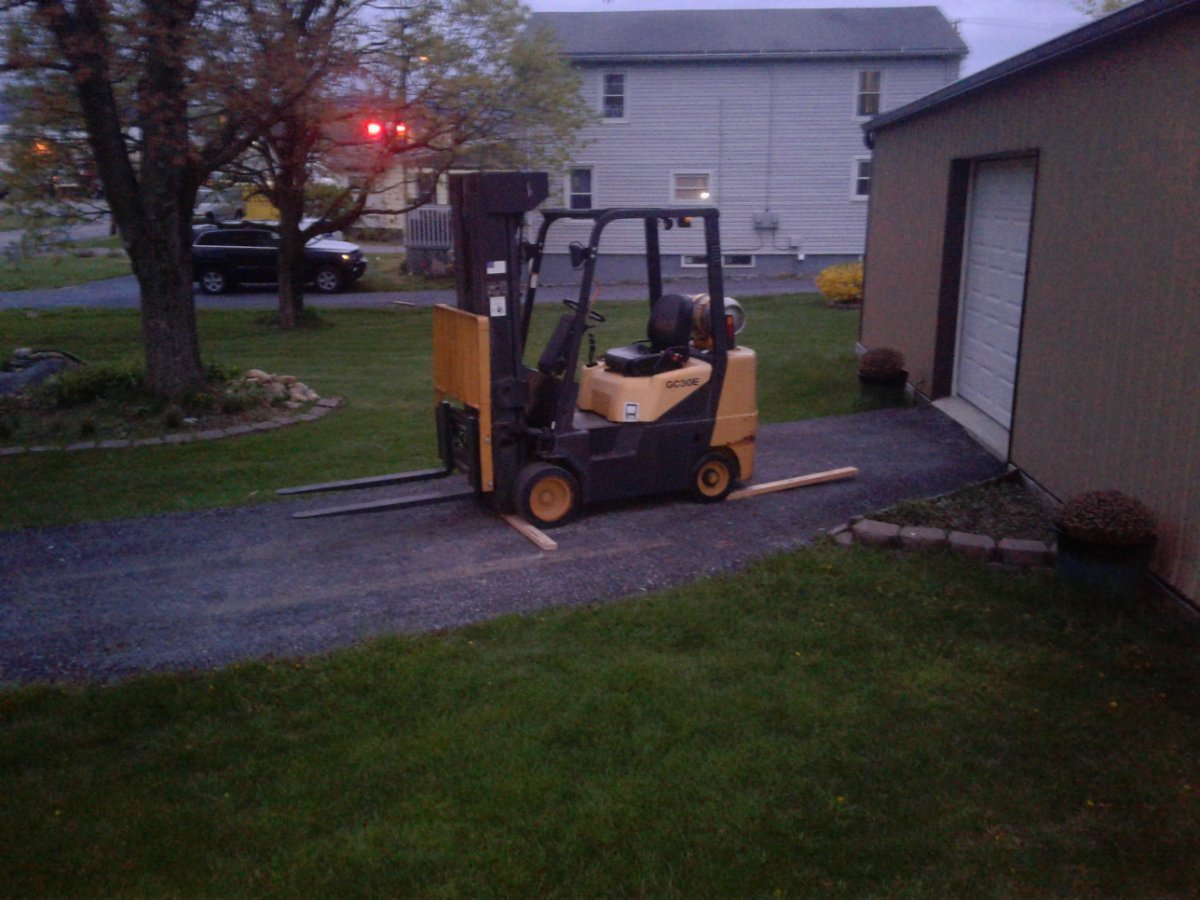
Hey Pucster, My tried and true method for growing grass in bald spots is to buy a few bags of the cheapest "Garden Soil" found at any ACE Hardware or Home Depot, (usually $2 bucks a bag give or take a few cents) then "Dust" the area with the soil. (crumble the soil from the bag, and spread a light layer over the bare area) Over seed the area with the type of grass seed you want to grow, using your feet, smash the seed into the dusted soil, then top off with the dry grass and mesh. (I personally have had much better luck with just grass clippings than the grass with mesh in it. When you go to remove the mesh, you pull some of the new grass out with the mesh, just sayin') The object of the grass/mesh is to hold the moisture so the seeds will germinate. You will need to water in the morning BEFORE it gets too hot, and again in the evening after it cools off. (Don't water during the heat of the day, it boils the seeds!) In about 10 days or so, you will see the grass sprouts poking through the grass mat. Let the new grass grow for 2 weeks, set your mower deck 1 inch higher than you usually mow, and mow the area. (After you remove the mesh) You will find that about 80% of the area will have new grass. You will need to repeat the process until the entire area is filled in. On you second try, just use clippings from the mowing of your yard. The addition of the new soil and the regular watering is what makes the magic happen! On your sloped areas, it wouldn't hurt to take a pick or a pointed shovel and break up the base soil a little. (Stab the shovel point into the ground about 1 inch, and twist the shovel handle) This will make it easier for the grass to root in the base soil. After looking at your pics, this could take the better part of the summer to get grass to grow on those slopes. I usually hit a place like a farm and feed store or Tractor Supply for 50 lb. bags of "bulk" seed instead of Home Depot for little 3-5 lb. bags of "Designer Seed" for "Weekend City Farmers"! $1 per pound is a decent price for bulk seed instead of $3 to $4 dollars a pound for Designer Seed. It's ALL the same seed, I assure you! Patience is a virtue when trying to get grass to grow in a bald spot! Your new mantra will be Dust, Seed, Cover, Water, Repeat! You will be mumbling that mantra in your sleep by October! LOL!! I had a Pole Barn built on my property a few years back, and by the time the construction equipment and two full cement trucks rolled across my front yard, the grass was destroyed! It took the rest of that first summer and into the next summer to bring back all of the grass that was missing, but you would never know a 580 Case Backhoe, three Bobcats, and two 13 yard cement trucks had plowed my grass under the previous summer! I have attached a few pics. Good luck with your project brother! Earl
-
Need Help with Upstate PA/ Western NY Excursion
skydoc_17 replied to Semi-retired's topic in Watering Hole
Hey Michael, The US190 to Buffalo would be a good start. After that your choices are Rt. 219 to Rt. 242 NE of Ellicottville, NY to Rt. 353 to US86 to RT. 280 which will bring you to the NY/PA State Line. Rt. 346 takes you through the East/West section of the National Forest. This route puts you through many small towns, and is a pleasant ride. There is some sections of Interstate riding though. Or Rt. 62 out of Buffalo which skirts Lake Erie before it heads south. Both roads are two lane with above average scenery and some nice twisties, but not extreme. Also Rt. 219 has plenty of places to stop for gas and snacks. (and restrooms for the ladies!) For your return trip you could go Rt. 346 to Rt. 280 to Rt 17 towards Steamburg to US86 to Rt. 394 to Rt. 62 at Waterboro to Rt.83 at Conewango valley to Rt. 91 which turns into Rt.47 to Rt. 119 to Rt. 20 to US90 back to US 190. This convoluted route will take you some beautiful wooded areas and some excellent turns in the roadway. The US90 to US190 part of this ride is your average 4 lane slab type riding. Hope this helps, Earl -
After over 17 years, Friday was my last day at Veeder-Root! We laughed, we cried, we ate cupcakes! I chatted with so many people that had become a part of my life. I'm Happy and Scared to death at the same time. I am looking forward to what life puts before me as I join the ranks of the retired. Honestly, there were times that I thought I wouldn't make it, but here I am, on day one of my "New" life. Wish me luck!
-
Well, how could I not get involved in THIS thread with the recommendation of COWPUC!! As a matter of fact, in the Member Vendor's section of the Forum, I offer a kit that addresses this very issue! Here is the link: Thank you Pucster for the props, and if anyone has any questions about the Needle Shim Mod, or any of my other kits, please feel free to PM me. I am always up for a good chat about these wonderful machines! Earl
-
Hey Folks, Interesting topic! I have both the gauge type, and the CarbTtune. The amount of Vacuum that the gauges read is irrelevant. It's the difference between each cylinder that needs to be balanced. I sync my Carbs. every spring, but I have OCD! (And I own the Gauge!) Either gauge will do the job as long as you can VERIFY that all four gauges read the same value an a given vacuum. If you are finding that your Carbs. are out of sync many times during a riding season, then the BUSHINGS in the linkage are worn, and need to be replaced. Keeping in mind that the last model year for the Second Gen. was nine years ago, and the first year of production for the MKI Venture was 39 years ago, it would be safe to say that these little tiny nylon bushings have seen a LOT, even if you have a newer bike! A metal rod pivots on these bushings every time you roll on the throttle, and they are under spring tension even if you are cruising at the same speed for an extended period of time. These parts have a crucial job, and are often overlooked in my opinion. Ownership of the gauge set is not mandatory, Checking the sync yearly IS! Just sayin', Earl
-
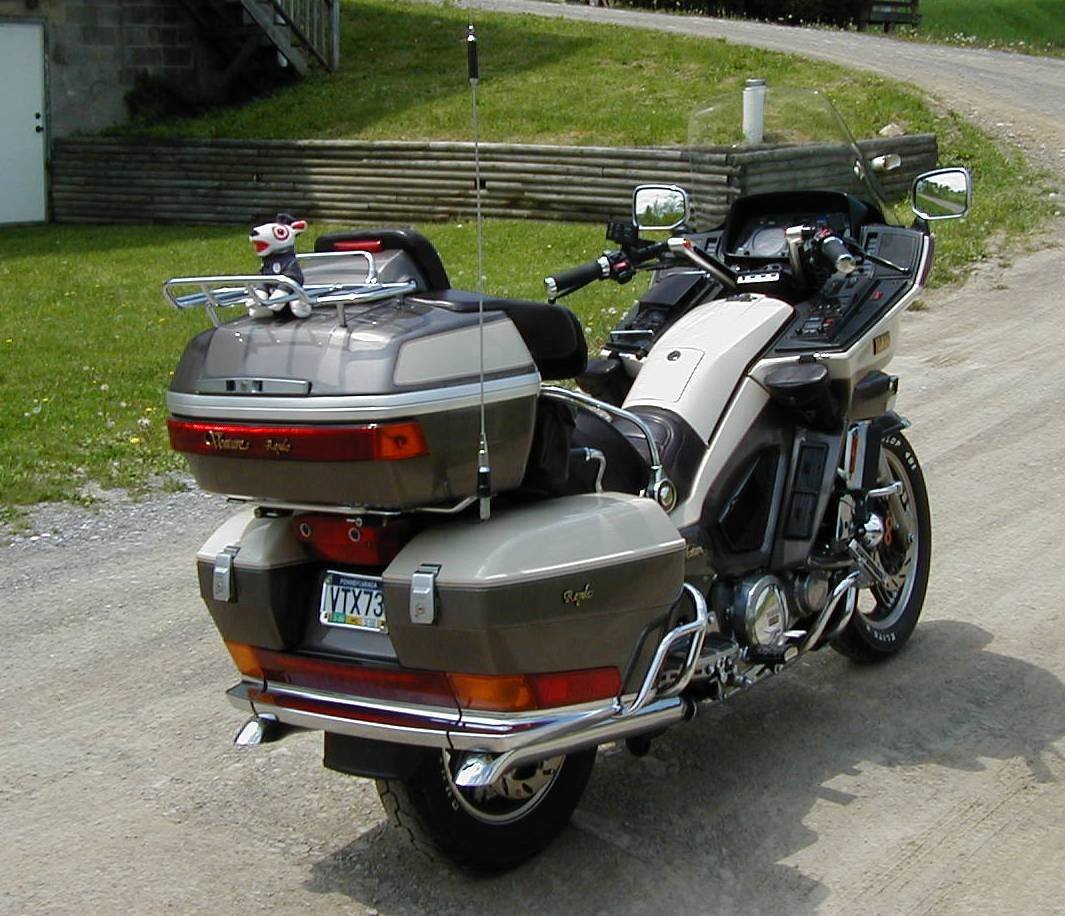
For us East Coast riders that live in the Northern part of the country, (except for those crazy Canuc's that seem to ride ALL year long!! LOL) it has been a LONG winter! With temps starting to creep up, and flowers starting to pop out, it looks like spring is right around the corner. Which brings me to the point of this post. It's time to take a GOOD close look at your scoot BEFORE you head off into the wild blue yonder! Tires: There is nothing between YOU and the road except two skinny pieces of rubber, my friend! Get down and have a close look at the two marvels of modern technology that keep YOU and THE ROAD separated. How's that tread look? Is the air pressure correct? What about the sidewalls, are there "cracks" in the rubber surface screaming that your tire needs to be replaced. Please don't ignore these signs that your tires need maintenance! Air Filter/Filters: When was the last time you pulled the cover on your Air Filter? Is it caked with dust and to your surprise there are "critters" living in there? Your engine can't breathe if the Air Filter is plugged up. This effects gas mileage and performance. Show your scoot some love, and change out that filter if it has been a few years. As my wife would say, "I'm Worth It"! Well brother, your bike is as well! Engine Oil/ Filter: Now, just because you only put 900 miles on your bike the last two years, doesn't mean you can change your oil and filter every FIVE YEARS! Engine Oil breaks down over time, and the result is the creation of acids that score bearings, piston walls and fog up the sight glass on the side of the engine. Most of us have a decent amount of money tied up in our motorcycles, so the cost of an oil change is money well spent, in my opinion. Please don't forget that our bikes have a "wet clutch" which means that the clutch pac and transmission gears are lubed with the engine oil. Oil for a CAR with Friction Modifiers CAN NOT be used in a Motorcycle, PERIOD! I can't stress this enough. You will send your clutch to an early grave if you put the wrong oil in your bike. Please be careful! Brakes: As much as I like to go FAST, I always keep in mind that I also need to be able to STOP! Take a few minutes and remove all three brake calipers from your bike. That's right, I said REMOVE all three calipers from the rotors. (Leave the brake line connected!) There are only two bolts holding the caliper on the mounting bracket. I suggest you blow the brake dust off of the inside of the caliper body, check the condition of the caliper pistons and seals, (Is a piston stuck, are the seals leaking, etc.!) If the pads are thin, replace them. If you have a stuck caliper, or a leaky seal, the calipers can be rebuilt. Repairing a caliper is a LOT cheaper than replacing a BRAKE ROTOR! Not to mention the difference in stopping distance between a good set of brakes and a bad set might be the back window of a soccer mom's SUV! There are also performance upgrades in the form of R1 4 piston calipers that can be added to your bikes that give even better braking action. Don't take my word on it, look into it or PM me. Fork Seals: Because the front "shocks" on our motorcycles are built into the lower fork tubes, there are two seals that keep the fluid in the lower fork tube, and not on our front brakes and wheel! If you see an oily ring around the chrome tube that comes out of the lower fork tube, then this means that the fork seal is starting to leak. There is a cleaning method to clear up a seal that is "seeping" a bit, but if that seal is leaking to the point that oil is dripping down the lower fork tube, then it is time to replace that fork seal. Now the skill level for this service is a bit higher than changing oil, and you might want to consult a local motorcycle repair shop, (NOT a Stealer, I mean Dealer) to take care of this project. It's best to be "Real" with yourself about your mechanical abilities with a job like this. But weather or not you do it your self, or have a repair shop do it, It needs to be done all the same. The money you will save in replacement brake parts if you have a bad leak will outweigh the cost of this service, in my opinion. Clutch: Next to the "Oil Debate" is the "Which Replacement Clutch Do I Use" Debate. I am not even going to address that issue here and now, BUT if you drop your scoot down a gear and roll on the throttle to pass a semi truck on the highway, the LAST thing you want to hear is the motor winding up, and your bike NOT going forward in a hurry!! Let me repeat that! If you try to pass, and your clutch is slipping, then you need to address this issue, PRONTO! I personally believe that the BEST tool that a motorcycle rider has is the ability to avoid and evade a dangerous situation. Bar None! If I "drop the hammer" on my scoot, it's because I need to be somewhere else at that moment, because if I'm not outta' there in a hurry, I'm in an accident. Clutch slippage is NOT an option for me, and it shouldn't be an option for you either. Please address ANY clutch issues BEFORE you actually need your bike to get outta' there quick. Lighting: Let's be honest, NOT replacing burned out light bulbs is just plain TACKY! But on top of that, it could create a safety issue with your visibility! As motorcycle riders, we have always had an issue with BEING SEEN! I can't tell you how many motorcycle accidents I have heard about and the first words out of the cage driver's mouth have been, "I didn't see that rider" before I ran over him, then backed up over him! (Just Kidding) Make sure ALL of your lights work, and even explore some new technology like LED Headlights or other types of accessory lighting. It may save your life! Now there are other things that you should be looking at on your scoot, but this list will give you a good starting point. The point I am trying to make here is "Look you bike over the way you looked at your Girlfriend/Boyfriend, Wife/Husband ON YOUR FIRST DATE! You didn't pull the trigger on that project without giving him/her a good "Once Over" , (Let's hope not anyway) So since everyone on this forum claims that their scoot's are their "Second Love", then don't disrespect your bike by not taking good care of her. My dad used to say, "If you take care of your bike, Your bike will take care of you! Ride safe out there! These are MY thoughts, for what they are worth. Earl
-
I prefer to be the Tail Gunner, partly because of the "Crazy" factor, and partly because the Jardine Pipes on my bike are pretty extreme, or so I have been told. Personally, I'm basically deaf due to 50 years in factories, so they don't bother me at all, but I do try to be respectful to the other ride members. As long as we all get there, I'm happy with that. Earl
-
Hey Tony, We're glad to have you aboard, brother! I don't tell this story often, but perhaps it will make you feel better about your situation. I had joined this Forum some 14 years ago. I was preparing to attend my first "Meet and Greet" in Gettysburg, Pa. I had never met anyone, had only posted a few times, and felt like I had nothing to contribute to the members. To make a long story short, half way there, (this trip was a 4 hour trip ) I hit some railroad tracks and EVERY Fuse in my Fusebox rained down on the roadway! Needless to say, I never made it to the Meet and Greet, and I had to call my brother to come with the trailer and haul me home. I was heartbroken! I had hit it off with a few of the members of the forum and they "busted my chops" about not making it to the meet, BUT they also encouraged me to fix my bike and make it to the next one. Because they encouraged me, I went right to work and created the Fuse Box Upgrade Kit I offer in the Member Vendor's Section of this forum and from there, over the years, I have offered MANY items to solve problems with these wonderful machines that we all love so much. The point I am trying to make here is Relax Tony, let your guard down a bit, and let yourself grow in this safe environment. If you are having a GREAT Day, share it with the members! If you did a repair on your scoot, share it with the members! If you are stumped with a problem with your bike, share it with the members!! You get the idea. I can't tell you how many times I was ready to "give up" on my bike, or my life for that matter, and was pulled back from the edge by the members of this family that have ALL gone through the same thing either with their bikes, OR their lives and shared info that helped me through to another day. Maybe some day, you will be able to do that for another member yourself! BUT even if that doesn't happen Tony, just knowing that you are here, and your bike is running, and you are enjoying life, is why I keep coming to the Forum every day, brother. Don't be afraid to ask questions or give advice! If you can, offer to help someone with a problem. If you can't, offer them encouragement! Don't be afraid to think "Outside the Box"! Start by doing it here in this safe forum, then expand it to the rest of your interactions with other people in your life. The next thing you know, YOU Sir will become a better person. (not that you aren't a swell guy already!!) And if you are a swell guy already, share that on the forum! LOL!! In conclusion, I would like to remind you that EVERY day, we are given a very special gift. The sun comes up on a new day, with the opportunity to do with it, whatever we want! Bike not running, learn to fix it! Loss of a loved one, grieve and learn how to move past it. Lost a job, learn a new skill and boldly go for it! Not getting along with your wife, learn how to understand her feelings! (GOOD Luck with that one, brother!!) WE are glad you are here Tony, so much so that someone thought enough of you to pay for your membership. It's the least we could do for a new friend! Earl
-
Veej: a new member who’s been lurking a whisker
skydoc_17 replied to veej's topic in Welcome To Our New Members
Good Morning Brandon, Welcome to the forum! With the veritable "laundry list" of items that you have accomplished on your first XVZ, it doesn't appear as if "Mechanical Skill" is going to keep you from putting your second XVZ in tip top shape in short order! I complement you on that! It's a pleasant surprise to chat with a "newbie" that has your skill level, and has picked up on pretty much all of the major flaws with these fine machines. I will try to address some of your concerns and share some of the ways I have overcame them. Please keep in mind that I do lean towards the "Performance" side of upgrades, so for a bike used for touring mostly, some of my suggestions might be a bit aggressive, but solid. Front Forks: I find that the front forks on both the MKI and MKII's (because they are identical) are a bit "Light Duty" for an 800 pound motorcycle, In my opinion. So they must be maintained regularly. Considering that the shielded front bearings on your #2 bike are 39 years old, even with only 17K miles, should be replaced. I'm sure the grease is more like "snot" then grease at this point. Replacement S.S. Brake/Clutch Line Set: The line set I currently offer has adjustable, replaceable swivels on the ends of the brake lines. This will allow you to add the line set to your stock calipers, forks and rotors, and when you upgrade ANY of the above items you simply adjust or replace the swivel ends, NOT the entire line set! This line set in it's current form WILL De-Link the front brakes from the rear brakes. I too enjoy the braking system on both of my First Gens. to function in a "traditional manner", right brake lever controlling BOTH front brake calipers, foot pedal controlling the rear brake. Many find this De-Link upgrade useful , some do not. I can supply a stock S.S. line set but if you plan to upgrade to the De-Linked system at a later date, NONE of these lines from the stock set can be reused. As always, it's your bike, you get to choose! Replacement of the right front brake M/C: What we are talking about here is volume vrs. higher pressure. There is some debate over which is better. The stock M/C provides more volume with the larger bore, the Virago M/C provides more pressure with it's smaller bore. So for the "Teckno Geeks" we are talking about the stock 5/8" bore at .6250" (volume) vrs. the 14MM bore of the Virago M/C at .5511" (higher pressure) I personally find the Virago front M/C just a bit too "grabby" for my liking. Especially because both my First Gens. have the larger diameter front rotors and 4 piston progressive engagement R1 Calipers. The stock front M/C works just fine for me, your mileage may vary. Replacement of the rear M/C: The MKII rear M/C has a larger bore, (more volume) than the MKI rear M/C (higher pressure) The outside dimensions of BOTH M/C's are identical which means that either one can be mounted in the stock location. I prefer the MKII rear M/C over the MKI rear M/C because I use the low speed riding method of applying a slight amount of rear brake only and raise the RPM's of the engine to a constant value. By releasing or applying the rear brake only and leaving the engine RPM constant, this has greatly improved my low speed handling of my bike. This method is easily seen in the "Ride Like A Pro" DVD series of vids and on YouTube. Clutch Basket Noise: Because Yamaha chooses to use straight cut gears in the transmission of ALL of the V4's it produced during this era, (1983 to 2013) and the clutch basket acts as an amplifier for the gear noise, it's pretty much, "It Is What It Is" as far as the gear noise is concerned. I have personally found that they are either noisy, or more noisy in my opinion! I will say that there has been more than once that a GOOD Carb. Sync has quieted down a "More Noisy" engine in my experience! Keep this in mind Brandon. 1983 MKI Plastic Water Pump Impeller: The early MKI VR's came stock with a plastic water pump impeller. Later models were changed to a metal impeller. It would be wise to find out which you have (by removing the water pump) BEFORE you have an overheating issue! Also your coolant could be 39 years old as well!! Something to think about. These are MY thoughts, for what they are worth! Again, welcome to the forum!! It will be a pleasure to have you share your skill level with all of us in the future! Good luck on your journey. Earl (skydoc_17) -
Hey Orlin, If you EVER doubted that this was the job for you, my friend doubt NO MORE! Your Eagle Eyes, Your Steady Hands, and Years of Experience ALL came into play on that day! You gave that young boy the gift of LIFE! The saying goes, "Not ALL Hero's Wear Capes"! I'd be proud to ride with you ANYTIME, Brother! Earl
-
Good morning Don! Both Jean and I are prayin' like crazy for you, my friend! I know it's hard to dwell on the facts day to day, but hearing that you are still fighting the good fight is music to our ears! Please know that WE haven't given up on you yet, old friend, so please don't give up on yourself! On a brighter note, you'll be able to wear your PIRATE costume AGAIN at Halloween! Keep us posted, and you might want to transfer your "Angel Bell" from your bike to your car this week! Just sayin'! Earl and Jean.
-
06 RSTD Mechanic / Shop Recommendation in Charlotte NC...
skydoc_17 replied to llaczo's topic in Watering Hole
Hey Lou, I second what Larry said! It would be easier to find a Unicorn than to find an independent shop that will treat your bike the same way that you will. And like Bpate said, the dealers won't work on these bikes now because of their age. Pick up a Metric Tool Set, roll up your sleeves, bring up the VR.ORG Forum on your computer, and dive right in. There is NO better feeling than completing a service on your own motorcycle and patting yourself on the back for a job well done. Trust me Lou, we won't let you get into too much trouble! Feel free to PM me if you need a "one on one" about a service on your scoot! Earl


.jpg.5092c32ab78f029070ce86665db7bec4.jpg)
.jpg.83b32c012862dd8db6e588287bfec9b8.jpg)