saddlebum
-
Posts
6,866 -
Joined
-
Last visited
-
Days Won
169
Content Type
Profiles
Forums
Gallery
Events
Store
Everything posted by saddlebum
-
 Maybe this will help https://www.ngksparkplugs.co.za/products/ngk-resistor-caps/
 -
I also believe part of the problem is often an affliction known as flat surface syndrome. You can usually spot the ones with this condition by the Christmas trees they ride and can be spotted light years down the road. Fortunately for the severely afflicted, technology has developed a treatment to help minimize the side effects of this condition ( warning this is not a cure for those afflicted as they are usually afflicted for life ) . Its called LED and it works by lowering the demand on the stater. Less demand equals less heat build up equals improved chances for the stater to survive flat surface syndrome.
-
Hey come on .... its not that bad..... for the past year now you have been able to see the floor.
-
There is also a kit that you can install that results in more oil spilling over the stater to help cool it. I may be able to dig up the part number later for you as I have one in my garage somewhere just need to remember which drawer it is in.
-
Good for you and congratulations but keep in mind the course is only the foundation. The rest depends on how you build on that foundation. Eye's ear's and the grey matter between your ears and how you use them are the most important tools in your arsenal of safety equipment. Distraction, not paying attention and cockiness are your most dangerous pitfalls. Having said all that and not meaning to rain on your parade, enjoy your summer and rack up some miles of one of the greatest pleasures available to us all.
-
Just caught this myself. I feel real bad for you and her mother. I have 3 girls two boys and 6 grand childre and I have no idea how I would deal with something like this nor do I ever want to find out. Prayers for you and your wife.
-
Missing piece to complete my '89 VR Restoration
saddlebum replied to Mach VIII's topic in Watering Hole
Try your local hardware store as well. Most will carry those and so will any marine or truck and trailer tarp repair shops, they are called twist lock tarp fasteners. If you only need two a tarp repair shop may just give them to you. -
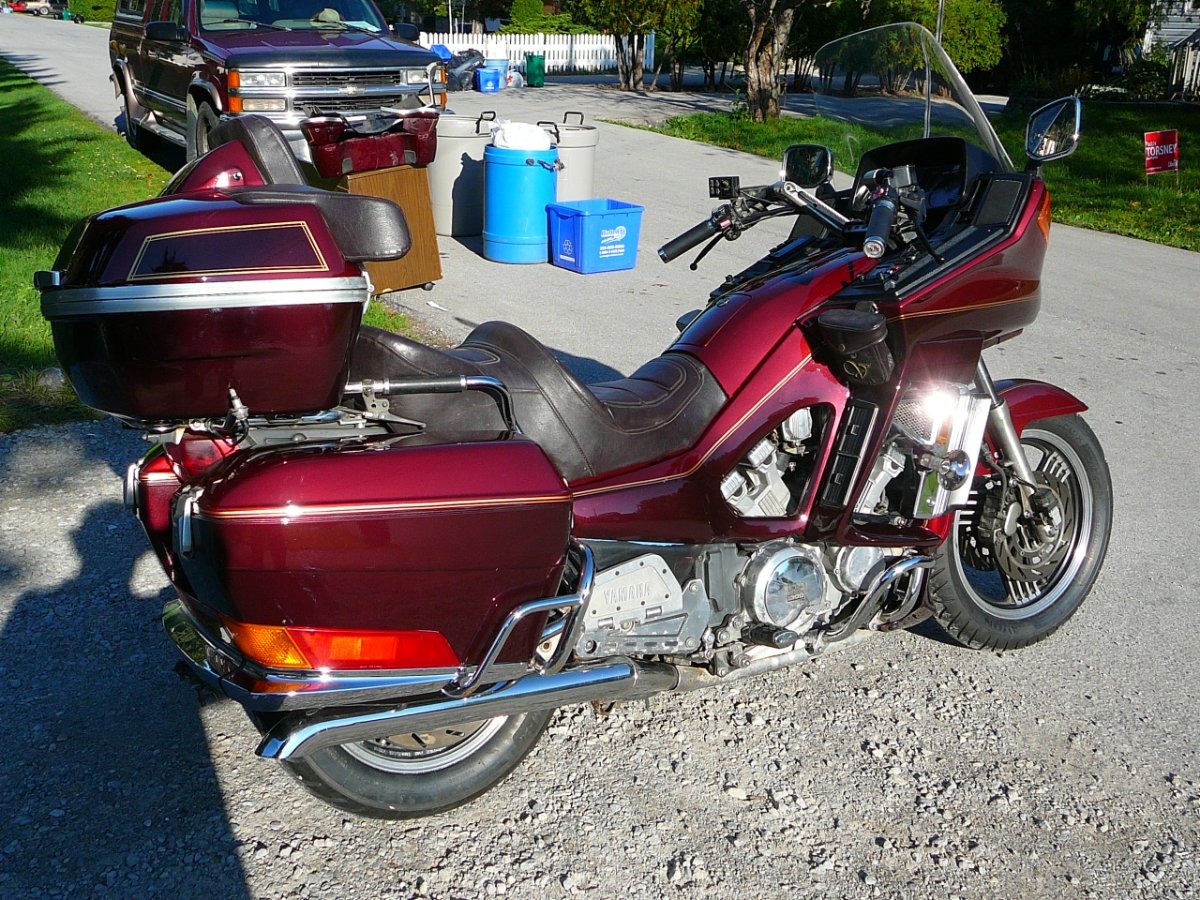
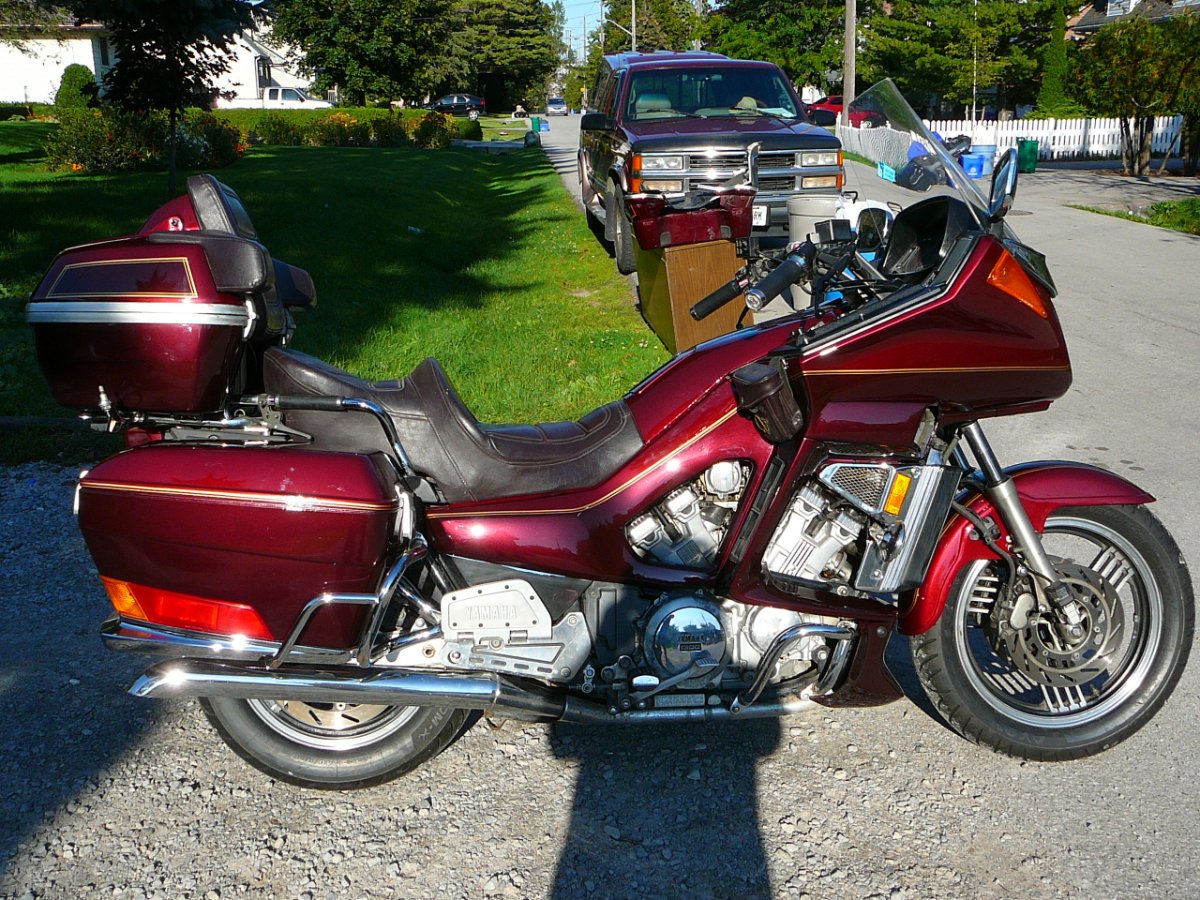
Bike is looking good. But here in lies the problem 1) that first scratch you get no matter how tiny will drive you insane so be prepared for this highly emotional disruption in your life.Best keep a bottle of scotch and a cozy hammock in a duffel bag bag marked( FOR EMERGANCY USE ONLY ). In My case it occurred the day I was about to take my bike out for its first post restoration ride. My son decided drop off and store his portable table saw in my garage. He set it on a cardboard box beside the bike which collapsed resulting in it falling over and scratching my right side trunk. Secondly after all that work you will become highly attached. I have a second 89 in better shape with lower millage than the one I ride but can't make the transition. Here are some before and after picks of my 89.

-
Final Drive Oil Leak - '99 RSV
saddlebum replied to BratmanXj's topic in Royal Star Venture Tech Talk ('99 - '13)
If your used to a softer tire this could be why it feels different. The E4 has a stiffer sidewall than the shinko plus dual compound rubber. Harder center strip for wear and softer side wall for cornering. Which is probably why it feels like a new tire Ironically I plan on trying the 777 next tire change because of the cost difference. -
Final Drive Oil Leak - '99 RSV
saddlebum replied to BratmanXj's topic in Royal Star Venture Tech Talk ('99 - '13)
Not necessarily, If it were a huge miss-alignment maybe but that is highly unlikely. On the other hand a small misalignment could take quite a while, even years to develop into a leak. You have to keep in mind the seal is flexible and to some degree forgiving when it comes to alignment issue but even it has its limitations. I work with seals on a regular bases from 1/4 inch diameter up to 10 inch and occasionally larger seals as part of my job and have seen all kinds of seal issues including seals improperly installed that should have leaked almost immediately go for thousands of miles before they did. On another note I am curious about wht you don't like about the E4. I am on my second set have been quite happy with them other than I found after a while the rubber got hard before the tire wore out and started loosing grip in the corners. -
89 Front Fork question
saddlebum replied to videoarizona's topic in Venture and Venture Royale Tech Talk ('83 - '93)
When you pull it apart don't be surprised if you find it already has progressives installed by a previous owner. I pulled both my 89s apart and found both had progressives in them already. They are identifiable by the longer overall length and the closer spacing of the coils at one end. When installing progressives I always install the tight group to the top so as to not increase the live weight to the lower half of the forks. -
Cause it's the computer age And those computer geeks love to invent their own language just so the rest of us earthly folk remain in a state of perpetual confusion.
-
If the lower size goes in freely and the upper size does not go in at all, I am happy. Keep in mind, though its true clearance decreases with, age this usually occurs mainly during the break in period 1st 60,000 miles after that they really don't change all that much and IMHO too loose means more engine noise and reduced valve opening.
-
Help with Desiccant? And Coolant system
saddlebum replied to NewKid-OldBike5280's topic in Welcome To Our New Members
Except for the dried blood from the beating I would endure if Marita ever caught me doing that. -
Final Drive Oil Leak - '99 RSV
saddlebum replied to BratmanXj's topic in Royal Star Venture Tech Talk ('99 - '13)
I agree with Marcarl. you could over torque the axle nut to the point of stripping the threads and you still will not hurt the seal. If the seal is worn the usually factors are age, bearing wear or (and this may be a bit far fetched ) misaligned pumpkin. Before you reassemble it, loosen off the four nuts on the drive shaft tube just enough to allow some rotational movement in the tube. snug up your axle but not to full torque. re tighten the driveshaft tube nuts and then perform final torque on the axle nut. Having said all that don,t forget to check the axle bearings before you reassemble it. -
Wow it almost sounds like he hit deliberately. More than likely he was on his cell and did not look up before he pulled ahead. Glad your around to talk about it those type of accidents tend to be a lot worse.
-
What you got against 1st gens? You prejudice or what? Or are we just too dang fast to see ? As far as the third gen goes I cannot say I was overly impressed. Maybe I expected more due to all the hype but after road testing the one at WNY rally I was more than happy to climb back on my 1st. Gen. It seemed to me the throttle on my 1st gen was more responsive feeling a bit of delayed response on the 3rd gen. I also was not crazy about the engine vibration coming up through the seat. And finally waiting for the bike to go through its checks before firing up versus just turning the key and go was something I was not fussy on. ( Not that I plan on robbing any banks ) Otherwise I thought it was a very nice bike, ride and handling was great but I would not give up my 1st gen for it and I really do prefer the V4. Now if I was in need of another bike and was looking to get a new one it would for sure be at the top of my list of bikes to consider. Like @sleepy2 says it really does boil down to personal preference on this bike.
-
Help with Desiccant? And Coolant system
saddlebum replied to NewKid-OldBike5280's topic in Welcome To Our New Members
The descant air dryer comes apart real easy, there is a snap ring at one end you just press the end plate in a bit so you can remove the snap ring, then carefully remove the end plate as there is a spring behind it. then there is a screen and a filter to remove. Behind that is the desiccant. You can buy the desiccant pretty cheap from places that sell automotive painting equipment, as well as harbor freight in the US or princess auto in Canada. It comes in various size packages and is used to replace the desiccant in spray painting air dryers. just replace the amount poured out of the dryer with the same amount. When you reassemble push the end plate back in far enough to reinstall the snap ring. how far back is not an issue as long as you can get the snap ring in. A little shot of air into the fitting hole will pop it into place. Another trick I heard some have tried is to simply remove the desiccant place it on a tray in a small oven and dry it out then reuse it, I my self have not tried it as we don't have a small oven and my wife closely guards the big one ever since I used it to warm a pair of boots so the waterproofing wax would melt well into the leather. -
everything I save turns into junk and everything I ever tossed became valuable......Go figure
-
89 Front Fork question
saddlebum replied to videoarizona's topic in Venture and Venture Royale Tech Talk ('83 - '93)
That was the day I stopped following directions -
89 Front Fork question
saddlebum replied to videoarizona's topic in Venture and Venture Royale Tech Talk ('83 - '93)
Yup that's the way @Marcarltold me how to do it the first time I did them. then he quickly moved and stood at the other end of the garage as I proceeded to follow his directions. -
89 Front Fork question
saddlebum replied to videoarizona's topic in Venture and Venture Royale Tech Talk ('83 - '93)
If once you drain the air down as far as possible using the manual setting on the class control panel and if there is still air left in it you can slowly loosen the air line either at the forks or at the compressor unit at the rear of the bike to finish bleeding off any air that may be left in the system. -
-
Track? As In she knows were I am? As in she can find me? As in theres no hiding from Her? Not even in the garage or basement?
-
Wow that has to be the fluke of all flukes. Glad you came out of it ok as it really could have been a lot worse and within hair of being so. I hope you had spare underwear, jeans and boots cause I imagine they were not in the most sociable condition after that incident.


.jpg.67233a40d08226bf457dba7202b618bd.jpg)
1.jpg.bd7a39c9d0a82cf3bdad27f999c400c0.jpg)
1.jpg.fbbf132a10d145943488b034c997901d.jpg)