Leaderboard


Popular Content
Showing content with the highest reputation on 03/30/2021 in all areas
-
Pucster! I just got off the phone with my local Yamaha dealer. They show the stator as being the same for all the Gen 1 engines from '83 to '93. The Royal Star Ventures are different. These guys have yet to steer me wrong.2 points
-
But all that round and round and round an ........ is making me dizzy (er?)1 point
-
If you are looking to free up floor space, Before I had a lift table or a jack I put a 6 foot piece of angle iron with 2 large eye bolts and mounted that to my roof truss, And used a come along or a small chain hoist. And have lifted many motor cycles, Only front or rear at a time. If you want to get the front and rear up in the air then I would use a jack and use it until I had it where I wanted it. I do have 2x10 trusses. You could beef up the truss if you have 2x4 built, Also has come in handy for lifting lots of other things also.1 point
-
Goldenrider and I got the rear head reinstalled and timed up yesterday. Hoping to have it roadworthy later today. Hopefully, no one will need to deal with this. But if you do, here are some things we found (in no particular order): - The rear head can be removed without pulling the engine. You get about an inch of clearance and it comes out easily. Don't know about the front head, but it looks like it should make it. - The Yamaha replacement head gasket has a coating already on it. - The inside edges of the head casting are very sharp, This makes it very difficult to slide in the long chain guide (front side). We used a jeweler's file (Harbor Freight set is nice) to put a small chamfer on the inside edge. This allowed the chain guide to slide in much easier and without damage. It is a really tight fit getting this guide in place around the frame neck. - The small rolled positioning pins for the cam shaft caps are easily damaged - AND VERY SHARP. We found using the smooth end of a drill bit to roll the edges back out works. A 1/4" bit should just fit inside. Be wary of these pins while spinning the wrenches. They can, and do, leave a nasty cut on your knuckles. - Put a little oil on the pins before installing the caps (you are also to oil the journals and inside of cam caps). This helps the caps slide on much easier. - Setting the correct timing positions is a PITA. It took a couple of tries as the positions of the cam shafts move when the chain guides are put in place. - Use a paint pen to mark the cam shaft sprocket and chain position. This helped to judge moving the sprocket teeth one tooth in the chain. - Having never done this before, we preinstalled the head with the old gasket just to see how it would go. This was a good thing as we weren't experimenting with the good head gasket. - Have a good service manual. We had both a Yamaha Service Manual and Clymers. They were in general agreement but one or the other will have the illustrations/pictures you want to see. - Don't set the labelled muffin tray of bolts on the floor next to the bike. As we were really concentrating on what we were doing (radio-and-TV-off level of concentration), pictures were not taken. Sorry. I will add additional points to this list as I think of them. RR1 point
-
If I remember correctly intake clearance is .004-.006 and exhaust is .006-.008. Set them toward the higher limits as clearance shrinks with wear.1 point
-
.008 is a pretty large shim and at the top of the tolerance for the exhaust if I remember right. You will want to get a feeler gauge that goes down to at least .0015" and check with that, make sure the timing is in the right position to get proper measurements.1 point
-
I use to ride with my father as a child when it was the VTS. Then inherited both of his 1986s. One brown and one the black and silver. I've rode both of them for many years. Now that I'm in my 40's I thought I would check out the rsv. I picked up my 01 with 9k on it. I love it!
 1 point
 -
Well you know supervising the supervisor to make sure he supervises the students properly is a very important undertaking. Now I may have done a better job supervising the supervisor if there had been donuts with the coffee but sometimes you just got to work with what you got. In any case I deemed Carl did well enough that my assistance was no longer required (and a second day without donuts would have been a hard go) So I stayed home the next day to finish working on my own bike. My sons camper and a pine corner book case I was drafted into building for my daughter. PSSST I hid the honey do jar cuss the missus kept tossing pieces of paper in it, not sure what they were for but I got the feeling it was not in my best interest.1 point
-
Yep had a great few days working together! Carl let us take our time so we didn't forget anything. Even so we did put a couple things on out of order and a couple reroutes for hoses but NO missing parts and no left overs. I think we could have done the job quicker also but we would have had less time getting along. And with all the parts that had to be removed slow and patience with thinking over and discussion helped a lot! I only had to change 2 shims on the valve check--not sure how many Don did. Carl got my choke to work properly as I must have too much oil and the fitting got covered with a film coating. He also repaired my lower fairing mounting tabs. Can't say enough about the people on this site! Also can't forget to thank @saddlebum for his shim and tool loan. Also his help supervising with @Marcarl1 point
-
Valves are adjusted, got most of them right I think. Discovered that this is more interesting than it is on a first gen, might suggest to make some modifications so that it is easier to put back together. I'm thinking there is a lot of stuff just getting in the way of progress. More hoses and wires than you can shake a stick at. Hope @sleepy2 and @XV1100SEknow where all the crap attaches to. I helped them so far and @saddlebumwas here to add more confusion, so we'll see what happens next. May have a couple of scooters forsale shortly.1 point
-
You is supposed to toss the old oil out not add food coloring to make it look like new oil with updated additives. Leave it to a dutchman to stretch a penny1 point
-
Did an oil change on the Spyder last night, had more oil left over so I did the diesel as well, now the neighbor wants his oil changed. No problem, after doing my two I have more left over than I need. Crappy thing is, I have just as much now as when I started this project. Just a bit different color is all. Gotta see if Marca has some food coloring,, that otta do it!! Leave it to beaver!!1 point
-
This is what my wife considers roughing it 🤣🤣🤣
1 point
-
That looks like a nice tent! It's a bit out of my price range! I would highly reccomend setting up to pull a trailer for extended camping trips. Kris and I just use a cheap Ozark Mtn. 4 man tent from Walmart. A good sleep system is a better investment than an expensive tent. Check the gun and knife shows or Mil Surp stores for the newer black Ranger systems. They can be had for under $100 in excellent condition and will have you set for every condition. With the trailer, we have room to pack the tent, sleep systems, a small folding table, camp stove, cooking gear, a large loaded cooler(on the tongue), air matresses, and even a HF Canopy to set up the kitchen. This leaves the hard bags for snacks, water, rain gear, and tools1 point
-
What are you trying to accomplish, and what seat / bike do you have?? I wanted to firm up my seat, so I cut some out of it, added carpet pad, it worked well. 3M makes a great spray adhesive that sticks foams together, and a electric knife trims like butter.1 point
-
ALL GOOD THINGS MUST COME TO AN END! (Or so they say!)I am officially back to work at my "Day Job" starting Monday, March 15th, 2021! All of my kits I offer, as well as the Shim Kit Loan are being offered again. The only exception to this would be the Block Off Plates. My wife has eased up a bit about letting me out in the shop, FOR NOW! I have been warned that if I come in from the shop "all beat up", that will be the end of that, so to speak. I can't tell you how grateful I am to be sitting here still on this planet, and chatting with this wonderful group of people! So, if anyone needs the Shim Kit, or anything else for that matter, just let me know! Also Thank you EVERYONE for the support during this trying time! Stay safe! Earl1 point
-
I have a set of slash cut road kings on my 05 RSTD. @Squidly used to make brackets years ago so I'd see if he agrees that the dimensions above will work, but you do need a bracket of some sort to bolt them on. I believe mine came off of an 06. I love the sound, not too harsh, but like has been said a nice rumble. Mine did have the catalytic converter, but I drilled it out. I also drilled out the baffles. Good luck1 point
-
There are a bunch of threads on here about this, below is a link to one I had started last year. I bought a set of Ultra Glide pipes to put on my 2005 RSTD, but haven't done it yet. You need to make a bracket (cost me 40$ to get them cut) so the exhaust will bolt up, or some guys use P-Clamps. Also, HD put the catalytic converter in the left pipe of some years (2010 - present I believe), so you want to make sure that you get a set without that. I can let you know how it turns out when I'm done.1 point
-
The 2006 RSV I bought last December had Harley Davidson mufflers on it when I bought it. (I assume they came off of a Road King) Compared to the Baron mufflers on had on the 2005 I rode before I bought the 2006 I like the sound of the HD mufflers much better. The Baron’s were a little harsh and loud out of the box. Wrapping some fiberglass packing around the baffles on the Baron’s helped but it still wasn’t the deep sound I was looking for. The HD mufflers sound great with a nice low rumble that’s not too loud.1 point
-
How long since the oil was changed? Notchy shifting and trouble finding neutral are an indicator it’s due.1 point
-
I just checked my subscription knowing it expires in March, it says they autopay now. That’ll save me a headache most years when I forget it until I can’t post🤣🤣🤣. One more thing jumped in my memory bank, BOSS IS HAVING ANOTHER BIRTHDAY TOMORROW. Have a good one Don.1 point
-
Hey Zach, Hey Ben, Thanks for the mention! Saddlebum is correct I offer a kit that De-links the front and rear brakes and replaces every rubber brake and clutch line on your motorcycle with Kevlar lined, S.S. covered material. It also uses a modified VMAX front brake splitter. The MKI VR's (1983 to 1985) had the two piston front and rear calipers with the 80MM spread on the front caliper brackets. The MKII VR's had the four piston front and rear calipers with the 100MM spread on the front caliper mounting brackets. Since the early R1 and R6 Calipers all have the 100MM caliper mounting brackets, you would need to change out your front forks to the MKII forks to be able to put the R1/R6 calipers on your bike. This is a direct bolt on swap, and I have a set of forks if you are interested as well as the De-Link Kit. You can also install a four piston rear caliper on your bike if you swap out the caliper mounting bracket, I have this bracket and a freshly rebuilt 4 piston rear caliper if you are interested. If you have other questions about upgrading your brakes, please feel free to contact me at: skydoc17@gmail.com Good luck with your project! Earl1 point
-
I had a weird issue with that plug / fuse, the big red one on the + side. I messed with it, all good ever since. I'd be examining all connections based on your last comment.1 point
-
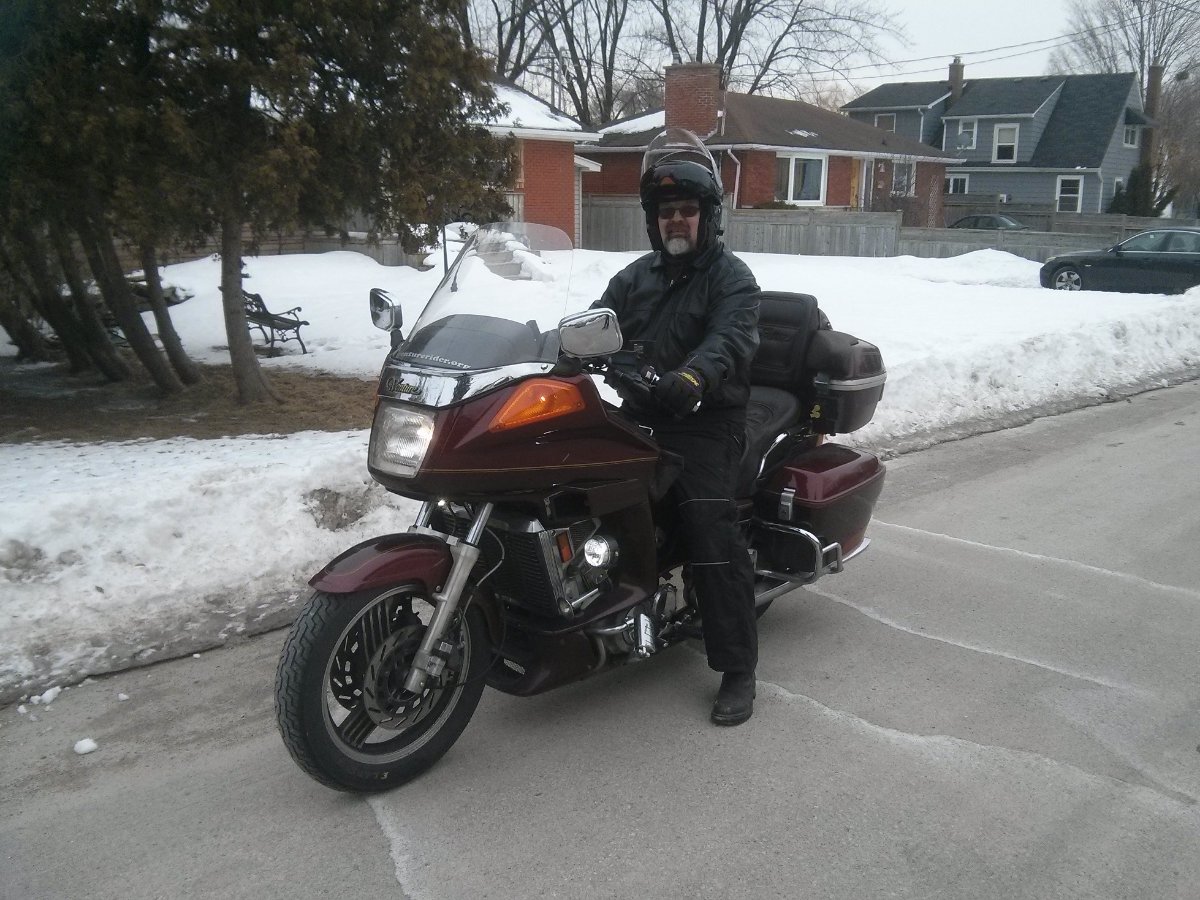
Then as long as the roads are dry and clean go! Thats what snowmobile suits are for
1 point
-
Sad news on 3/19/2021 the blond beauty has been wrecked. Left turn got me in a intersection in downtown Joplin, missouri. Head on with a full size truck. I slow down watching him . He was sitting still till I got to intersection then he pulled out in front of me. Me and Nana are still sore from the crash. Front tire almost touching radiator. Will post the picture of it . ASAP THANK YOU GUYS for the help with her she was a beautiful bike. Oh yeah was getting 33.7 MPG that day. Lmao @saddlebum @cowpuc @Pasta Burner @Squidley0 points


.thumb.jpg.7a237fd6f9e6ccc63e708f1223e49a67.jpg)