luvmy40
-
Posts
1,728 -
Joined
-
Last visited
-
Days Won
40
Content Type
Profiles
Forums
Gallery
Events
Store
Everything posted by luvmy40
-

forward control fab
luvmy40 replied to cruiserlover's topic in Venture and Venture Royale Tech Talk ('83 - '93)
How's it going on the Maxim? Are the controls going to work for you? They were for the XJ750 originally. -
Staor and/or rectifier question
luvmy40 replied to luvmy40's topic in Venture and Venture Royale Tech Talk ('83 - '93)
Just to clarify. The voltage has always dropped to around 12V at idle. It just always picked back up to 14 as soon as the rpms were back up over 1500 or so. That fairly typical of motorcycle charging systems. This one time, it took a while to get back up to 14V. I know the Gen1 MK1 had an issue with the stator not getting enough oil for cooling. I'd just assumed(I know!) that at 130K mi. any problems would have already been dealt with or would have been obvious from the start. -
Staor and/or rectifier question
luvmy40 replied to luvmy40's topic in Venture and Venture Royale Tech Talk ('83 - '93)
I'll take a look at them tomorrow but I do keep a close eye on that kind of stuff and they were fine before I left for MD, about 1K mi. ago. -
I noticed something I'd not noticed before while out on a ride this afternoon. While stopped at a traffic light my voltage was down at 12V. This in it's self is not odd. I've got the idle a little low, around 950 rpm+/- and the volt meter has always been solid at 14V when over 1500 rpm. I gave her a little throttle while still stopped, up to about 1800 rpm and the voltmeter didn't budge. When I took off from the light, I watched the voltmeter and it took a long time, maybe 30 seconds to come up to 14V. The next time I stopped, everything was back to normal. 12V at idle, 14V as soon as I took off. I haven't checked to see if the stator mod has been done or if she has an after market stator. There hasn't been any need as of yet. What exactly am I looking for on the stator cooling mod? Is there any way to determine if the stator is original or aftermarket? Does the simptom above sound like a stator or rectifier issue? Or, is it just a normal thing that I never noticed before? Thanks in advance for any input!
-
I love when I can help out another rider in need. Kris and I were out for a short CTFW session this afternoon. We'd been randomly running the back roads in our rural area for a couple hours and were headed home when I saw the tail light go out on a bike sitting at a traffic light for the freeway on ramp. The rider and his passenger pushed the scooter off to the side of the road as we went by. I spun around at the next light and came back to them, a younger guy and his GF/Wife on a beautiful older yellow Moto Guzzi bobber. When I asked if I could help he said "It's something electrical, I just lost all power at the light" I said it might be the main fuse and asked if it had glass fuses. He said he didn't know but that the lights came back on but everything went dead again when he hit the starter. Sounds like a bad ground at the battery to me, I said. He pulled the seat off and sure enough the negative battery connection was very loose. So, I tossed him a six way and he tightened the connections and the bike fired right up. They thanked us for stopping with a round of high fives and we rode off in opposite directions. I hope he learned a lesson today. Always check the little stuff and always carry a tool kit.
-
Delinked Rear Brakes are weak
luvmy40 replied to rrod1393's topic in Venture and Venture Royale Tech Talk ('83 - '93)
Well, if it's the original brake line, you'll definitely need a longer line to move the connection. But you should probably replace the rubber hoses anyway due to age and deterioration. That is if you have an '83 with the same rear MC as I do anyway. My rear MC is significantly different in configuration than the diagram in the service manual depicts. My question to any who have de-linked is why not remove the proportioning valve and tie directly into the MC without the valve? -
I'd label that as "dinnerapplebees060918" or wherever/whenever. But why not open it in paint and tag the people?
-
Odd after market parts
luvmy40 replied to dna9656's topic in Venture and Venture Royale Tech Talk ('83 - '93)
Those are definitely for "Wing" air deflectors. I'd be interested in them if you decide to sell them. -
Sidestand check
luvmy40 replied to Venturous Randy's topic in Venture and Venture Royale Tech Talk ('83 - '93)
I read this when first posted and checked my side stand to find the jamb nut loose and a good amount of wiggle. I just got around to fixing it with grade 8 1/2" hardware. Thanks Randy! -
I fixed my loose side stand with grade 8 1/2" bolt and nuts.
-
Those things are fun! I used to have a pretty steep hill side about 10' wide to mow. I used a Flymow with a couple lengths of rope and just swung it back and forth on the hill side from the top. It wasn't perfect but it a durn site easier than wrestling a wheeled mower up and down that sucker.
-
While I'm at it, I might as well add new hydraulic lines all the way around and new brake pads as well. And I forgot about the clutch master cylinder leaking too! It's going to be a busy and expensive winter!
-
I should also add steering head bearings to the list. I'm getting a bit of wobble around 35mph that is more pronounced on hard deceleration.
-
I could add the swing arm to the list but the valves were checked and adjusted as soon as I got her 3 years ago so I should be good in that department for a few years.
-
I title the folder by the event or month and year if they are just random photos, not connected to a particular event.
-
...of what I want to do to The Beast this winter. Progressive springs and rebuild the forks. New seat from Diamond Seats. http://diamondseats.com/product/yamaha-venture-venture-royale/ Ignitech TCI. COP conversion. New windshield. Replace some of the more badly damaged plastics. New front tire. Tear down, inspect and service drive shaft/final drive. Clean/polish the badly oxidized aluminum everywhere. I'd prioritize the springs and seat as #1 and #2 , the rest are on the list as wants rather than needs. The front tire should be serviceable for another season and she's running fine right now. The ignition mods are preventative rather than reactive at this point. Inspecting the drive shaft should be labor only. Now I have to start budgeting for the parts!
-
Please help
luvmy40 replied to s.tyler58's topic in Venture and Venture Royale Tech Talk ('83 - '93)
Well, RDawson beat me to the punch. and is also the source of the back rest I am in the process of acquiring! -
Please help
luvmy40 replied to s.tyler58's topic in Venture and Venture Royale Tech Talk ('83 - '93)
You are missing parts or that is an MK2 back rest(not sure which). The back rest for the MK1, and it maybe the same back rest as the MK2 with different mounting hardware(again, not sure) mounts to the helmet lock tabs and the passenger grab bar mounting point. The helmet locks then are moved to mounting points on the MK1 specific mounting hardware. I am in the process of buying an MK1 driver's back rest from another forum member. When I get it I'll have better information for you. -
LA Choppers
luvmy40 replied to Bikerider62's topic in Royal Star and Royal Star Tour Deluxe Tech Talk
With most carbureted bikes you can get away with modifying the exhaust OR the air air filter(high flow) without re jetting. -
This a good quality fuse box?
luvmy40 replied to Chaharly's topic in Venture and Venture Royale Tech Talk ('83 - '93)
Here's what I used on my Gen1 https://www.delcity.net/store/ATC-&-ATO-Standard-Fuse-Block---6-way/p_10959.h_26383.r_IF1003?mkwid=scLcgrJgC&crid=38094426869&mp_kw=&mp_mt=&gclid=EAIaIQobChMIj9m3itXb2wIVF57ACh2aGQ8OEAQYASABEgLMNvD_BwE -
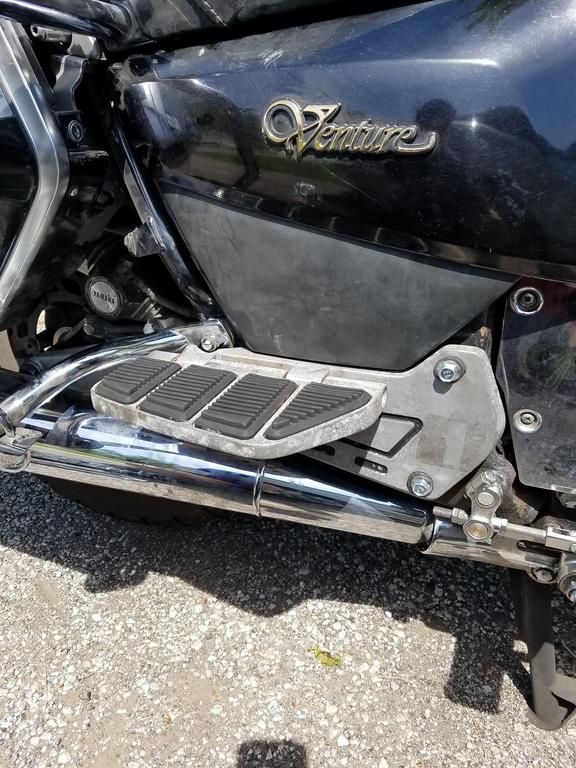
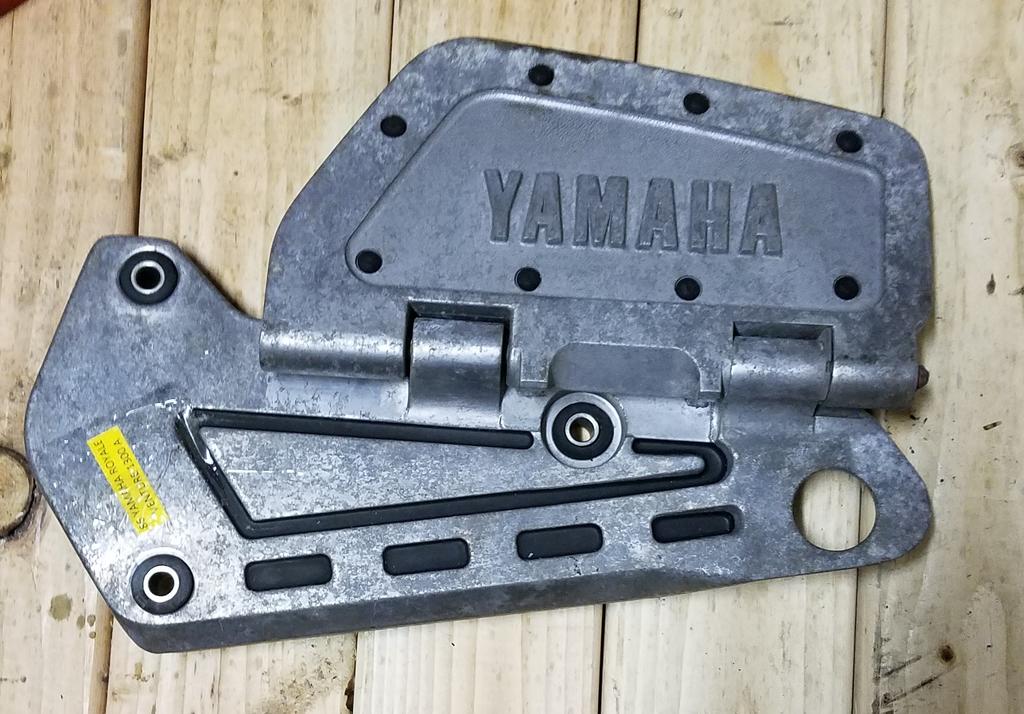
I replaced the passenger foot pegs with MK2 passenger floor boards. http://www.venturerider.org/forum/showthread.php?136829-KK2-passenger-floor-boards-on-MK1
-
KK2 passenger floor boards on MK1?
luvmy40 replied to luvmy40's topic in Venture and Venture Royale Tech Talk ('83 - '93)
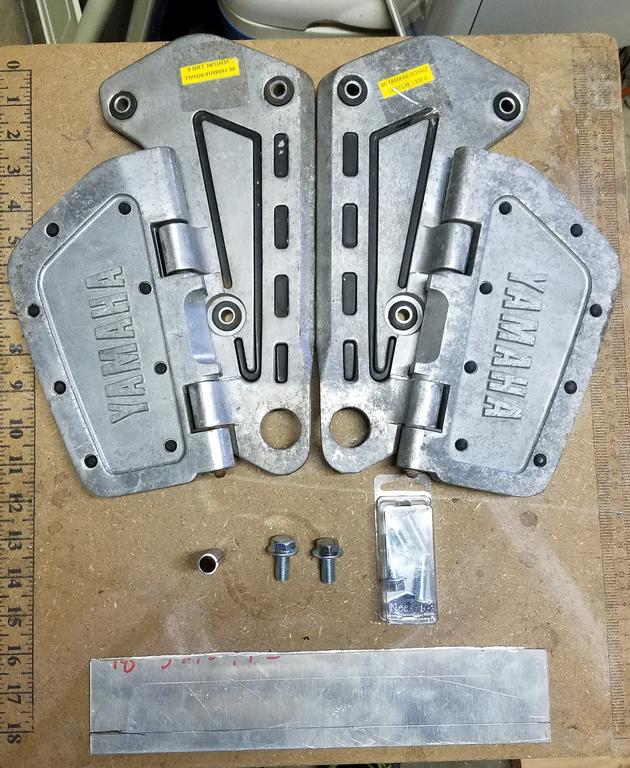
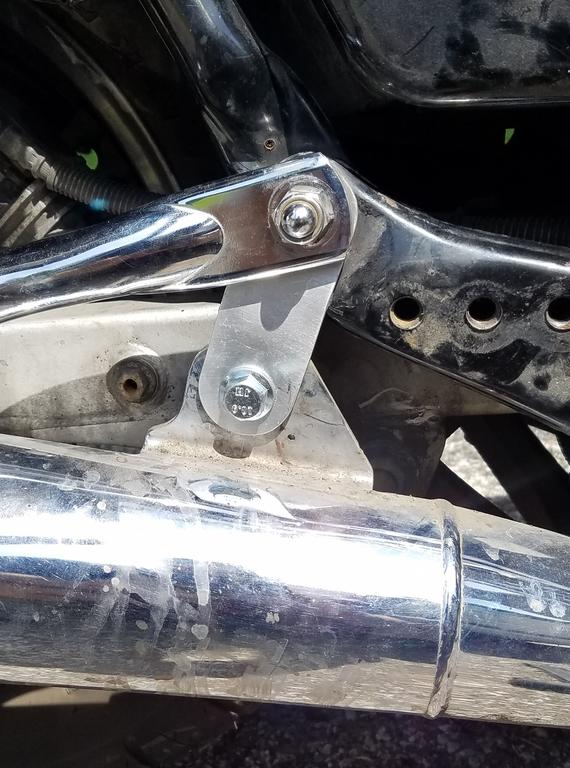
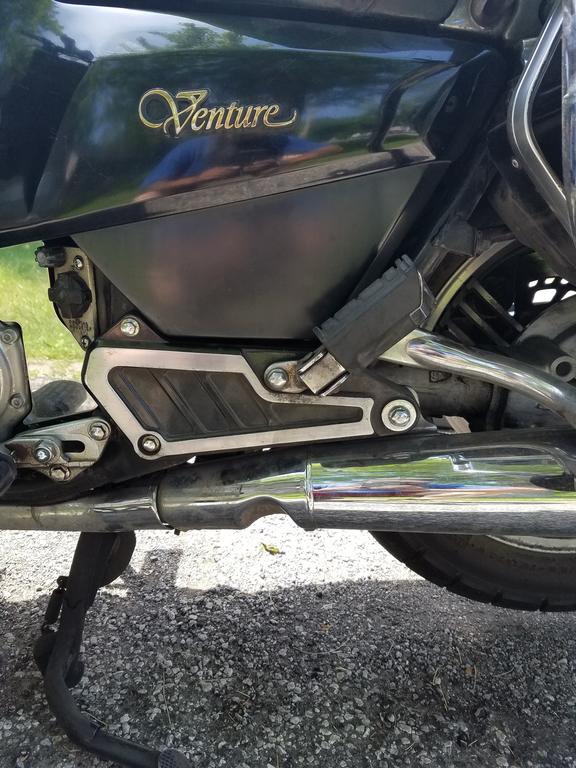
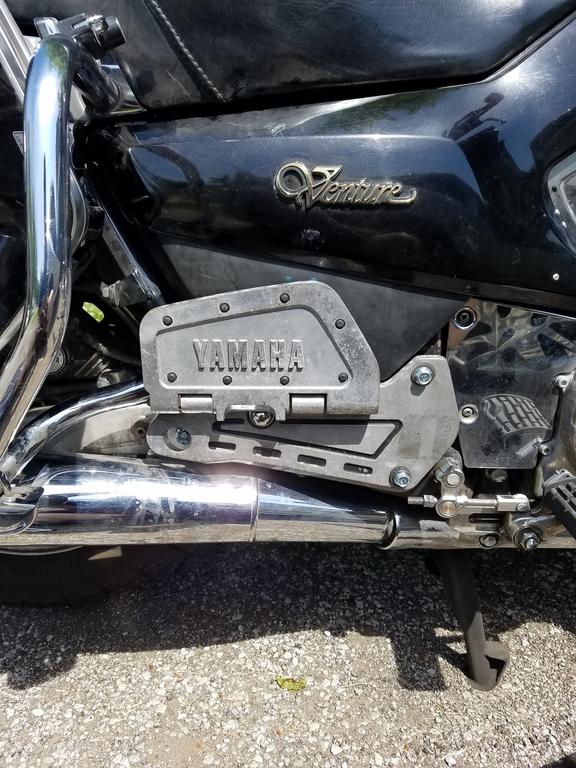
Got 'em done today! I picked up a steel spacer the correct diameter for the M10 mounting bolt, 4ea. M8-1.25x30 bolts, 2ea. M10-1.25x20 bolts and dug up a piece of 1/8" aluminum sheet stock from the scrap pile. I cut two bushing inserts from the steel spacer and replaced the insert in the rear mounting holes of the floorboard mounts. Then I made a couple muffler hangers from the aluminum stock and re-hung the mufflers from the point where the main frame, the rear sub frame and the saddle bag crash bars bolt together with the new M10-1.25 bolts in the muffler tabs. I mounted the floorboard mounts with the new M8-1.25 bolts in the front holes and the original M10-1.25 bolt from the peg mount in the rear hole with the new bushing. I had to use the thick washer that came off of the crash bar mounting bolt as the bolt was bottoming out in the frame before tightening on the bushing. Before: The raw materials: The muffler hangers installed: After:
-
It might be more of a PITA than it's worth, but take a look at the X1 from Hawk. It looks like you could plug any ear bud set into it. The issue might be rigging the mic without a helmet to attach it to.
-
Has anyone put the MK2 rear floor boards on an MK1? I have been talking to Bongobobny about this as he did so many years ago so I know it's doable. I just wanted to open up a discussion to see if there others who have done so to come with the best plan possible. Here's one of the floor boards I have. with the original peg mount removed, the front two wholes line up and the rear hole under the floor board lines up with the middle peg mount hole. The issues are: 1. The front bolts aren't long enough. 2. The rear bolt is a larger diameter and will not fit the mounting bushing on the floor board mount. 3. There is no mounting point for the muffler on the floor board mount. 1. is easy to remedy 2. I am going to try to find steel bushing inserts of the proper diameter and force them into the rubber mounting bushing. 3. BBNY fabed up aluminum hangers for the mufflers that attached to the frame. I'll probably do something similar. So, if anyone else has done this; What did you do?
-
Is it possible to?
luvmy40 replied to Air Ready Auto's topic in Venture and Venture Royale Tech Talk ('83 - '93)
Take a look at the classified section. The last I looked Mralex had a the left and right main fairings posted at a very reasonable price. I've bought a couple items from him and the transactions were seamless. It would cost a good deal more than he is asking and involve much more work to remove all the original fairings and mounts and install a bat wing. Now, if you just want to, then go for it. I'd like to see the results.