.JPG.97d34da93fc67655234eb6371e3710e9.JPG)

Prairiehammer
-
Posts
3,621 -
Joined
-
Last visited
Content Type
Profiles
Forums
Gallery
Events
Store
Everything posted by Prairiehammer
-
 If I understand, you are inserting the zip-tie into the spark plug hole and holding open the valve by putting the zip tie between the valve head and the valve seat?
 -
The screws are 4mm diameter, 12mm long. Yes, there is a gasket for the choke assembly. Part number 3JB-14536-00-00 https://www.partzilla.com/product/yamaha/3JB-14536-00-00?ref=0b935775ba783008fc3eb8976f85607427091d8a
-
Bike not running
Prairiehammer replied to jonclark's topic in Venture and Venture Royale Tech Talk ('83 - '93)
Throttle shaft seals seem not to need be ever replaced on the Mikuni BDS34/35. At least, I have never seen them replaced, although some have cautioned about too long carb cleaner soak possibly degrading throttle shaft seals. Carb parts to replace.xlsx Throttle Shaft Seals and Cleaning.docx -
Thanks
-
Don, the pics USED to be in this thread, but not now. Can you fix it?
-
Yeah, Yamaha nomenclature sometimes seems irrational. Yamaha calls the oil pan on the First Generation XVZ "COVER, strainer". Go figure.
-
Thanks, Jeff. Your thoughts match mine. The reason I inquired about the battery cables, etal; was that I see RSV (and RSTD) battery cables from various eBay sellers for $4- $6 dollars SHIPPED! I figured that for that kind of money one could upgrade the First Generation cables real cheaply, IF the RSV cables were in fact larger. The lengths of the cables are different from the First Gen, but I don't think that is a real problem; (the RSV cables are longer).
-
Bike not running
Prairiehammer replied to jonclark's topic in Venture and Venture Royale Tech Talk ('83 - '93)
First: the CV carbs on the Venture will not perform well with an open intake. The airbox and filter must be fully installed. Closed up. Second: if the jet block was cruddy, it is likely that the pilot circuits within the carb body are fouled, too. The pilot jet is notorious for being easily blocked. I suggest that you need to perform a THOROUGH re-cleaning of the carbs, replacing gaskets and O-rings with new. Attached is a pdf file for an excellent tutorial on cleaning the Mikuni BDS carbs. Vmax Carb Rebuild Guide by NaughtyG.pdf -
Nothing on Front Left Brake
Prairiehammer replied to Coyle996's topic in Venture and Venture Royale Tech Talk ('83 - '93)
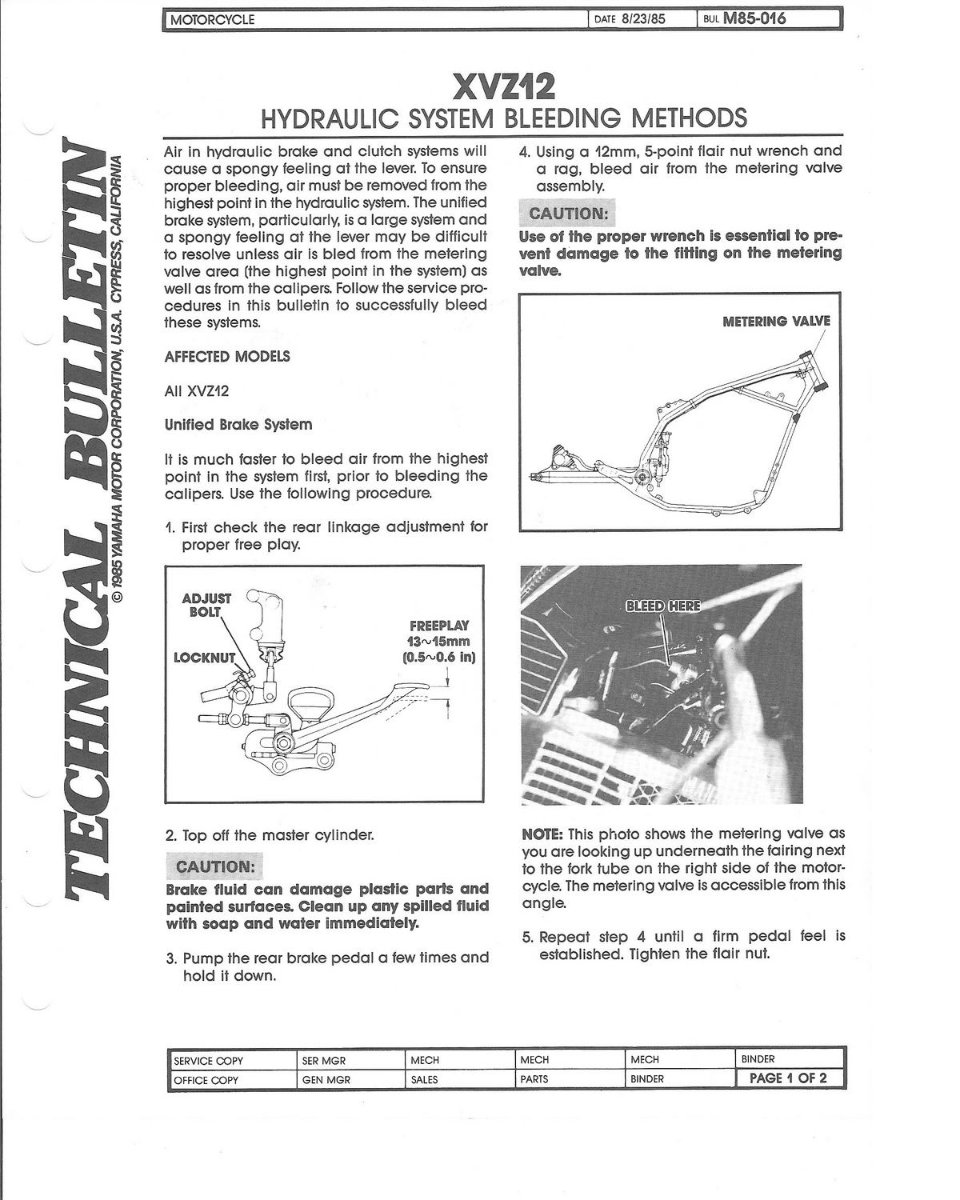
Don't start bleeding the rear/left front brakes at the left front anti-dive. M85-016 Hydraulic System Bleeding Methods .pdf
-
Removing the CB or AM/FM or CLASS will have no effect on the cruise control.
-
Carb Removal HELP! 87 Venture
Prairiehammer replied to tylerp's topic in Venture and Venture Royale Tech Talk ('83 - '93)
Drain the carbs. There are drain screws near the base of each carb and they will drain via the hoses sticking out the sides. It's messy, and because of that, I might not even drain them, but keep aware they're full of gas still if you don't. Remove the fuel-feed hose (from the fuel pump) in the top-center of the carb bank. It is the only hose with a clamp. Use a radiator pick to free it up (carefully) if it is stuck. Pay attention to how the hose is routed. Gas will spill. Remove the four vent hoses. Notice the path they follow so you can put it back together right. Remove the vacuum advance hose from the left front carb holder and bracket. Unscrew the choke cable retaining screw enough to free the cable. Slide the cable housing out of the retainer. Unwind the cable and slide the cable-end out with the cable aligned with the slot in the lever. Do not use pliers (you'll fray the wire.) Remove the pull side throttle cable. It is the outboard most cable. There's a clip that supports the two cables under the left fairing, just ahead of the adjuster. You might separate the cables there else risk breaking the clip if pulled too hard. Optionally, loosen (screw all the way on) the lock nut and then adjuster for the pull cable while carefully counting the turns so that accurate adjustment can be returned. This gives you a fraction of an inch extra play that I always seem to need. Pull the cable up and slide the cable through the slot in the inboard side of the cable retainer housing. Spinning the throttle wide open will help. You can now reach the cable-end and slide the free cable through the throttle-lever slot. This can be a bit frustrating. Maybe someone can help hold the throttle, etc. I also gently use the radiator hose pick to navigate the cable around. Again, do not do anything that would fray these cables else you will need to replace it immediately. Loosen the four hose clamps on the carb holders. Free each carb from its holder rubber carefully and individually. The application of penetrating oil may help. This is not a good place to have a vacuum leak by cracking, tearing, or puncturing a carb holder. Eventually the entire carb bank should begin to rock in the holders without a lot of restriction. Lift the carbs free from the holders and intake. Use a rocking motion and do not force. You may need to pry - gently - with a flat blade screw driver between the top of the carb holder and body of each carb to fully separate. Be careful not to damage the carb holders. Watch that cables and hoses on the right side of the bike are not interfering. Slide halfway out the left side of the frame while watching that you are not crimping throttle or choke cables. The engine intakes are partially exposed, be careful nothing foreign can drop in there at this point. Remove the push side throttle cable as it is now more accessible. Remove the carbs and set them aside. Pack a clean rag or paper towels in each carb holder to plug the intake, the crankcase breather pipe, and/or cover everything to keep it clean! Allow nothing down the engine intakes. You can have a quick peek inside at the valves though. -
What is the wire gauge of the negative, positive and starter cable on the RSV?
-
@cowpuc I knew DenDen from the Venturers Club. Indeed he was the First Gen Venture guru. I would be very interested in his info.
-
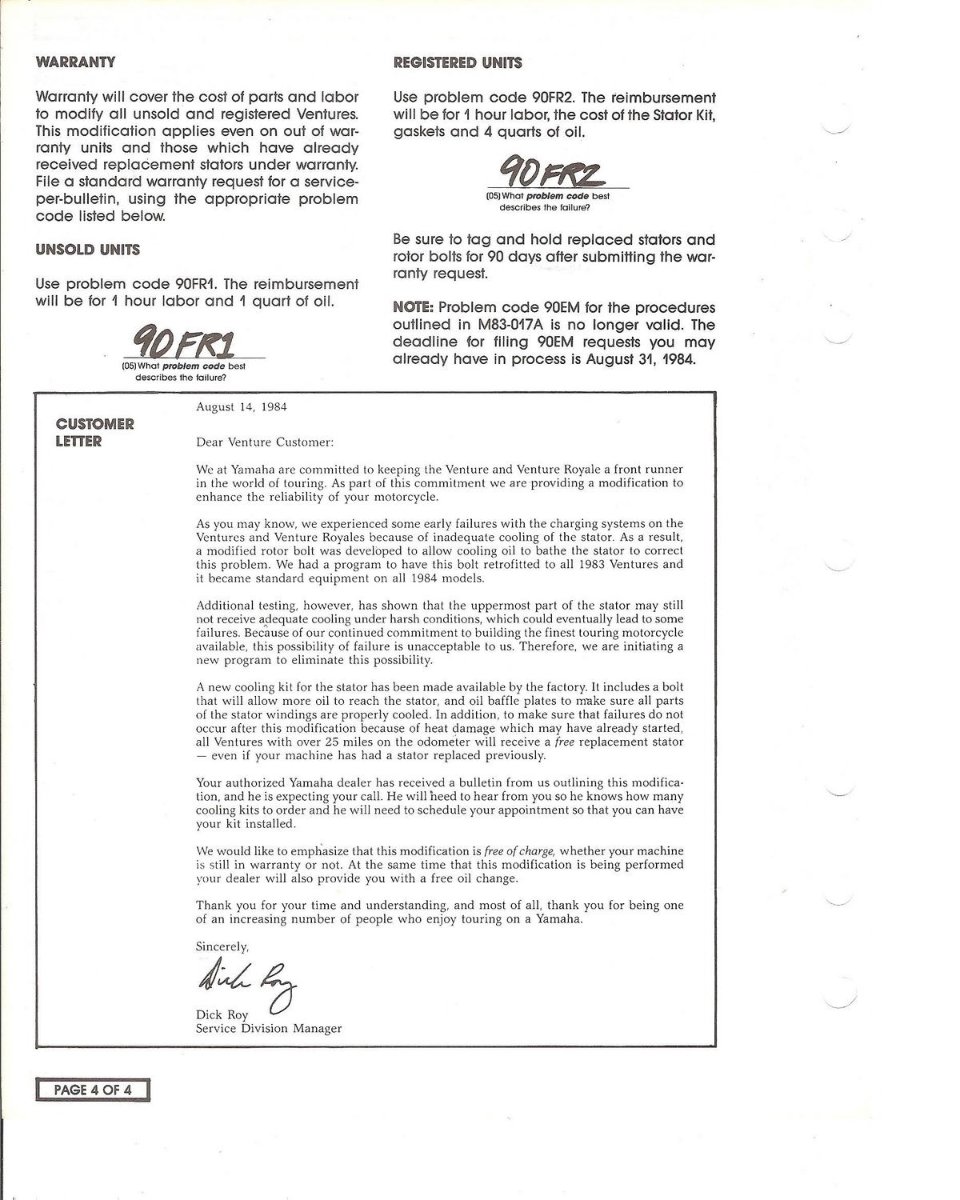
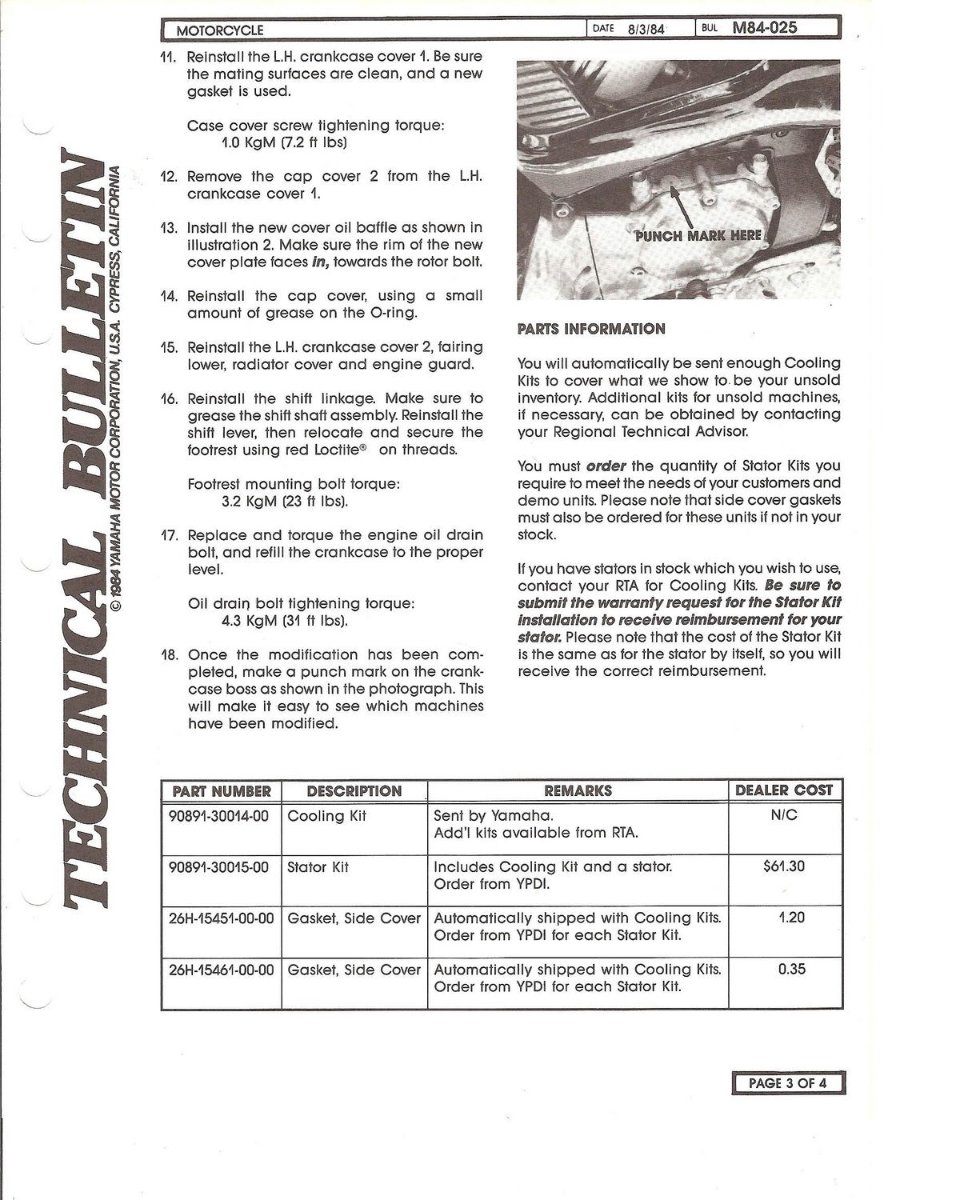
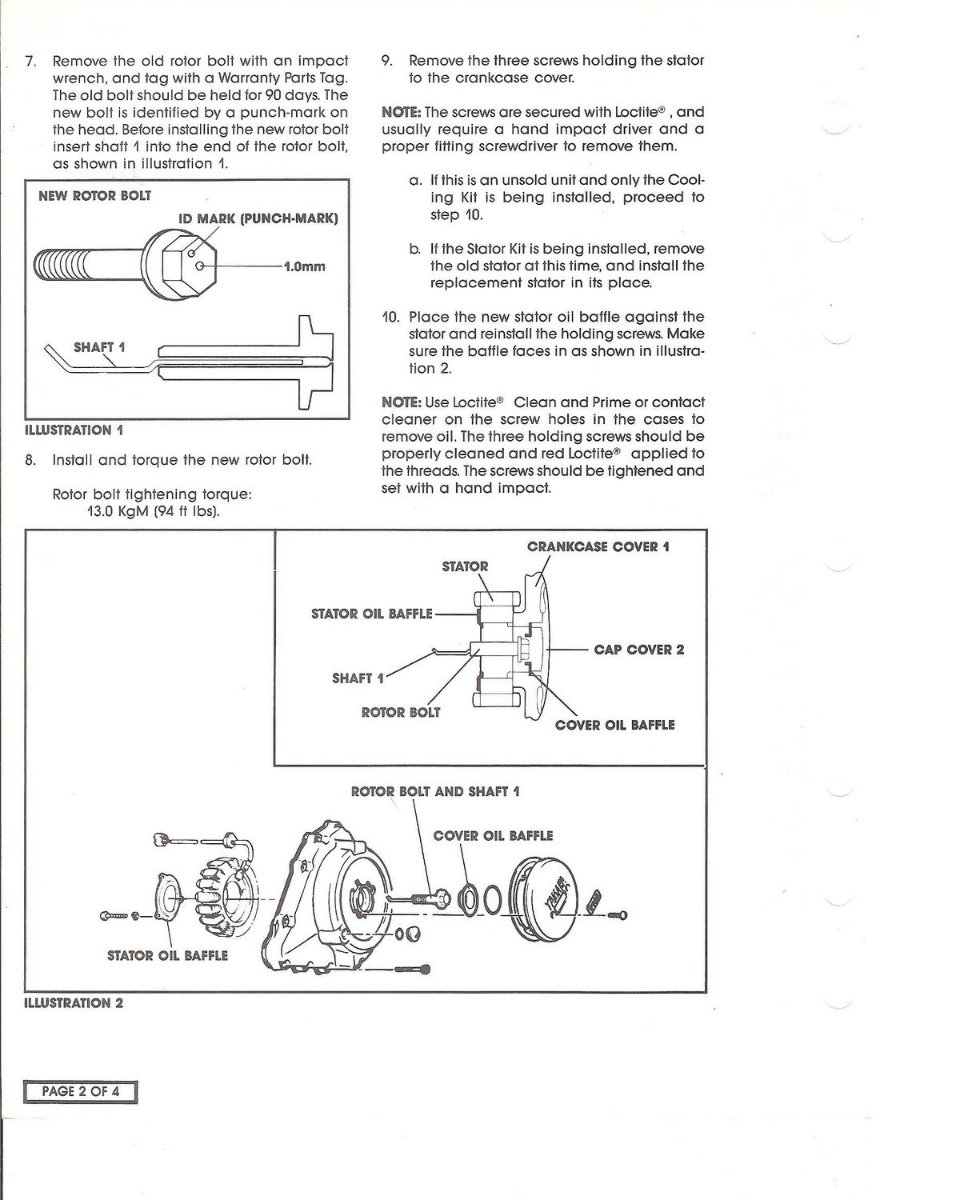
The SINGLE punch mark was indeed supposed to be done by the dealership when the stator cooling mod was performed. I have never seen TWO punch marks on the crankcase. I do not know what that is about. There was never a "recall" for the transmission fix. And it was not a warranty claim.
-
On the middle gear cover, the bolt/cap screw at the six o'clock position should have a copper washer under its head. The copper washer acts as a gasket to prevent oil escaping. If the copper washer has become work hardened (and it is once installed) it will leak when the bolt is reinstalled, even if reinstalled with the washer. The washer can be re-annealed (softened) and reused or it can be replaced with a new washer. To anneal the old washer, heat it to red hot with a torch and then quench the red hot washer in oil or water. It will now be as new (soft) and capable of acting like the gasket it was.
-
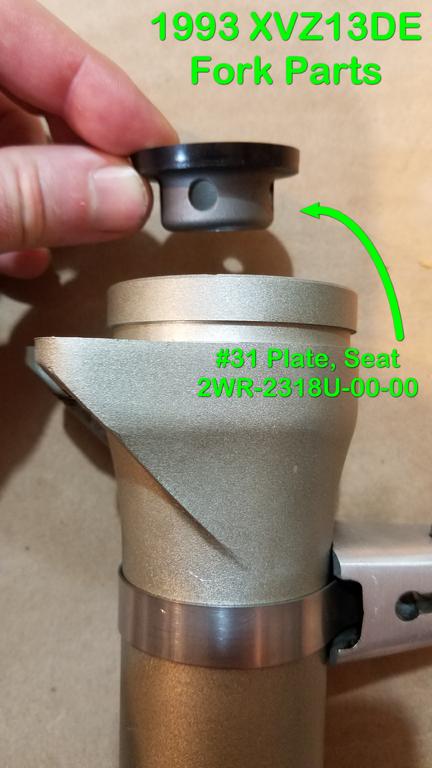
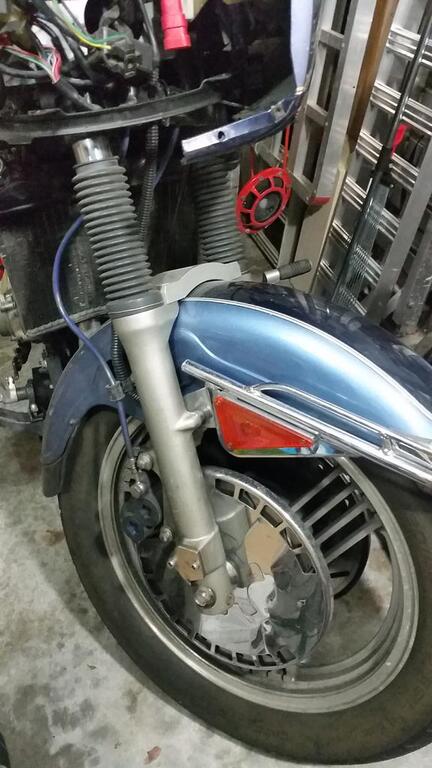
Front fork tubes
Prairiehammer replied to cimmer's topic in Venture and Venture Royale Tech Talk ('83 - '93)
The difference in the outer fork tubes is the provision for the protective accordion boots on the 1990-1993. The outer tube for those years has a groove to receive the boot. Also, the 1990-1993 outer forks are painted a sort of matte finish, on some years, other years will be "clear", "silver" or "Light Gray Metallic 1", or "Light Yellowish Gray Metallic 5") as opposed to the clear finish over polished aluminum on prior years.
-
First gen Exhaust clamps
Prairiehammer replied to Yamaha32088's topic in Venture and Venture Royale Tech Talk ('83 - '93)
There are some new "bands" on eBay: https://www.ebay.com/sch/i.html?_from=R40&_trksid=p2334524.m570.l1313&_nkw=26H-14788-01&_sacat=0&LH_TitleDesc=0&_osacat=0&_odkw=26H-14788-01-00 https://www.ebay.com/sch/i.html?_from=R40&_trksid=p2334524.m570.l1313&_nkw=26H-14789-01&_sacat=0&LH_TitleDesc=0&_osacat=0&_odkw=26H-14789-01-00 But, besides the outrageous price, the band does not come with the needed bolt: 95024-08025-00 [h=2][/h] -
You are pretty much stuck with the stator from a First Generation Venture, BUT many have incorporated the newer R/R from a FJR or even a Second Generation Venture.
-
Thanks for the info, Steve. Very sad. Dale and I have had several electronic conversations but never an in-person meet.
-
Thank you! All three of your Ventures were already in my database! Andrew Gregson (Sailur) contributed them back in June 2019. BTW the 1986 Standard XVZ13 was only available in Canada. It was never sold in the US. The official color for the 1986 Standard XVZ13S is "Midnight Silver". What became of the 1986 Royale?
-
Do you have a Venture Royale (with onboard compressor and CLASS) or a Standard Venture ( no compressor or CLASS)? If you have a Royale (CLASS and compressor) are you actually selecting the REAR shock for pressure and inflation? Not the FRONT? Are you operating and observing the CLASS read out when the ignition switch is in the ACC position, not ON? Are you observing the air pressure while the Venture is on the center stand, or while on the side stand? After inflating the rear shock to 50 psi and then sitting on the bike (now off the center stand), what is the pressure read out in psi for the rear shock? When you get off the bike, what does the read out display for the rear?
-
The screw is just to hold the valve within the valve body. One does not have to loosen or remove the screw to rotate the drain cock. If the plastic valve core will not turn it is because the detent ball and spring have rusted solid enough (no spring in the spring) to resist when you try to rotate the valve core. When you rotate the valve core the detent ball is released from one of the detent holes and engages the other detent hole. Spray penetrating oil into the hole at 12 o'clock and at 6 o'clock on the valve body. And push in on the detent ball through the detent hole. Work it.
-
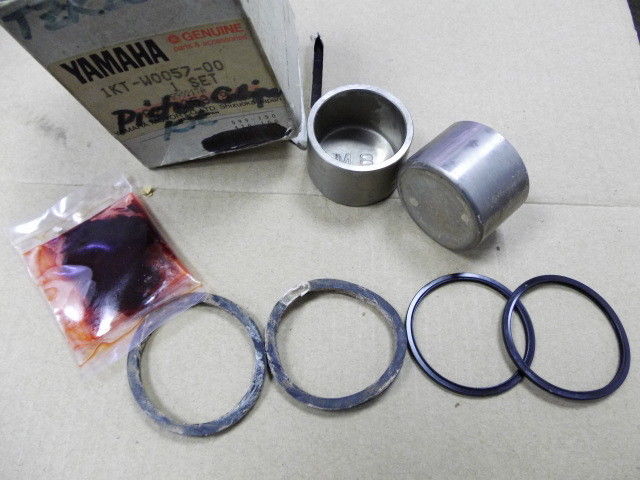
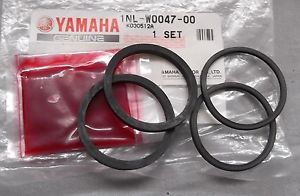
What you are missing is the fact that each Yamaha kit is for two pistons, thus two kits per caliper.


.jpg.d0dee01638aca7cf46485255680afb31.jpg)
.jpg.9f2c6aee53751ef6b81c22bf618385fa.jpg)
.jpg.ae69125d051ed5d795ea5fb6d0f9c0eb.jpg)