skydoc_17
-
Posts
2,283 -
Joined
-
Last visited
-
Days Won
41
Content Type
Profiles
Forums
Gallery
Events
Store
Everything posted by skydoc_17
-
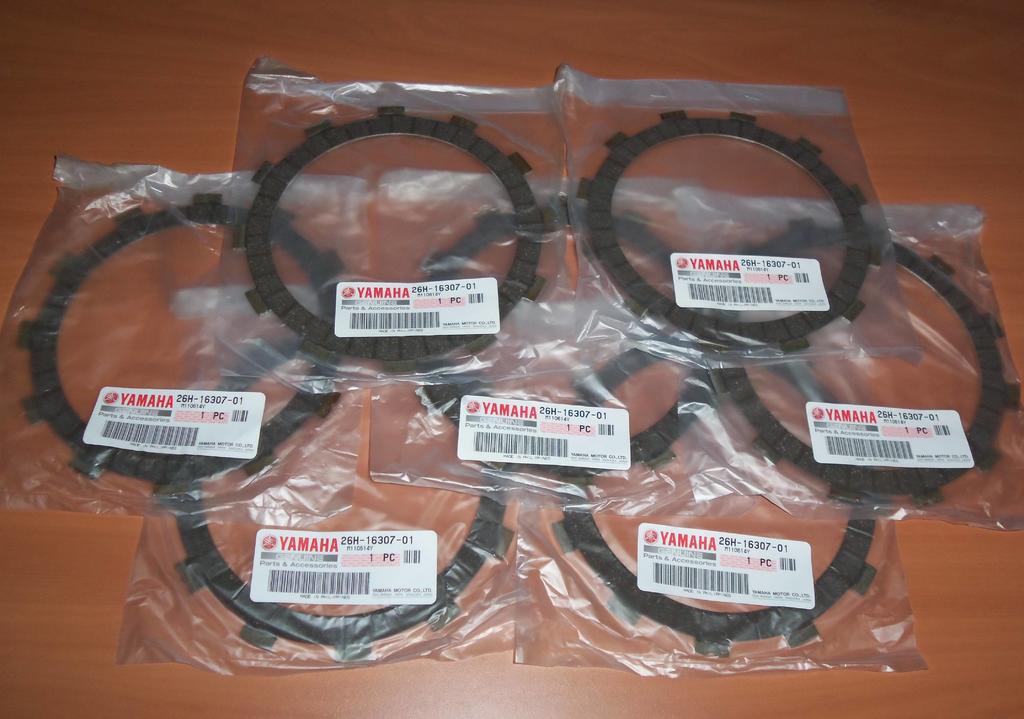
 If you have recently purchased one of my Clutch Spring Upgrade Kits for your First Gen. VR (1983 to 1993), or Second Gen. RSV or RSTD or RSTC (1996 to 2013) then these 7 brand new Genuine Yamaha Clutch Friction Discs will basically give you a brand new clutch when added to one of my clutch spring kits. These clutch friction discs work on the MKI and MKII VR's and all of the Second Gen. RSV’s, RSTD’s, and RSTC’s. If you purchase these friction discs with one of my clutch spring kits, the price is $105.00 with NO additional shipping costs, if you buy them separate, the cost is $15.00 extra for USPS Insured, Priority Mail Shipping. (shipping outside the lower 48 states is at actual cost) I accept PayPal and Checks! Thanks for viewing my ad. Earl (skydoc_17)
-
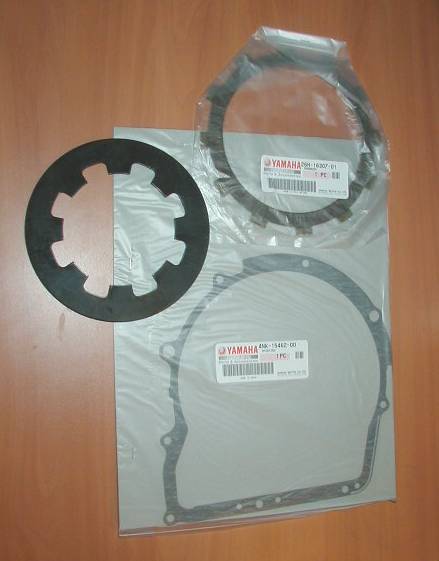
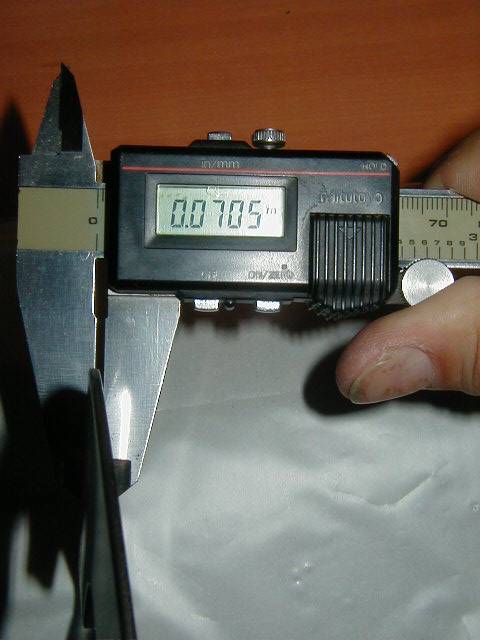
When you roll on the throttle of your Second Gen. RSV or RSTD does the clutch slip? When you "briskly" go from first to second gear does your clutch slip? Do you ride 2 up often? Are you trying to pull a trailer and is your clutch slipping? Are you thinking about paying $300.00 plus the install for a Barnett Clutch, well think again! The stock Yamaha clutch is a high quality part and will last up to 100,000 miles. The problem is not your clutch; It's the clutch basket diaphragm spring and that "wimpy" half disc that has failed. So here's the fix! Install an aftermarket, thicker clutch diaphragm spring, and full clutch disc and never worry about that RSV or RSTD or RSTC clutch again! The heavy duty clutch diaphragm spring puts 25% more clamping force on the clutch discs than the stock RSV clutch spring. Here's my deal, you get a brand new .070” thick heavy duty clutch diaphragm spring, (name brand) a new full clutch friction disc to replace the half disc, and a brand new, genuine Yamaha replacement clutch cover gasket, everything you need to do this install for $115.00 including shipping in the USA!!! I will include complete written instructions, and i have a picture file that can be downloaded! what a deal!! If you have some miles on your current set of friction discs, check my other MEMBER VENDOR Classified Ads for the remaining 7 genuine Yamaha friction discs or the seven steel clutch plates for $105.00 a set each, Making this upgrade basically, a brand new, better that stock clutch! This upgrade can be done in less than 2 hours, doesn't require the removal of the clutch basket, can be done with a 10mm and 12mm wrench and an allen wrench, and a pair of needle nosed pliers and side cutters and you will loose very little engine oil! Shipping in the 48 states is free, outside the us is at actual cost! I accept paypal and checks! Thanks for viewing my ad. Earl (skydoc_17)
- 22 replies
-
- 2
-

-
- slipping clutch
- heavy duty clutch
- (and 3 more)
-
Valve adjustment kit....
skydoc_17 replied to YamahaLarry's topic in Royal Star Venture Tech Talk ('99 - '13)
Hey Jeff, Thanks for the props about the shim tool kit! To Larry, I do still loan out my shop shim kit. It comes with the bucket shim tool, feeler gauges, various picks, and roughly 80 bucket shims of different sizes. Of course, if the shim you need is not in the kit, you will need to swap/purchase those from your local dealer. I do require that you purchase a set of Valve Cover Gaskets from me, which I keep in stock, and I require that you pay for shipping both ways for the loan of the kit. I would need your location for shipping costs. If you are interested, feel free to PM me. Thanks again Jeff, Earl -
Hey Bob, I am. But lets take a look at the tire you just mounted. Where was the weight mounted on the tire you just balanced? Was it on the same side of the rim as the valve stem and "red dot", or was it on the other side, or somewhere else? As I said earlier, placement of the dots, and marks on the rim are not nearly as important as the proper balance of the tire with as little weight as possible, in my opinion. I am mildly curious weather you added the ounce of weight to counterbalance the valve stem and red dot, (in this case a debead and tire rotation would be in order) or did you need to add even more weight to the same side of the rim as the valve stem. Either way, if the tire is balanced, and the bike rides smooth, then you did just fine, and I commend you! Earl
-
Fuel flow question
skydoc_17 replied to SpencerPJ's topic in Venture and Venture Royale Tech Talk ('83 - '93)
Hey Spencer, I am thinking that ol' Cowpuc might be on to something. Check out this link: https://www.venturerider.org/forum/showthread.php?32121-Ebay-Carb-Diaphragm-Replacement! Between the written description, and the pics, I think you will be able to take a look at your Diaphragms without any worries. We actually have contact with Cirrus Company where we get a modest discount on replacement Diaphragms. Keep up the good work, everything you are replacing is just making your scoot more reliable. If you have any questions, please feel free to ask. Earl -
Hey Bob, I am sure that your rim/tire has been reinstalled on your bike by now, so these next comments are for "next time". I feel that one ounce of wheel weights is enough to debead and rotate the tire on the rim. I would have placed the red dot exactly opposite of the "heavy spot" you found when you balanced the rim without the tire. I would also admit that my OCD makes me strive for a level of perfection not enjoyed by most people. (just ask my wife!) I would like to commend you for having the courage to do this vital maintenance to your bike yourself. I always have a great sense of pride when I work on my bike because many times I have not been impressed with the quality of service or the cost for that matter at many dealers. Good job Bob, and thanks for posting your results to the forum. Earl
-
Hey Bob, You have posed some interesting questions. I will attempt to share with you what I know about this subject. The "H" that is cast into the outside of the wheel in your first pic is the dept. the wheel was cast in. If more than one mold was used to cast this rim in dept H, then there would be a stamped number in the area before the H. (ie: 1H, 2H, etc.) Because our rims are cast in a mold and then C.N.C. machined, my guess would be that the mark you are seeing in pic #2 is the production stamp of the operator that machined your rim. The industry standard for marking a rim is actually a single punch mark on the surface facing outward, and the dimple indicates the "LIGHTEST" area of mass on the rim. Now, about the tires. You will usually find one or two colored dots on a modern motorcycle tire. The RED dot denotes where the "belts" or "Plys" overlap, and this dot shows the heavy side of the tire. You could also see a YELLOW dot on the tire, and this dot shows the lightest side of the tire. Because I mount and balance my own tires, I personally would not hesitate to debead and shift a tire on a rim to decrease the amount of weight that is needed to balance a tire/rim. I have found that dimples on the rims and colored marks on the tires are nothing more than a general reference, and depend highly on the precision of the operator inspecting the rim or tire. Not a bad place to start, but certainly not the final word on tire and rim balancing. For those of you that don't enjoy the availability of tire and rim mounting and balancing, I personally have had a dealer remove, debead, and shift a tire on a rim if I found a small boat anchor attached to one side of my rims due to the mechanic not taking the time to shift a tire to find the best match between tire and rim. Don't be afraid to speak up when picking up your dealer mounted tire/rim purchases if you notice excessive wheel weights on a rim. Hope this helps, Earl
-
Head removal
skydoc_17 replied to Tiresmoking's topic in Venture and Venture Royale Tech Talk ('83 - '93)
Hey Martin, Welcome to the Forum! Before I would go ripping heads off, I would check the Valve Lash! That low compression could be nothing more than a poorly adjusted valve bucket partially holding a valve open. Did you do a dry compression test as well as a wet compression test to see if it is the piston rings? Another thing to consider, for the price of a gasket set, valve job, and possibly a ring set you could purchase a low miles 1300 motor and rid yourself of the second gear issue at the same time. Just some things to think about and check out. Again, welcome to the forum! Earl -
Fork Overhaul
skydoc_17 replied to dna9656's topic in Venture and Venture Royale Tech Talk ('83 - '93)
Hey Doug, Where to begin! The "Spring Washer" that you are assuming is a wavy washer is in fact a tube with a washer on each end. The "tube" preloads the fork springs, and this is why your current springs are so much shorter than the new Progressive springs. The lower set of bushings are usually good, and don't need to be replaced...usually. ID mic of both the top and bottom bushings will tell the story. The top bushings are the ones that get sloppy. Unfortunately, they are no longer offered from Yamaha for either the MKI or MKII motorcycles. The upper bushings are made from a free machining mild steel called Leadloy. I have had good luck machining them from bushing bronze as well. The bushing bronze makes for a smoother fork action, but doesn't last nearly as long as the mild steel. In your PM, you asked about electroplating the existing worn out bushings, The issue with this would be the upper fork tubes are hard chrome plated. Usually with a bushing/slide mechanism, one surface is hard, (hardly wears at all) and the other surface is sacrificial. (wears the most) With the hard chromed upper fork tubes being hard, and the electroplated inner bushing surfaces being hard as well, you would most likely wear out the upper fork tube in the area where the fork seal rides, causing a leak, and requiring the upper fork tubes to be replaced. That's why the sacrificial surface is usually the cheaper of the two parts. It's just a shame that Yamaha no longer makes these parts for our bikes. To make these bushings, machine a ring OD to the size of the bore in the lower fork tube. (Which requires the measurement of that bore to .0001", to get a "push fit") Then machine the ID of the bushing to the OD of the upper fork tube +.002". (Which would require the measurement of the OD of the upper fork tube as well) Then take a hacksaw and split the ring in two. You also asked about the PVC shim that comes with the Progressive springs. I weigh 185 lbs. and used half of the provided shim in each tube. Other factors are the weight of the fork oil, if you weigh more or less, are riding two up, etc. Like I said earlier, you will be lucky if you get it right the first time. But to answer your question, you will need some shim to preload the springs, or your front end will be too bouncy. Earl -
Fork Overhaul
skydoc_17 replied to dna9656's topic in Venture and Venture Royale Tech Talk ('83 - '93)
Hey Doug, First off, I commend you for doing this project on your bike! This is one of the more complicated things that should be done to our Ventures, and many shy away from it. You didn't mention why you decided to rebuild the forks on your bike, but some of the issues would be "bottoming out" during braking, and seal leakage. You also didn't mention if you are going to reuse the old springs. If they are stock, then by all means, replace them. If they are aftermarket, and bottoming out was not a problem for you then I suggest that you place the springs side by side. If one spring is longer than the other by more than an inch, then I would suggest that you replace them. If they are close to the same length, and bottoming out was not the reason for the rebuild, then they should be OK to reuse. There are two methods for measuring the amount of fork oil to install in the forks after rebuild. The first is the "Volume" method, and the second is the "Measurement" method. Because the lower Aluminum fork tubes are castings, there could be quite a difference in the amount of fluid, (or volume) from the right fork lower to the left. After trying both methods, I personally found the "Measurement" method gave me the best results. Best results meaning smoother action of the forks as they compress, equal compression of the fork tubes as a set, and much less chance of bottoming out during a panic stop. If the fork tubes compress at different rates, (especially during a panic stop) the bike will drift to the right or left depending on which tube has the less resistance. Here is a description of each method. A: Volume Method- You measure out the same amount of fork oil for each fork tube, no matter how much it changes the height of the fork oil from one tube to another. This is the easiest method. B: Measurement Method- You fill each fork tube until you can equally measure the same amount of "air space" from one tube to the other. (Measuring from the top of the fork tube down to contact with the fork oil) This is also where you can adjust the firmness of the movement of the forks. I weigh about 185 lbs. and ride mostly one up these days. I left 7 inches of air space when I did the measurement. (It took me a few tries, removing and adding oil to find the "sweet spot") If you are heavier, add more oil. Lighter, remove some oil. (The same measurement amount in each tube) If the forks are bouncy, ie: too soft (PO GO Sticking) add more oil. If your teeth clunk together every time you go across a set of tracks, ie: to firm remove some oil. The other two areas where adjustments can be made are the preload spacer which is between the top of the spring and the fork tube cap, and the thickness of the fork oil. A small length of 3/4" schedule 40 PVC pipe works great as a preload spacer, and can be trimmed easily to find the "sweet spot" of the fork action. Lastly, by all means don't forget to replace the fork seals! I personally have never had very good luck using aftermarket fork seals, but some have. I'll leave that selection up to you. If you hit the sweet spot on the first try, consider this a Praise Jesus Miracle! It took me an entire weekend of oil level adjustment and preload spacer adjustment to get my bike "just right". Many front fork rebuilds later, I can usually get it pretty close in one long day now. Be patient with yourself, and you will reap the rewards of years of trouble free riding for the effort! If you have any questions, please feel free to ask. Good luck with this project Doug, You're a Hero in my book! Earl -
Delinked Rear Brakes are weak
skydoc_17 replied to rrod1393's topic in Venture and Venture Royale Tech Talk ('83 - '93)
Far be it for me to claim any "special" knowledge about First Gen. braking systems, but I can share the knowledge that I have gleaned by working and riding on First Gens. for over 25 years, and riding motorcycles for over 50 years in no particular order. (No, this doesn't make me an "expert", it just means I crashed a bunch, broke off a lot of bolts learning how to work on a motorcycle properly, and lived to tell about it!) 1. Brake fluid is Glycol Alcohol Based, (like Antifreeze) ANY Rubber brake or clutch line that has been exposed to Alcohol for more than 20 years is DONE. Period. Part of the "blackness" you see in your sight glass is decomposed rubber! 2. In 1983 to 1991, there was NO technology available to control the ratio between front and rear braking, (ie. computer control) other than a spring loaded "pop off valve" which by the way has been around since the steam engine days. So to compare a mechanical proportioning linked motorcycle braking system from the 80's with a computer controlled, electric over hydraulic linked braking system that may even have "anti-lock" from a late model Goldwing or BMW is well.... A Stretch, to say the least. When I first started riding motorcycles, MANY didn't even have a front brake! NONE, Nada. And I don't remember crashing into a bunch of stuff as a younger rider. I do however vividly remember NOT overrunning the ability of my motorcycle to STOP, and after i had the rear end of my bike slide out from under me a few times, I learned not to jam on the rear brake. In my opinion, it's really about the equipment you have on your bike weather it be stock of custom, and your ability to TRAIN yourself to operate that equipment effectively, no matter if it is linked, de-linked, ABS or whatever the powers that be come up with tomorrow! Now that the history lesson portion of my rant is over with, I would like to address some of the honest issues that have come up in this thread, again in no particular order. 1. If you De-Link your brakes on a First Gen. and use the port that was used for the proportioning valve and the rear brake line I can Guarantee you that an air bubble as big as a pea is going to get trapped at the junction between the upper rear master cylinder port and the new rear brake line. And if you gut the proportioning valve and connect your new line to that valve, you might as well connect an air compressor to your brake line because you will never get that air out. EVER. 2. If you use a stock right front MKII caliper or an R1 front right caliper on the rear of a First Gen. MKII the bleeder is in the WRONG place to bleed that caliper properly. Is it possible to get MOST of the air out....MAYBE, but I would hardly call that an upgrade. 3. If you buy a new stainless steel, kevlar lined, line set, and install it on a set of 30+ year old calipers and master cylinders OR a set of 15 year old EBAY R1 or R6 calipers and your braking performance doesn't improve much or you have leakage, or the master just flat won't activate the caliper, then don't blame it on the line set, the real problem is, you haven't completed the upgrade yet. You wouldn't put one new tire on your car then wonder why the other three keep sliding off the road would you? 4. For the MKI owners, (1983 to 1985) There are two excellent upgrades I suggest you consider. A) The MKII rear master cylinder has a larger bore than the MKI and is a direct bolt on item. B) The MKII Front Forks will allow you to install 4 piston calipers (even the R1/R6 progressive engagement calipers) and are a direct bolt on replacement. Yes, you will have to pony up a few bucks for these upgrades, or you could just plop down the cash for a new Wing or BMW. 5. There is a difference between the MKII rear brake caliper and a Second Gen. rear caliper. The MKII rear caliper has 4 pistons of equal size, and the 2nd Gen. caliper has 2 larger pistons and 2 smaller pistons. This is called a progressive engagement caliper. When you lightly engage the foot pedal, the two smaller pistons start to move first due to the smaller surface area. As you engage the pedal more, the larger pistons start to move to the point of full engagement of all 4 pistons. The Second Gen. Caliper is a direct bolt on item for the MKII VR, and the bleeder is in the correct position to bleed this caliper properly. Now this is what I call an upgrade! 5. This next tip is for the Second Gen. owners, or you "BIG guys" that have had trouble with the rear brake locking up on your MKII First Gens. I highly suggest you consider the KEVLAR (Arimid is the generic name for kevlar) rear brake pads. The reason behind this is this pad was made for bikes that can go 160 MPH+! You won't even warm these pads up at highway speeds. You will get decent braking action, but a MUCH smaller chance of lock up. Normally this is where I would sneak a link to the items I offer in the Member Vendor Section of the Classifieds to the original poster that mentioned an issue with his First Gen. but I think this time I would like to point out to all of you "Arm Chair" mechanics, who haven't actually tried any of the upgrades available for the First Gens. or you posers, (I'm sorry, that was a typo, I meant to say POSTERS!) that think the answer to the issue this gent is having with his motorcycle is "well, if all of the motorcycle companies are putting linked brakes on bikes, it must be a good thing!?!? The last time I looked, this was the First Gen. Tech Talk part of the forum, and this is where I always came when I needed help with MY First Gens. My thoughts, for what they are worth. Don, I'm sorry brother, I think I'm channeling Yammer Dan! -
Hey Robert, Welcome to the forum. Stick around, you may make a friend or two. "Safe Speed" is a rather relative term in my opinion. I have personally rode a Second Gen. over 110 mph without any problems what so ever. With that being said, I have been on a highway fully loaded, with a 50 mph cross wind going 45 mph, and could barely keep the bike on the road. My personal style of riding is usually "quick" compared to other riders. Weather conditions, fatigue, road conditions, luggage and passenger load all come into play on a motorcycle much more than in a car or truck. If that "little voice" in the back of your head is telling you that you are going too fast, then most likely YOU ARE! One of my Ventures has been so heavily modified that my dear wife will no longer ride with me on that motorcycle. I am sure that as you ride your RSV for longer periods of time, you will find that the "going fast" part will exceed your expectations easily. I am also sure that you will find that the stopping, and maintaining control while stopping will be the determining factor in your quest for finding the magical "Safe Speed" of your bike. Like I said earlier, Welcome to the forum Robert, keep coming back, and by all means, get out there and ride and report back to us on what you have found out about what your safe speed is! Just my thoughts for what they are worth. Earl
-
Someone PLEASE...
skydoc_17 replied to s.tyler58's topic in Venture and Venture Royale Tech Talk ('83 - '93)
That a boy Steve! Don't give up on the old girl just yet!! Bravo to you Dave for sharing that radiator with Steve. Like it has been said many times, this forum is a Family. Just because we all are not related by blood doesn't me we don't care very much about each other! Good Job! Earl -
Someone PLEASE...
skydoc_17 replied to s.tyler58's topic in Venture and Venture Royale Tech Talk ('83 - '93)
Hey Steve, As it is with MANY things that are important in life, your wife, your children, your Car, or your truck, it's OK to be angry with them my friend, BUT you NEVER GIVE UP on them! This is a 35 year old motorcycle, and from time to time it is going to need some replacement parts. Count on it. The fact that it is paid for means that you can spare a little time and money on it. Think of how you would feel if your bike was broke down, AND you had a loan payment on it! For me, these motorcycles have been a "Labor Of Love", just like my wife or my children. I don't always like how they act, or like what they do, but I ALWAYS love them. Every time I get on my 87'VR and I start her up, my spirit comes alive! EVERY TIME! If it means I have to twist a wrench to get that feeling, I would gladly do it. EVERY TIME! If you don't get that feeling from you 83'VR, then perhaps you should trade it in for a PRIUS! When I was a child, my Father, who was a very wise man used to say to my brother's and myself, "Boys I love you with all my heart, and wouldn't trade a one of you for a million dollars..........BUT I wouldn't pay a nickel for another one of you"! This very important life lesson has stuck with me thru all these years, I LOVE my 87'VR with all my heart, it has given me times of great pleasure and pride, it has also been a great disappointment and a source of embarrassment on a few occasions. But as I mentioned earlier, I have never given up on the old girl, and the good times have greatly outweighed the bad times, much the same way my relationship with my wife and my children has been. With some time and patience and elbow grease, "This too will pass". Just my thoughts, for what they are worth. Earl -
Hey John, Nice Looking Push Bar you have there! I had pretty good luck moving the two sensors closer to the center of the bumper area. See how much wire you have, move them closer to the center of the bumper, drill new holes, reinstall the two sensors, and go to an Auto Body Store and find a set of "Plastic Plugs" that will snap right into the old sensor holes. This worked for me, but it wasn't on a Ford. The "Plugs" are used to hide Screws in the interior of a vehicle but work great for this project. I bought a small rattle can of touch up paint at Wallyworld and sprayed the plugs, couldn't tell afterwords. Hope this helps. Earl
-
NO TOM, That's not a fat joke....It's a "FAT BIKE JOKE"! Skydoc "skinny bike" _17
-
Hey Saddlebum, Not to worry about all of those Spyders, with BIG TOM at the helm, we may have to call his new scoot a "WIDER"! Couldn't help myself TOM, after the shock of this morning! You're still in my book, no matter what you ride! Earl
-
Hey Tom, SAY IT AIN'T SO!!! You sold your scoot??? How in the world am I gonna' find the WNY Rally without your BIG old BLOOMERS flapping in the wind! I actually have a pic of your bloomers flappin' on my GPS over Pioneer Motorsports, and the closer I get to those bloomers, the happier I get....WAIT, that didn't come out right! DELETE...DELETE...DELETE! Don't be a stranger TOM, Maybe we can Trike a PRIDE SCOOTER for you or something! The next thing you know, Yamaha will release a 2 cylinder, air cooled Venture......wait a minute...... somebody pinch me, and wake me up from this nightmare! First Mama Yama, then BIG TOM, this is just more than a man can bare on a Sunday morning. Honey, fix me a BIG cup of the "Kool-Aid"! Both Jean and I wish you the very best in your retirement, whichever way you decide to go Tom, you have been, and will always be my Hero, (you old coot)! Earl and Jean
-
Battery issues
skydoc_17 replied to acobb's topic in Venture and Venture Royale Tech Talk ('83 - '93)
Hey Addam, Welcome to the forum! I'm sure with the help of the members of the forum, you'll have that pesky electrical problem solved in no time. As for Jeff, and Bobby, thank you, my friends for the kind words about my Fuse Box Upgrade Kit. I know I have told this story a few times before, but next month will be ten years since I purchased my Venture, and reading this thread brought back the memories of how the fuse box upgrade kit came about. Like many of us, I had come across a low priced 87' MKII Venture, and having owned them in the past I just couldn't pass it up. As is the case most of the time, this bike was in need of some TLC, but having owned a few before, I didn't think there was anything wrong with this bike I couldn't handle. I had just joined the VR.ORG Forum, and a few of the members were getting together in Gettysburg Pennsylvania for a "meet and greet". I had just finished a rebuild of the Carbs; and was dying to get this baby out on the road and put some miles on her, plus I wanted to meet some of the people that had been so kind to me when I introduced myself on the VentureRider Forum. I left out Saturday morning bright and early on RT 30 hoping to be in Gettysburg before noon. I shunned the Turnpike because Rt 30 is a wonderful twisty road thru the mountains, and I wanted to check out the handling of the bike. I was just west of Chambersburg Pa. when I crossed a set of railroad tracks, the kind of tracks that make your teeth clunk together, when I lost all power on the bike! It sounded like popcorn as I looked down in horror watching all of the fuses from the fusebox rain down on the roadway! Every clip in the fuse box had broken and I couldn't even light a cigar! I thought the bike was ruined. I called my brother on my cell phone, he came with the trailer, and that was the pitiful end of my first "meet and greet". I never even made it. I took some ribbing from the guys on the forum, and my wife wanted to turn the old 87'VR into a planter in the front yard, but I was determined to get this bike on the road. And so the Fuse Box Upgrade Kit was born. That was 10 years and 85,000 miles ago, and she is still running strong. Oh, I did have to build my wife a planter in the front yard though. I wish you the best of luck with this project, Addam. Don't give up just yet. And if by chance you do have some use for the fuse box upgrade kit, here's the link: http://www.venturerider.org/forum/photopost/showproduct.php?product=59&title=first-gen-vr-fuse-box-upgrade-kit&cat=17 Thanks again Jeff and Bobby, for reminding me that "we've all been there"! Earl -
OK Bobby, You got my attention! First off, Congrats to Andrew for his "new to you" Venture! You won't be disappointed. I offer two kits for the Second Gens. The first kit is the basic kit, which will take care of a clutch that has NOT been slipping for a while, and has relatively low miles on the engine. Here is the link to that kit: http://www.venturerider.org/forum/photopost/showproduct.php?product=62&title=second-gen-heavy-duty-clutch-spring-26amp-3b-full-disc-upgrade-kit&cat=17 If your bike has higher mileage, or the clutch has been slipping for a while, I suggest that you replace the remaining clutch friction discs, here is the link for that kit: http://www.venturerider.org/forum/photopost/showproduct.php?product=53&title=first-and-second-gen-7-new-genuine-yamaha-clutch-friction-discs&cat=17 I personally am the kind of person that likes to repair things ONCE, and get on with the riding part. If I had purchased a used bike with a slipping clutch, I would repair it one time, using both kits, and be done with it. With that being said, there has been MORE than one time that I basically spent all the money I had on the purchase of a new to me scoot, and parts money was pretty scarce. If this is the case, then install the basic kit, and when she slips again, install the second kit. Your mileage may vary. You do have the advantage of the extended riding season being as far down south as you are, so your repair "down time" is much shorter than someone like myself that lives much farther north. As always Andy, only YOU know how deep your pockets are, and weather or not you want to work on the same issue over and over again. I'll leave that choice up to you. If you have any other questions about your clutch or your bike in general, please feel free to pose the question to the forum. There are many members here that will guide you thru pretty much any repair or mod you would like to do to your bike. Congrats again Andy, and welcome to the family! Earl
-
Hey Randy, The journey doesn't end just because you sell your bike! The knowledge that you have can now be shared with the newer members of this forum. Ninja's can't be Ninja's forever, there comes a time when the older Ninja's TEACH the younger Ninja's how to be good Ninja's! TIME is a beast that no one escapes. It gets us all. It sounds like you have found a vehicle that will take you thru the next part of your journey, my friend. GOOD for you. If this new vehicle allows you to enjoy the road with your sweetie, then it's all good. I have ridden many thousands of miles with my wife Jean, but since her heart attack, she doesn't feel comfortable on my 87'VR any more. All of the riding I do now, I do alone. I do still enjoy the ride, but miss my dear Jean. A change is in our future, I just haven't had the courage to address it yet. The other posters are right on the money with posting your bike on this forum and if you wait until spring, and polish that bike up a bit, you will get every penny the market will bear for your wonderful machine. Because this is YOUR motorcycle, you get to decide who will be the next owner. There's a LOT of power in that. I am sure you will choose wisely. I have turned down "brain dead" money for the sale of one of my motorcycles because I knew in my heart that the person buying the bike didn't have the skill or the attitude to own the bike, or I just didn't like the guy! In my opinion, one of the coolest things about life is that we get to try things, and if we live thru the journey, we get to try something new. I have always been genuinely impressed with your mechanical ability Randy, and now I am even more impressed with your ability to embrace you change in attitude, something I personally have not been able to do...YET. Please consider sticking around the forum Randy, I can personally think of a thousand questions I would love to ask you about Ventures, and Life! Maybe not in that order! Earl and Jean
-
Spitting oil
skydoc_17 replied to Air Ready Auto's topic in Venture and Venture Royale Tech Talk ('83 - '93)
Because gas freezes at negative 250F, at 50F your fuel is near boiling at this temperature. This is the reason there is no remnants of the fuel leakage on the floor. My guess is the line on the fuel pump that goes up to the Carbs. that is held on with a spring clamp is leaking there. Install a hose clamp on the fuel line (or both sides to be sure) and see if the fuel issue goes away. Also while you are down there, (fuel pump area) have a close look at the fuel filter. I have seen those crack in the tube area where the fuel lines connect. As far as the coolant leak issue goes, I have a kit for that. Here's the link: http://www.venturerider.org/forum/photopost/showproduct.php?product=186&title=first-gen-1983-1993-radiator-drain-upgrade-kit&cat=17 The O'Ring in this kit is slightly oversized, and made from Nitrell to stop that pesky leak. It takes about 30 minutes to install, and the kit also comes with a S.S. cap screw and lock washer to replace the cheesy metric Phillips head screw which the bike came with. Lastly, if the specks on the wall that came from the exhausts didn't run down the wall like oil would if you splashed it on the wall, then it is carbon washed out of the exhausts by condensation. Nothing more. Replacement of a water pump will NOT address a coolant leak in the area shown in Puc's video. Earl -
Hey Jeff, Both Jean and I are sorry for your loss. If we didn't love them so much, it wouldn't hurt so bad. I'm sure that Molly will be waiting at the Pearly Gates for you when you get there. As it is with all GOOD things, the memories last much longer than the grief. Our prayers are with you, my friend. Earl and Jean.
-
I used one of the Cherokee's that was a rental unit for a company training trip back in June of this year. 2017 with 30K on the clock. Driving from Pa. to NY, highway, the auto trans dropped 4th gear at 70+mph and the rear wheels came off the ground! While in third, trying to "limp" to the next exit, it dropped third, and almost threw me in a ditch!! I drove the last three miles on the shoulder, at 26 mph in second gear. Called Enterprise Rental, they sent out a 2017 Nissan Rogue, which was twice the SUV the Jeep was and I continued to NY, and drove back and forth to class for the week, and back to Pa. without an issue. The Rogue got twice the gas mileage the Jeep did. Just sayin'. Earl
-
Hey Joe, It's GREAT to see you back on the Forum, It's been a while! I can't offer you any suggestions on where to get this service done in Orlando, but I can offer gasket sets, and my shop shim kit if you wanted to do this service yourself while visiting Florida. If this would work for you, let me know. Again, great to have you back! Earl