videoarizona
-
Posts
4,226 -
Joined
-
Last visited
-
Days Won
15
Content Type
Profiles
Forums
Gallery
Events
Store
Everything posted by videoarizona
-
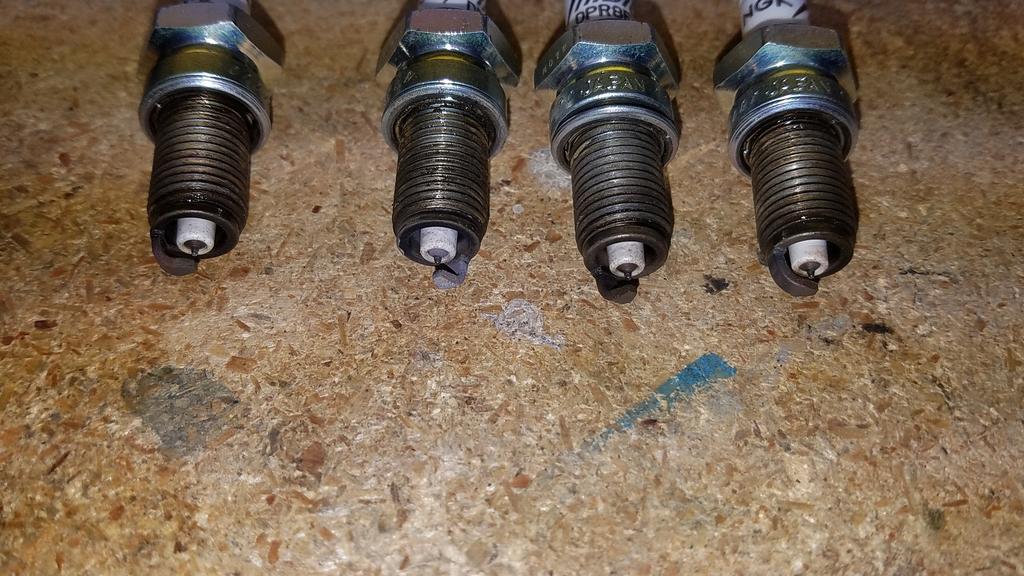
Got tired of sitting around in the heat...decided it was time to have some fun. Have the RSV torn apart. Cleaning, adjusting, lubricating.... Got to the sparkies. Iridiums. About 8K on them...including that punishing trip back East with headwinds and a full load. They look really good! Even still gapped at 32 thousanths. The tips are clean, the insulators are clean...everything looks fine. (disregard the tip color of #2 plug...they are all the same. Must have been the way the flash hit it.) The pic is before I cleaned anything... So...my instinct says to put them back in. Heck...my Yukon XL went over 100K on the same type iridiums...why can't these go more? So that is the question to the brain trust. What would you do?

-
 Yep. By taking off the rear wheel, then slipping the axle back in...you can tell the alignment. If the axle goes in easily, she's aligned. If not...loosen the acorn nuts, slide the axle in then tighten the nuts. The axle should move freely. I do this anytime I have the rear wheel off. Just to make sure. Besides once you are in there, it's time to grease everything anyway...so why not one little extra step?
 -
Vacuum leak???
-
https://www.bridgestonetire.com/tread-and-trend/drivers-ed/ceramic-vs-metallic-brake-pads Seems to be the middle choice.....maybe stick with organic for the rear for less performance???
-
Prayers...Bob....come on guy....fight this....we love you, brother!
-
Lift the lid and wiggle the wires with the bike in "aux" mode. See if the display is intermittent.
-
Changed my mind. Going to also see if I can get the Gen 2 engine guard braces installed. Got one almost ready to go but forgot which way the little brace goes....time to search the web site and see if I can find the instructions written by the member vendor that made them....always something! Update: Didn't get the braces on. While tightening one of the bolts on the right side brace, the brace snapped. Yep. Guess I'm stronger than I thought....NOT! So much for that idea.
-
My goal for today is to hope the painters finish painting the house. Downside is I'll have to write a nice big check for them. Sigh. It's only money.... P.S. I like Richard's and Carl's posts better....
-
Glad you are home safe. Prayers Up for mom!!
-
https://www.venturerider.org/forum/showthread.php?493-CLASS-E4-Error-Repair
-
Excellent find! The E4 error. Easy fix. On the right side of the fairing, lift the lid holding the Class control and look down. At the front is the overflow bottle, the rear is the white Class connector going into the controller. That connector strains the circuit board and cracks develop on it. Solder the connector and all should be well again. To get to it, take off the top panel on the fairing, then the Class controller. While you are there, take off the CB antenna cable, clean, check your signal strength and put it back. The rest is easy. Take the controller apart, pull the circuit board and resolder the pins for the connector. Use a magnifying glass to make sure you get a good connection. Put back together and test. Don't over heat the board wit the soldering iron...use a pencil if you have one. I found pics on the forum somewhere.... david
-
Really good to now a member of our family made the ride! Thank you for sharing...
-
:sign yeah that: Lots more meets to enjoy! Agreed... Prayers Up, Bob!
-
Full LED conversion
videoarizona replied to Shadowhawk's topic in Royal Star Venture Tech Talk ('99 - '13)
Sorry for late response...been out of town. I got mine on EBay.... Like here.... https://www.google.com/search?q=led+motorcycle+reflector+lights&rlz=1C1AOHY_enUS709US709&tbm=isch&source=iu&ictx=1&fir=J007NlApwz6ObM%253A%252C8PhIg7M4aJ9i3M%252C_&vet=1&usg=AI4_-kSl3X7wgLQ9NFa_NZhPDRztjfKIYw&sa=X&ved=2ahUKEwjxhsLR9K3jAhVLpZ4KHUmeC3cQ9QEwAXoECAkQBg#imgrc=_&vet=1 Mine are two way...ie...turn and running lights. Look for those with 3 wires. -
Interesting thread. I like CD's too. But didn't want to go to the trouble of finding and mounting a player on the RSV. I went back to cassettes! At least now I can mix my own mixes....LOL! If I can figure out how to mount an SD unit and get it to play well with the controller...I'd be really happy. I just added an SD card to the Sierra truck and have around 5k songs on it. That would be a hoot to have on the bike! As far as foam is concerned, It shouldn't be to expensive! Open cell or closed cell. If it's that bad in your area, find a Harbor Freight nearby and look in their sales stuff. They have instrument type cases on sale right now. Maybe cheaper to buy the case, take the foam out and use that. I don't know...just another off-the-wall-thought from me. But yea, building a simple foam insert for the saddlebag would be a cheap and easy way to go. It also looks like there's enough room to mount the CD unit on one end and leave the other end for tools, etc.. Good luck...keep us posted. Notice the mounting angle limits....below https://www.clarion.com/us/en/products/2007/audio/changers/changers/DC625/us-en-product-pf_1165294763815.html
-
My new 2018 and what I think
videoarizona replied to dave_wells's topic in Star Venture and Eluder Tech Talk ( '18 - Present)
Dave, on my past 3 Yamaha bikes, the widest and tallest Clearview with vent did the trick for my lady as far as buffeting. Got rid of most of it...making her ride far more comfortable. Hoping this continues for the Gen 3. -
Please Read and RELAX
videoarizona replied to Freebird's topic in Star Venture and Eluder Tech Talk ( '18 - Present)
Me too. But I have to say, I love the old threads and posts. There's so much information here.....sigh...not enough time to learn all there is to learn from the guys and gals that have and still are... around! -
Please Read and RELAX
videoarizona replied to Freebird's topic in Star Venture and Eluder Tech Talk ( '18 - Present)
Rich, this is an old thread.....and back in the beginning...the 3rd Gen bike was just coming out..... -
Condor was right...Addictive.
videoarizona replied to Tennessee's topic in Royal Star Venture Tech Talk ('99 - '13)
Has the rear been lowered? Looks like it....the brace hanging down for the rear brake??? BTW, Nice looking bike there! You will enjoy the miles on her, for sure! -
They used to have a lot more products. Mostly VStar 950 and 1300 stuff as well as RSV. I bought my tail light panel from them. Not listed. Ah well...EBay will have more stuff...
-
It looks like they have dropped all their Yamaha products. Nothing I could find on the website. Shame, as I liked and have bought their stuff.
-
please help, what would you do?
videoarizona replied to made2care's topic in Venture and Venture Royale Tech Talk ('83 - '93)
Well....the idea of tooling around at any speed on 2 tires that may have internal dry rot and blow out at any time and any speed....you get the message. 4 tires, no problem....2 tires...deadly chance being taken. nope. Nada. Nein. Nej. Non. Tidak. In other words...hell no! Grins... david -
Not that hard at all. I got to mine when I replaced my front fork seals. First time I've ever gone down this far into a bike. Took about 2 hours to get down to the bearings..... Most of the steps I used I got from various posts on this site... Between you and your mechanic...you can do this. Seriously!
-
Full LED conversion
videoarizona replied to Shadowhawk's topic in Royal Star Venture Tech Talk ('99 - '13)
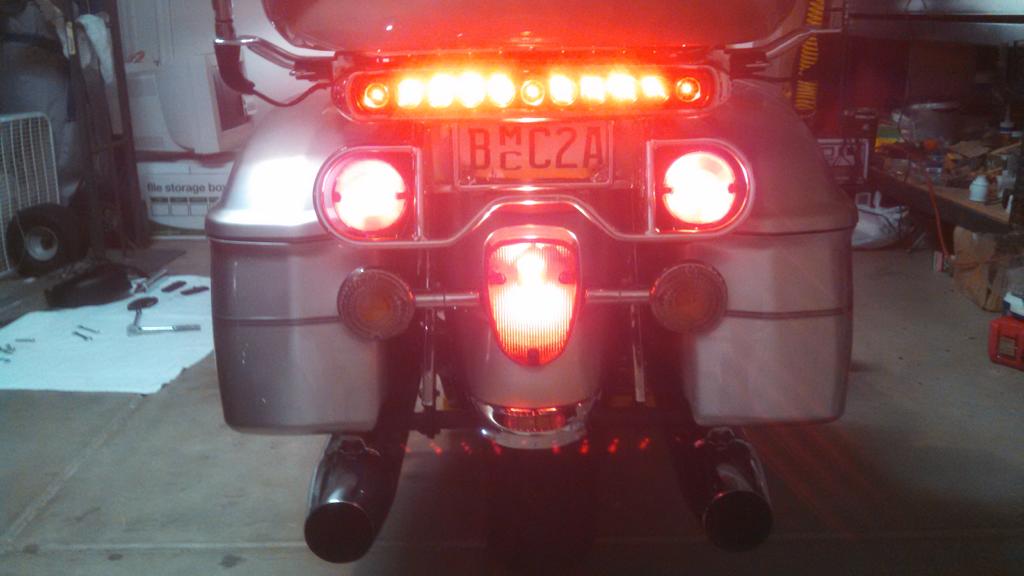
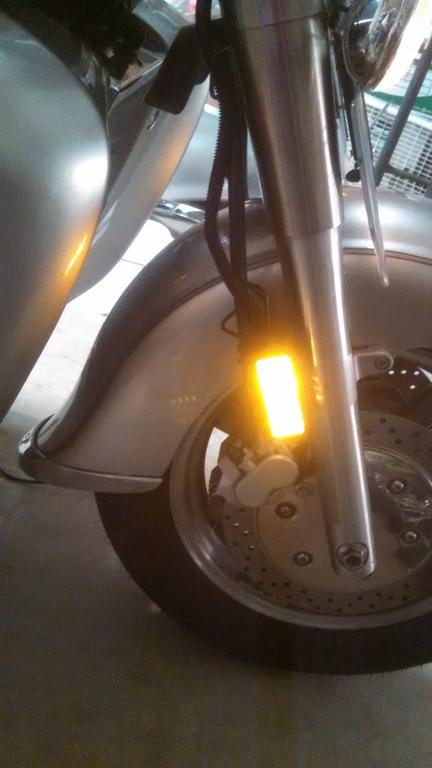
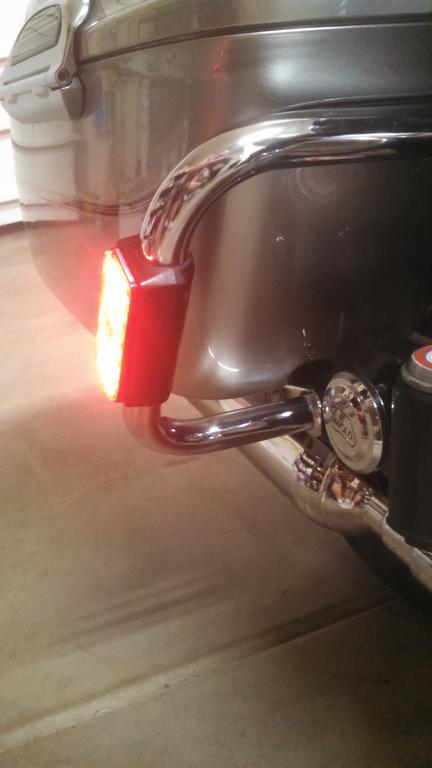
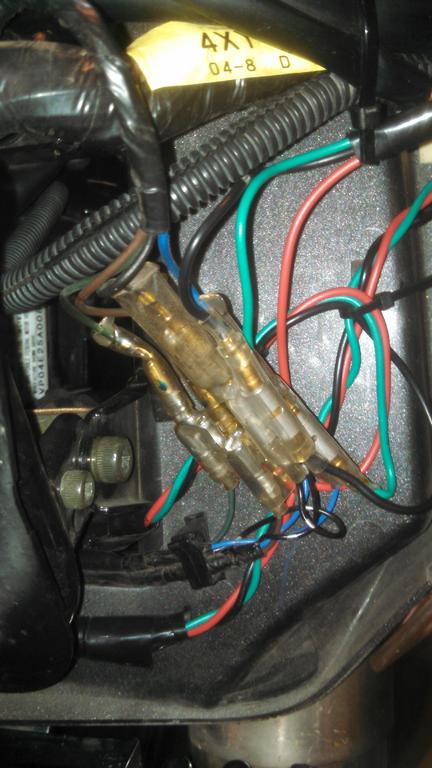
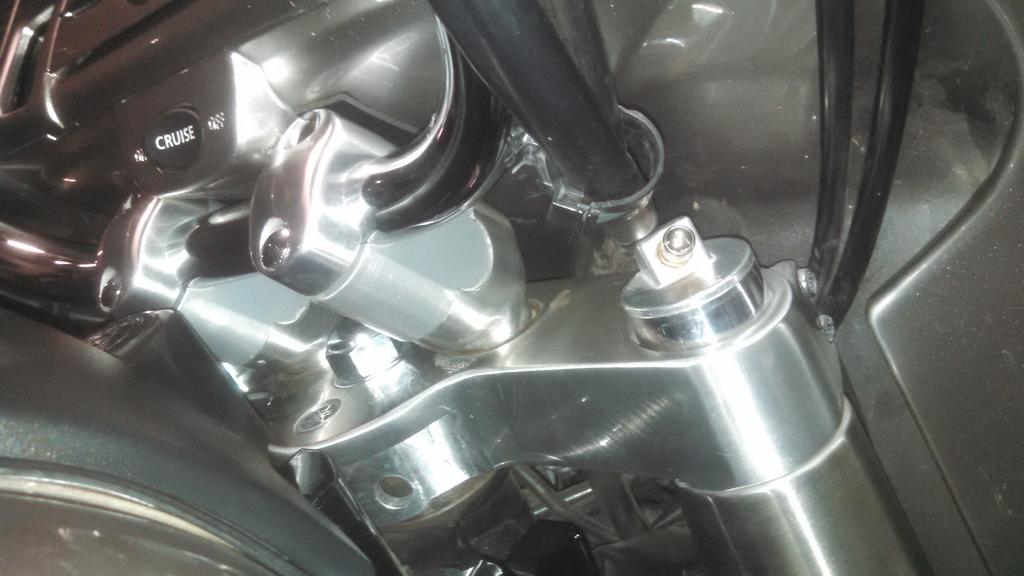
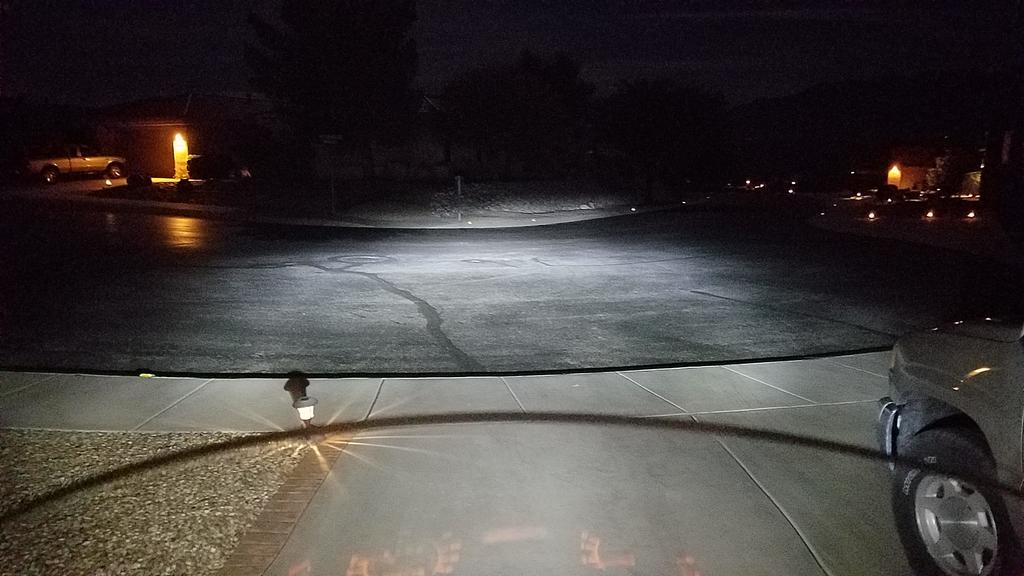
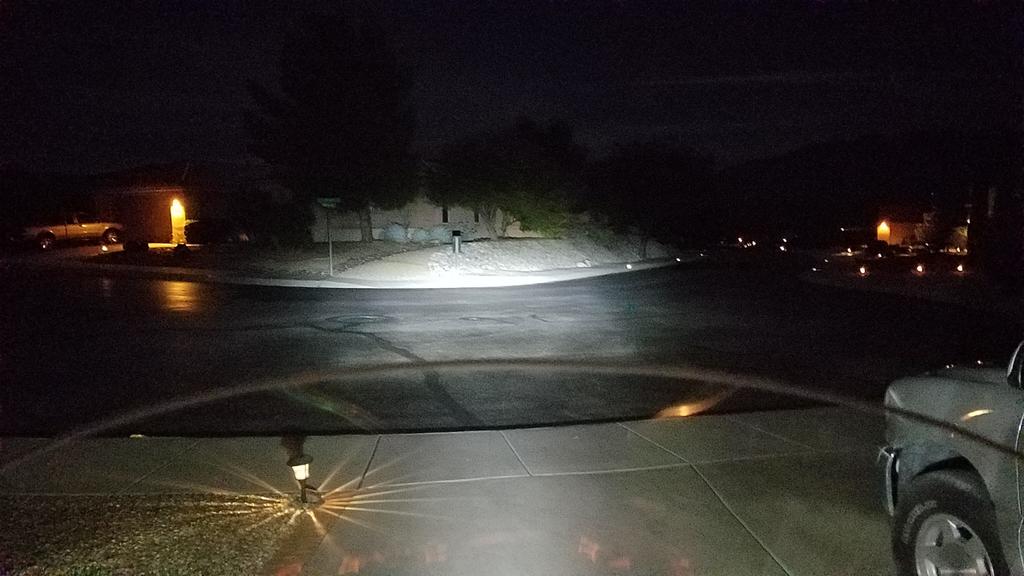
LEDs. Some ideas for you.... I replaced my headlight bulb, reflectors, taillight with LED's. Taillight was sold by Custom Dynamics, about $90. A board replacement that is quite bright. I don't see it available on their site, now, but it fit the VStars as well. Maybe available on EBay. The reflectors I replaced with 2 cheap 2-way LED boards that fit almost perfectly into the reflector spaces...and wired to the taillight and front running and turn signals through plug and play adapter cables sold by a member here. Added an LED strip under trunk and HD style tail light kit for additional running and stop lights. Headlight bulb was a Dot approved LED with low beam cutoff and passive cooling. Fit fine and works very well. Also, you might want to consider the ignition switch modification. As stock, Yamaha runs a ton of current through the switch. Member that makes the plug and play cables also makes a plug and play set up that routes most of the current through a relay instead of the switch. Easy installation, like all of his stuff. Look up above under classifieds, member venders. LEDs in rear Reflector LEDs..run and turn blink. Wires run through rear guard, up front forks. Plug and play accessory cables from Steve. I've used his stuff to wire in the XM radio power, rear lights, front leds and soon the small front spot lights I'll be mounting on the forks. I used the 12 volt power center located under the dash on the lower left side of the fairing. Pics of the headlight pattern. High beam does go out nicely! Much better than stock in both reach and width. Low beam... High I also lowered my front end about an inch. helps level the bike, gives me more flat feet room and makes the low speed handling a touch easier. Currently run 0-4 lbs air front shock, 30lbs rear shock. Front tire at 38 and rear at 40. I change rear to 35-40 for 2 up. david PS. love your part of the country. Spent some time just East of Knoxville picking up my travel trailer. Strawberry Plains Best Western! Been through that area a lot in past few years. Will have to plan a detour south to your area by the Tennessee River next time!
-
Welcome to the Yamaha stable and this group! You've had some nice scoots, for sure...glad to see you found a really clean RSV!