.JPG.97d34da93fc67655234eb6371e3710e9.JPG)

Prairiehammer
-
Posts
3,621 -
Joined
-
Last visited
Content Type
Profiles
Forums
Gallery
Events
Store
Everything posted by Prairiehammer
-
 Thanks a bunch, Max. I am especially enamored with the Canadian VINs. You did know you have a Yankee Venture in the mix? Do you want a copy of the database? If so, I'll need an email address.
 -
Rear End Questions:
Prairiehammer replied to videoarizona's topic in Venture and Venture Royale Tech Talk ('83 - '93)
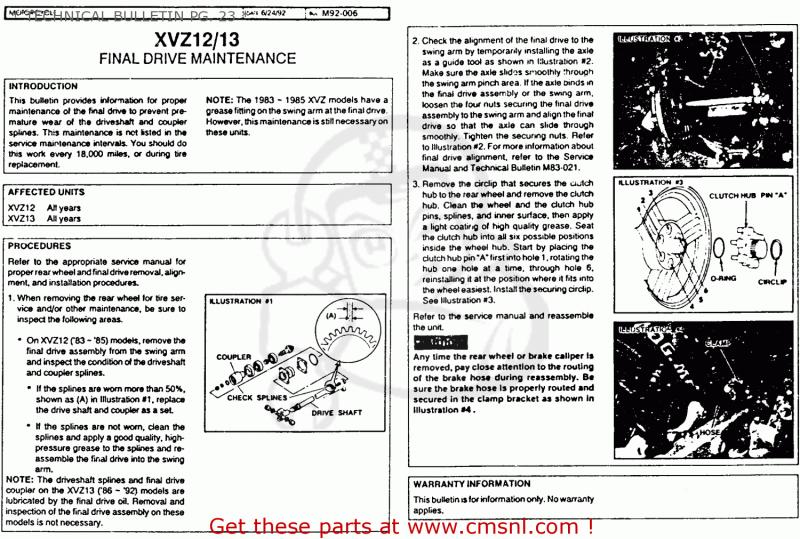
Here's a question that I have not 'engineered' a logical answer to: if all the engine/drive shaft torque is transferred by the driveshaft splines and the coupler gear to the splines on the pinion shaft, WHY should the pinion shaft be breaking at the (presumably low stress) threads-to-splines transition? The threaded portion of the pinion shaft isn't carrying a torque force...or is it? -
You can leave, but don't log out.
-
Rear End Questions:
Prairiehammer replied to videoarizona's topic in Venture and Venture Royale Tech Talk ('83 - '93)
Frank, I think the procedure in the manual refers to when reassembling a rebuilt, repaired or otherwise unlubricated final drive. Call it pre-assembly lube. This Yamaha Technical Bulletin specifically says that the 1986-1992 (the Tech Bulletin was written in 1992) rear drive shaft splines are lubricated by the final drive oil. (See lower left paragraph.)
-
Rear End Questions:
Prairiehammer replied to videoarizona's topic in Venture and Venture Royale Tech Talk ('83 - '93)
Something don't look right. The coupling should not have come off with the drive shaft. And looking at the final drive input, it appears that your final drive input (pinion) is broken. Pull the coupling off the rear of the drive shaft and I'll bet you find the forward end of the final drive pinion shaft. -
Rear End Questions:
Prairiehammer replied to videoarizona's topic in Venture and Venture Royale Tech Talk ('83 - '93)
The 1986-2013 Venture rear drive shaft splines are lubricated by the final drive gear oil. The 1983-1985 Venture rear drive shaft splines must be hand greased. The front drive shaft splines on either version should be hand greased. -
AW. So, that means Fred won't be going to Duluth?
-
Can you make the side cover vent louvers in aluminum? http://www.venturerider.org/forum/showthread.php?91561-Anyone-with-access-to-a-3D-scanner-and-printer
-
Gary, thanks for the 'insider' expert points. Just popped my balloon, though. BTW, the louvered vents I was talking about were the ones on the SIDE covers (your Tweety never had those), but the fairing 'knee' vents are valid for when talking about the complications and cost. Thank you for the 'low down'. I think I will re-investigate my idea of adapting a steel HVAC floor register. LOL
-
I think you said that several months ago. S'ok, buddy. I am patient. Just make sure you bring the '86 to Duluth next summer and I will retrieve the recalcitrant information personally.
-
No, Neil. Though IF I had the build date for your '86 that might give me a clue, since I have US49 and a Canada '86 with the same serial number. Been waiting for your info.
-
Your memory is *fairly* good, Jeff, but the critical part that is missing in your vane is the 'bell crank' arm with pivot point that is actuated by the 'traveler'. In fact, that arm is the kicker for preventing me from making some vanes from some brass sheet and wire soldered onto the center line axis. As for the $1500 mold, well, I believe a 3D printer would be more cost effective for 'on demand' or short runs.
-
As a military veteran, I sympathize with the INTENT of the message, but it is not true about US Congressmen making 100% of their salary when retiring, and especially not true about receiving the 100% after just one term. http://www.senate.gov/reference/resources/pdf/RL30631.pdf I am as Conservative as they come, but it serves no constructive purpose to make us 'Right Wingers' look stupid or ignorant by perpetrating these bits of misinformation. "Members of Congress are not eligible for a pension until they reach the age of 50, but only if they've completed 20 years of service. Members are eligible at any age after completing 25 years of service or after they reach the age of 62. Please also note that Members of Congress have to serve at least 5 years to even receive a pension. The amount of a congressperson's pension depends on the years of service and the average of the highest 3 years of his or her salary. By law, the starting amount of a Member's retirement annuity may not exceed 80% of his or her final salary." http://usgovinfo.about.com/od/uscongress/a/congresspay.htm
-
THANK YOU, Doug. Canadian VIN are infrequently added to the database, this helps a lot. Can you/would you elaborate with manufacturing date, mileage and color? Also, please PM with your email address, if you would like a copy of the database sent. Thanks again.
-
The individual vanes on the 1985-1993 side cover adjustable vents are prone to distortion, breaking and loss. I know, I know, many have eliminated the adjustable vent altogether, but I find the ability to open and close the vents advantageous from a comfort viewpoint. Closed in hot weather and open in cool weather; the vent used like that is so effective, that Debbie requests that I 'turn on the heater' (open the side cover vents) when she is chilled or 'turn on the air conditioner' (close the side cover vents, open the knee vents in the lowers and most effectively, rotate the Baker Air Wings to scoop air into the rider envelope). However, many or most of the Venture's suffer from heat related distortion and ultimately breakage and loss of the individual vanes on the right side cover vent. Yamaha supposedly modified the plastic used in the side cover vents back around 1986-1987, with the intention to improve the durability of the vanes, but it seems it was a futile exercise (if it happened at all) for even late model Ventures suffer from the plastic degradation. The cause of the distortion and breakage on the right side and not on the left side (though, I have seen some with broken louver vanes on the left as well) is that heat rises and heats the right vent more than the left vent when the bike is shut down and placed on the side stand. That's Yamaha's theory. Whatever the reason for the vane degradation, I find the adjustable vent useful enough to replace the missing vanes, if possible. Of course, the individual vanes are not available. When the side cover adjustable vent assemblies (Yamaha description: "grill, side cover") were available they retailed for $190-$200 EACH. That price apparently justifies sellers of used (but always broken) vent assemblies to ask high and unreasonable prices for their vents/grills. Thus, my opening question. It would seem to me, that the original vanes could be replicated in ABS (as are the OEM vanes) fairly easily and inexpensively. The fly in the ointment, from my perspective, would be developing the 'X,Y,Z' information for the 3D printer, ergo the 3D scanner requirement. Are there any small batch manufacturers known to any of you's guys with those capabilities?
-
Looks like Venturers.org just went offline
Prairiehammer replied to Bert2006's topic in Watering Hole
Yes it is 'closed group'. Since it is a closed group, if you are not a paid up member of the Venturers, you will not be able to see it. If you are a paid member, and have asked to join the Facebook Venturers page and have been accepted, the link to the Facebook page is: https://www.facebook.com/groups/the.venturers/ -
Check out the featured touring bike in this scooter rag you guys
Prairiehammer replied to cowpuc's topic in Watering Hole
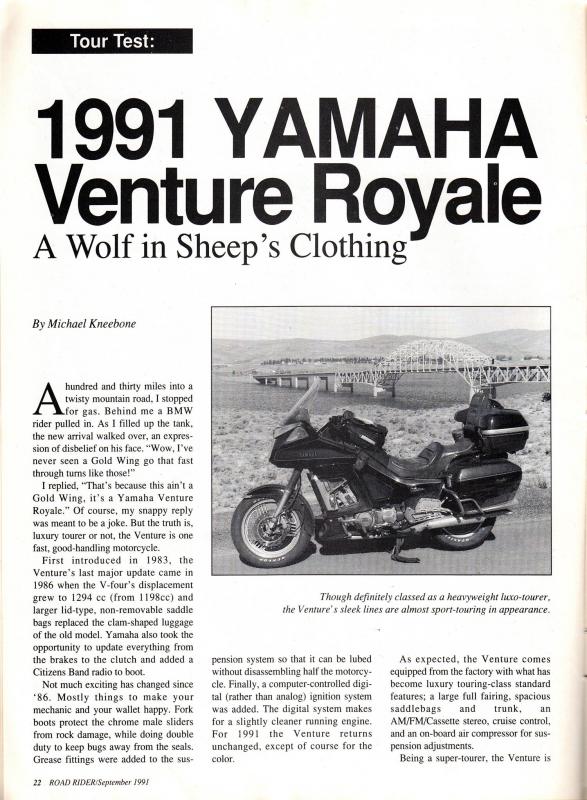
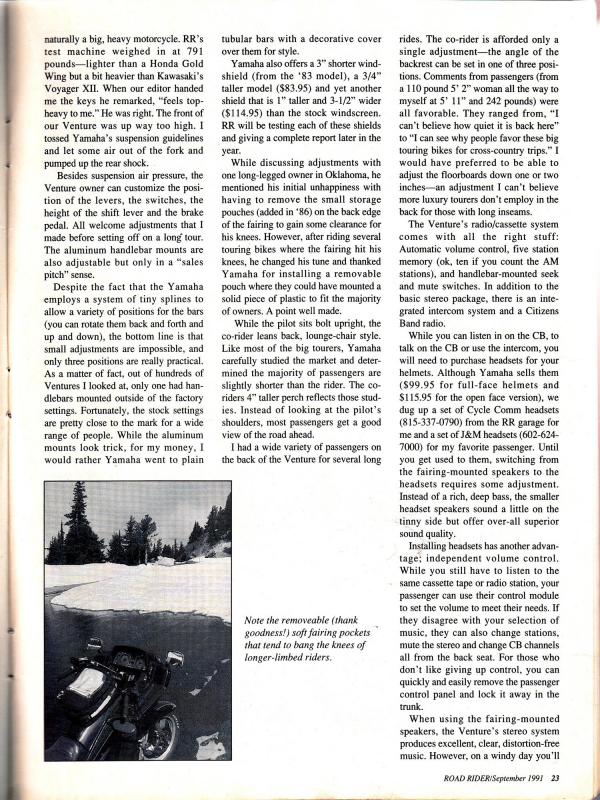
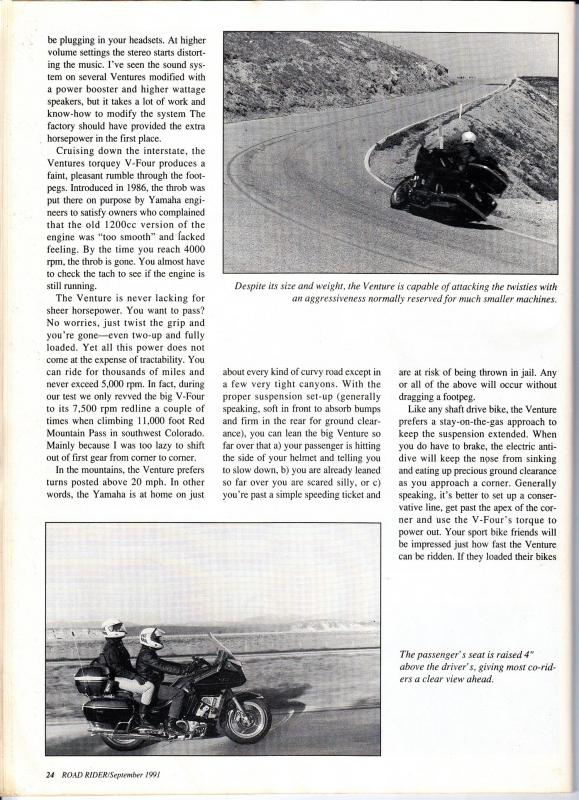
Here is some more nostalgia for you First Gen enthusiasts: "A Wolf in Sheep's Clothing", Road Rider September 1991.
-
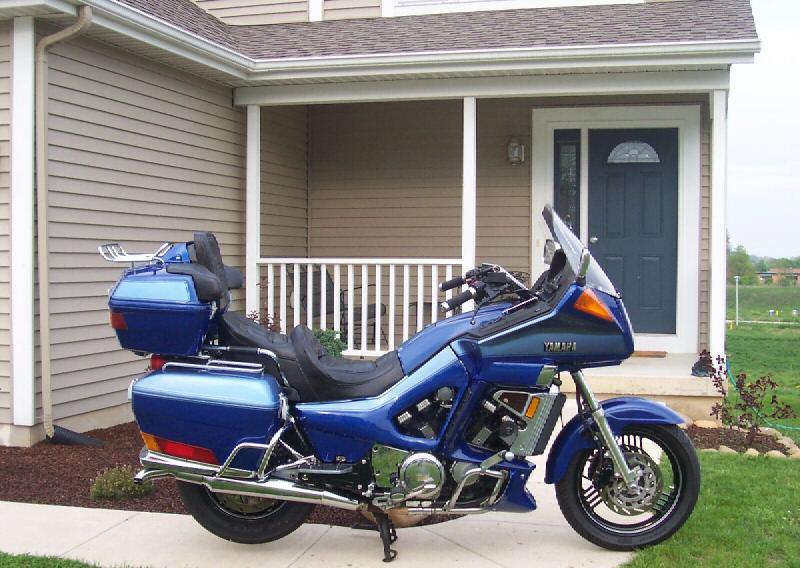
Thank you Bill. Coincidentally there was a maroon 1989 sold in April of this year. The seller was in Raleigh, NC. That bikes VIN was just two serial numbers older than yours ...27185.
-
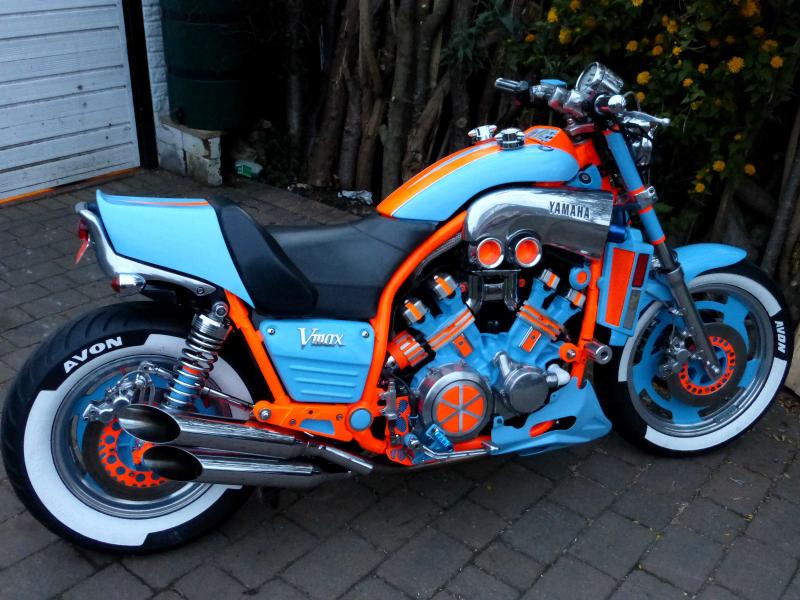
Some more, including a wild VMax:
-
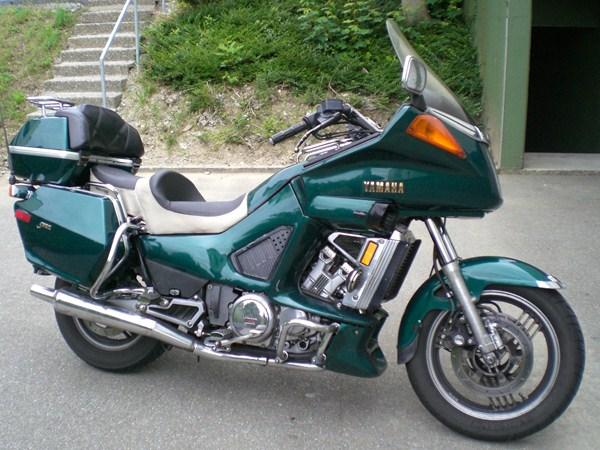
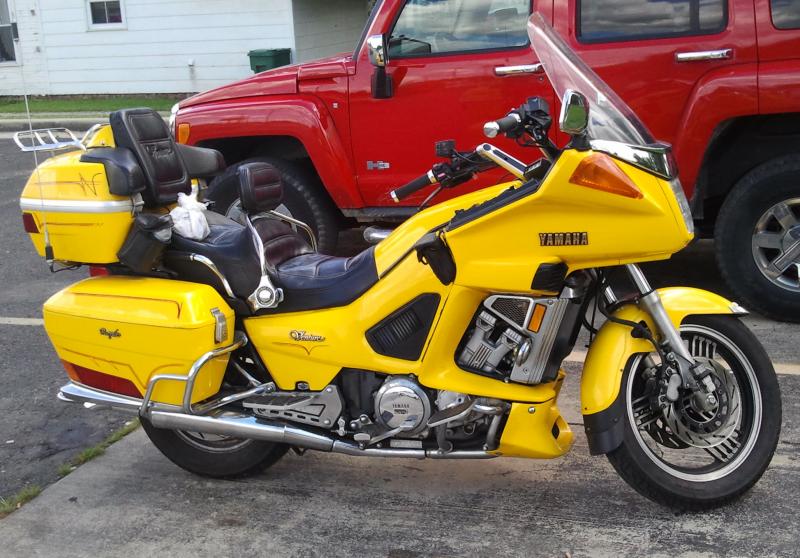
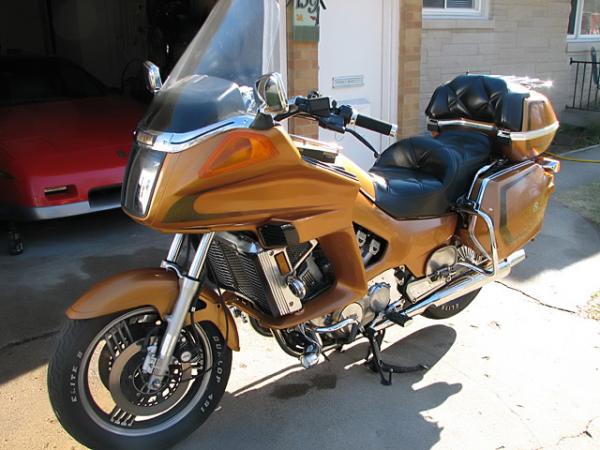
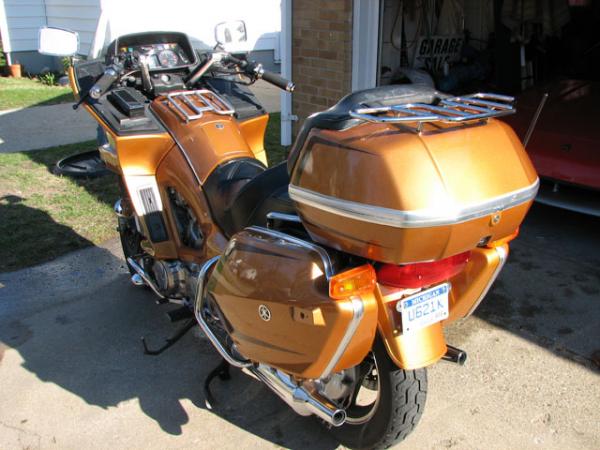
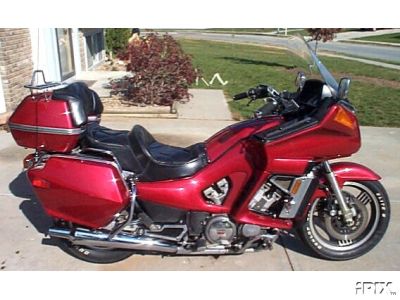
I've collected several pics of re-painted Ventures:
-
You don't grind the case hardened face where the cam runs, the 'Fool would grind the bottom of the shim.
-
My suggestion about the V-Max pistons was only intended to open another avenue of search and availability. The bore of the V-Max is the same as the Venture 1200, the piston wrist pin is the same as well. The V-Max pistons are different from the Venture piston but may interchange. Dingy or Squeeze can offer more accurate information about the V-Max. There is a seller on eBay currently offering new 1200, 0.25mm oversize Venture pistons, Yamaha pn. 26H-11635-00-00. Unfortunately, the seller appears to have but three pistons to sell. http://www.ebay.com/itm/One-Genuine-Yamaha-OEM-NOS-Venture-XVZ1200-26H-11635-00-00-PISTON-1-O-S-0-25-/281257391183 The stock '2nd O.S., 0.50mm' part number for the 1200 is 26H-11636-00. Finally, consider boring the cylinder out ±3.00 mm and install 1300 Venture pistons, pn.1NL-11631-00-A0 Edit: I just discovered that if you bore the 1200 block out to 79 mm (the 1300 bore) you should/would have to resleeve the cylinder. That involves removing the old sleeve, boring the block for a larger sleeve and finally boring the sleeve for the 1300 pistons. Lots of machining and expense. But it brings up another idea; perhaps replace the pitted sleeves on the 1200 block and use stock pistons and rings.
-
Consider a 'clean-up' bore and investigate over sized pistons for the V-Max. Those V-Max guys bore out their block and get pistons all the time.
-
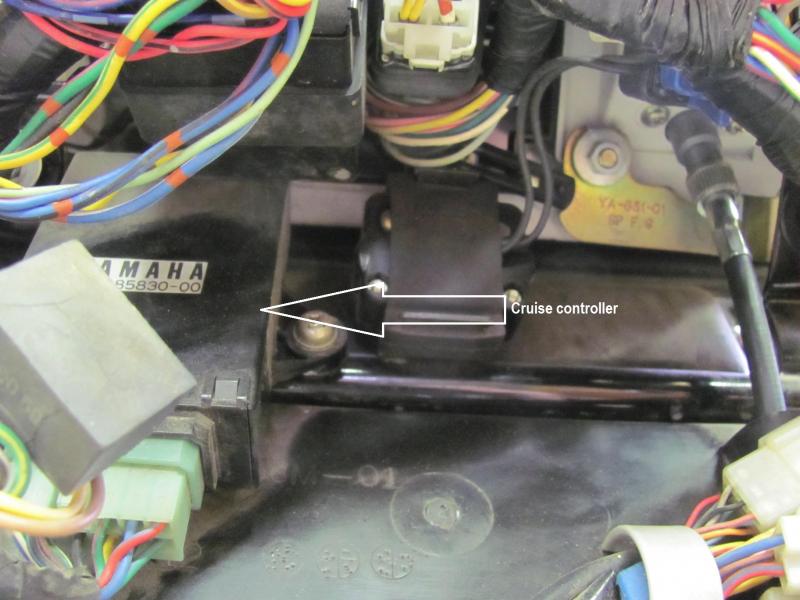
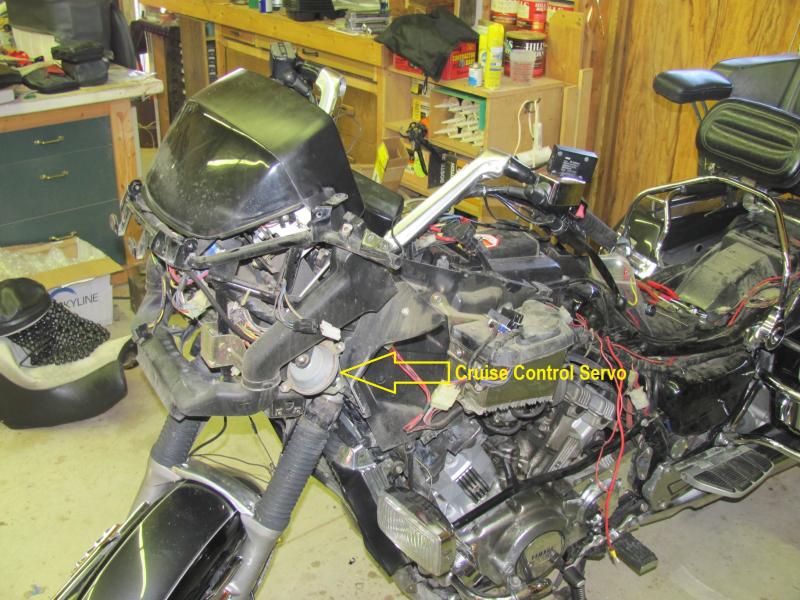
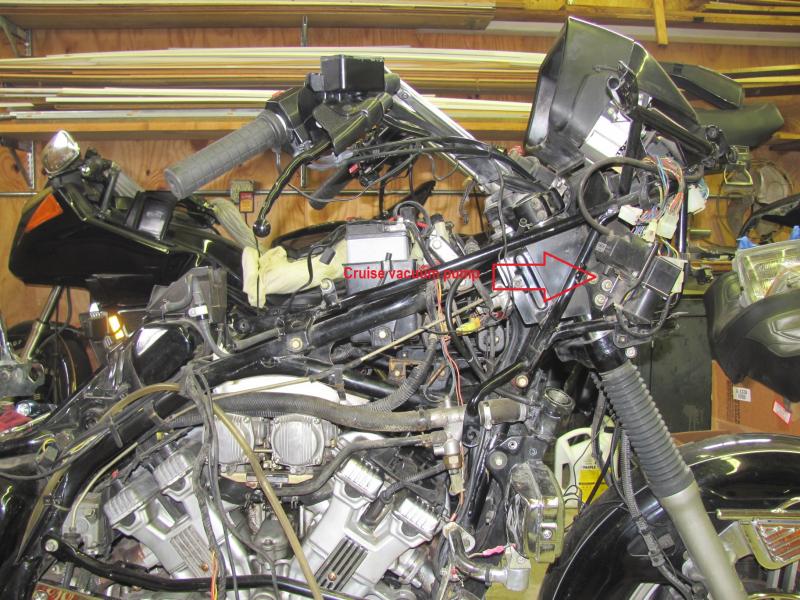
Cruise Control component access.
Prairiehammer replied to dna9656's topic in Venture and Venture Royale Tech Talk ('83 - '93)
The major components of the cruise control are behind the main fairings. On mine, the cruise control controller is behind the headlight, the vacuum pump is beneath the right fairing and the vacuum servo is behind the left fairing. YMMV
-
Thank you, Coff and Brian. If either of you want a current copy of the database, please PM me your email address and I will send it out.

.jpg.8551cfa2bcb0b366b429d347fd8df210.jpg)

.jpg.695eb19027156c2ff0efdc668587c761.jpg)
.jpg.292d1590c7afef1a237d0b3067349b16.jpg)
.jpg.3f45ed82c0d449a881a0ab6673d0ac74.jpg)
.jpg.2c39b8225a7f40155f82983fad12bf90.jpg)
.jpg.8bbe6ba0255945348f180e4a48365236.jpg)
.jpg.c2f26557c467ac6422db53b51f070cc9.jpg)
.jpg.17ee8029e14c1a9560903efd141c14ef.jpg)
.jpg.57dbc6f80eb800b4ce824b1a52411d2f.jpg)