

Freebird
-
Posts
18,135 -
Joined
-
Last visited
-
Days Won
260
Content Type
Profiles
Forums
Gallery
Events
Store
Everything posted by Freebird
-
WOW...very good. She said in Galena and she was going to do it. She sure didn't waste anytime. Give her our congrats.
-
Hey folks...it's all in fun. I knew when I bought the Harley that I would need to have VERY THICK skin. I get a laugh out of these posts so don't worry about that. Now you ALL go to your corners and think about what you have done.
-
OK folks...this is the reason that I decided to go ahead and sell the RSV. Eileen is super excited about it and I really didn't need two motorcycles. This is about the cleanest used boat I have ever seen and I looked at a LOT of boats over the past few days. It is powered by a 350 MAG, Alpha Drive, with 344 Hours. It has never had any painting done on it and I couldn't find a single scratch or ding anywhere on the hull. I hope it is as good as it looks. We looked at it yesterday and made the deal on it today. Will pick it up next Friday after taking it on a test drive first.
-
No problems that I know of. Everything seems to be working from here.
-
You will not be forgotten. Remember, I promised that this site would not change so that is why I started the new one. This one will remain a Venture site and be here as long as all of you want it to be. Nothing is changing and there will still be Maintenance Day at my house.
-
Yes Condor, a very small handful of people did but not many. You would be fairly surprised at the amount of money I spent on this site in those early days. Even more so, the number of hours that I spent. I still spend a LOT of time taking care of things but it is a lot easier now that it is pretty stable. Very few people seem to have a problem paying a dollar a month to participate here. I THINK that is a number that anybody can afford and more than covers the costs here and yes, makes some profit. I really don't know why anybody would have a problem with somebody making a little money for the hours of time and effort that they spend working on something but there may be those that do and if that is the case, I guess they just have a different way of looking at things. I will say this also, NOBODY has ever been kicked out of this site for their lack of ability to pay the dues. There have been a small number of people who have told me that they were going to have to let their memberships expire due to very difficult situations. I have always extended them free membership until things get better for them.
-
No, and there wasn't one here for about 5 or so years. I may try the ad supported route there. Not sure yet but unless it takes off, it's not important anyway.
-
Yea, listen to you. I tell you what, I will GLADLY upgrade this forum to the newer version but you will be the FIRST one to have a little hissy fit. You are the one who uses our home page to see the list of current posts and etc. That is not available on the other site. There are MANY customizations here that are not compatible with the new software and if I could have, I would have used this same software on that site. Unfortunately, much of what I have done here is no longer possible when starting a new site. But hey...if all of you want me to upgrade and totally change this site, let me know.
-
OK folks, this is the official announcement of my newest website, Touring Hogs. Dedicated to Harley Davidson touring class motorcycles. Whether you are a rider, passenger or just enjoy the discussion, I hope you will visit and join now. I still have a lot of work to do on the site but it is now functional and officially online. Please spread the word to all your Harley riding friends. http://www.touringhogs.com
-

steering bearing adjust
Freebird replied to baylensman's topic in Royal Star Venture Tech Talk ('99 - '13)
This is my opinion on the issue. The quick fix of tapping it with a screwdriver to tighten it up is, in my opinion, a temporary fix. I've seen too many of these bikes that simply didn't have much grease on those bearings. I think that you can get them tightened up and they will be fine for a while but the lack of grease causes them to wear quicker so the more you tighten them up, they quicker they wear. I had a friend who asked his Yamaha shop about repacking the bearings and they told him that they wouldn't bother because they are often worn out and need replacing at 50,000 miles or so. I contend that the REASON some are wearing out is because they are not properly packed so they should have done it. So to do it right, you really need to drop the front out of the neck and repack the bearings. Then tighten it properly and I think it will be good for many miles. -
Well first of all, rest assured that I am IGNORING Bubba. I've met him and just wouldn't feel right taking his home. As for the VMax rear, it will cause you to run about 500 RPM higher in 5th gear. That is still about 500 RPM lower than a first gen. Performance is greatly increased. Gas mileage is at least as good and better under some conditions. That being said, I also have a stock rear end that will go with the bike. I also have the original TCI unit that would be a good spare if the Dyna were to ever go out. Haven't heard of that happening though. Of course I have the stock shock links also in case somebody doesn't like the leveling links on it.
-
It's in the garage but for sale or trade for a boat.
-
That's great but....is this your boat?
-
not true
-
Hey...this forum isn't going nowhere and it's not going to change. I love it the way it is and all the people here. That is not even a concern. Who knows...if and when Yamaha comes out with a new Venture......................I may be riding one again.
-
I've been assured that it will go 10,000 miles. I'm barely over halfway there. Weather was fantastic. A bit cold in the early hours but we never saw a drop of rain. HEY....I ROAD with a VentureRider on a RSV and I wore a VentureRider T-Shirt on Sunday. So THERE. You are exactly right. Probably won't be this year but I need to color in some states out that way. I like it a lot. There are a couple of things that I still need to correct. Handlebars still aren't right. Need a different windshield, more buffeting than the RSV. Gas mileage is good and ride is comfortable though. Love the low end torque/low RPM. That's probably the biggest thing. Hey...you go to your corner. See my response above about riding with a RSV on this trip, wearing my VR shirt and I'm flying a VR flag. So I'll just give you a also. Could you add a bit to that. Don't think it's going to reach. Here's one for you also.
-
wardrobe one won't work. Heck....Rick wouldn't even let me stop and pick up T-Shirts this weekend.
-
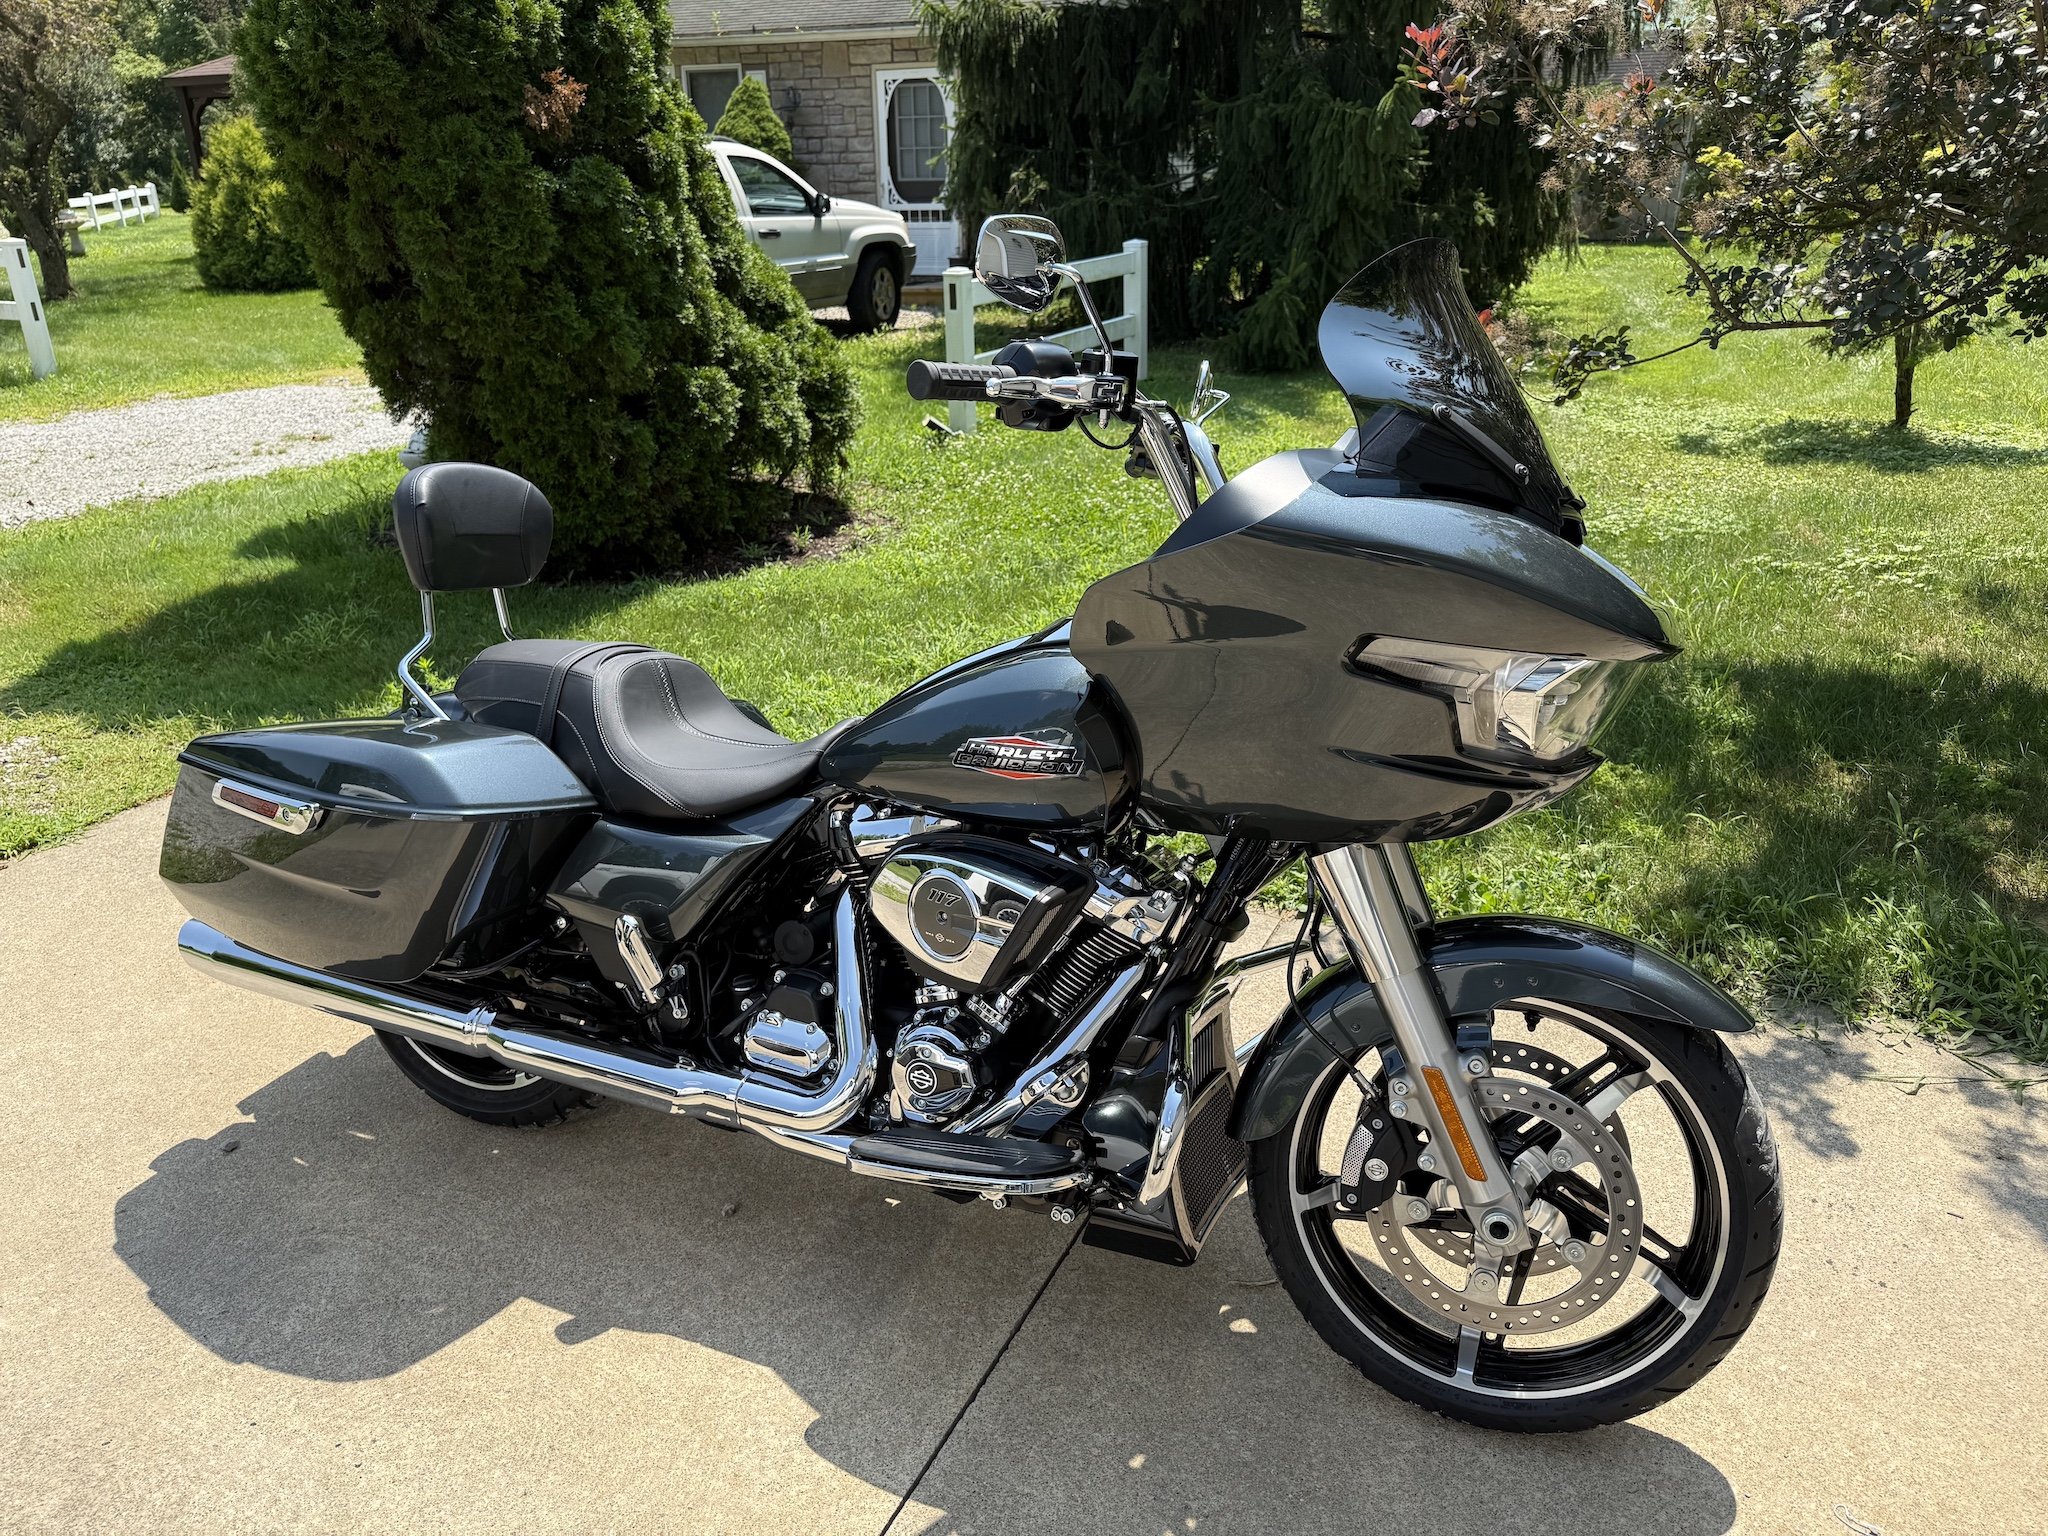
Well you will remember that I did the Saddlesore 1000 about 3 weeks ago down to Florida. Well this weekend, Rickardracing and I successfully completed the Bunburner 1500. Rick actually did a couple hundred miles more because he left Michigan about 3:00 Saturday morning and met me at my house around 6:15. So, we left my house around 6:30 Saturday morning and took 480 across to 77. We then took 77 all the way through OH, WV, VA, NC and SC. Out of Charleston, SC, we picked up I20W over to Atlanta. Got through Atlanta last night and then stopped at a hotel in Smyrna, GA. We got to the hotel around 10:30 pm and I got in bed about 11:00. Got up at 2:00 and were on the road by 3:00 and headed on home. Took 75 all the way to the 75/71 split in Cincinnati when Rick stayed on 75 toward Michigan and I took 71 through Columbus and then home. Total mileage for me was about 1560. Got home around 3:00 pm after stopping for a Sandwich in Mansfield. Bunburner 1500 means 1500 miles within 36 hours so it was a success. So I've now got just barely under 6,000 miles on the Road Glide since buying it about 7 weeks ago I think it was. Not too bad.
-
I am going to get Eileen a boat. Looking for something with a cabin, head, etc. 24' to 27' long. Actually, she found one yesterday that she likes but I need to sell something first. OH..and my Harley site was touringhogs.com I didn't think I was going to try to start it up again but I am working on it. There are SOOOO many Harley sites though...I'm not sure it will ever take off once I get it ready.
-
They are NOT rebuildable. I have an almost new one for sale in the classifieds. If you are interested in it, make me an offer.
-
I know...I know.
-
You could but it is really unnecessary. I would just take it off or leave it as is. It won't hurt anything being there.
-
Nope, there is no Road Glide this year. The Ultra Plus has the exhaust port water cooled though.
-
Yes, and that is something that I've thought about over the years and is the main reason that this has remained, for the most part, a Venture and Royal Star site. I don't mind what Big Tom is suggesting here and don't think he is suggesting that we change the focus of VentureRider.org
-
Now that might be pushing it a bit.