dna9656
-
Posts
1,124 -
Joined
-
Last visited
Content Type
Profiles
Forums
Gallery
Events
Store
Everything posted by dna9656
-
I got an '83 Royale; The following is removed, the cage that holds the front fairings, ignition box, air cleaner,, windshield, seat, ALL or nearly all the electrical relays, Res. lighting unit etc. Anyway I need some sort of logical procedure to re-assemble it. I plan on transplanting the tires and wheels, Ignitec, coil over plug ign. coils, seat, windshield, side and rear travel bags, side panels, starter, and other stuff from my other 83.5. I figure that the 1986 fork, the R-1 brake calipers, front master cylinder, and the wheel and tires are first. Install the brake conversion kit that eliminates the combined F & R factory brake set up. I plan on going through the carbs. I think I should check the CLASS before I get too far. Change the fuel filter, make sure the fuel pump and valve works and has no leaks...the rear master cylinder (I have one for a '86) and rear brake reservoir checked out. Any input would be appreciated.
-

Dano's Starter Clutch
dna9656 replied to dna9656's topic in Venture and Venture Royale Tech Talk ('83 - '93)
Sadder and wiser: Well it's all moot now. I lined up the starter reduction gears, All the teeth looked lined up. Tightened the bolt on the clutch and broke the boss (block) holding the final large gear. I read here on the forum where a this happened to a member and he got it welded, Well I got a 83 with 26k on the odometer, Guess I'll be moving parts over sooner than I thought. I have the Ignitec, coil over plugs, PLUGS, the windshield, the seat and the 1985 trunk, the trunk rack, the 1300CC forks and brake upgrade (most parts on hand, need Sky docs conversion plumbing) the wiring for the heated seats the wheels (they have new tires and bearings) and the LEDs. Hand grips, and of course the starter clutch. Not starting tonight. When I do I'm doing the started clutch first and taking pics at every step. So BEFORE you install the starter clutch REMOVE the starter drive gears The gold 83 is torn down pretty far, the basket(?) that holds the front fairing halves is off, well the bike is pretty well skeletal. Anyone can come over and lend a hand if they like. -
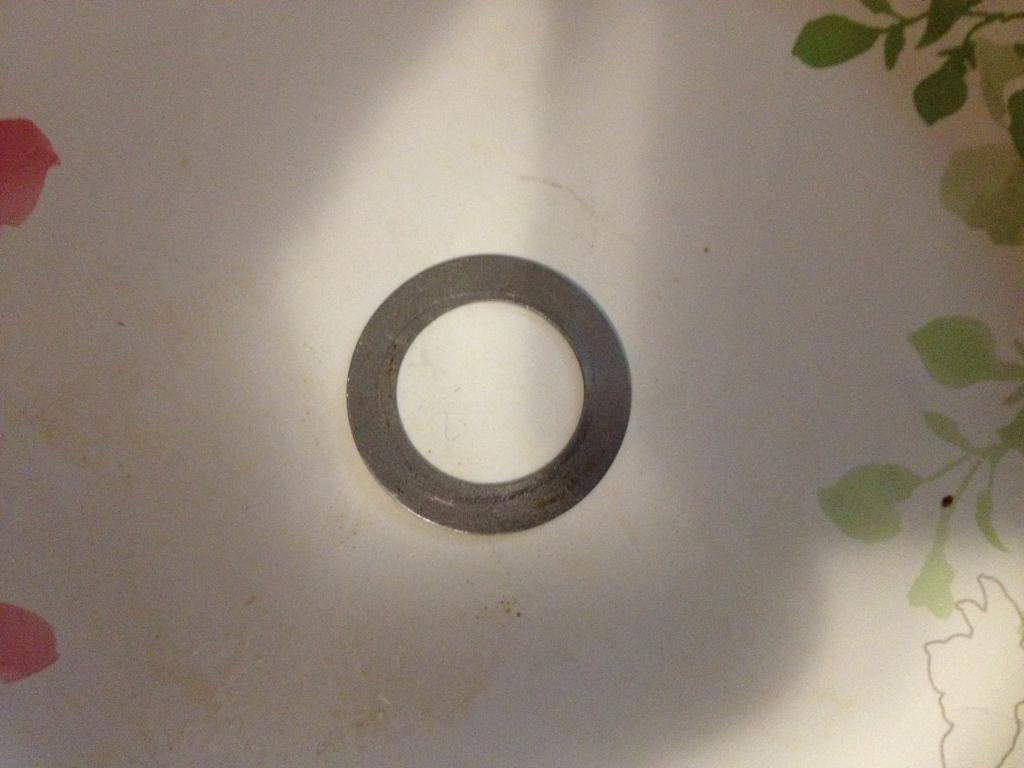
This looks like the washer used in the oil filter. I wonder if I set it on the lift for use next time and spaced it. If not it looks JUST like that washer on the spring in the filter, real thin like.
-
Dano's Starter Clutch
dna9656 replied to dna9656's topic in Venture and Venture Royale Tech Talk ('83 - '93)
Well I guess I was ignorant of it's being PLUGGED in vs. hard wired. Live and learn... -
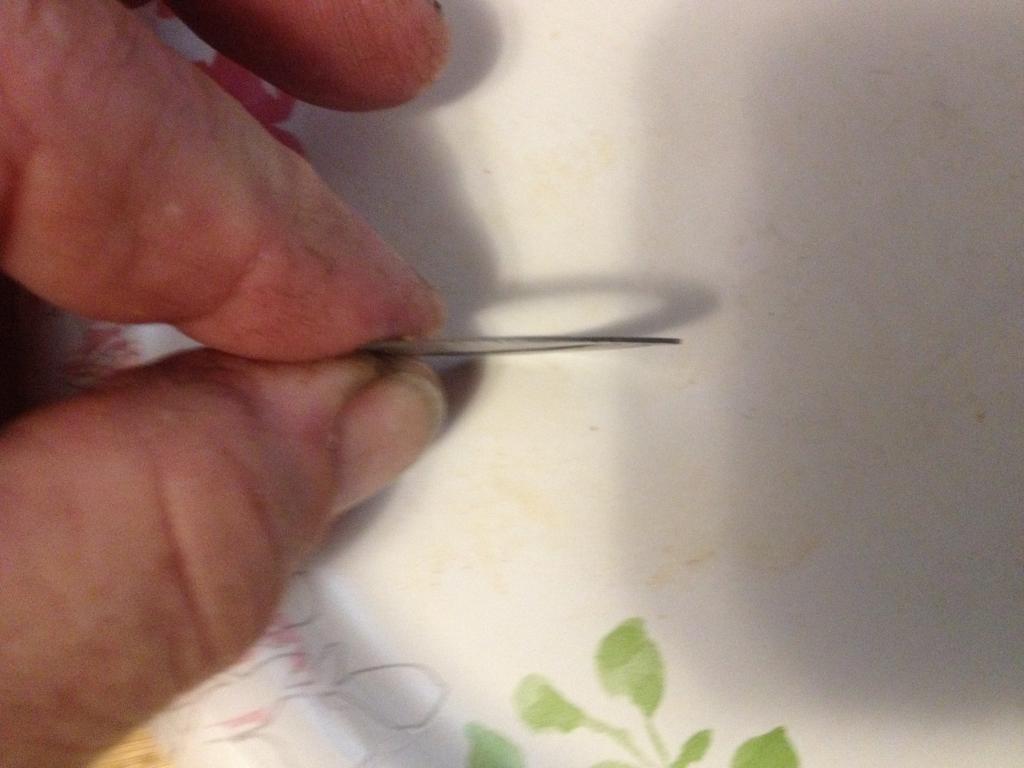
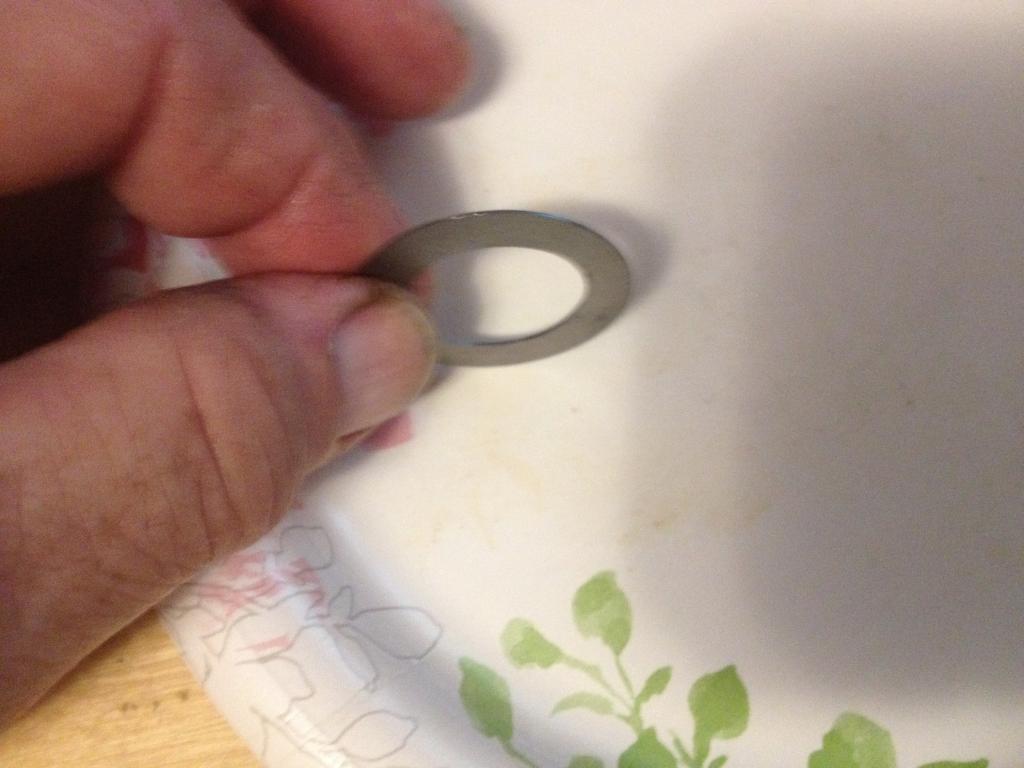
Doing the starter clutch as previously posted. I got a REAL thin washer (seal, gasket?) about the size of a Morgan (silver) dollar and a VERY short, chromed Phillips screw I can't find a place for. Any input would be helpful! Call me if you like! Number is in the profile. Found where the screw goes now that washer! HELP!!!

-
Dano's Starter Clutch
dna9656 replied to dna9656's topic in Venture and Venture Royale Tech Talk ('83 - '93)
The reason I tool the stator out was to clean the old gasket off the cover. I tried cleaning it with a gasket scraper and a razor blade but it was gouging the gasket surface too much and it was really slow going. After removing the stator I went over to the bench and used the "scotch bright" type of gasket remover you put on a drill. They say it will not remove any metal but now that I had the cover on a table top (not hanging by wires on the bike) I could more effectively remove most of the gasket with a scraper THEN remove what little was left with the drill attachment. I don't have a 1 1/4 wrench I have a 1 1/8 though. -
On start up I got the "rocks in the valve cover" sound so I asked around and learned that I needed a starter clutch. I subsequently learned I needed Dano's starter clutch as it was a tremendous upgrade over Mother Yamaha's starter clutch and it wouldn't wear out too soon! So I got one (long story short) and I started the install today. I read all I could find on the job here, read the FSM and proceeded. Clean the covers on the left side of the engine. Clean below as well. You'll want to take off the shifter linkage but only enough so the front side cover can be removed. Remove the rubber clutch cover. Then the rear cover; I think it's a 6.5mm Allen head wrench you'll need to take loose the socket head bolts holding it in place. Next is the 2 screws that hold the round (2 1/4"?) crank shaft bolt cover on to the main (largest) side cover. Now remove the the forward most cover, use the same 6.5mm Allen wrench to do this. You'll need to take loose the (magnets?) from the lower side of the forward cover, remove the plug holding the wires for them and then the magnets(?). Now there are 2 screws holding the stator in place; remover them and the you might need to gently bump the stator with a mallet to knock it loose. Remove the stator; Put it in a safe place. Now what you see is the starter clutch, there is a big (19mm) bolt there. The starter clutch has a hexagon cast into it so you can hold the clutch assembly while you turn the crank shaft bolt. That hex is approx. 32mm, I used a pry bar against the frame (aft of the driver's foot peg) to hold the adjustable wrench that I put on the hex....turned the ratchet on the crank shaft bolt and it didn't take a lot of effort like I thought it would. Remove the bolt and the long pin that's inside it. Install harmonic balancer puller, use 3 M8 1.25 thread and 90mm long grade 10.5 (or what ever is the metric hardest bolt) and washers (same grade) and tighten the 3 bolts. Now tighten the puller a bit then whack the puller bolt with the BFH a few times and tighten again, whack with the BFH again; (here's where mine came off) if it doesn't come off leave tension on the puller and attack the old gasket on the covers and the engine. Don't gouge the metal. Use a (VERY CAREFULLY) razor blade and holder to remove he gasket material completely. Now clean the covers, use compressed air and a rag to catch the debris and the oil out of the deep places, dry the cover(s) then chase the threaded holes where the Allen head bolts came from, blow the screw holes out with compressed air and clean up the engine and job site. Wire wheel the hardware (screws) as necessary. After the clutch is off clean behind it, inspect all the gears and their mounting holes for condition, inspect the covers too. Install is the reverse with variations.... I hope you paid attention to what screws went where while you were taking it apart!
-
The nicest guys on the planet are right here! I have 3 or 4 sets of side bags, fairs etc, I have 3 parts bikes and 1 runner. You have some VERY smart guys here, some are engineers, some are designers, I am ALWAYS impressed with the people here. BTW 3M has some plastic repair products you might look into at your local body shop supply jobber. BEST 12 bucks I ever spent on my bike is right HERE. There is a on line factory service manual (FSM) you can down load here on the site.
-
Good Cheap Bike Jack?
dna9656 replied to ChiefCass's topic in Venture and Venture Royale Tech Talk ('83 - '93)
This is similar to the one I got on Amazon. -
Good Cheap Bike Jack?
dna9656 replied to ChiefCass's topic in Venture and Venture Royale Tech Talk ('83 - '93)
Pics of removable section? -
To all that may not know: a "WAG" is a Wild Ass Guess, a SWAG is the same but it's "Scientific"; THAT may mean that it's an educated WAG.
-
I'm surprized no one gave you an answer! I'm changing the Starter gear soon. I haven't been in there yet but I am reading the posts on the subject. The FSM is woefully inadequet on many point that are brought up in the posts here on the forum. Seems to me if you put everything back as you found it everything should be ok. Dingy (Gary) is the man on this. Send him a PM....
-
Use the Yamaha dealer as a last resort. If the caliper and piston are in good condition I see no reason not to re-use them. I re-used mine on all my bikes unless (of course) they were FUBAR. K & L is a long standing and trusted name. Brake Crafter is unknown to me but that doesn't mean they aren't any good.
-
Good Cheap Bike Jack?
dna9656 replied to ChiefCass's topic in Venture and Venture Royale Tech Talk ('83 - '93)
I bought the lift from Harbor freight and i really like it with reservations....you have to have help to get the bike up on it's center stand or held in place with tie down straps. There is a wheel chock that comes with the life but it's not trust worthy so I bought BOTH of the other wheel stands HF sells and bolted (one at a time) to the lft, I don't trust them to hold the bike up so I got a "Venom" scissor jack from ebay. it lifts the bike up so I can get the center stand down. I also bought HFs bike dolly, the whole bike rolls on it. I use it to turn the bike around in the garage. it has a side stand platform. I'm going to order another side stand platform and bolt (or weld) it to the motorcycle lift. -
OEM Fuel Line
dna9656 replied to Gypsygirl's topic in Venture and Venture Royale Tech Talk ('83 - '93)
So far as expense goes it's always important to all of us BUT when we're talking about fuel hose, brake linings, clutches, tires, it's always best to go first class, remember if you by cheap you buy twice IF you live through the experience. I would recommend we ALL replace the fuel lines we haven't changes since this ethanol came out. Your bike will seldom break down in your drive way, it'll be on a dark, lonely road, on a rainy night and you'll be in a cellular phone dead spot. Trust me. Oh yeah I forgot to mention 3/8" steel line can be bent into 90 degree elbows and (if you wish) flared on the ends and then you can use hose clamps to hold the new hose in place. -
OEM Fuel Line
dna9656 replied to Gypsygirl's topic in Venture and Venture Royale Tech Talk ('83 - '93)
So far as expense goes it's always important to all of us BUT when we're talking about fuel hose, brake linings, clutches, tires, it's always best to go first class, remember if you by cheap you buy twice IF you live through the experience. I would recommend we ALL replace the fuel lines we haven't changes since this ethanol came out. Your bike will seldom break down in your drive way, it'll be on a dark, lonely road, on a rainy night and you'll be in a cellular phone dead spot. Trust me. -
OEM Fuel Line
dna9656 replied to Gypsygirl's topic in Venture and Venture Royale Tech Talk ('83 - '93)
Did you order PIPE (made of metal) or HOSE (made of a rubber type substance?) sometimes the stuff made of the rubber type stuff is called a PIPE in parts books.... -
Some of the fixes that people on this forum find amaze me!. When we were kids most of us had no idea of what was possible, for me some of that thinking remains but you folks amaze me with the all the fixes and knowledge of how to adjust this or that, machine this part to do such and such; it's very cool. I think we should all move to some centrally located town and be neighbors... we could help each other out, have BBQs and picnics... what good times....
-
exhaust collector options
dna9656 replied to jimmyenglish's topic in Venture and Venture Royale Tech Talk ('83 - '93)
Well that's one approach. Here in the Pacific. NW US. there are Ventures on CL fairly often, about half are beaters or 2 steps from being parts bikes. Some are gems...some are gems in the rough... I have a tent in back of my garage I could store some bikes in... so long as they were roll able and don't present too much of a problem I could leave them there. I bet most of us have limited funds for this hobby, Thank God for Ebay and Amazon, but most for this place...if ya can't find your part one place it's sure to be in the other... parts bikes are good investments... if you can't use a part someone here is probably looking for THAT part...,maybe they got the part YOU'RE looking for.... -
Powder coat is way better (practical) than chrome anyway. It's more maintainable, maybe not as scratch resistant to abrasion but certainly easier and cheaper to fix than chrome. I have been considering getting a used electric or propane oven in my garage and power coating my stuff. We do it at work but the boss won't allow us to do our own stuff there. Wish you could reconsider the tutorial. That kind of thing would benefit many here.
-
89 rear sits 3" too high?
dna9656 replied to ChiefCass's topic in Venture and Venture Royale Tech Talk ('83 - '93)
Glad to see Neil is posting again! HIYA NEIL!!! -
Taking LOTS of pictures or doing a video? Sounds like a post for the reference file for everyone to look at/consult for those heavy duty mods....More power to ya!
-
I sawed 1.0" from the thick part of my broken stand and had it welded in place just below the "ears" on the stand by the fabricators in my neighborhood (pros) thinking that the bike wouldn't be leaning over so far, well 1.0" doesn't make much difference. I was using a 2" X 4" and that worked ok but was a LITTLE TOO upright, so I went with the 1.0: extension. I also had to extend the spring as well, I did that with a chain link used to connect chains to anchor points or to other chains. Well I got it powder coated and now have the issue with the "ears". How the bolt went through and threaded in place before (and will not now) is somethng that makes no sense. So I have some MAP gas and a torch, even some propane,,,,it's rainy today too....
-
Yeah I KNOW all about the weight of our bikes... trust me. One guy CAN pick it up using standard methods BUT there have been times when I couldn't muster the strength...Once when coming around a corner in a parking lot I got cut off and had to steer very tightly around a curb, I got hung up on the curve with the bike leaning too close to the ground to pick it up and couldn't get it off the curb. I was stuck, it was cold, raining, and in a busy place. Of course i was right in the middle of everything. The guy that cut me off? Well they just kept going (what else is new?) oblivious to my issues. A couple of guys driving by took pity on me and helped me out...thank goodness for good Samaritans!!!
-
Sometimes I have to scratch something...I know my Road Star makes my nose itch terribly.... Speaking of cruise control... Mine didn't work at all (83.5) yet the light is dim/bright when it's supposed to. Now it's started working intermittently yet it won't HOLD the setting at any speed so I THINK I have a vacuum leak.... Comments?