


FuzzyRSTD
-
Posts
1,651 -
Joined
-
Last visited
Content Type
Profiles
Forums
Gallery
Events
Store
Everything posted by FuzzyRSTD
-
Stebel air horn. Very loud.
-
Yep, as mentioned, adjust the locking mechanism. I had to adjust mine once. 2007 RSTD here. No problems since.
-
I say go with the name brand Loctite. All automotive parts houses should have it and Walmart. I use it on all my acorn nuts when attaching the eye bolts to my flag poles I build for my my flag mounts. A small bottle will go a long way. A small dab will due the job. It is almost like a water type fluid. I put one drop on the inside of the acorn nut threads and it covers the whole threaded area. I use the permanent on this application. http://www.loctiteproducts.com/ THE PRODUCT ADVISOR RECOMMENDS: TECHNOLOGY: Threadlocker Loctite® Threadlocker Blue 242® Securing nuts and bolts from accidental loosening. Removes with hand tools. OTHER RECOMMENDED: Threadlocker Loctite® Threadlocker Red 271™ Securing nuts and bolts from accidental loosening. Heavy duty; removes with heat and hand tools.
-

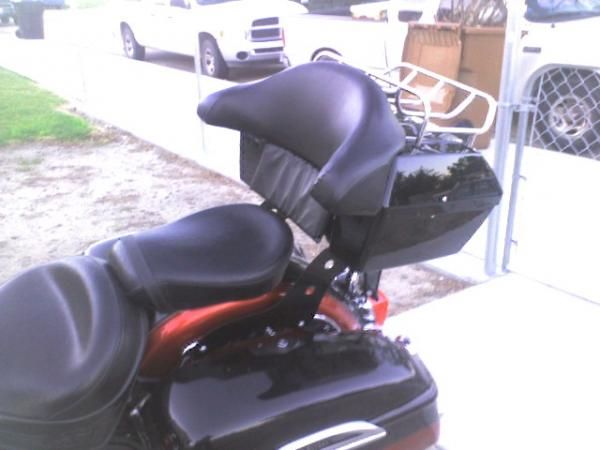
Sissy Bar Passenger Back Rest and quick connect for sale ??
FuzzyRSTD replied to FuzzyRSTD's topic in Watering Hole
Thanks Kickshot. I sent a couple private messages to you with more information. Thank you very much and I will pay for the shipping. Just contact me here or through the information I provided. I have the trunk now just need these parts to get started. I have a trip planned in August and hope to have it all together and working by then. Thanks again. -
Wondering about Ponch also. I hope he is doing very well. I think of him every time I put my bike on the center stand. Remembering him helping me get my center stand on at Freebirds maintenance day. Remembering the tip he gave me about carrying a small length of a 2x4 to roll the rear tire up on to get the bike on the center stand so much easier. I still carry that 2x4 at all times. Along with a small DC air compressor and tire repair kit.
-
Greasing Splines
FuzzyRSTD replied to rutman's topic in Royal Star and Royal Star Tour Deluxe Tech Talk
I sent them an e-mail for pricing and quantity. -
Sissy Bar Passenger Back Rest and quick connect for sale ??
FuzzyRSTD replied to FuzzyRSTD's topic in Watering Hole
Thanks Kickshot. I appreciate the offer. I am still looking and contemplating the idea. The shipping from Texas to me would be rather expensive maybe and I would like to find the thing, or at least the chrome back and locks together. I would like to have it but would not want you to spend a lot for shipping it. -
Skid I will ride with you my friend. I am used to passing my buddy JD on his Road King short stroke. LOL, Nice ride.
-
Yamaha Wompus rack and DMY trunk
FuzzyRSTD commented on Phoneman1981's gallery image in Member Albums
 A good side view photo Phoneman. How about a rear photo ?
 -
Sissy Bar Passenger Back Rest and quick connect for sale ??
FuzzyRSTD replied to FuzzyRSTD's topic in Watering Hole
I have searched and searched with no luck so far on the internet or the classifieds here. -
Looking for a Sissy Bar and quick release for my 2007 RSTD. I have a trunk spotted and need this to attach the trunk to my bike please. Any help is appreciated. Thank you.
-
Clutch Upgrade Tips
FuzzyRSTD replied to FuzzyRSTD's topic in Royal Star Venture Tech Talk ('99 - '13)
It keeps the last steel plate and last half disc in place. Remove the wire and discard, along with two other small steel rings about 1/4" across and the half clutch disc that are behind the last steel disc. Also discard the clutch spring that you took off in the beginning. Then replace with Skydoc_17 upgrade,the heavier clutch spring, full size clutch disc, and new gasket in this order. #1. Replace the half disc with the full disc that has been soaking in the Yammy oil. After removing the steel small 1/4" wide steel rings. #2. Start the reverse process of putting in the steel plate- clutch disc-steel plate-clutch disc-steel plate-clutch disc and so on. I also did the roughing up of the steel plates before putting them back in. #3. Lastly put the heavier clutch spring in, paying attention to the small steel ring that goes behind the clutch spring. You will hardly know that is there with out looking. The oil held it in place on my job. http://venturerider.org/forum/showthread.php?t=10518 NOTE; Have yourself as I did, a 5 mm allen wrench cut to approximately 3/8" long on the short side as noted by Tartan Terror, or else you will have to remove the exhaust. There are three bolts that will have to be removed with the allen wrench. Thanks to Tartan Terror for the good tech write up on this to, he mentions this also. I had to remove my Steble horn to. -
Me to Kirby. Especially at $300.00, wow.
-
Suspicious tire damage
FuzzyRSTD replied to stanG's topic in Venture and Venture Royale Tech Talk ('83 - '93)
Avon Venom my friend. Get you some. -
OK, I found them here is the link to another post about them with good information. From what I see, I will go with the Yamaha brand. http://www.venturerider.org/forum/showthread.php?t=20800
-
Best buy on the Baker Air Wings and a link please ? I am like Ragtop, the post are useless information with out a link and good photos. I will go searching for them for now.
-
Dealer replaced my head gasket at around 15,000 or so. Found out it was a recall on my bike and it did not cost me anything. The head was not properly torqued from the factory. I do know they did not remove the motor to do this and that there is a write up about it somewhere here if I remember correctly.
-
Oil and Filter for RSTD
FuzzyRSTD replied to bwk's topic in Royal Star and Royal Star Tour Deluxe Tech Talk
Agree ! X 2 -
Clutch Upgrade Tips
FuzzyRSTD replied to FuzzyRSTD's topic in Royal Star Venture Tech Talk ('99 - '13)
Here is my clutch disc alignment photos before I removed them and did the Skydoc_17 upgrade. I believe this is why I had slippage once in the first place. My clutch basket was replaced earlier on my bike. Looks like the dealer mechanic did not align them properly. [ATTACH]85379[/ATTACH] [ATTACH]85380[/ATTACH] [ATTACH]85381[/ATTACH] -
I have a 2007 Royal Star Tour Deluxe and I just did the clutch upgrade kit from Skydoc_17. Thanks Skydoc for a good product and instruction sheet. Everything is done and back together. I just want to add a few notes and photos that I think will help someone else, along with the Tech Library write up from Tartan Terror. Thank you Tartan Terror for your help. #1. The small wire is located at the very last as you take out the friction disc. It is very small and there was no photo depicting it so I took a photo of it before taking it out. It is on the left of the photo at the dark mark in the rear. The wire is wrapped and in a notch around the splines. [ATTACH]85371[/ATTACH] #2. After you get the last steel plate out, then the half friction disc. This is what you will see. [ATTACH]85372[/ATTACH] #3. When putting the pressure plate back on, this is what you are looking for when Tartan Terror mentions the dots to align back up with the punch marks on the pressure plate and next to one of the bolt towers. First photo showing the pressure plate punch marks. [ATTACH]85376[/ATTACH] Now this photo shows the punch mark next to the bolt tower. I had mine marked for reference but I still wanted to make sure they where aligned properly. [ATTACH]85374[/ATTACH] Also my clutch basket had the two dots to the 11 o'clock position and one dot at the 5 o'clock position. This is opposite from Tartan Terrors description. But thanks to Skydoc_17 I now understand why.This turns and will not be the same as described. Also the alignment of all the dots is not why i had the problem. It was because of the weaker spring that I replaced with new upgrade. Can't wait to try it out.
-
My sincere condolences to Heather and all the family. I only knew Steve from here on the VR site and I highly respect him and his family. I pray God will comfort you all in these trying times. Respect Honor Remember. Condolences from my family to yours. James D. Fultz 437 Reeves Branch Olive Hill, KY 41164
-
This is was my first bike. A 1973 Honda CB350 in a gold color. I loved it. A very tough bike. I was 14 years old. I worked it out in the hay and tobacco fields for several farmers around home. I helped set, hoe , top , spray , cut , and house tobacco all summer. Then help strip it in the fall and winter. Put up hay in between times. $2.00 hour most of the time, sometimes less, according to who you worked for. I remember the guy we bought it from, he had a very very nice Honda Goldwing. I have never forgotten that big beautiful Goldwing sitting on his car port. [ATTACH]79835[/ATTACH]
-
For those electrical goroos here, is it possible and fairly easy for me to wire in hazard flashers on RSTD ? I am not very electrical inclined, so please make it as simple as possible. Thank you all in advance.
-
That is exactly how I feel about it to Steamer. I do the same exact thing while riding. I think that answers the question myself. Run on Reserve always and get fuel when low.
-
RSTD Clutch adjustment
FuzzyRSTD replied to David Hall's topic in Royal Star and Royal Star Tour Deluxe Tech Talk
The fluid should be changed ever so often. I changed mine last year. Very well said M61A1MECH . Thanks.....