syscrusher
-
Posts
848 -
Joined
-
Last visited
Content Type
Profiles
Forums
Gallery
Events
Store
Everything posted by syscrusher
-

Talking tires,, guess I what I noticed this weekend..
syscrusher replied to cowpuc's topic in Watering Hole
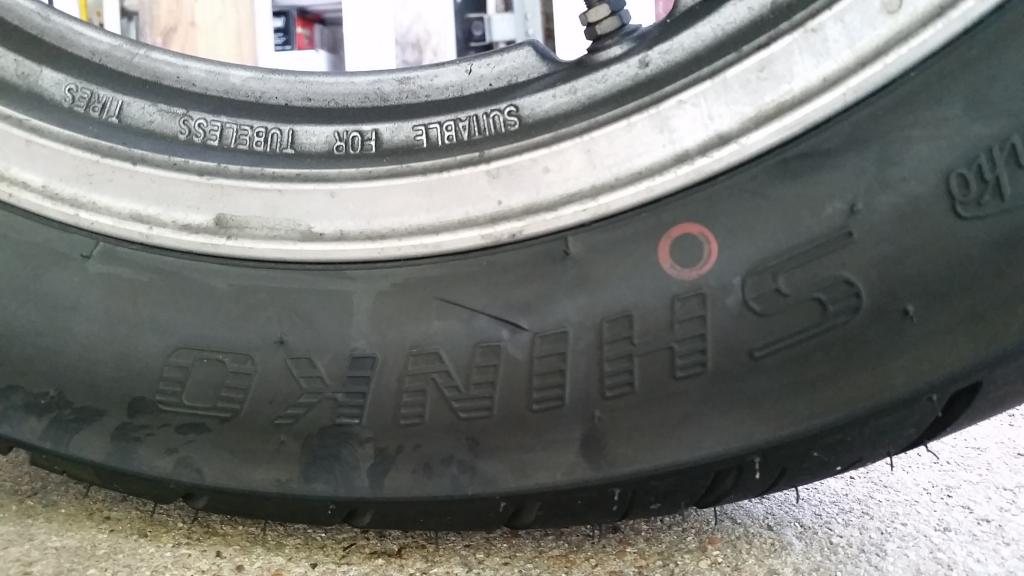
Here's the photo of the cut I saw the other day. I'm not sure this was the same one I was talking about or not. I didn't really roll it to check the whole tire but I was working on my new footboard mounts and noticed it and took the picture. What do you think? Would a big vulcaning patch keep it from spreading or are there any other tips?
-
Progressive front fork springs
syscrusher replied to blaine1's topic in Venture and Venture Royale Tech Talk ('83 - '93)
I guess the tops of my fork tubes have always been flush with the top of the clamps in the triple tree. This is how I installed the new tubes as well because it gave me a reference for the position of the tubes. The caps were never affected by the clamps on my 1993, maybe it's a little different than other model years. Unless, it just occurred to me that you may be suggesting that the clamp actually squeezes the tubes enough to deform them and put pressure on the fork caps? When I changed fork tubes getting the top clamps tightened was one of the most difficult parts of the job since there is very little room in the steering cutout for a rachet with an allen bit on it or to move a 'L' shaped allen wrench more than a tiny bit at a time, as I recall. -
Noise on PRV175 coming from HID Ballast
syscrusher replied to syscrusher's topic in GPS, Audio, Electronics
I'm happy that the Pyramid worked for you. I took a pass on it when I read a reviewer on Amazon who said he cut one open and there was tiny thin wires and next to nothing in the way of components. The Browning has some heft, rated for 250W with a 10000 mfd capacitor and iron core inductor. Radio Shack used to sell one like the first link you provided, it's transformer isolation for the signal path and losses can be severe if the overall impedance match is very different.
-
That's a great way to do it. I didn't think of that. I don't know how many times the diaphragm ring practically fell into the groove when it was inverted that way, until I pushed in the spring. It sure is easier to cut the end of a dowel than it is to polish the edge of the aluminum sheet. I guess I won't be able to sell many Diaphragm Installation Tools here.....
-
My local HF had the 100 piece Security Bit set on sale for a few cents less than a Hamilton today. I bought 16 M5x0.8x12mm stainless socket head cap screws for $3.20 at Fastenal locally. Ace Hardware wanted $1.19 each in stainless.
-
When I had it open I looked into the carb body and I didn't see any holes to line up with. The only hole on the "bottom" of the carb body was the needle jet itself. I also didn't want to risk tearing the diaphragms by pulling them loose from the slide. I'll have to be told all about why to line up the holes in some scientific jargon that sounds like it must be way over my head before I try lining up anything. Then I'll have to try and find a hole to line up with. It runs pretty good WITHOUT lining up anything, I'm not sure I could stand it if the holes WERE lined up!
-
I must have found her 'G' * Spot! I didn't know she had such an appetite**. I guess I may have not gotten one or both of the diaphragms on the right side seated correctly. When I opened those two the diaphragms popped right up out of the ring groove. I hate dealing with the damn things because they tend to come out of the groove and if I use my fingers to hold it in place there's enough room to let the ring pop out when I remove my finger and put the cap down. I needed something thinner than my finger to hold the diaphragm until the cap could hold it. I invented a diaphragm installation tool as seen in the attached photo. It's made from thin sheet aluminum roofing material. I knew that cutting with the shear would leave a rough edge so I used the Dremel with a cut-off wheel and then smoothed the edges of the cutout with the Dremel. I got them very smooth as they need to be. Before attempting to use it I spray the side that will make contact with the rubber with WD40. I get the diaphragm in the groove underneath the sheet and then bring the cap to it and put in a couple screws just loose enough to let me slide the sheet out from under the cap. With the sheet removed the screws all get tightened down and on to the next one. Everyone reading this make a note to remove the fake tank cover, start up the bike and then remove the air cleaner and cover. Rev it up a little and make sure you see all of the slides move. If you don't then take a look at the diaphragms for those. I never knew this was happening. When I got the VR there were pinholes in the diaphragms and the loss of vacuum made the idle rise to 3000 or so when warm. I opened the caps up and put Super Glue over the pinholes. Those diaphragms were well behaved and stayed in their grooves easily. This was probably the best performance I experienced with the bike before getting new diaphragms and messing up the install on some of them. At the time with the Super Glue my carbs weren't balanced so it was still a little off. There really was nothing to hint at what was happening other than to look, which I never had. I guess looking at the slides when revving should be a part of the procedure. I had been thinking I needed new plug wires because of a slight miss. Thanks to all for the help! * the Gassy spot ** appetite for the Gas
-
Progressive front fork springs
syscrusher replied to blaine1's topic in Venture and Venture Royale Tech Talk ('83 - '93)
I have had the caps out on my 1993 without loosening the top triple clamp many times, until I replaced tubes after my accident. If the clamps were loosened I wonder if it wouldn't require aligning the forks again to be sure it's all OK. I used ATF in mine this last time because I was expecting I may have to redo and I didn't want to waste money on fork oil. I added 13.5 ounces as the Tech Library entry said. I also capped the anti-dives, which I suppose means I need even less oil. It does some pogo-ing on the crappy concrete with repeating surface imperfections. I wondered if my ATF was too light to provide rebound damping, but after reading your post I now wonder if I have too much oil and an "air spring" effect is causing the pogo-ing? -
Back in January I used my digital carb sync to balance the carbs. When I pulled the vacuum plug off of the right rear carb (izzit #3?) there was no change in the way the engine ran. No stumbling or hesitating, nothing. There is good vacuum on that port, etc. and I balanced the carbs very closely, nearly perfect. Well today I had the lid and filter off the airbox while it was running and when I throttled it the slides on the left both opened a little wider and pulled the needle with them. The slides on the right side didn't move, neither one of them. I used a long screwdriver to move them manually just to ensure they weren't stuck but the return spring provided more force than vacuum in the cap and so they closed again. This is beyond my understanding, except for one thing, it seems like my right cylinders are only getting the pilot mixture and nothing more. I am sort of optimistic that someone here knows just what's going on and when I fix it I'll have somewhere close to twice the power I have now. But I am stumped. What is going on with my carbs? I had new diaphragms a year ago. At the time I didn't know that the small hole in the slide lines up with the hole in the carb body but I have to admit I didn't think that could be tremendously important because vacuum should be even throughout the carb and not require lining it up. If we expected it to spray a jet of fuel through the two holes when lined up it would be different but I don't think we're expecting that to happen. Could I have two damaged diaphragms on the same side after a year? Did I really install them incorrectly? I can't find my tamper resistant torx bit, I hope it's available at Ace Hardware. Please help??
-
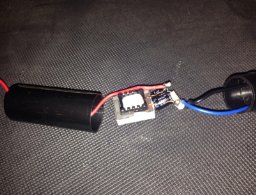
It's a three terminal device, Power In, Filtered Power Out, and Ground. Since I had already modified my fusebox I put this between the existing ACC connection to the fusebox (screw terminal) and the right side of the ACC fuse. This required one blue shielded tab connector for the output connection to the ACC screw terminal, a blue shielded female tab receptacle to connect the right side of the ACC fuse to the input, and a ring connector to screw down to the ground screw terminal. It screwed to the top of the air box right up near the battery. My entire ACC load is filtered clean as Taylor Swift's teeth and there is no unwanted noise whatsoever. Accept no substitutes, this is the real deal with real components inside it. It deserves five stars, the people giving it a so-so review on Amazon didn't know how to install it. Browning BR-FILTER [ATTACH=CONFIG]100788[/ATTACH]
-
Noise on PRV175 coming from HID Ballast
syscrusher replied to syscrusher's topic in GPS, Audio, Electronics
It's a three terminal device, Power In, Filtered Power Out, and Ground. Since I had already modified my fusebox I put this between the existing ACC connection to the fusebox and the right side of the ACC fuse. This required one blue shielded tab connector for the output connection to the ACC screw terminal, a blue shielded female tab receptacle to connect the right side of the ACC fuse to the input, and a ring connector to screw down to the ground screw terminal. It screwed to the top of the air box right up near the battery. My entire ACC load is filtered clean as Taylor Swift's teeth and there is no unwanted noise whatsoever. Accept no substitutes, this is the real deal with real components inside it. It deserves five stars, the people giving it a so-so review on Amazon didn't know how to install it. Browning BR-FILTER
-
Here's the list, 19 hours and 22 minutes behind the wheel, 944 miles. Just plug these places into your GPS or Google maps and you will see the best of what Colorado has to offer for scenery. Maybe diverge a little from the main slabs along the way for extra enjoyment. Colorado Springs, CO - Garden of the Gods Cañon City, CO - Royal Gorge Black Canyon of the Gunnison National Park, Montrose, CO Durango, CO - Hwy 550 "The Hwy With the Million Dollar View" Mesa Verde NP - The most interesting place in Colorado Telluride, CO - Gorgeous "Box Canyon" Colorado National Monument, 1750 Rimrock Drive, Fruita, CO 81521 - Very, Very nice place to visit Estes Park, CO - Rocky Mountain NP tourist trap Ward, CO - Odd little town in a pretty nice spot Boulder, CO - Quite a lot to do here. Denver International Airport, 8500 Peña Blvd, Denver, CO 80249 - your extraction point
-
Talking tires,, guess I what I noticed this weekend..
syscrusher replied to cowpuc's topic in Watering Hole
It's been a month now. I just doubt if they will do anything for me at the shop. I bought the tire online so I'm guessing the shop will pass the buck. I've got no proof of anything. -
Talking tires,, guess I what I noticed this weekend..
syscrusher replied to cowpuc's topic in Watering Hole
I just noticed a cut on the sidewall of my new front tire today. I'm wondering if the bike shop did it when they cut away the shipping info and other tags before mounting it. Do you suppose it might stretch out and cause trouble? It's about 1/8" at the widest point now. Does anyone know what I could use to seal it and keep it stable? -
Wow, Port Orchard must be tough! I thought my 2x4 was sort of fashionable looking. The young guys are wearing plaid and growing their beards out. What could be more hip than propping up your 22 year old motorbike on a 2x4? BTW, when I put it on the 2x4 the end of the foot sticks up in the air. Do these bend easily or something?
-
I looked at the Cyron on their website and it is not as bright as HID. It's only 2500 lumens while HID get as bright as 5500 lumens. This is a very fair comparison between HID and LED: http://betterautomotivelighting.com/2013/04/17/is-led-superior-to-hid/ It's from 2013 but probably not far off the mark. HID Headlights will Be Brighter, by about double HID Headlights will not last as long. LED Headlights last 10x longer than HID LED Headlights are the new technology, they look cooler and draw 1/10 the energy to operate Some LED Headlights are brighter than stock HID Headlights are available in a range of different colors HID Headlights can be used in any application LED Headlights have a narrow application range Most LED Headlight Bulb replacements are not bright enough yet to be safe (hard to know which ones can be used safely) When looking at off-road lighting and comparing HID to LED it’s not quite as difficult of a choice but here are some things to keep in mind: HID Headlights will be much cheaper. A 6″ 35w HID off-road light will run anywhere from $150 – $500 35w HID will produce 3,000 – 3,600 Lumens of output. 55w HID will produce 4,500 – 5,500 Lumens of output. LED is available in many configurations running from 900 Lumens (a single 10w LED product) all the way up to 35,000 Lumens (Vixion X XIL-PX7240) LEDs will traditionally draw less energy than HID HID and LED can both be found in long-range configurations
-
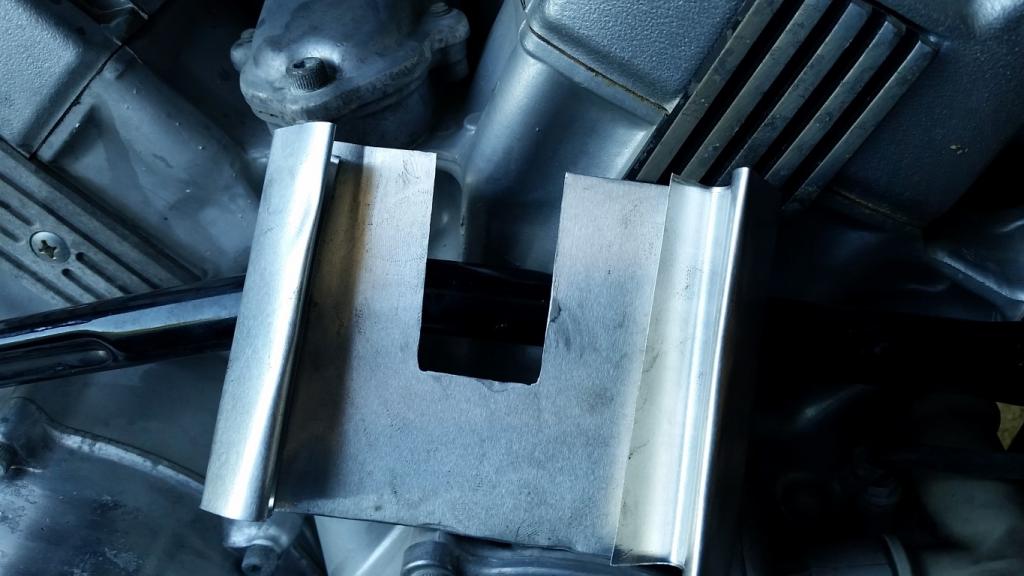
What is this bracket tab for?
syscrusher replied to Great White's topic in Venture and Venture Royale Tech Talk ('83 - '93)
This was my thinking, for my '93, but I meant to look to be sure. -
Too Rich OR Too Hot Outside?
syscrusher replied to syscrusher's topic in Venture and Venture Royale Tech Talk ('83 - '93)
At 1/3 my choke never seemed to do anything. It always took about 28 seconds before I had to move it from full choke to 2/3 to keep it from revving too high. I'm amazed that now full choke just makes it smell bad and run a little crappy but not revving fast as it always had before. Thanks for the Mikuni info, my DR650 also has a TM40 Mikuni with the enriching circuit. -
I have 6 feet of parachute cord wrapped around two blocks of wood about 4"x5" or so. One block is 5/8" plywood and the other is 2x4. Tiny eye screws attach either end of the cord to either of the blocks. When I park I take a look at how far the side stand is from the ground with the bike nearly upright and decide which of the two blocks needs to go under the side stand foot. The unused wood block goes back into the pouch anchoring the paracord for easy retrieval of the in-service block. If I need both blocks sometime that's fine too.
-
The garage is getting pretty close to operating temperature this last week from the heat outside but I found that my 93 VR will start without the choke. Does this confirm that it's adjusted too rich or something stuck or just fine? It seems pretty weak after starting, almost like weak spark or missing. All pipes get hot, probably more hot if leaner, huh? I had just two bars showing on gas gauge and added nearly full can of Sea Foam to gas. I went for short spirited rides for a few days letting it marinate over night. I think the carbs are clean now. Engine didn't really seem to mind that level of SF when I was riding it. I'm just wondering what I should expect. I noticed the choke thing when it also didn't run fast with choke full on but as I reduced the choke there was a point where it would run faster. Before I reduced choke it ran very rich each time with a smoky toxic smell of carbonizing combustion. I thought I'd try to see if ran without choke and it runs slow, around 600rpm. It needs a little throttle to fire but then it'll run slow at first until it's warm. When it's warm it doesn't seem weak anymore.
-
Swamp "A", monkey butt, etc. How do you deal with it?
syscrusher replied to Great White's topic in Watering Hole
I used one of these on my big cruiser. I would start with it fairly full and sit on it. After a while I would let some air out a little at a time. Sometimes I would let it get a little ahead of me and I'd sit in a bucket sort of while it supported my thighs more. Then I'd pull it back and sit on top of it again. My seating position would be constantly changing so that my tush wouldn't get tired of the same old. The Mustang seat for it was soft but put me in a weird position on it so I sold it off. The stock seat and the Corbin Rumble Seat were both a little stiff. The stocker really sucked. I bought a Corbin Dual Tour and reworked it and it was better but still not great. I'm a bigger guy, there's considerable weight on my tushie and that has an effect. The "standard" foot position enables the rider to lift the butt a little while riding which helps. I do suppose if I weighed half as much I could sit there for twice as long......... -
Introductions & questions
syscrusher replied to Gunny's topic in Venture and Venture Royale Tech Talk ('83 - '93)
There has been a sticky link to this thread, but here is where to get the ones I bought. -
Introductions & questions
syscrusher replied to Gunny's topic in Venture and Venture Royale Tech Talk ('83 - '93)
Your V65 Magna weighs 618lbs and has 116HP. Your 93VR weighs 785lbs and has 97HP, 5.33lb per HP vs 8.1lb per HP. I think you should notice a difference here. With some modifications you can put VMax heads and the VBoost stuff on your VR. I was once told that jugs and pistons were available to make the displacement as large as 1.8L. Unless you strip it down you will still have an extra couple hundred pounds to carry around. My suggestion is to accept that the VR is built for a different purpose than the V65 and is likely to perform a little differently. -
Another crappy thing that companies providing insurance underwriting scores based on credit do is to include any change of credit card number as an account closing. When Target gets a bunch of credit card info stolen your bank will typically cancel the existing card and issue a new one with new numbers. This is not your fault, but it is held against you in this way anyway.
-
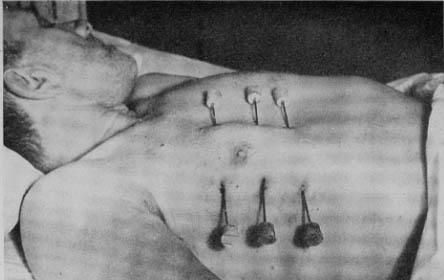
I found this page that shows some treatments for that. This is what you want right here: http://www.trauma.org/archive/imagebank/chest/images/chest0013.html