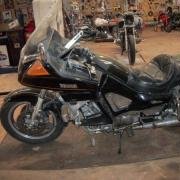
Air Ready Auto Posted June 28, 2016 Posted June 28, 2016 So how do I get this coolant line off, where do I get a new one, and what other repairs can I do while in their?
bongobobny Posted June 28, 2016 Posted June 28, 2016 OK the water pump should be pulled to get it off! You should be able to find a new one, sorry, don't have the part number handy. Looks like it suffered the old crash bar pushed back by laying it down failure. Is it leaking?? You can temporarily fix it by sanding it down at the gash then applying 2 part plastic epoxy to it... PS replace the rubber O rings when you replace the elbow PPS with the water pump off, if you have the plastic impeller on the water pump replace it with the metal one.
Yammer Dan Posted June 28, 2016 Posted June 28, 2016 AS Bob said rough it up cut a patch out of a ABS Elbow and apply with ABS Glue. Or Replace.
Flyinfool Posted June 28, 2016 Posted June 28, 2016 You have to take off either the water pump or the thermostat housing to get that elbow off. It kind of depends on what other stuff you might want to do "While you are in there". If you take off the water pump, I would put in new seals while it is off. If you go for the thermostat housing, I would consider putting in a 4 brush starter or doing the ground mod on your existing starter, and/or heavier starting cables, and at a minimum, new seals in the thermostat housing and the drain valve. On mine I went the thermostat side since I was having the slow hot start issue and needed to get the starter out anyhow. The thermostat has to come out to get the starter out.
Condor Posted June 28, 2016 Posted June 28, 2016 If it were me I'd just patch it if it's leaking, or do some body work on it if it's just ugly. There's a silicon tape that can be used to wrap the elbow that works really well. Even on Radiator hoses. As long as everything else works I'd avoid pulling the pump and PM'ing everything. "Change light bulb...Rewire house"
Air Ready Auto Posted June 29, 2016 Author Posted June 29, 2016 Lucy seams to be running a little hot so I think I'm going to pull off both the thermostat and water pump and update both and replace the elbow. Does anybody know what the Napa numbers for the thermostat and seals are or where I can find them? I thought I saw them somewhere on this sight but I haven't been able to relocate them.
cowpuc Posted June 29, 2016 Posted June 29, 2016 If by running hot you mean the temp gauge is reading high = that is normal for the MK1's.. It's common for em to run close to the red zone once they get warmed up and for the fan to come on just as the needle gets into the red. They did come with plastic impellars in the water pump and the update was an aluminum impellar - the plastic ones deteriorated badly.. The "dent" in the pic of the damage on the elbow in your pic is pretty common and commonly repaired but I do notice it appears they are still available from Mom Yam.. Here is a link showing the parts: http://www.cheapcycleparts.com/oemparts/a/yam/50042476f8700209bc787e2a/water-pump No idea on the Napa Numbers...
Condor Posted June 29, 2016 Posted June 29, 2016 If it's anything like the cost of the water pump seals, gaskets, 'o' ring, and bearings on a 2ndGen, the parts are going to run you shy of $100.00 bucks from your local Y dealer.... if they still have them available. This stuff is not available from your local Napa store. Like Puc said the MKI's tend to run right at red line. As long as the fan doesn't kick on you're OK.
Prairiehammer Posted June 29, 2016 Posted June 29, 2016 The plastic elbow used on the Venture is identical to the same elbow used on the First Gen VMAX, except for the color; the Venture part is silver and the VMAX part is black. If you want to save about 40%, go with the VMAX elbow, pn. 1FK-12446-00-00 for $22.45. The Venture elbow, pn. 26H-12446-00-00 is $37.43. Either is available new for those prices at boats.net. As for the thermostat: For the thermostat, the NAPA # 156 is a perfect replacement, actually seems to work better then stock. Quick warmups, temp guage stays steadier, less prone to overheating, and a lot less money. I'd recommend replacing all the O-rings in the plastic elbow and crossover pipe and t-stat housing while you're at it. Denden '83 xvz12TK OR
dna9656 Posted July 3, 2016 Posted July 3, 2016 What a forum! How cool is that? The best hard won advice and help you can find! Still the best $12.00 you could spend on your VR! KOO DOS to ALL!!!
cowpuc Posted July 3, 2016 Posted July 3, 2016 What a forum! How cool is that? The best hard won advice and help you can find! Still the best $12.00 you could spend on your VR! KOO DOS to ALL!!! Yea!!!
Venturous Randy Posted July 3, 2016 Posted July 3, 2016 While you have the guard off, grind the corner off where it is close to the elbow and you will have a lot more clearance and a tip over will not damage the elbow. You can more than double the clearance by doing this. Randy
camos Posted July 4, 2016 Posted July 4, 2016 AS Bob said rough it up cut a patch out of a ABS Elbow and apply with ABS Glue. Or Replace.This would be a good place to use my favourite patch/repair method using a mix of ABS and MEK. Put some MEK and some ABS scraps in a small glass jar with a lid that will seal. In a day or two the two components will become an ABS putty that can be used to build up the damaged fitting. Swirling the jar to redistribute the MEK every so often will help speed up the process. Getting the right consistency is pretty much trial and error but it is easiest to make a fairly loose mix and then let it dry out until it is like play dough or Plasticine. Squirt some MEK on the damaged part of the elbow, let it sit for a minute or so, give it another squirt then press the putty into the damaged area. Once it has set in a few hours use a utility knife and a file to shape the patch. It will take a few days to fully cure then finish using a fine sandpaper. Doing repairs this way you should have a solvent applicator bottle which is essentially a small plastic bottle with a needle. A metal screwdriver works well to stir with. When done the remaining plastic on the screwdriver can be allowed to harden then it can be easily cut off to clean up the screwdriver. The left over mix in the jar can be saved for any repair/rebuild on the fairing. It will eventually harden but adding more MEK will rejuvenate the mix. Using white ABS might give a close enough color match to the OEM silver although I think perhaps using black for the patch then spray paint the elbow black would be the best looking. I think the VMax elbow comes in black but I'm not certain of it.

Recommended Posts
Create an account or sign in to comment
You need to be a member in order to leave a comment
Create an account
Sign up for a new account in our community. It's easy!
Register a new accountSign in
Already have an account? Sign in here.
Sign In Now