Search the Community
Showing results for tags 'headers'.
Found 6 results
-
I am in need of a set of original mufflers for my 97 RSTD. if anyone has a set lying around. My headers are fine. Just need the slip on. Thanks
-
 Been doing some research. It appears as though a vmax exhaust setup (prior to 2007) "should" fit into a venture royale, at least the headers should bolt up, since they used the venture royale engine in the vmax. It looks as though the exhaust is obviously more up swept then the venture royale 1300 exhaust. Has anybody ever attempted this feat.? They have some really nice vmax exhausts. Even if one were to buy vmax headers the number of aftermarket slip ons is way better than the venture royale's (a.k.a. NONE).
 -
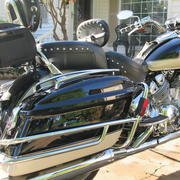
I guess my rear exhaust headers are not supposed to glow, but they were yesterday. The plugs do not show signs of running particularly lean but there is some heat getting back there from somewhere. Currently the carbs are off for a full rebuild, and the front exhaust headers too, to get at the starter. I noticed that one of the headers was very loose in the collector, and this would probably be contributing to the "spitting" back through #1 and #4 carbs. I suspect the butterfly valve seals aren't helping much, the intake boots seem to be sound. Anyway ... I was wondering if anyone else had experienced this. I do know that some exhaust headers, on some bikes do have a "glowing" issue, but I didn't think that the Venture Royale had this ... er ... feature. Any thoughts?
-
Can the copper exhaust gaskets be reused? I thought I saw somewhere on here a thread about reusing copper washers,etc but you have to anneal them first. Of course, I can't find the thread now. Anyone have any experience with this? The story is that I had to tear the exhaust apart on my 84 to repair a hole in one of the headers. The old gaskets look to be in good shape so I figured I'd try to reuse them if possible. Thanks!
-
For many of you this will not mean much, but for a few old hot rodders out there, it may. I have a 79 El Camino that was my dad's for many years before he died in August 2000. It had a 305 with a Quadrajet that ran ok but did not run very strong and seemed to use a lot of gas. My son needed an engine to go into his Chevy pickup, so he, my 16 year old grandson and I got the parts together to build my old 327 for the El Camino, so he could have the 305. We bored it .030 over, ordered a new cam that is the same as the old L-79 327/350 HP version. I had an Edlebrock Performer series aluminum intake and we put a 650 Holly double pumper on it. I also put full length tube headers on it. I even put the same aluminum Micky Thompson valve covers back on it that I put on 35 years ago, with a little polishing. After primeing the oiling system and getting some gas into the carburator, we cranked it up, open headers and all. It exploded to life, especially with it being inside a garage. Boy, does a cammed up small block Chevy with open headers sound good. This is the same basic engine I built and put in my 1964 Chevelle in 1972 when I was in the military. I rebuilt (basically re-ringed) it again in 1983 and put it in a 240Z Datsun. I put about 100,000 miles on the 327 in the 240Z. Now, all these years later it is back together and sounds real good. I can't wait to get the complete exhaust on it and be able to take it out and see how it runs. It may not get any better gas mileage, but I bet it runs a lot better. RandyA
-
VR-Exhaust Combiner Chamber Repair A.K.A. Fixing the Rattle in The Baffle by Robert Trim My second 1987 Yamaha Venture Royale Exhaust baffle began the 'rattle samba' a short time back. The devil is in the details and a picture is worth a thousand.... well you get the drift. Here's a way I did the surgery 1- You have to drop the entire exhaust system. a- remove mufflers on both sides first. 2 bolts on the rear of the chamber and 2 bolts half way down the mufflers accessible through the passenger's foot rest supports. b- remove the side panels, both sides. c- remove the lower fairing legs, both sides. The lower air dam and plastic cross brace. d- remove allen bolts holding headers to front cylinders. e- loosen 2 bolts in the clamps holding the combiner chamber to the front pipes. f- There are FOUR attach points holding the exhaust collector box to the bike. The TWO front attach are released by removing two 12mm NUTS located on a bracket near the front of the collector box which hold it to the bottom of the engine case. The TWO rear attach points are released by removing two 12mm BOLTS for the exhaust clamps at the bottom end of the rear headers; these are best removed by using a 10" socket extension angled up at a 45 degree angle on either side of the center stand. g- now the fun part... the chamber is not going to come easy. Use a pry bar on either side and work it lose from the rear headers. You will need to work the front headers lose and free so the chamber can drop down. 2- Cut open the chamber. 3- Remove needed baffle screen to get at the baffle. 4- Remove the baffle. 5- Bend opening shut. 6- Have someone weld it shut. It's stainless steel and needs someone with experience. 7- reinstall in reverse order. Make sure you put the chamber in place WITH the front headers attached. An extra set of hands is vital at this point. Here's some of those thousand word photos.... http://www.venturerider.org/baffle/StrippedSideSm.jpg Side plastic, mufflers and front headers off. http://www.venturerider.org/baffle/LowerSectionSm.jpg http://www.venturerider.org/baffle/BafUpperBolts.jpg It's easier to remove the parts with the bike on the center stand until you get to the rear header clamps. Put it on the side stand, use a mirror and drop light on the floor and look up between the frame tube and slightly forward. About the angle of the arrow you see above. The right side is easier to fine than the left so start with that one first. http://www.venturerider.org/baffle/MirrorSm.jpg http://www.venturerider.org/baffle/ScreenIn.jpg http://www.venturerider.org/baffle/CutoffToolSm.jpg The chamber is on it's back and this is 2 steps into the opening process. I used a cutoff tool to cut it open. WARNING... USE safety glasses and leather gloves when using the cutter. The above photo shows the left baffle liner screen already cut out and you can see the down pipe from the rear header connections. http://www.venturerider.org/baffle/BentUp.jpg Bend it open ONLY as far as you need to gain access to the baffle. I needed it 90 degrees open to get the cutoff tool in. If your baffle is flopping fairly freely (very common), open a little and grab with vice grips, twist and pull hard. http://www.venturerider.org/baffle/SideOpen.jpg Here both screens are cut out. http://www.venturerider.org/baffle/ECUbaffleSm.jpg My baffle had it's welds in place but was stress fractured along the bottom. I simply used the cutter to finish the break. http://www.venturerider.org/baffle/BaffleOut.jpg The rest of the bracket is fine so I leave it. It's spot welded top, bottom and in the front. With the chamber now open for air flow, this now exactly like the crossover pipes put between headers of a dual exhaust system on a car. The VR will now breath much easier. http://www.venturerider.org/baffle/DrillEndCut.jpg Carefully fold the flap back and work it as straight and as close to original placement as possible. Use a drill bit to create a termination hole at the end of each cut. Stainless will crack from any sharp point even after it is welded. http://www.venturerider.org/baffle/ReadyForWeldSm.jpg Ready for welding. A good welder will suggest that after welding the seam, a second layer of stainless be added over the seam. This will pretty much assure that the weld will outlast the bike. http://www.venturerider.org/baffle/CrackedBracket.jpg It is important to check for other cracks. This is the chamber mounting bracket on the top of the chamber. I did not see this until I gave it a good cleaning. This is a common problem. Get it welded as well. http://www.venturerider.org/baffle/BigWeld.jpg Big seam welded to perfection by the students at Salt Lake Community College's welding program. Good people to know. http://www.venturerider.org/baffle/BracketWeld.jpg Bracket crack all fixed. http://www.venturerider.org/baffle/ChamberReady.jpg Ready to go back in place. It's better to approach this from the right side of the bike. Slip the chamber back on the rear header down pipes and thread the bracket bolts on a few turns. Install the front headers into the chamber front inlets. This is a process of seating the pipes into the chamber and, at the same time, making sure the front header seats align flush. Soon as you get it dialed in, put the alan nuts on the front headers to hold them in place. Tighten the chamber bracket nuts. Then tighten the clamps to the front headers, then the header-to-head alan nuts. These are kind of a bear because there is a frame cross brace just 'almost' out of the way. You need a 5/16" longer length alan wrench to get it started. Install the mufflers. Replace the plastic parts and you're good to go. One additional tweak it to drill out the 2 baffles in the mufflers. You'll need a 1/2" drill bit welded to an 18" rod. Punch a few holes in the baffle on each end of the muffler for more air flow. Hope this helps if you need to do baffle surgery.