tz89
-
Posts
452 -
Joined
-
Last visited
Content Type
Profiles
Forums
Gallery
Events
Store
Everything posted by tz89
-
Thanks. Will do.
-
I have one board and parts kit left over from my prototype run. As an experiment I've posted it on ebay. Most forums discourage posting ebay links. You can search on digital carb sync or use the #s 111530378990 111530378389
-
Thanks! I am thinking of posting the software on an open source platform but have not made that decision or commitment yet. I am naturally inclined to open source, but there a good reasons either way. Stay tuned.
-
I think you should worry that wider bars will interfere with turning and we all need a tight turn sometimes. I'm wondering why you tip over so much that you are anxious to find an alternate method but that may be just a mis-read of your post. Did you forget the kickstand in the garage? There are videos of using leg strength to push up a bike - don't use arms and back. Maybe it is worth a little controlled practice. And while the old rubric that you shouldn't ride a bike you can't pick up applies, the leg push method means most of us can ride these heavy bikes and get it upright in most circumstances. That said, I've been surprised by the number of people who suddenly appeared to help right my bike when it went down. I was at a Victory demo day a couple of years ago and they deliberately dropped the Vision to demonstrate the guards and ease of righting it.
-
Thanks to those filling in the survey. it helps a LOT. Keep it up, please. One responder wanted it to be able to power off the bike instead of batteries. Done. All you need is a wire with a barrel jack connected to your bike or dc power. This thing can run on 12v already. Anything from about 4.5v to nearly 18v dc.
-
btw - thanks. That's a good feature request: ability to change the scale and/or units. Any other ideas please let me know or list them when you take the survey.
-
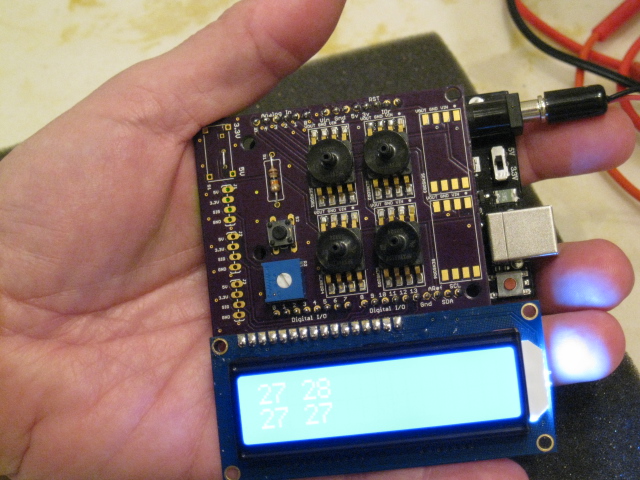
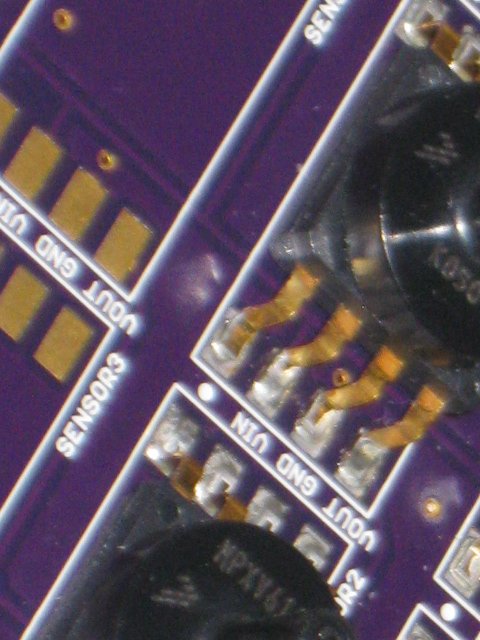
I usually set the software to read out in 1/10 inch of Hg. That's practical for setting the sync and reliable. I've tried it at .05" which is about the most accurate it can get. There is no practical need for that much accuracy imho and you have to start thinking about the error rate. You can't use this as a weather station. It will never rival a classic mercury manometer in good working condition which is still the best if you have one. But it is not toxic and way more portable. The sensors I use and recommend using are quite good. Here's the data sheet link: http://www.freescale.com/files/sensors/doc/data_sheet/MPXV6115V.pdf.
-
I'm not a member or Valkyrie owner. I try to be respectful. But maybe I can join and go easy.
-
I would like some feedback from that group of riders.
-
This was the original thread: http://www.venturerider.org/forum/showthread.php?73158-Built-a-digital-carb-sync
-
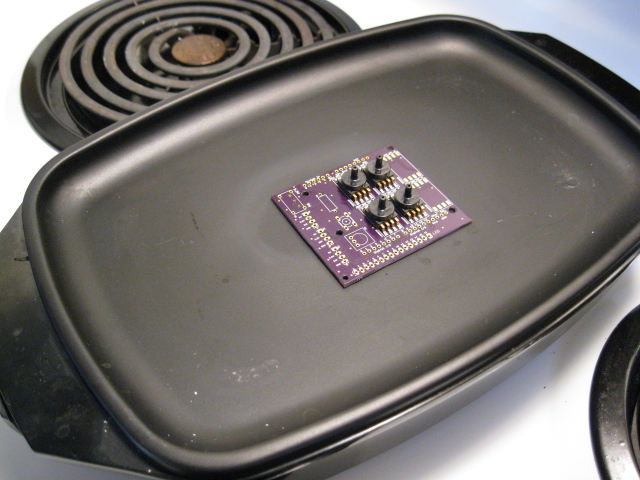
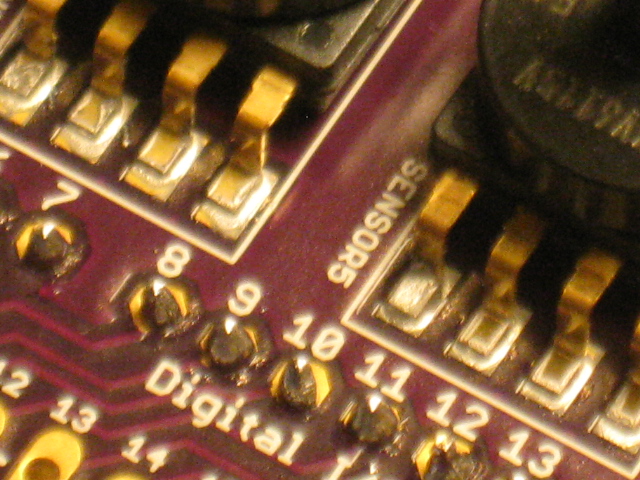
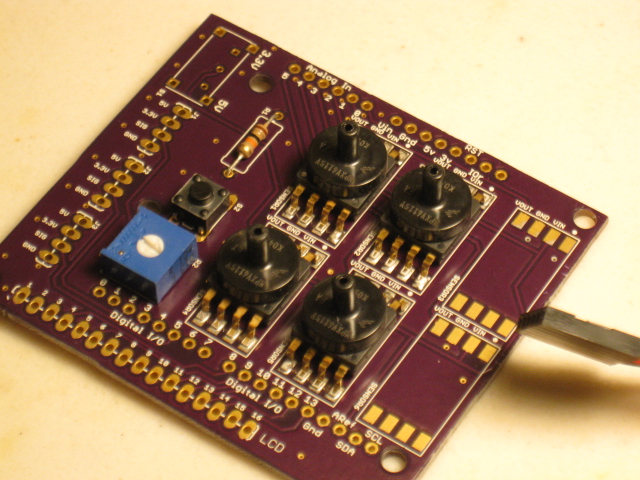
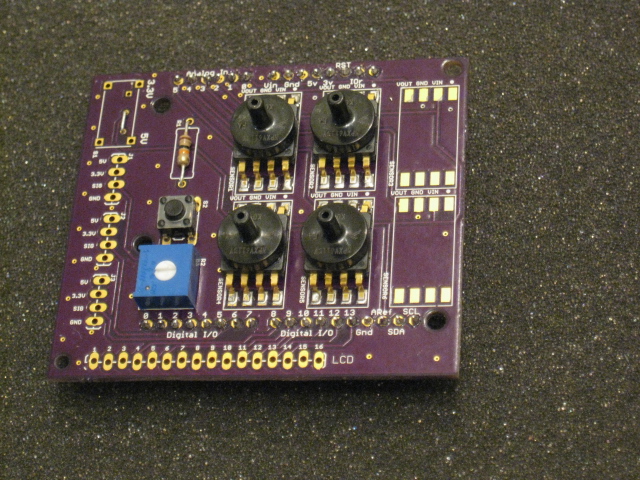
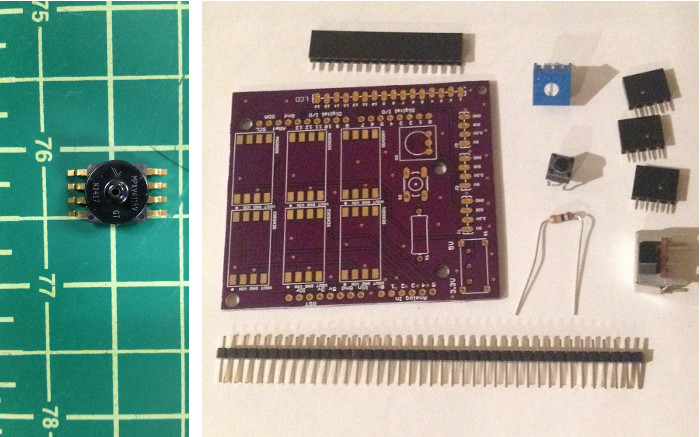
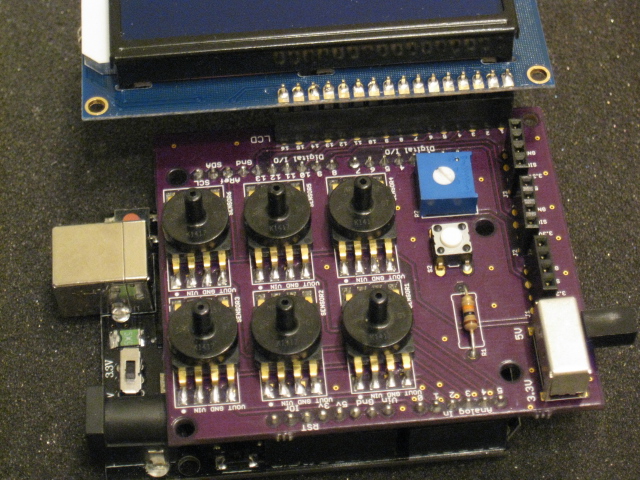
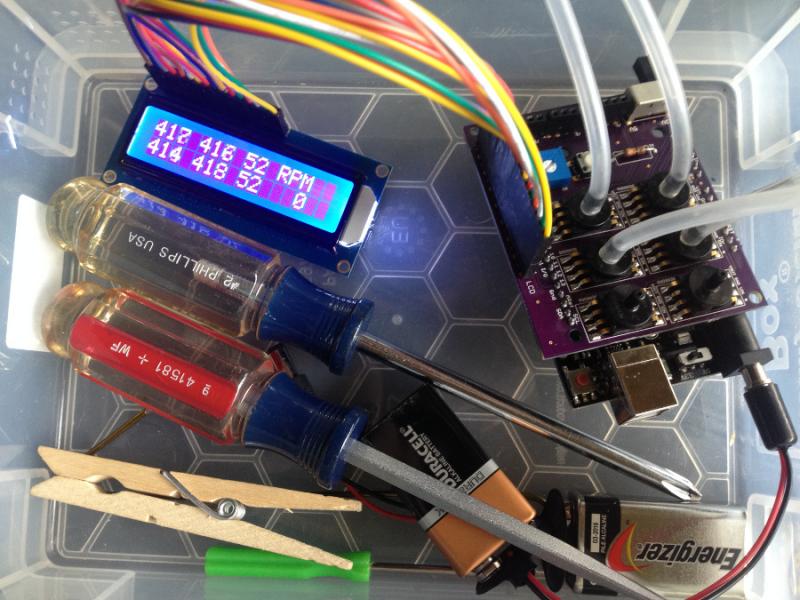
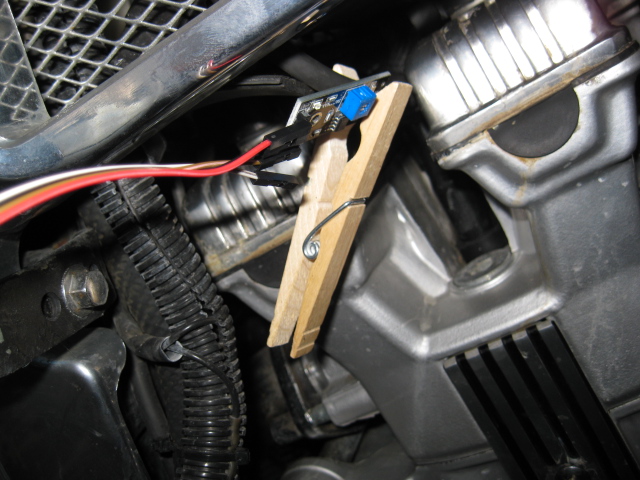
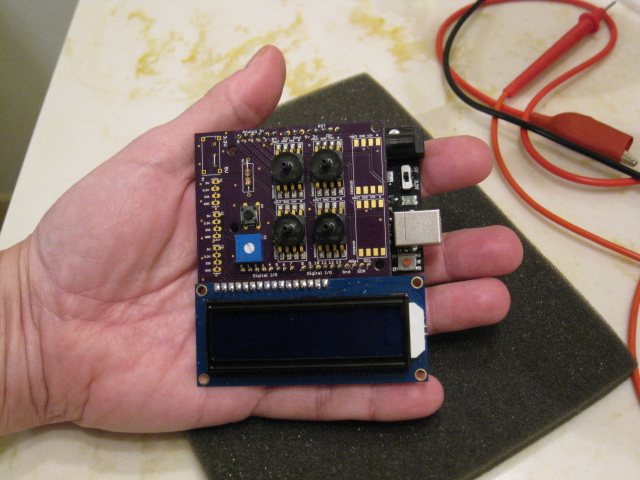
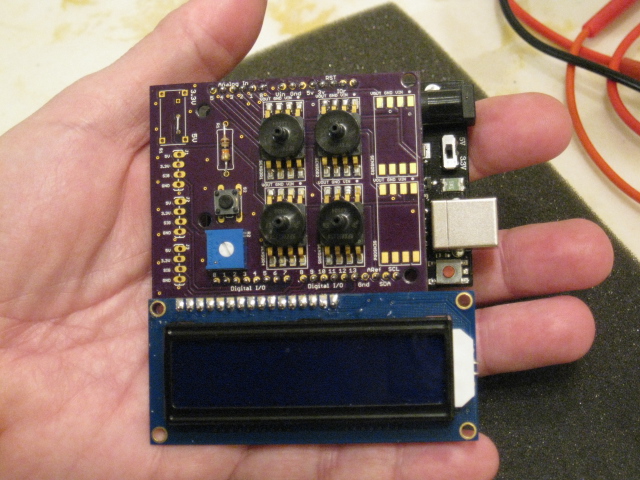
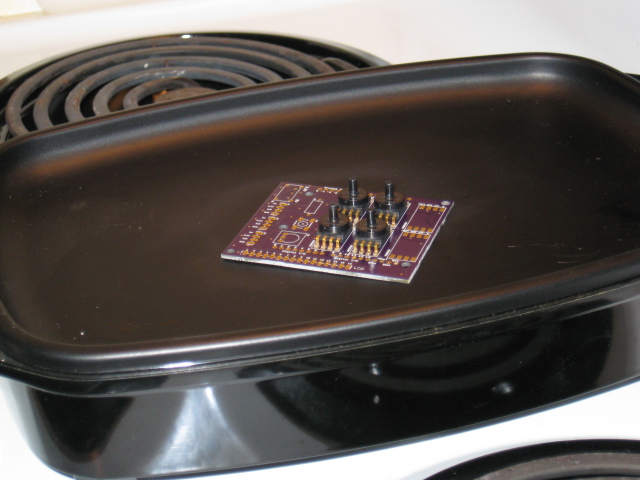
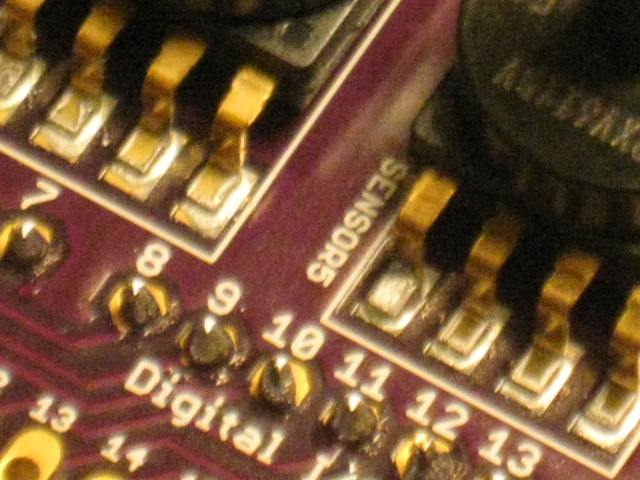
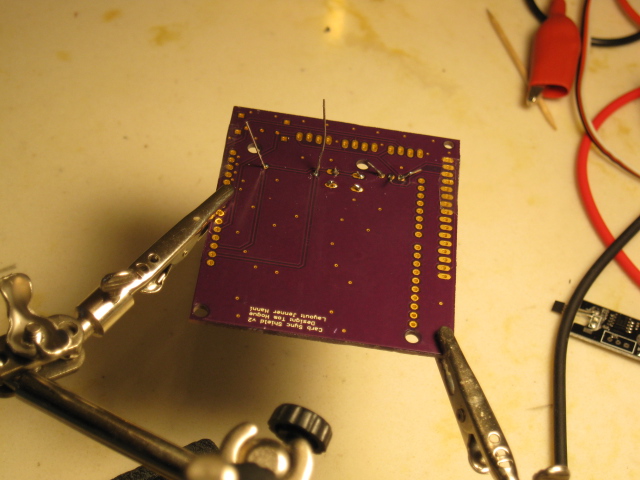
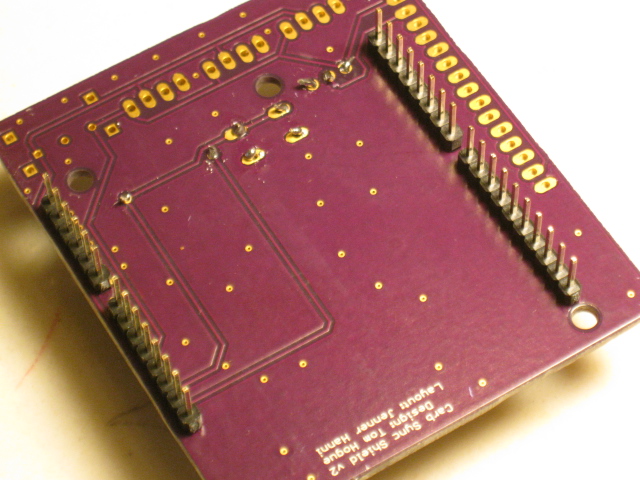
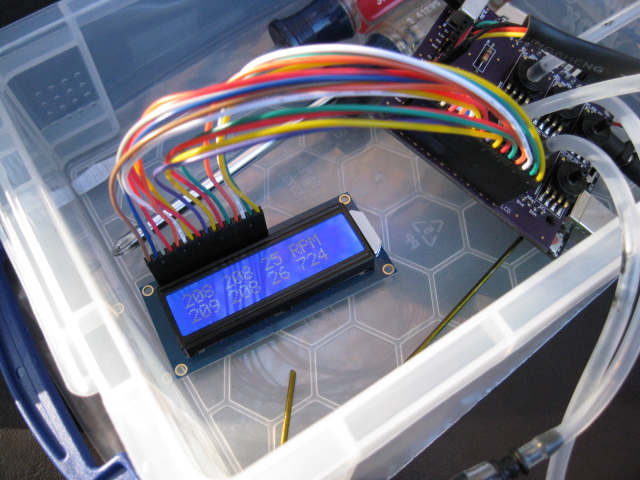
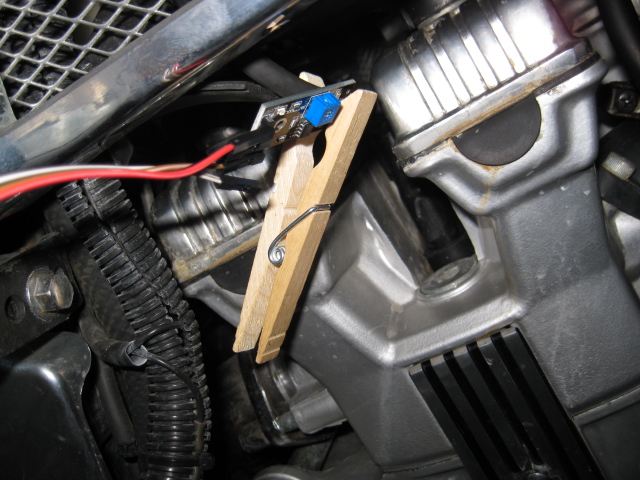
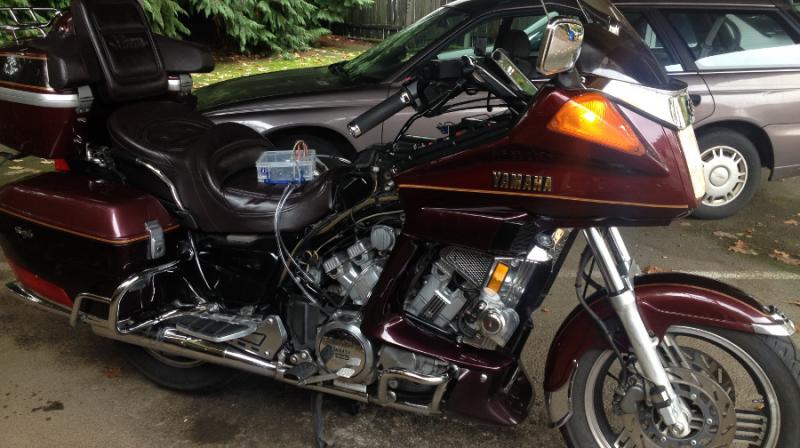
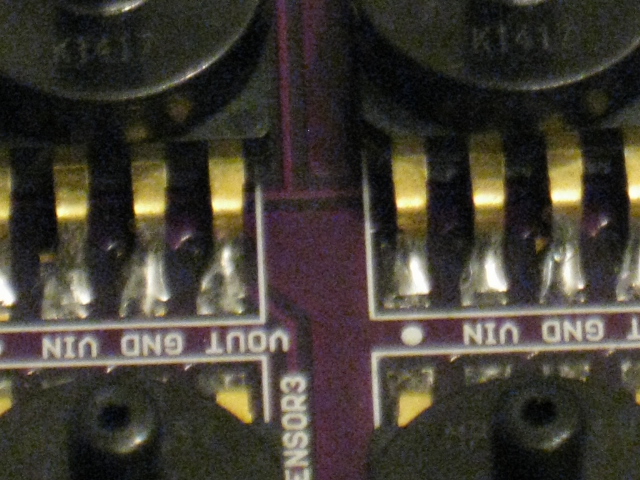
Here are a few pictures of my new board. A number of you have asked to get one. Please take this Google form survey to help me decide whether to make it available. http://goo.gl/forms/Oupfgt3SeK I'm posting this as a new thread and hope the old thread will wrap up. Please respond here. The first photo using a hot plate to neatly solder the sensors. The pads are big so a soldering iron works. A close up showing the hot plate results. A close up of the soldering iron results. A close up showing alignment of sensor notch with white dot on board. Everything else is soldered on by hand using a soldering iron. The finished board before mounting the LCD screen. The parts. The other board hand soldered with 6 sensors for a Valkyrie, with a removable LCD screen. My board layout guy Jenner Hanni helped a lot to get this all in shape. The first prototype on the bike. And some early work on a future RPM feature the board is designed to use. Typical configuration for a Venture with LCD mounted.

-
Got it. There's a setting. I suppose it doesn't matter why this started today but I'm probably not the only one.
-
Missed that. THANKS!!!
-
I just started a new thread called "Stop the Junk..." before I saw this thread. The ads are clogging up the new posts and I just mark everything as read and leave the forum. If I'm missing something let me know.
-
All of a sudden I see dozens, hundreds of listings from ebay as new posts. If this is some new automated feature, turn it off, please. If it continues, the pleasure and value of the forum goes way down, imho. If I want to check the classifieds or ebay I'll go there.
-
Please go to the new thread to view and respond. Sorry for the confusion. http://www.venturerider.org/forum/showthread.php?90191-New-digital-carb-sync-board
-

First Gen Carb Help
tz89 replied to Atomck1's topic in Venture and Venture Royale Tech Talk ('83 - '93)
Many on here would probably say bite the bullet and do it right. Or at least be careful when you do it the other way, which many on here have. Me, too. When I got my 89 #3 was blocked and not firing. My mechanic pulled the pilot screw and cleaned it out that way. I got lucky and it worked. Be careful about compressed air. Be careful what you spray in there - some carb cleaners will eat the rubber diaphragm. Leaving the carbs on the bike means you can't get all the circuits clean, the float bowls may be completely fouled, and the jets may be so blocked this method won't work. You can't do much with the enricher. If you get lucky, you can remove the pilot screw, remove the diaphragm, spray and clean as best you can from the side and top. Drain the bowl. Then re-install the diaphragm. You'll probably need a new one but we are hoping for 100% luck. Put in the pilot screw. If you didn't count the turns from bottom before you took it out, set it to 2.5 turns from bottom. Some good advice says set to 3 then turn in until you hear the rpms drop then back out a bit but that's an advanced course. This is luck. Go buy a new resistor cap for the plug and put that on by clipping just the end off the existing wire. Heck replace all the wires and plugs. Put a lot of seafoam in the gas. Starts right up. If you are lucky. Let her run on the seafoam, then ride it like you stole it, and let it sit overnight will all that seafoam. -
That's the page the delivers the error......
-
Supposed to arrive by mail today....
-
This appears to be from the site host.. if you enter venturerider.org as the url, the default redirect takes you to the wrong page.
-
Perhaps you could use that backup to create a test site, then do the upgrade, and let a few of us hammer on it. Might get a few lessons learned to ease the real deal.
-
wa yd ow nw ay do wn wa yd ow nw ay do wn They read and run about the same speed!
-
New ivan's performance jet kit
tz89 replied to hoochster's topic in Royal Star and Royal Star Tour Deluxe Tech Talk
On my 1st gen the wires easily come off the coil so it is easy to swap in new wires. I believe it is different on your bike. In any case the old caps will come off, you can clip a little off the end of the wire and replace with new resister caps. -
I've read the most likely culprit is a worn clutch lever bushing. In that case the switch that senses the clutch lever is being pulled (and the cruise must release) never opens. In my case it was the rear brake peddle switch causing problems (so my brake light was always on). Anyway - both are fixed now. I never use my cruise but I can.
-
New ivan's performance jet kit
tz89 replied to hoochster's topic in Royal Star and Royal Star Tour Deluxe Tech Talk
Vegas odds, any one? Spark plug cap: 1:1? Coil: 1:4? Idle jet: 1:3?