Search the Community
Showing results for tags 'screw'.
-
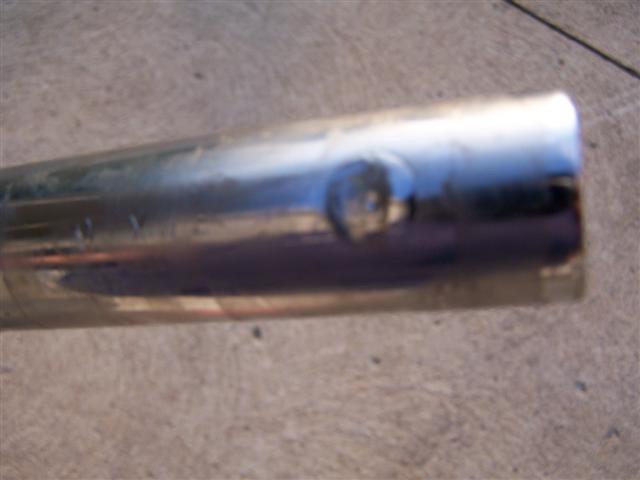
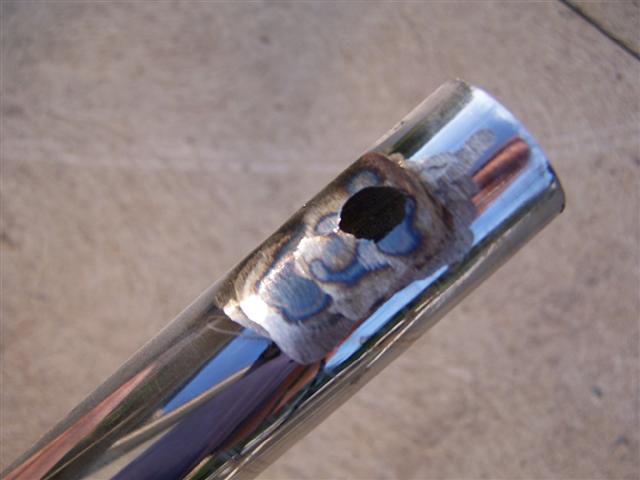
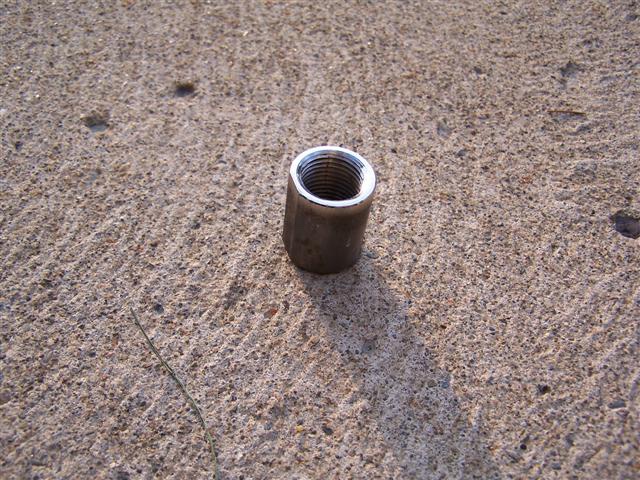
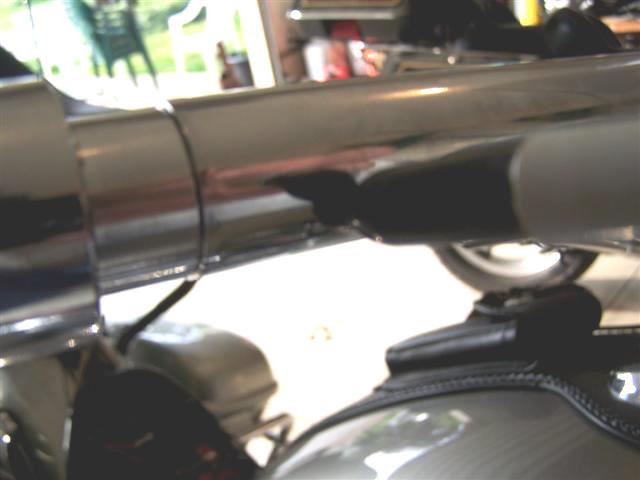
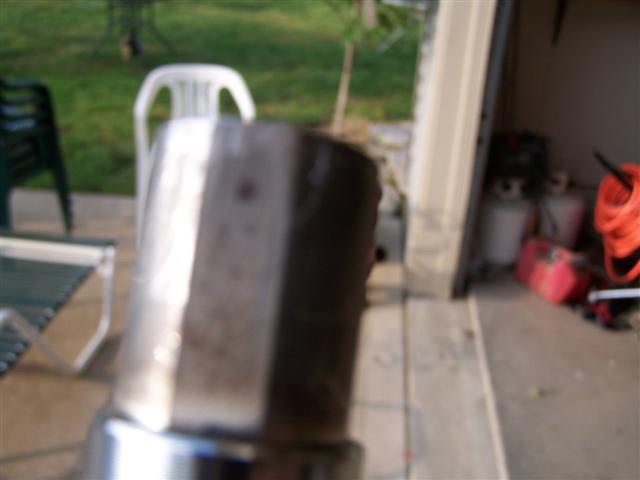
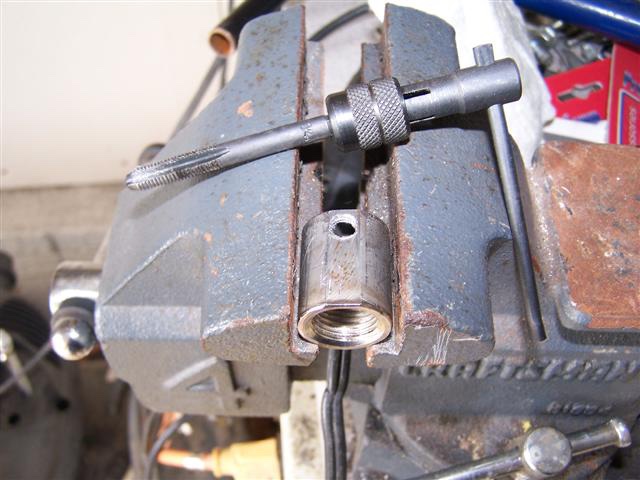
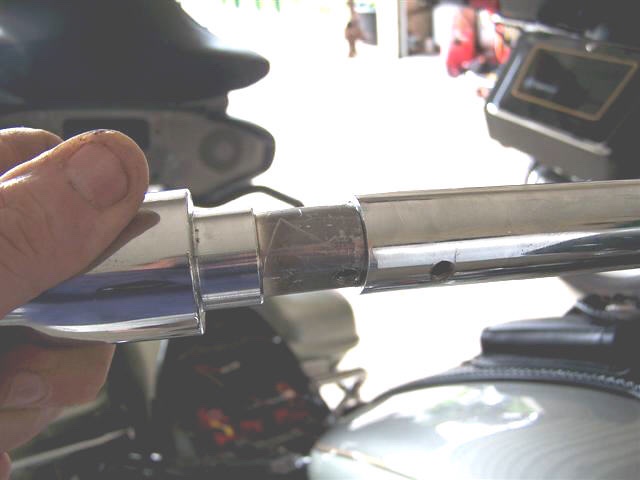
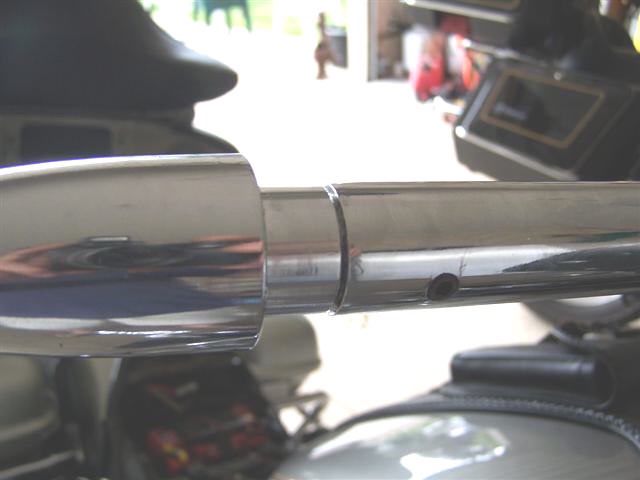
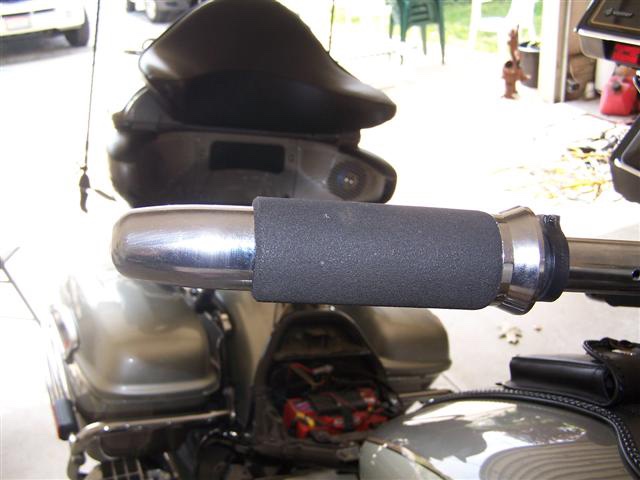
Installing Stock Weights on Flanders Bars First I need to give credit to the basic idea here to Kbran. He posted a while back that he had done this when he installed his Flanders bars and it sounded like the way to go. The only difference is that he welded his and I opted for a set screw approach. The main reason being that I'm not a very good welder. This is a bit time consuming but I like the stock weights so it was worth it for me. Pretty straight forward job that most anybody should be able to do. After removing the bars, you will see the factory weld that holds the threaded sleeve in place. I simply used a bench grinder to grind the bars down in that area until the plug just fell out. Drill a hole in the Flanders bars approximated 3/4" from the end. The size hole you drill will depend upon the size set screw you use. I picked up a couple of 10/28 screws 1/4" long at the hardware store so used a drill size that I could tap for 10/28 Screw the insert onto the end of the weight and push it all the way in and then using a marker, mark the insert through the hole. Now you can see the mark where you will need to drill and tap the insert to match the hole you drilled in the bars. Drill and tap. Screw the insert back onto the weight. You will also need to tap the hole that you drilled in the Flanders bars to the same size. At this point, I slid the throttle grip on. You can't see it in this next picture but the throttle grip is already slid on so that once the weight is installed, I just slide it back to where it is supposed to be. Insert the weight with insert into the bar. Line up the holes and insert your set screw. The screw needs to be flush with the outside of the bars. Especially on the throttle side to make sure the throttle can turn freely. It will be almost flush if you use a 1/4" long screw. Just a very little dressing with a smooth flat file will get it just right. That's all there is to it. Do the other side and you are done.

-
Sending Unit Repair Thanks to Brian H. (6m459) for this excellent article. I measured my sender unit resistance and found it to be open circuit as was suggested by another member. I removed it from the tank to find that the wiper would loose contact with the resistance wire at the mid point, of the float travel, as the resistance wire substrate is warped. It made good contact at top and bottom but not in the middle. I found that there is a handy adjustment available that lets you re-tension the wiper quite easily. Undo the screw and slide the bushing closer to the resistance wire, against a compression leaf spring, then re-tighten the screw. All seems to work well again now but I'll be keeping a close eye on it for the next little while. Shown with cover removed. Note bend in resistor wire substrate. http://www.venturerider.org/sendingunit/1%20(Small).jpg The wire loses contact with the resistor midway. http://www.venturerider.org/sendingunit/2%20(Small).jpg Solution: Loosen screw, slide wiper closer, retighten. http://www.venturerider.org/sendingunit/3%20(Small).jpg Close up view. http://www.venturerider.org/sendingunit/4%20(Small).jpg
-
Have removed the coolant bypass valve by removing the phillips screw on the side. When I pulled the valve out, I dropped it so I'm not sure if I lost any parts. There is a small spring for the a/m screw. Any other loose parts that might be lying on the driveway somewhere that I need to look for? This is from an '87. Could use a quick response. Thanks
-
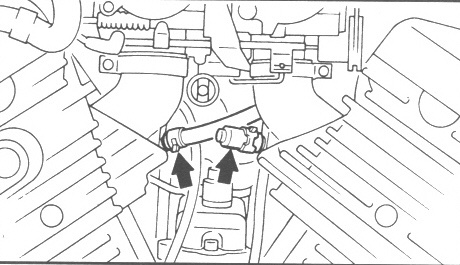
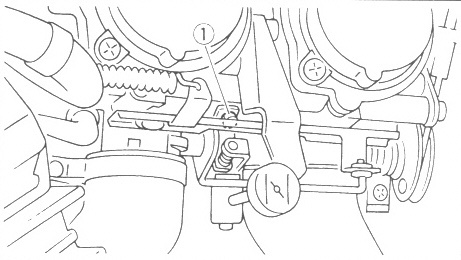
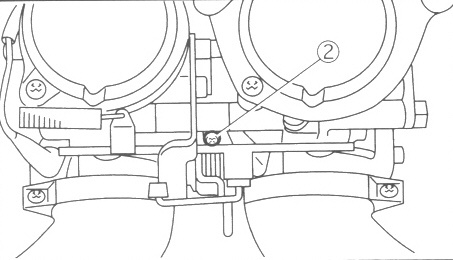
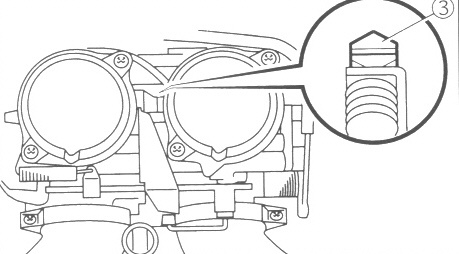
Synchronizing The Carburetors WARNING! Please be aware that the Yamaha Service Manual has the procedure for syncing the carburetors WRONG. The manual indicates that screw 1 is used to sync carb 1 to carb 2 and that screw 3 is used to sync carb 3 to carb 2. That is opposite of what it should be. The following is the correct procedure. NOTE: Prior to synchronizing the carburetors, the valve clearance and the engine idling speed should be properly adjusted and the ignition timing should be checked. 1. Stand the motorcycle on a level surface. NOTE: Place the motorcycle on a suitable stand. 2. Remove vacuum plugs. 3. Install: Adapters Vacuum gauge (Fig.2) Engine tachometer (Fig.2) to the spark plug lead of cyl. #1. Vacuum gauge: YU-08030-A, 90890-03094 (These are Yamaha part numbers. Any suitable mercury sticks, or other suitable gauges are just fine) Engine tachometer: YU-08036-A, 90890-03113 (Yamaha part numbers. Any suitable tachometer will work. A tachometer is not absolutely required 4. Start the engine and let it warm up for several minutes. 5. Check engine idling speed. If out of specification, adjust to 950 to 1050 RPM. Refer to "ADJUSTING THE ENGINE IDLING SPEED". in your service manual 6. Adjust carburetor synchronization. A. (Fig.3) Synchronize carburetor #1 to carburetor #2 by turning the synchronizing screw (3) in either direction until both gauges read the same. NOTE: After each step, rev the engine two or three times, each time for less than a second, and check the synchronization again. B.Synchronize carburetor #4 to carburetor #3 by turning the synchronizing screw (2) in either direction until both gauges read the same. NOTE: Turning screw clockwise raises carburetor #4 and lowers carburetor #3. C. Synchronize carburetor #2 to carburetor #3 by turning the synchronizing screw (1) in either direction until both gauges read the same. NOTE: Turning screw clockwise raises carburetor #3 and lowers carburetor #2. Vacuum pressure at engine idling speed is 37 kPa (280 mmHg). NOTE: The difference in vacuum pressure between two carburetors should not exceed 1.33 kPa (10.0 mmHg, 0.4 inHg). 7. Check engine idling speed. If out of specification, adjust. 8. Stop the engine and remove the measuring equipment. Yamaha then recommends the following. 9. Adjust: Throttle cable free play Refer to "ADJUSTING THE THROTTLE CABLE FREE PLAY". Throttle cable free play (at the flange of the throttle, grip) 4 - 6 mm (0.16 - 0.24 in) 10. Install vacuum plugs.
-
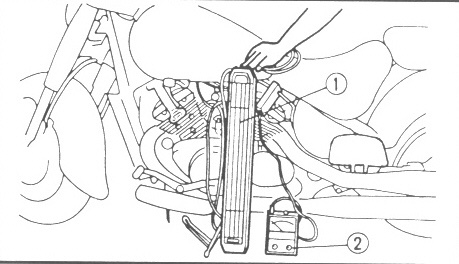
For the past few weeks my RSTD has been running a bit rough...I was getting a bit more vibration in my grips and floorboards...a few more backfires (I already plugged my AIS)...and so I ordered the Morgan Carbtune. Well it arrived last Friday...but alas...I fell off a ladder at home Saturday morning and have been crawling into work and around the house ever since. Well today on the way home from work I decided enough is enough. After I got home I got the Carbtune out...hooked it up...synched carbs 1 & 2, then 3 & 4, then 2 & 3 and guess what? Now it runs like a champ! The increased vibrations are gone...no more backfire...and she screams when I punch the throttle in overdrive once again. What a great tool...I highly recommend this to anyone with a Venture or RSTD...it truly is a piece of cake to do once you know where the three screws are and the number order of the carbs. The first two synchs (carb 1 to 2) and (carb 3 to 4) are adjusted with a phillips head screw driver from the right side of the bike (right side when when you are in the saddle). The last synch screw is a flat head screw that is accessed from the left side of the bike and is up to the right of the choke pull button on the left. I am sure someone will post pictures of these screws and this will help. The screw to synch carbs 1 and 2 is accessed on the right side of the bike but it is all the way on the left side of the bike...you have to go through the "V" to get to it...and it underneath the choke button on the left hand side...again...you can only get to this screw from the right hand side of the bike. Here I used a 20" Phillips #2 and had no trouble reaching it and then reading the carbtune gauge (which was attached to my right handlebar). The screw for the next synch (carb 3 and 4) is also on the right side of the bike and is found a little up above and to the right of the spring for the carbs. Here, believe it or not, I also used the long phillips screwdriver but my hands were on the metal shaft of the driver and not on the handle of the screwdriver. Again...had no problem finding, adjusting, or viewing the carbtune gauge. Finally...the last synch is betweed carbs 2 & 3...and that screw is accessed from the left hand side of the bike and is found above and to the right of the actual choke button. Here you need a flat head screwdriver. I already knew my idle was good...so I just jumped into the synching proceedure. When I took the bike out for a test run after she cooled down and I reattached everything...I simply could not believe the difference. What a tool...after 2 to 3 tuneups...I would have to say the tool will pay for itself. Later...
-
While at Vogal, I had my carbs synced by the professionals and it ran better and smoother on the hand grips. But, I knew my carbs needed to have the air mixture setting adjusted because at idle the richness would bring tears to your eyes. Without starting the bike, I started around the carbs and found two was about two turns out and one about one turn out. When I got to the front carb on the right side, I tried to turn it and it was pretty tight, but moved a little. When I bottomed out, it would not move and in the process of trying to make it move, I broke off the two raised edges that are on each side of the slot, therefore no more slot. I have another set of carbs I bought cheap off ebay, so I knew at worst, it would take pulling the carbs off and breaking them apart and cleaning them all and putting a spare on. So, if I really screwed the carb up on the bike, it would be ok. What I ended up doing was I used a drill bit that fit the hole with minimal slop and drilled a dimple in the head of the screw. I then used a small drill bit that fit the easyout, or screw extractor as some would know. I was able to drill deep enough to get a hole without drilling so deep that I drilled to where it shanked down to the step area. By tapping the easyout and seating it, I was able to unscrew the adjustment screw. I used a piece of rubber hose on my shopvac to pull out any debris. I was then able to put in one of the spare mixture screws from the other carbs and I was back in business. I then hooked up my son's carb syncing outfit and synced them myself. It took a few minutes, but I got them all the same. Now the bike is again running good and don't bring you to tears when idleing. randya
-
I remember seeing many months ago a list of screw on filters that fit first gen ventures. I am sick of messing with that o ring. Anybody know of a filter that will work?