Vickersguy
-
Posts
173 -
Joined
-
Last visited
-
Days Won
6
Content Type
Profiles
Forums
Gallery
Events
Store
Everything posted by Vickersguy
-
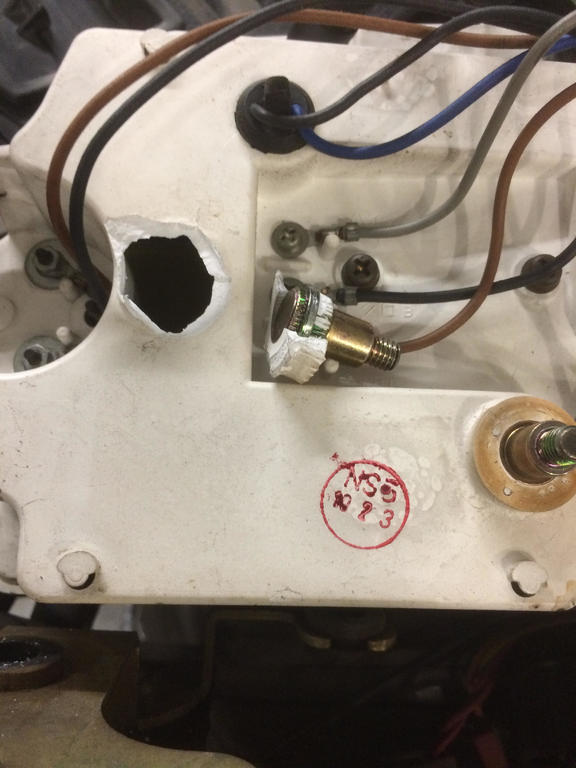
Per Prairie hammer's instructions, I cleaned up the seats in the class valve body. They are fairly clean and square now, the corrosion is gone and the plunger contact area is shiny instead of grey with oxide. The challenge is to fix the rubber cap on the solenoid rod
-
I'm not sure if the de-linking kit involves new braided lines. If it does, I recommend you save the springs on the old lines. Should you replace the gas line from your fuel pump to the carbs, the spring will fit over the new 1/4 inch gas line. It will help prevent folding the fuel line where the hose does that 180 degree bend, as well as armor the soft fuel line. I'm doing exactly that, right now.
-
Gonna do new brake piston seals while you're doing the brake lines ? Seems a good time to do it. PM me if you are.
-
Well, I'm not quite sure how to answer the " which ammo will be most accurate " question. Perhaps I could relate an anecdotal story to illustrate the probable answer. I got a Remington 700 SPS in .223, installed a match trigger group, threw away the junk stock and installed the receiver into an Accuracy International chassis with bipod, added an $850 Vortex Viper 8X24 FFP scope and got some walmart ammo and went out to roughly sight it in. It shot 6 inch groups at 75 yards, lol. Went and got the good stuff, Hornady varmint at over twice the price per round and shot a 1/2 inch group without really trying. You absolutely get what you pay for in ammo. Another story is I used to shoot .22lr with my friends. We set up clay pigeons at 209 yards and took turns. You had to pick one, take your shot. Hit or miss it was the next guys turn. When they were all gone, hi score "won". I got tired of loosing with my $75 22 and went and got a CZ 455 and skipped the bulk ammo in a bucket and got Eley Target ammo at $5.75 per 50 rounds. ( The really good Eley Tenex costs $1 per round. A high price for .22lr !!! ) My hit rate went from 35% to over 95%. If you want to play the accuracy game, for real, you cannot skimp on the ammo. If you must get by on the cheap, you're going to have to reload. There is no other option. Another point is that 1:7 twist rates are for heavy bullets. If you try a sub 55 grain bullet with a hot charge, you may explode the bullet with centrifugal force. Those little guys are spinning in excess of 100,000 rpm. There's a lot to accuracy. AR-15 twist rates go from 1:10 to 1:7. Each twist rate is optimal for a bullet weight. The 1:9 is the " middle of the road " barrel. I'm no expert by any means, but the 1:7 barrels should do better with a minimum of 62 grain bullets and should easily stabilize 68 grain fodder. Lightly loaded 55 grain ammo, with low velocity, might not be over stabilized in the 1:7 but it will not provide best accuracy. Cheap Russian ammo is, frankly, junk. Good for making noise but not much else. Believe me when I tell you this: There is no way to get real accuracy out of cheap ammo. There is nothing you can do to your gun, no trick part you can buy, that will make cheap ammo shoot well. It's garbage in, garbage out. There are AR-15's out there that will deliver nice quarter size groups at 100 yards every single time. They ain't shootin Tula and that's a fact. Don't misunderstand me. I love a big pile of hot brass. There's nothing like roaring through a belt of ammo at a shoot. Quantity has a quality all it's own they say. It is fun in a different sort of way. The green box Remington probably will be most accurate. It has my vote.
-
Another Dim Headlight Post
Vickersguy replied to Vickersguy's topic in Venture and Venture Royale Tech Talk ('83 - '93)
Yes I did but I didn't take a pic. It took a moment to figure out how to tie it off because the ties must be attached to the inst. pod and not other stuff. Used a glue on wire tie base to anchor the tie. -
Another Dim Headlight Post
Vickersguy replied to Vickersguy's topic in Venture and Venture Royale Tech Talk ('83 - '93)
Okee Dokee, Here we are. The problems are fixed. The new solder station showed up and the cold solder joints are redone. I'm not one who will hide bad choices. I was wrong on all counts about the RLU. My readings were same/same on my two RLUs. Because they are both good. I say "problems" because several things changed after I re-installed the CMS after the re-solder job. I now have a level reading on the gas gauge which I didn't have before and all the warning LCD's have gone out but the oil pressure, which should be on when the bike is not running and the battery, which should also be on when the stator isn't charging. Good stuff. So the dim headlight issue, if you have it, is, in all probability, bad solder joints inside the CMS. Off to the next issue. -
Been traveling some, following along on the Smart Phone.. Do I remember
Vickersguy replied to cowpuc's topic in Watering Hole
Yes Yes and Yes ! The cap blew in this afternoon and there wasn't even any ice on it. It is awesome ! It's even more awesome because it's the first part on the bike with a story, which makes it better than a new cap even ! My cap on the left and Tweeksis's donation proudly mounted on the right ! Thank you so much Puc. Let me show you > I also have found new ways to occupy myself till the soldering station arrives so I can fix the CMU. I've been modifying the plastic mounts for the studs in the instrument pod. Very cool huh ? I guess it's time to play with the epoxy again....
-
Another Dim Headlight Post
Vickersguy replied to Vickersguy's topic in Venture and Venture Royale Tech Talk ('83 - '93)
I figured it might be a good idea to check those solder joints while I wait for the new RLU to show up in the mail. I mean, how hard can it be, couple nuts, a plug or two, badda bing. There you are... Well, it didn't go like it does in the movies. One of the nuts on the instrument housing mounting posts wouldn't break free. The nuts were really tight. So I put some stress on it and heard that crunch sound where the stud broke free of the housing and started spinning freely, the nut still tight on the stud. So I reach in with some slip joint pliers and put some stress on the embossment the stud is anchored in. It keeps spinning, so I grab tighter. The plastic around the stud starts breaking up and the stud is still spinning. Finally enough plastic broke away that I could grab the stud with the pliers and the nut finally broke loose. What a mess. I mean, I can fix it back up with epoxy and fiberglass but it's such a pain when things go that way. I have 8 or 9 cold solder joints. They are bad enough I can see them with a magnifying glass. Now I get to wait for the new soldering pencil to show up in the mail too. On the bright side, except for those bad solder joints, everything is remarkably good condition. All the connections and plugs are shiny and oxidation free. So it goes.... -
Another Dim Headlight Post
Vickersguy replied to Vickersguy's topic in Venture and Venture Royale Tech Talk ('83 - '93)
Just a thought, as the replacement RLU wanders slowly across the country. Now that I've got it out and on the bench, I think I'm going to take some resistance/continuity readings off this RLU, then the same readings off the next one, when it finally shows up and compare the results. It might be that I could shed some light on the RLU mysteries or at least give some readings someone else might use in future. That good/bad comparison could prove helpful to someone. Or not. It remains to be seen. -
Been traveling some, following along on the Smart Phone.. Do I remember
Vickersguy replied to cowpuc's topic in Watering Hole
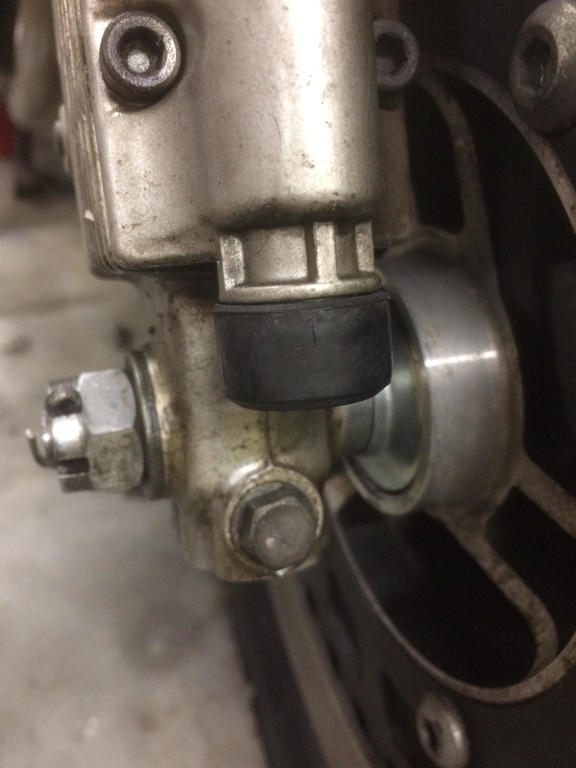
Oh yeah, that sounds awesome! I'm wondering if the E-6000 is the same or similar to the Yamabond 5 that I already have. That stuff is tough and sticks well too. It's thin enough so it doesn't clog up the ridge on the inside of the cap, compromising the purchase the cap has on the ridge on the anti dive body. Either way, it's better than a piece of rubber tube to camouflage the adjusting screw area. I'm totally up for this. I'll PM you shortly. Thank you so much ! -
Been traveling some, following along on the Smart Phone.. Do I remember
Vickersguy replied to cowpuc's topic in Watering Hole
Yessir Mr. Cowpuc sir ! Yep ! Just the one ! Though it's really hot here, 29F at the moment, I won't have a good man going out into sub zero temps for such a thing. Wait for a heat wave, at least 30F, before rushing out to your tent barn. It is a great comfort to know the bike will wobble straight when it's done now. I'm beginning to think I'm the only one that doesn't have one or two Mk1's put back for parts. -
Been traveling some, following along on the Smart Phone.. Do I remember
Vickersguy replied to cowpuc's topic in Watering Hole
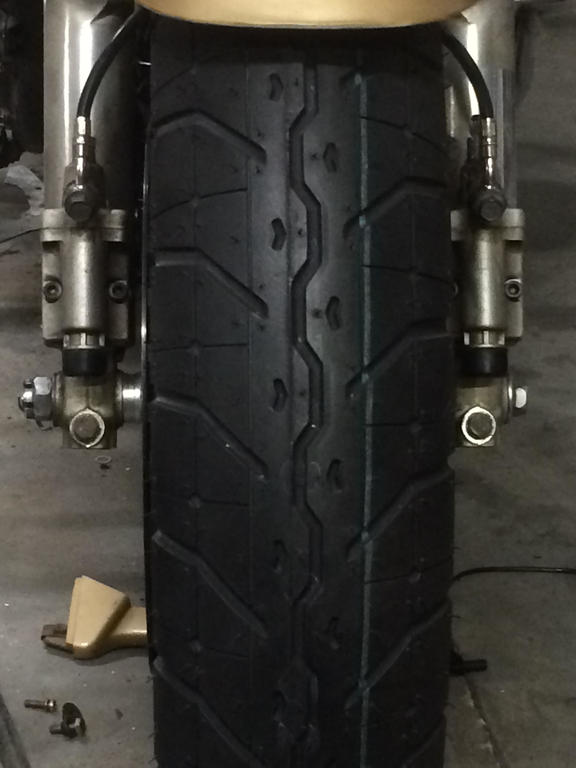
Hey Cowpuc, Just a comment, I have really enjoyed you vids and posts and I thank you for the information you have shared. Yes, that would be me looking for that silly rubber cap. Just so you know, you haven't lost it yet. I know it's silly, but it triggers my sense of aesthetics. I got the black vinyl covered braided lines just to keep the color " right " on the front end. Can't have the black cap on one side and not the other. Sadly my quest continues. I have found one, but I have to buy the whole bike. Seems a bit extreme just to get one plastic cap but I am considering it. If the bike was an '83 blond, I would in a heart beat. It's not... There is an '83 getting parted out in W.V.. I may call the guy... So far, no luck on the cap. -
Another Dim Headlight Post
Vickersguy replied to Vickersguy's topic in Venture and Venture Royale Tech Talk ('83 - '93)
It's the reserve lighting unit that is bad. Here's the reasons I made that call. #1 ) The headlight indicator in the dash was lit. That is independent of all the other circuits being looked at. It's voltage source comes from the RLU and returns to the RLU. I know I have good grounds and I know my H-4 bulb is good, yet the light is on. That's a point against the RLU #2 ) When I jumper out the whole shebang, I get proper operation of the system, but the low beam will not work. Everything works fine except I have no low beam power. Again, another point against the RLU. #3 ) I put the battery charger on to make up for any low voltage conditions that might compromise the operation of the system. That bumped up the system voltage well above any failure mode that might have been caused by a low voltage condition. There was no improvement in system function. #4 ) A tested used RLU was available on e-bay for $5.60, including shipping. #5 ) My cheap chinese soldering pencil for soldering up the "computer" is burned up and no good and bad and don't work and awful. #6 ) Diodes are frequently used as switches in inexpensive logic circuits. They are reliable and can handle a fair amount of current. A bad diode, in a diode switch logic circuit, would give the kind of symptoms I'm looking at. Those symptoms would be low voltage on both hi and lo beams, ( current flowing through a resistance in reverse through a bad diode ) Also an open diode would cause the headlamp light to go on and I would have no power to the lo beam. These are typical failure modes of diode logic circuits. The scary thing is that they are very reliable. What will take out a diode is an over voltage condition, possibly caused by a bad voltage regulator, possibly damaged by too high a load on the system, which would have symptoms like the burned up alternator plug I just removed...... I think I need to stop thinking about this for a day or so. I'm gonna loose my Zen. -
Another Dim Headlight Post
Vickersguy replied to Vickersguy's topic in Venture and Venture Royale Tech Talk ('83 - '93)
I'm still cleaning connectors and switches. It does get boring and gives me time to think. Thoughts like, " What if I skipped cleaning all this stuff and just jumpered a hot wire from the battery directly to the blue/black wire on the dimmer switch ?" I got two answers that shed some light on the situation when I did this. #1 . The white headlight dash lamp went out. That let me know that I'm not wasting my time cleaning connectors and switches. The headlight dash lamp going out let me know that the delta V. between battery voltage and whatever voltage is getting to the RLU and the "computer" is important to how the system works. The #2 observation was that the headlight low beam went out completely. No more dim orange 4.8 volt glow. When switched to high beam, it was very bright. I didn't check to see if there was power to both high and low beam elements at the same time, but disconnecting the jumper wire did change the output light level. It got less bright. I do know that when the High beam is on, without the jumper connected, there is power to both low and high beam at the headlight plug. Also the headlamp symbol on the LCD never went off. I don't know what that all means, but I'm glad I tried the experiment. Overall it's still annoying. It reminds me of the thermos bottle joke. It keeps hot stuff hot and cold stuff cold, but how does it know? Whatever... I'm back to cleaning connectors and switches.....I'll get some voltage readings when I'm done. -
Another Dim Headlight Post
Vickersguy replied to Vickersguy's topic in Venture and Venture Royale Tech Talk ('83 - '93)
Well, the data is in and it's inconclusive. I spent several hours tracing the path through the XVZ12TDK diagram which seems to have the correct wire colors that exactly match the wires on my bike. The easy part is from the battery, thru the main switch, back to the fuse box, then to the start switch, then the reserve light unit. All that was easy. I am loosing 1.4 volts through that run. The worst offender is the kill switch but the key switch is not far behind. I will clean the kill switch anyway. There is a forum post on that, which I downloaded. It gets complicated at the RLU. The dim switch is not directly connected to the headlight. One output from the RLU goes to the dim switch, then goes to the computer on the hi/lo wires. Another output output from the RLU also goes to both the computer AND the H-4 bulb. I suspect the original design uses diodes for switches in this system. RLU's go for short $ on e-bay. I am opposed to just buying stuff helter-skelter to fix problems but I have no clear direction to go from here. On low beam, I've got 4.8 volts to the lo beam and nothing to the hi beam. On hi beam, I have full voltage to both hi and lo beams. This makes no sense to me at all. On lo beam, the white headlamp light on the dash is illuminated. When I switch to hi beam, the blue hi beam indicator goes on and the white headlamp indicator goes out. The fix seems to be this : #1 ) clean the kill switch contacts to reduce the resistance in the circuit. #2 ) get a used RLU from e-bay, and #3 ) plan on soldering the computer following the forum post instructions ( I'll have to locate those again ). The early Mk1 board is somewhat different from the later Mk2 board, I understand. Never the less, I've discovered no clue that would tell me it's the computer board or that it's the RLU. If there is a test I could do that would solve this I'm all ears. -
After reading the dim headlight posts, because it's rude to make a post on questions already answered, my headlight issue on my '83 is similar, but different. It's also weird. The classic trouble shooting path is to check the Hi/Lo switch, which I've done. The switch is good, but I'm not getting battery voltage at the switch. I have 12.8 volts at the battery but only 10.07 volts at the blue wire supplying power to the switch. At the H-4 plug to the bulb, I have 11.7 volts to the low beam, ( the same voltage if I use a frame ground or the neg. batt. post, so no ground issue...) and 4 volts to the high beam. I figure 4 volts is the "trace" voltage the RLU uses to check the condition of the filament of the high beam. When I switch to high beam, I have 11.7 volts to both hi and lo plug sockets. I think this means the RLU is working properly. If the headlight is plugged into it's socket, I get the panel headlight white lamp lit on Lo and it goes out on Hi. If the headlight is not plugged in, the white panel lamp is lit all the time. I'm beginning to think the next step is doing the solder joints in the dash panel. However, one guy with an issue exactly the same as mine, did the solder job and it made no difference. It ended up he had a bad bulb and I do not. The H-4 bulb is totally good. I have a 2 volt loss between the battery and the headlight switch and that power goes through the dash panel. It also seems clear that the dim switch only controls where the CMU sends the power, to the Hi or the Lo on the headlight. So it's the CMU, right ? and the solder joints... I'm going to pull and return all the relays behind the headlight just to be sure there are good contacts there. Just not sure where to go from here... OH, forgot to mention, my self canceling unit does not work. I don't think that affects the headlight though.
-
Geezum, now I've got oil anxiety. As wailmart is the closest, I guess I'll pick up the Mercury Marine Quicksilver 20/50
-
Well I've been looking for two months. Everywhere. E-bay, Craigslist etc. It seems that the only way to get one of these obscure caps is to buy a complete rolling chassis. $300 seems a little steep for this silly little plastic cap. As I'm older and unlikely to ever need enough parts to justify buying a complete spare bike, not to mention I really have nowhere to put the fool thing, I have been reduced to begging. Anyone with a Mk1, First Gen bike, who would part with this cap is urged to contact me. Please.
-
I retired two years ago, built a new house and parked my sailboat in the local marina, one mile from my driveway. Ahhh, I finally got to paradise !!! It never occurred to me that our "new" home would need so much work. I thought it would be just a few boat projects time-to-time. It is ! Plus the home repairs, need a new tile floor in the kitchen because the contractor screwed it up, plus landscapeing because my wife needs help with all the new shrubs and such, constant lawn care and so forth. Plus the marina got damaged in the latest hurricane and I got a job putting that back together as project manager. Then I decided to restore a 35 year old Yamaha Venture Royale and repair some Kenwood Ham Radios. I hope to find a doctor who will prescribe bedrest soon. This retirement is gonna kill me !
-
Thank's for stopping in Jeff. My thought is to install a rocker switch inline with the power supply to the hi/low relay that I can throw after the bike is running. I'm hoping that this will light up the warning lite in the instrument cluster to remind me to turn on the headlight. That said, I'm seeing an enormous differences in HID prices. I am only interested in reliability and I suspect prices and reliability are only loosely related. An HID light is a big investment, in the $50 to $70 range. The top rated Quartz Halogen, the Pillips extreme vision, is around $10, shipping included and it's a drop in. We'll see where the budget takes me going forward. I'd prefer the HID once I figure out which one is the best for longevity. I'm looking for some personal experiences from the crew here, as to how long their lights have lasted and so forth. Perhaps even a make and model # just to help me out here. It's for a Mk1, but I think the setup is the same for Mk2's also.
-
Back in the day, it was easy to get those cool Quartz Halogen 85/55 watt lamps to really goose up the view at night. It was plug and play. They are no longer made as far as I can tell. So the research started. I've read posts here till I started bleeding from my ears tonight and ended up more confused than ever. Flyingfool has been tireless in promoting his HID conversion. He's convinced me HID is the way to go now but the bulbs he recommends are obsolete. Is there an HID that is plug and play yet or do you have to mount a driver with all HID lamps ? I've pulled two driving/spot lamps and 10 marker lamps (along with about 50# of chrome plated junk) off my '83 to clean it up. The stator plug was about burned up with the power going through it so it was hard wired ala cowpuc's video advice. 10 marker lamps at 5 watts each and two spots which were probably 35 watts each, gives me around 120 watts load off the stator. I could do a 100/55 watt quartz lamp but HID would be kinder to the system. At least I do have the oil cooling modification on the stator. That's probably all that prevented it from burning up. So now, can someone point me at an HID lamp that is correct for the Mk1 headlamp reflector so I get the focused beam ? One with a passive heatsink and a built in driver would be cool ! If it used 50 watts maybe I wouldn't have to jump out all that stuff in the CMS. I've got enough problems already with the "Dim Headlight Hi/Low are the same" issue. Probably the relay or the ground but that trouble shooting process hasn't started yet. Just looking forward to trying an upgrade to the system when I get there...
-
On reading your post carefully, You may have several problems. If there is a hole in your heat exchanger, that could be messing up the natural draft and pushing the pilot flame away from the thermocouple. You must be cautious about that. It would be worth the effort to use a smoke source, like incense or a cigarette, to check the air flow around the pilot while the blower is running but the main flame is not lit. If air is flowing out of the combustion side of the heat exchanger you should see the smoke blowing away from the pilot area, towards your hand holding the smoke source. This would indicate you have a hole in the heat exchanger. If the smoke rolls gently into the furnace, while the blower is running, you're good. If you have a standard fan controller, which looks like a silver box on the front of the furnace with a shielded bi-metallic curley Q extending into the heat exchanger, it probably has reached the end of it's service life at 30 years. When they get corroded, they don't twist when heated and throw the fan switch like they should. You might adjust the "off limit', higher. It's one of the little silver "clock hands" around the disc inside the box. ( I hope I've got this right, Clockwise from "noon" the first hand is the emergency shut off switch that shuts off the burner to prevent heat exchanger damage when the blower fails to run. Second hand is the "on" switch to start the blower, and the third hand is the "off" switch that turns the blower off. ) Moving the third hand a short distance counter clockwise, will raise the temp the fan will shut off at and will compensate for the lack of travel that might be the problem with the fan switch. I'm thinking that the fan switch not shutting off, is it's own problem and not connected to the main flame ignition issue, unless there is the fore mentioned hole in the heat exchanger. You probably know all this stuff already, but I thought it would be best to examine the basics first before the more exotic explanations.
-
Sounds like the condensing furnace I had in the late 80's. As I remember its a bear to work on. I had a similar or exactly the same issue with mine. (it's been a long time ) I recollect that the pilot flame was too far away from the thermocouple. I had to tweek the thing so the flame hit the thermocouple as it was only close to the tip. I also had issues with the exhaust blower not making the switch. If you have a power exhaust blower, that has to make the switch to light the main burner... but that shouldn't be affected just by moving air close to the furnace. I'm voting for the flame not being close enough to the thermocouple. The thermocouple should be secured with a nut you can loosen, then slide the thermocouple in a bit so it's closer to the pilot. Then take two shots of whiskey and call me in the morning.
-
I'm having a blast restoring my '83 Royale. It's hard to wrap my mind around the fact this bike is one month younger than my son and I'm a Grandfather now. It's amazing what good condition this bike is in. Yeah, it's got some small cracks in the fairing that I've repaired with fiberglass and some scuffs that won't rub out, but all-in-all, it's in great shape. The new seat cover really spiffs it up. I'm into the valves now and getting the hang of it again. Last time I did this was on my CBX in '86. I love working on these old bikes almost as much as driving them. Grubsie beat me to the shim kit request. So to any members who could bring themselves to share one with me, it sure would help. I also live about 5 hours drive from any dealer who has the slightest idea what a 25mm. shim is for. The Yamaha dealers around here have out board motors and ATV's . Not a bike in sight. I didn't think bout checking the Honda dealers. That's next.
-
As am addendum to Bob K's ( Squidly ) observations, here's my thoughts for those without Metric feeler gauges. Given that wear results in tighter clearances, one will almost always be going to a thinner shim. The intake minimum clearance is .11mm or .00433* inch. If you have a good set of feeler gauges it will have a .0015 and a .0025 "leaf" in the stack. The .002 and the .0025 add up to .0045. If the .0045 will not go under the cam, it is at a minimum clearance and you need the next thinner shim. The exhaust minimum clearance is .15mm. This is .0063 inch. Use the .004 and the .0025 together for .0065 inch. If this combination will not go under the cam, then it is too tight and you need the next thinner shim. The .0045 and the .0065 become a simple go/no go measuring point for deciding if you need to change a shim. One shim step is .0024 inch. In my opinion, if the feeler gauge is tight, but goes under with some wiggling, you probably can go to the next thinner shim. Being 1/4 step too loose is way preferable to skipping the change and quickly wearing to the minimum clearance. I, for one, do not wish to go back in again any time soon. I haven't done the math, but if .0025 inch leaf won't pass under the cam, you need to go two steps on the shim, rather than one.