brummers
-
Posts
25 -
Joined
-
Last visited
1 Follower

-
good call on the other fluids. If I do his tires, Ill flush it then.
-
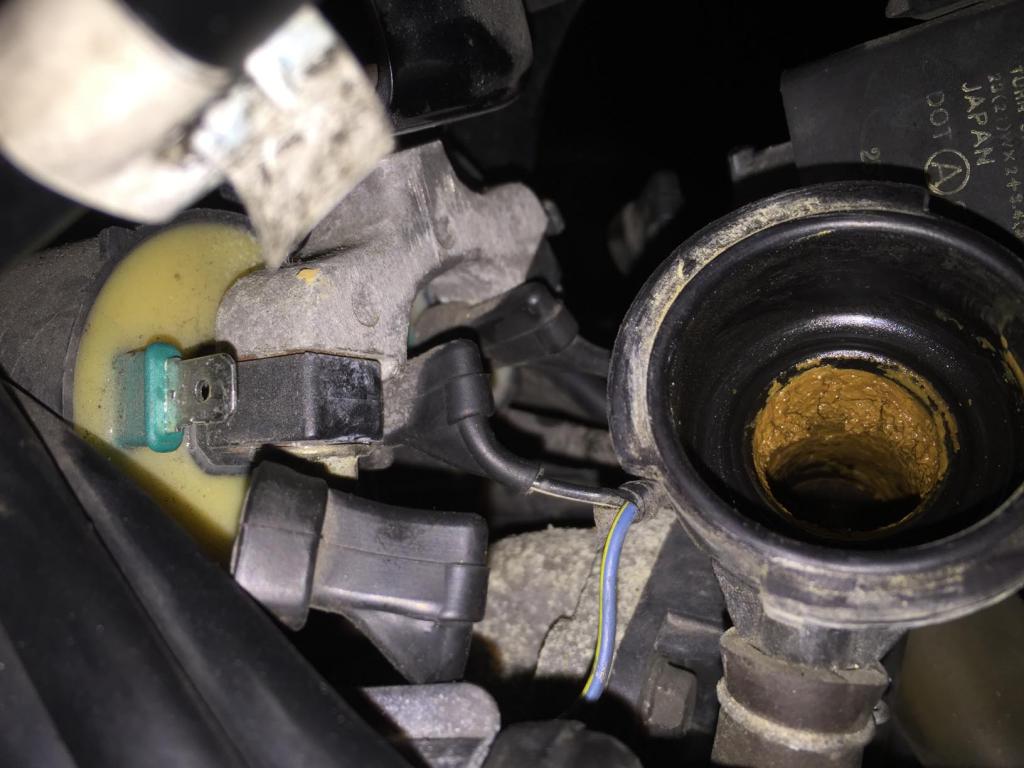
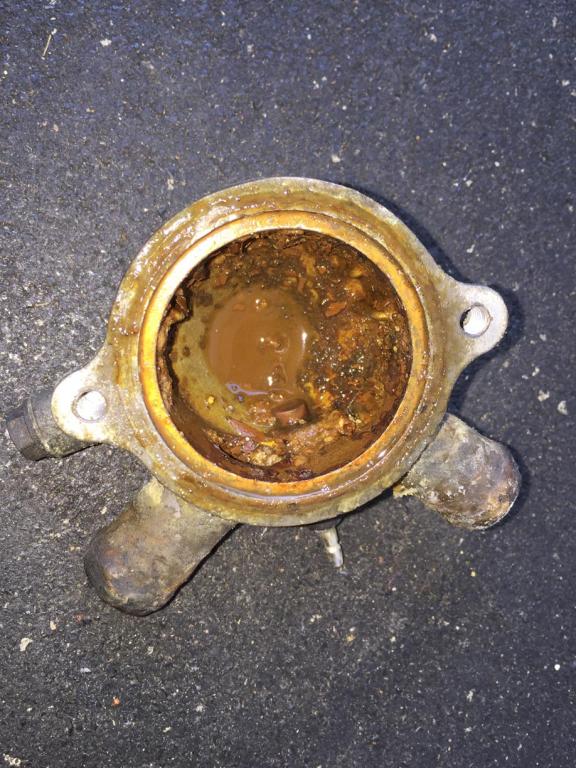
A buddy has a 98 Honda Shadow Spirit with about 60K on it. Complaining about no power at 70mph or so. He had already come to the conclusion that he needed new clutch plates and bought the kit. I rode the bike from his apartment to my house, suspension felt squirrely, but the clutch seemed to be working fine. Put the front wheel up against the back wall of the garage and slowly let out the clutch in 1st gear. Engine bogged down and stalled just as it should. Checked out the bike and found: 1. Mufflers were dangling off the headers, the mounting bracket had broken. The header heat shields were literally holding them on somehow. 2. both tires were about 10 psi 3. other various loose parts. I got it fixed up (and changed the clutch plates). He was happy with the performance. Amazing what 40psi in the tires will do! A few days later I get a call, he is about an hour away and the bike overheated. It has cooled down, it cranks, but won't start. Back in the garage, i found he checked the coolant level at the radiator fill after the overheating event. While doing this he knocked off a wire from the front cylinder coil. Now it can run. Drained the coolant and it was pure rust. The thermostat worked fine and I flushed out the system. I dont know how it ran as long as it did with the cooling system like it was!

-
No problem with the zip tie method, its easy to use spoons, too. Be sure to either remove your brake rotors or use a couple of 4x4's to support the rim and keep the rotors off the ground. The rotors will bend/warp very easily. I only looked up Michelin for my new Commander II's WRT balance beads and the like. You know if the tire ends up being defective, the tire manufacturer will certainly blame any 3rd party product, and Michelin states that very clearly. Also, if the RideOn works as advertised, you may be riding around with a puncture and not even know it! http://motorcycle.michelinman.com/advice/faq/about-the-purchase-and-use-of-my-tires [h=3]WHAT ABOUT BALANCING BEADS OR LIQUIDS?[/h]Michelin does not recommend the use of dry or liquid balancers/sealers or any other balancing materials. Tires and Tubes into which these have been injected will not be covered under warranty.
-
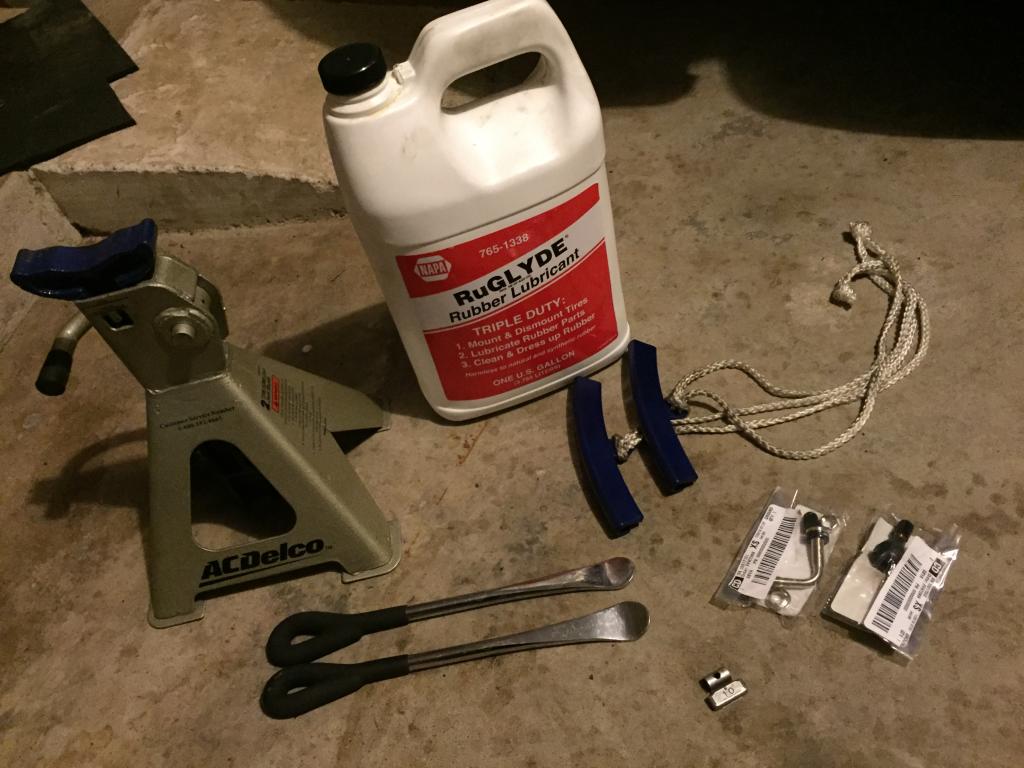
Just did my tires, here is what you need: 1. RuGLYDE from NAPA 1 gallon will last forever if you are just doing MC tires. 2. Rim protectors 3. Good tire spoons (the HF 24" tire irons are too thick) 4. New valves 5. (2) jack stands to static balance using the axle 6. wheel weights Remove the front brake calipers and use some 2x's to support the wheel on an off. makes lining up the axle super easy. I'd also stay away from the tire sealant, it will probably void any warranty from the tire manufacturer. Use the axle to static balance between two jackstands. Very easy to do and works quite well. You can also put a 90 degree valve on the front just like the rear.
-
I must have a 1.5 Gen then.
-
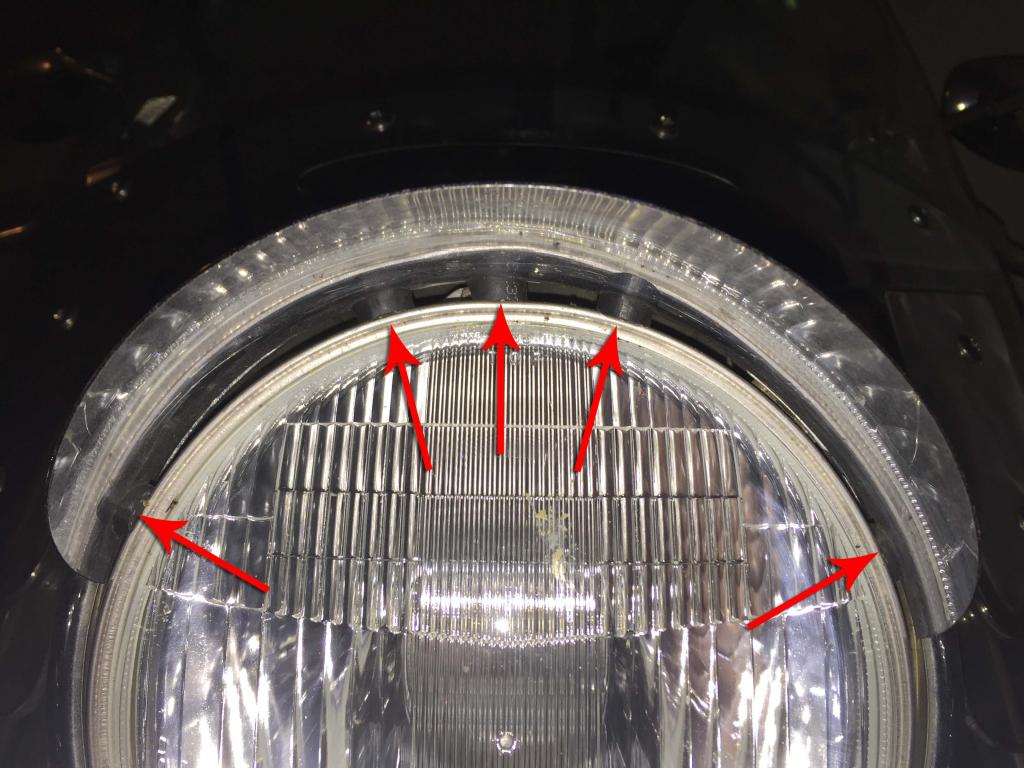
My headlight visor was very loose as well. PO used some foam, but it wasn't doing the job. I cut 5 spacers from a piece of thick wall fuel line to fill in the gap. Its been working great. My gap was not uniform, bigger at the top than at the sides, so I needed to cut several different thicknesses from the fuel line to find a nice tight fit.
-

Got a Royal Star Tour Classic! :)
brummers replied to michaelclaw's topic in Royal Star and Royal Star Tour Deluxe Tech Talk
Hold onto the 4 into 4 header pipes and slash cuts. I'd be interested in them for my '97 RSTD. -
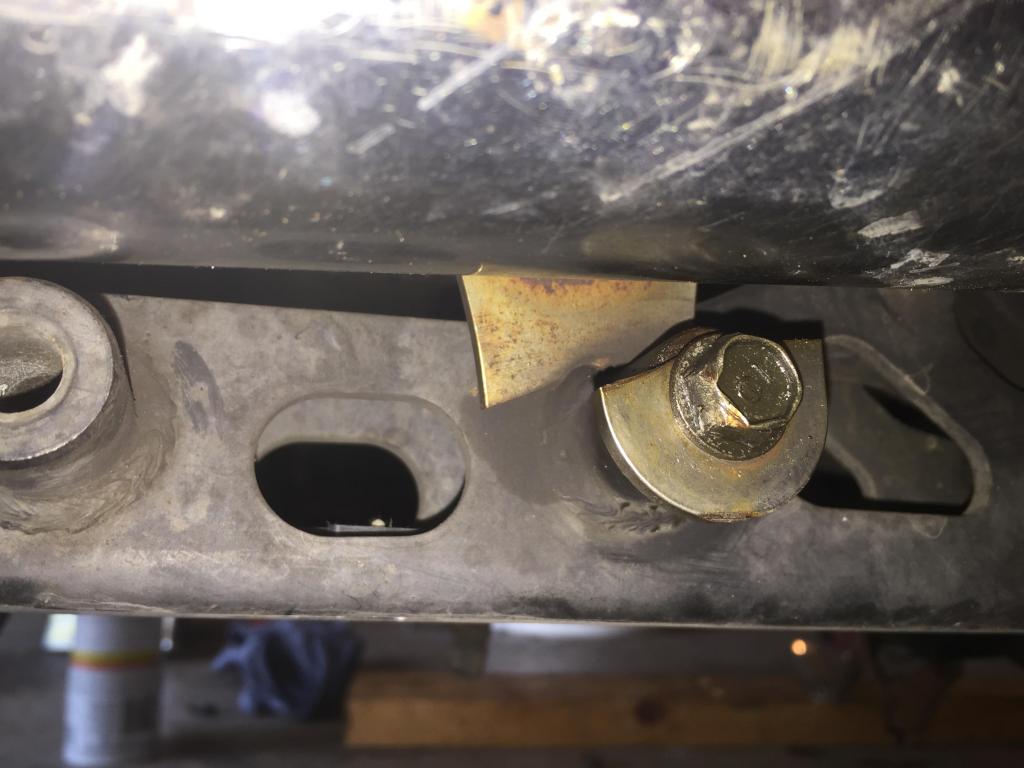
Are the tires new or did this develop recently? You won't accidentally break the bead free from the rim. It requires a significant amount of force, but even if you do, inflating the tire will reseat the bead. I dont think there is much you can do without removing the tire from the rim and cleaning it all up.
-
Just did some carb work on my 1997 with 28mm Mikuni's. Here is my parts list. These carbs are almost identical to the Vstar 650, so many of the rebuild parts work. Mikuni 28mm Carb rebuild OEM (Partzilla.com) 3KW-14105-00-00 PILOT SCREW SET $6.33 each (mainly bought for the O-ring you needed as well.) 36Y-14147-00-00 O-RING (Yamaha Motor) $5.03 each (8 needed for the fuel nipple between the carbs. I tried some from autozone, but they leaked) eBay: YAMAHA K&L CARB CARBURETOR FLOAT BOWL CHAMBER O-RING 18-8996 K&L Supply Float Needle 5pk 18-8944
-
1997 RS Hard to start after carb cleaning
brummers replied to brummers's topic in Royal Star Venture Tech Talk ('99 - '13)
In the end, leaving the enrichment valves in the carb bodies hindered flushing those ports of the Chem-Dip. I found that in 3 of the 4 carbs, the ports from the fuel bowl to the enrichment valve was completely plugged. I got them all cleaned and she started right up. I still have some popping on decel. I was able to use some spray carb cleaner and/or propane to verify I am leaking in air on my intake manifolds. #2 and #4 are the worst, but I am having trouble determining exactly where the leak is. I get an increase in revs if I hold some propane near the bottom the carb AND near the bottom of the intake boot. Propane is heavier than air, so I think my leak is at the bottom of the boot. I used a little silicone grease and the carbs popped on nicely. I tightened all 4 bands and triple checked them. The synch ports all have new plugs. What is the experience with where the intake boots leak? Do they loosen up over the years and just need to be removed cleaned and reseated? Thanks for all the help so far. -
I just sold my 2001 XVS650 Custom with windscreen. 23,000 miles and well maintained. $1,800. I bought it in 2013 with 8,500 miles for $2,000 but it needed tires and some TLC. At $3000, you should be able to find good 1100, maybe a few years older or consider an early 2000's sportster.
-
1997 RS Hard to start after carb cleaning
brummers replied to brummers's topic in Royal Star Venture Tech Talk ('99 - '13)
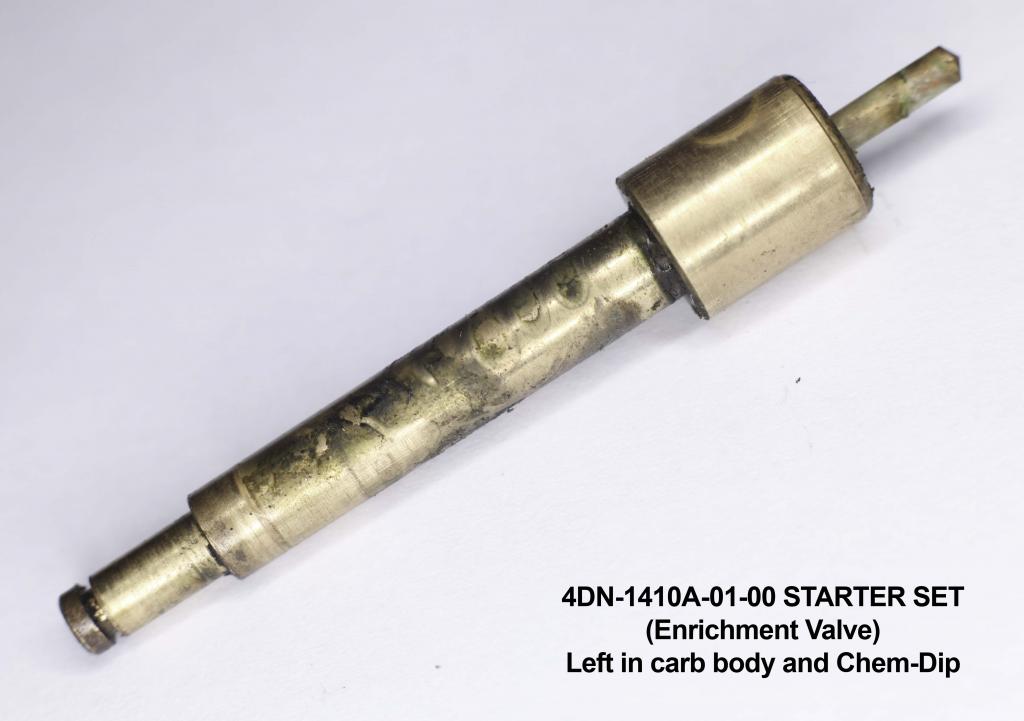
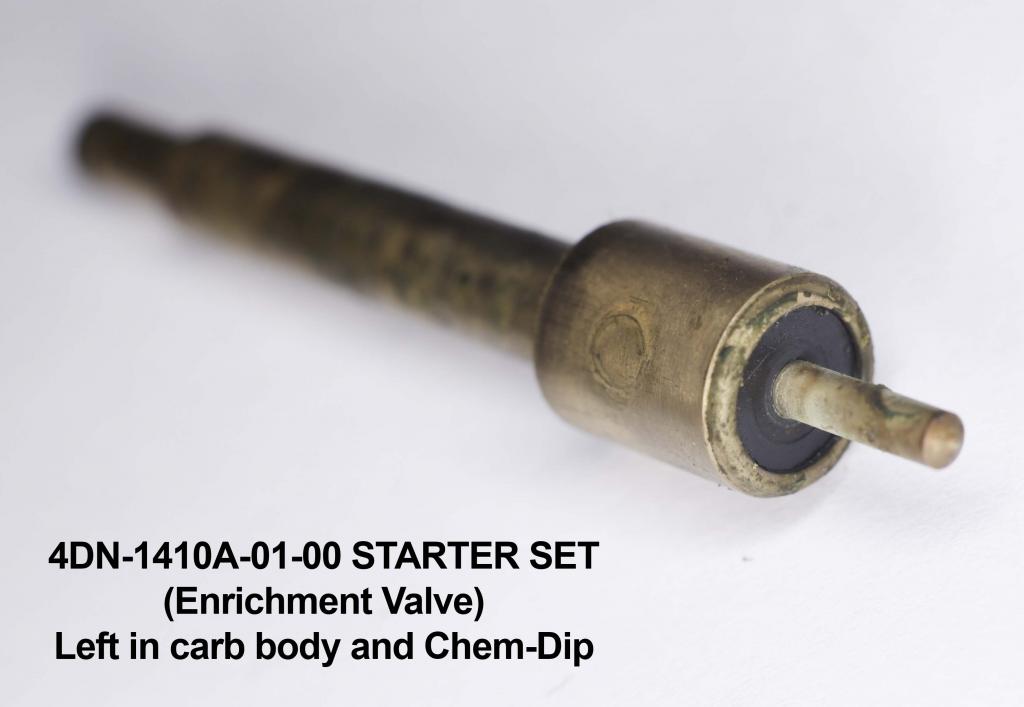
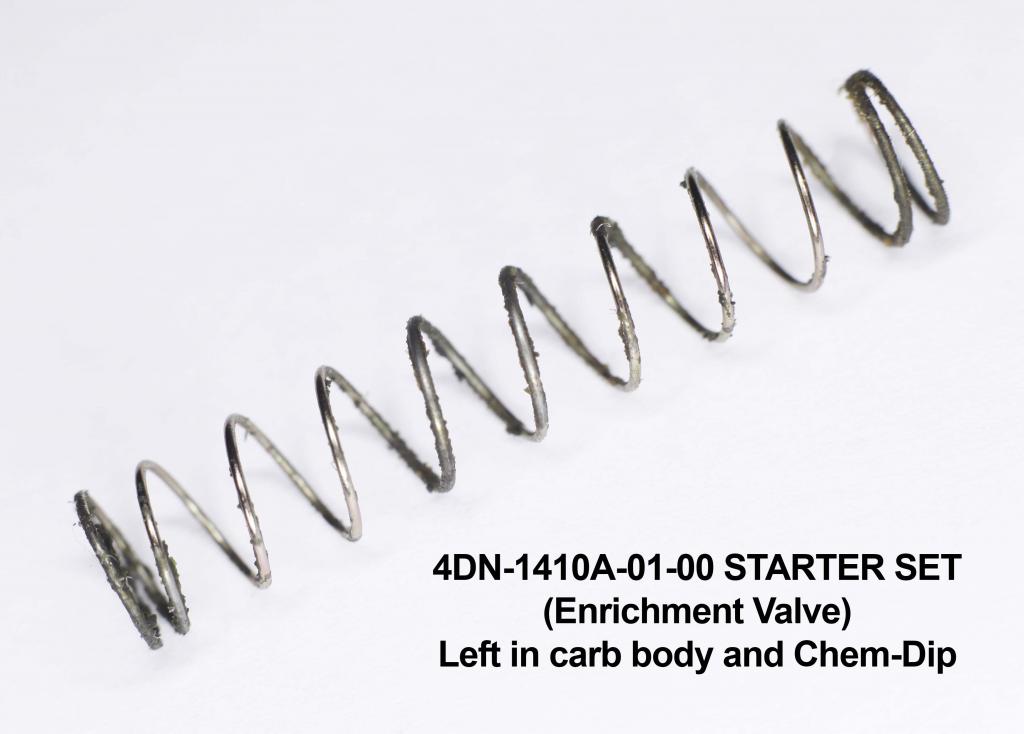
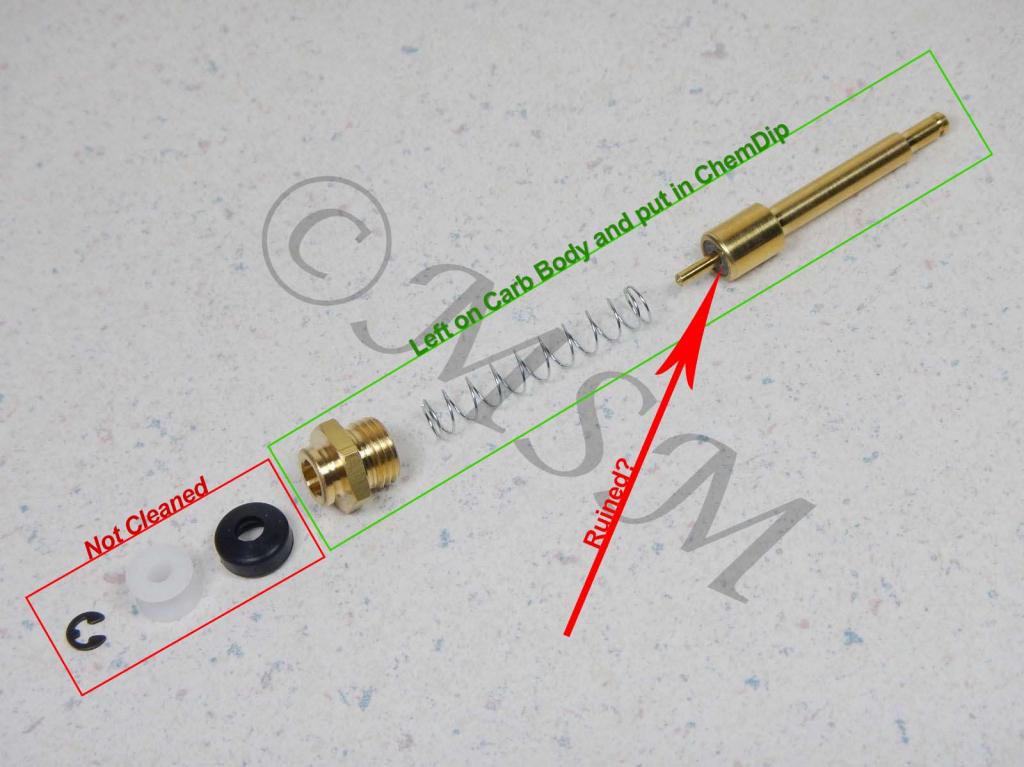
I plan to check the float height, thanks for the video and instruction, tazmocycle. As promised here are a few pictures of the Chem-Dip carnage. I've learned my lesson for sure! Carb cleaner and compressed air from now on. They could probably be cleaned up and salvaged, but I have new ones on the way. I just can't trust the rubber after the chemical bath/attack.
-
1997 RS Hard to start after carb cleaning
brummers replied to brummers's topic in Royal Star Venture Tech Talk ('99 - '13)
I've confirmed the piston arms are being pulled out on all 4 carbs. I'll remove and inspect the enrichment pistons this week and share some pictures of their condition. Thanks for the input. -
1997 RS Hard to start after carb cleaning
brummers replied to brummers's topic in Royal Star Venture Tech Talk ('99 - '13)
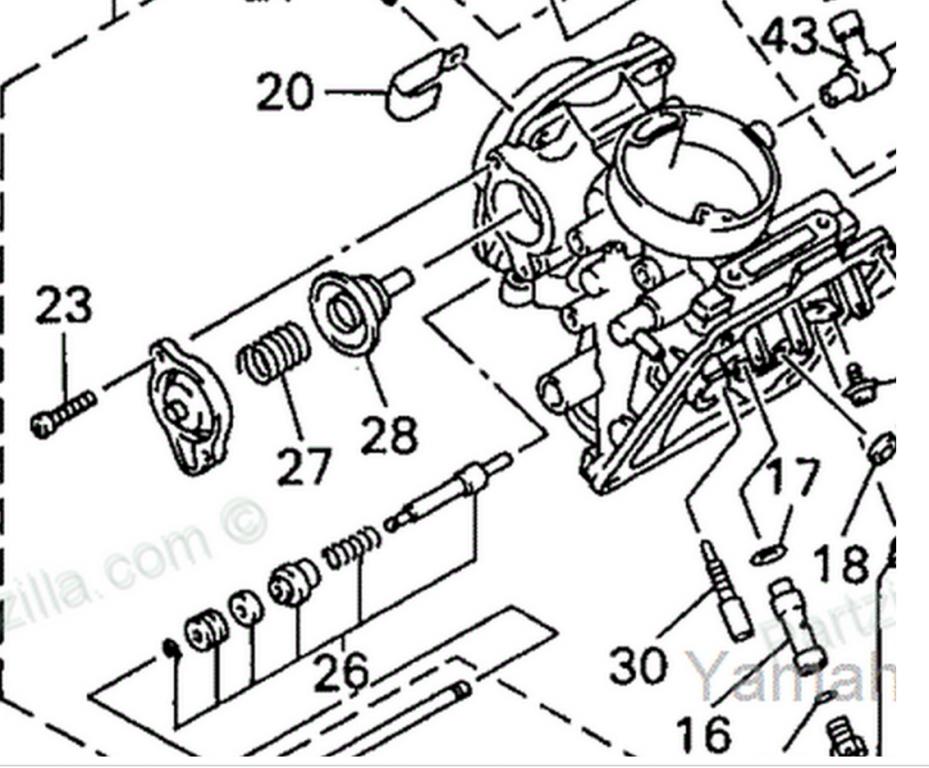
This is the best photo I could find of the starter for the 28mm carbs on my '97. I've marked what I left in the carb body and was subject to the Berryman's Chem-Dip cleaner. It appears there is a non metallic bushing or sealing surface on that piston. Can anyone confirm this? Does the enrichment valve add more fuel for starting or lessen the air?
-
1997 RS Hard to start after carb cleaning
brummers replied to brummers's topic in Royal Star Venture Tech Talk ('99 - '13)
OK, after warmed up with a little throttle I was at 13.8V, so probably OK. Im just racking my brain to think of what I could have done while cleaning the carbs to make it so hard to start, but runs fine once warm. I didnt adjust the floats, left them as is. Could I be flooding out right away? (I did one carb at a time so I didnt mix up any parts). I put the carb body in the Berryman's Chemdip with almost everything removed except the enricher plungers and butterfly valves. I didnt have a thinwall socket to fit the enricher nut to remove the plunger, but I figured there were no o-rings or plastics in there that would be harmed by the Chemdip. Time in Chemdip was 25 minutes. I think thats my next steps, float height adjustment, & inspect enricher plunger (Item #26 in attached picture). I left the plunger, spring, and retainer (rightmost 3 components of #26) in the carb body while in the Chemdip. TIA for any advice/experience.